
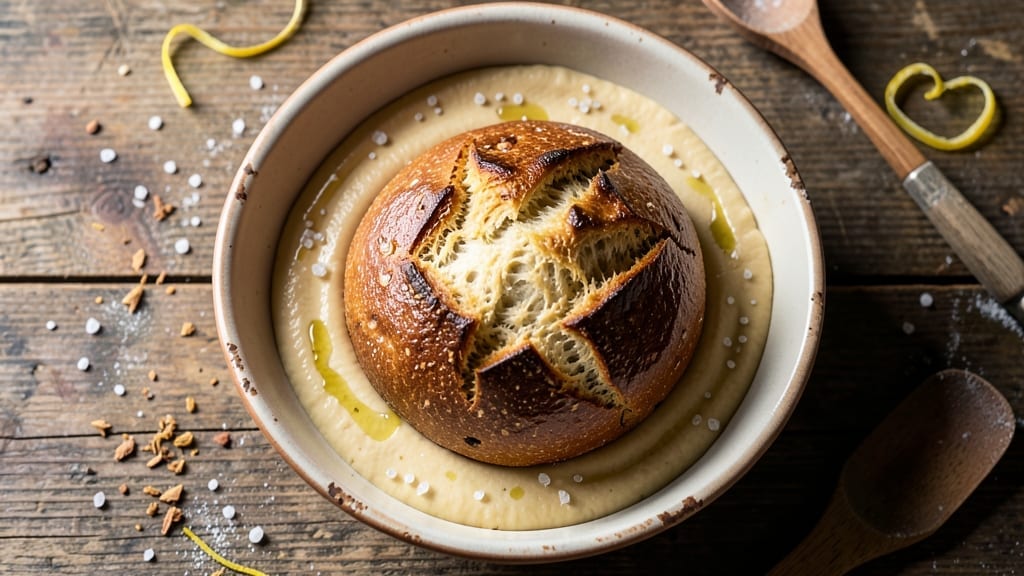
A 1-pound loaf of bread recipe that delivers restaurant-quality crusty bread with minimal effort is exactly what you need for weeknight dinners or homemade sandwiches. This no-knead method transforms simple ingredients into a golden, crispy loaf with an airy crumb—no stand mixer or advanced baking skills required.
The secret lies in a long, slow fermentation that develops deep flavor and creates that coveted oven spring.
What sets this recipe apart is its simplicity: just five ingredients and one bowl for mixing. You’ll achieve that perfect balance of a crusty exterior and tender interior by using high-gluten flour and baking in a preheated Dutch oven, which traps steam for even browning.
The process is hands-off after the initial mixing, making it ideal for busy schedules.
By the time you pull that loaf from the oven, you’ll have a perfectly shaped, golden-brown loaf with an irresistible crunch. The aroma alone will have everyone gathering around the table. This recipe yields exactly one pound—just right for feeding two or saving for sandwiches all week.
For best results, let the dough rise overnight in the refrigerator. This cold fermentation enhances flavor and improves texture, resulting in bread that tastes even better the next day.
Store leftovers wrapped at room temperature for up to three days or freeze for longer storage. Let’s get started on this foolproof loaf!
Ingredients for 1 pound loaf of bread
Five ingredients, one bowl—this is all you need for restaurant-quality crusty bread.
| Ingredient | Amount | Notes |
|---|---|---|
| High-Gluten Flour 🌾 | 3 ½ cups | King Arthur or similar brand preferred |
| Instant Yeast 🍞 | ¾ tsp | Fresh yeast at half the amount |
| Diamond Crystal Kosher Salt 🧂 | 1 ½ tsp | Adjust to taste after initial mixing |
| Extra-Virgin Olive Oil 🫒 | ½ tbsp | High-quality, fruity variety |
| Cold Water 💧 | 1 ½ cups | Room temperature if unavailable |
The high-gluten flour is non-negotiable here. King Arthur or Caputo are the gold standards, but any bread flour with 12-14% protein works. Check the label—some ‘bread flour’ is just all-purpose with extra protein. The yeast should be fresh and potent—if it’s been sitting in your pantry for months, toss it. For the olive oil, California Extra Virgin or Colavita brands deliver that rich, fruity depth. The salt matters too—Diamond Crystal dissolves more cleanly than table salt, but use what you have. Measure everything by weight if possible for precision, but cups work in a pinch.
No instant yeast? Fresh yeast at half the amount works, but you’ll need to proof it first. Short on olive oil? Melted coconut oil is a decent swap, though flavor will differ slightly. The water temperature is key—too warm kills the yeast, but cold water can slow fermentation. If your kitchen is chilly, use warm water (around 90°F) to help activate the yeast. For the Dutch oven, any heavy pot with a lid works—Le Creuset or Lodge are ideal, but even a cast-iron skillet with a metal lid can work in a pinch.
Mix the dough in the evening and refrigerate overnight for optimal flavor. The dough will rise slowly in the cold, developing complex flavors. If baking immediately, let it rise at room temperature for 1-2 hours until doubled. Store the loaf wrapped at room temperature for 2-3 days, or freeze for up to 3 months. For sandwiches, slice when cool—warm bread makes for gummy fillings. The crust stays crisp for 24 hours if stored in a paper bag.
Why You’ll Love This Recipe
- I’ll be real: this bread requires zero effort from you. Just mix high-gluten flour, yeast, and cold water—no kneading, no waiting around for dough to rise forever. The high-gluten flour gives it that sturdy, satisfying chew without requiring your back to pay for it.
- No-Knead, No-Fuss Magic: I’ll be real: this bread requires zero effort from you. Just mix high-gluten flour, yeast, and cold water—no kneading, no waiting around for dough to rise forever. The high-gluten flour gives it that sturdy, satisfying chew without requiring your back to pay for it.
- Crust So Good: Honestly, the crispy olive-oil crust is what sold me. That first bite—golden, slightly charred, with just a whisper of salt—makes it worth every minute. (And yes, even on a Tuesday night.)
- Leftover Hero: This loaf lasts forever—perfect for meal prep. Toast it for breakfast, tear it for sandwiches, or freeze slices for quick toast later. I’ve had it last a week in my fridge, and it’s still fresh enough to fool my picky husband.
Step-by-step instructions for no-knead crusty bread
This method delivers professional-quality bread with minimal effort and maximum flavor.
Mix the Dough in One Bowl
In a large mixing bowl, combine the 3.5 cups high-gluten flour and 1.5 tsp Diamond Crystal kosher salt. Use a wooden spoon or silicone spatula to create a well in the center. This creates a proper mixing vessel for the wet ingredients.
In the well, add the 0.75 tsp instant yeast and 0.5 tbsp extra-virgin olive oil. Pour in the 1.5 cups cold water all at once. Using the spoon, gradually incorporate the dry ingredients into the wet, stirring vigorously for 3-4 minutes until the dough comes together in a shaggy mass.
Here’s the thing—this dough will look wetter than traditional bread dough. That’s intentional. The high gluten content will develop as it rests, creating that signature open crumb structure. Don’t be tempted to add more flour at this stage; the hydration level is crucial for proper fermentation.
Rest the Dough for Optimal Development
Cover the bowl tightly with plastic wrap or a damp kitchen towel. Let the dough rest at room temperature for 12-16 hours. This extended fermentation period is what creates the bread’s complex flavor and open crumb structure. I prefer to do this overnight in the refrigerator for better flavor development.
During this time, the yeast will slowly activate, breaking down the gluten strands and creating gas bubbles. You’ll notice the dough will rise slightly and develop small bubbles on the surface. This is normal and indicates proper fermentation. If your kitchen is particularly warm, the dough may ferment faster—adjust the resting time accordingly.
Real talk: The longer you let this dough ferment (up to 24 hours), the more flavorful your bread will be. But don’t exceed 24 hours or the yeast may exhaust its food source and the dough could develop off-flavors.
Shape and Preheat for Baking
After resting, the dough will have risen noticeably and developed a slightly sticky surface. Turn the dough out onto a lightly floured surface and gently shape it into a 1-pound loaf using your hands. I like to form it into an oval shape about 8 inches long and 4 inches wide—this gives you that classic artisan loaf shape.
Place the shaped dough on a parchment-lined baking sheet. Cover it loosely with plastic wrap and let it rest for 30-60 minutes at room temperature. This final proof allows the dough to relax slightly and develop more gas bubbles, which will create that beautiful open crumb structure when baked.
While the dough proofs, preheat your oven to 450°F with a Dutch oven placed inside. The Dutch oven creates steam during baking, which is essential for developing that crispy crust and chewy interior. Let the oven and Dutch oven preheat for at least 30 minutes to ensure proper heat distribution.
Bake with Steam for Maximum Crust Development
Carefully transfer the dough (still on its parchment) into the preheated Dutch oven. Bake uncovered for 25 minutes, then remove the lid and bake for an additional 15-20 minutes until the bread is deep golden brown and sounds hollow when tapped on the bottom.
Watch the color closely during the final baking stage—you want that beautiful mahogany crust. If the top browns too quickly, tent loosely with foil to prevent over-browning while allowing the bread to finish baking through. The internal temperature should reach 205-210°F when measured with an instant-read thermometer.
This is where the magic happens: The steam from the Dutch oven creates that perfect combination of crispy crust and tender crumb. Don’t be tempted to open the oven door during baking—each time you do, you release steam and can cause the crust to collapse.
Cool and Enjoy for Maximum Flavor
Remove the bread from the Dutch oven and transfer it to a wire rack. Let it cool completely for at least 1 hour before slicing. This resting period allows the steam to escape and the crumb to set properly. I know it’s hard to wait, but slicing too soon will result in a gummy texture.
During this cooling time, you’ll notice the bread develop a crisp exterior and a soft, airy interior. The aroma will be intoxicating—this is when the bread reaches its peak flavor. Store any leftovers wrapped in a bread bag at room temperature for up to 3 days, or freeze for longer storage.
Slice the bread with a serrated knife and serve warm with your favorite butter or olive oil. Each slice should reveal an open crumb structure with large, irregular air pockets—proof that your no-knead method worked perfectly. The crust should be crisp enough to stand up to a knife cut but still soft enough to enjoy with every bite.
Pro Tips For Making 1 Pound Loaf Of Bread
- Weigh Your Water: High-gluten flour loves precision—use a scale for the cold water (about 6-7 oz for a 1-lb loaf). I learned this after my first batch turned out dense; the flour absorbs water differently than you’d expect, and eyeballing it leads to guesswork.
- Mix Yeast Last: Add the instant yeast to the flour after dissolving the salt in the water. The salt can inhibit yeast activity if they touch too early, and this recipe’s high-gluten flour needs the yeast’s lift to avoid a heavy crumb.
- Skip the Over-Kneading: High-gluten flour develops gluten fast—just mix until shaggy, then let the dough rest. I used to knead like I was punishing it, but this dough’s strong structure handles minimal handling better than brute force.
- Use Olive Oil Wisely: Brush the loaf after baking, not before—it’ll crisp the crust beautifully without steaming the dough. A light coat of EVOO on the dough itself can make it gummy; save it for the finish.
Wine and beer pairings for this dish
Crisp White Wine
For this rustic, crusty bread, I reach for a dry Riesling from Germany or Alsace—its bright acidity and citrus notes cut through the rich, buttery crust beautifully. A Sauvignon Blanc from New Zealand also works wonders, with its zesty lime and herbal undertones complementing the bread’s open crumb.
Avoid heavy, oaky whites like Chardonnay, which would overpower the delicate flavors. 🍷
Light Beer Pairings
A Belgian Witbier like Hoegaarden or Stella Artois is my go-to beer pairing—its coriander and citrus flavors create a refreshing contrast with the bread’s caramelized crust.
For a hoppier option, try a light American lager such as Corona or Miller Lite, which won’t compete with the bread’s texture but instead enhances the experience. Avoid heavy stouts or IPAs, as they can overpower the bread’s subtle flavors.
Red Wine for Hearty Spreads
If you’re serving this bread with rich toppings like garlic butter or olive tapenade, a Pinot Noir from Oregon or Burgundy is perfect. Its light body and red fruit notes won’t clash with the bread’s crust.
For a bolder option, a Chianti from Tuscany pairs well with tomato-based spreads, balancing the bread’s earthy tones. 🍇
Cider and Sparkling Options
Don’t overlook dry cider—a crisp English cider like Westons or a French Poiré adds a refreshing twist. For something bubbly, a Prosecco or Cava with its bright acidity and slight sweetness creates a delightful contrast to the bread’s crusty exterior.
These lighter options keep the focus on the bread’s texture and flavor without overwhelming it.
Regional Bread Variations
If you’re making a sourdough variation of this loaf, pair it with a dry sparkling wine like Lambrusco to cut through the tang. For a herb-infused version with rosemary or thyme, a Gewürztraminer from Alsace enhances the aromatic notes.
The key is matching the wine’s acidity and flavor profile to the bread’s specific characteristics—whether it’s the crust, crumb, or added ingredients.
Nutrition facts
Frequently asked questions
Can I make this 1-pound loaf recipe with all-purpose flour instead of high-gluten?
The recipe specifically calls for high-gluten flour (12-14% protein) to achieve that signature open crumb structure and crisp crust. Using all-purpose flour (10-11% protein) will result in a denser loaf with less oven spring. If you must substitute, add 1 tablespoon vital wheat gluten per cup of all-purpose flour to mimic the gluten content. Just know the texture will differ slightly.
Why does the dough look so wet? Should I add more flour?
This dough is intentionally wetter than traditional bread dough—it’s called a high-hydration dough (about 68% hydration). The high gluten content develops during the long fermentation, creating that airy crumb. Resist adding extra flour during mixing, as it can prevent proper gluten development. If the dough feels too sticky to shape later, just wet your hands slightly to help handle it.
Can I bake this bread without a Dutch oven?
Yes, but you’ll need to create steam another way. Place the shaped loaf on a baking sheet, then pour 1 cup boiling water into a heatproof bowl and place it on the lower oven rack. Bake as directed, adding the boiling water when you preheat the oven. The steam will help create a crisp crust, though results may be slightly less dramatic than with a Dutch oven.
How do I know when the bread is fully baked?
Look for three key signs: deep golden brown color, a hollow sound when tapped on the bottom, and an internal temperature of 205-210°F measured with an instant-read thermometer. The crust should be firm enough to resist slight pressure but not rock-hard. If unsure, bake 5 more minutes—it’s better to slightly overbake than underbake.
Can I make this recipe in a smaller or larger quantity?
This recipe scales beautifully! For a ½-pound mini loaf, reduce all ingredients by 50%. For a 2-pound boules, double the recipe and divide the dough into two equal portions. Just maintain the same hydration ratio (1.5 cups water per 3.5 cups flour) to preserve the texture. Shape the larger loaf into a round boule instead of an oval.

- 5 Lb Eye Round Roast Recipe: Slow-Braised to Melt-in-Mouth Tenderness - November 3, 2026
- 3-Hour Ciabatta Bread Recipe: Crusty Chews and Airy Holes Mastered - November 3, 2026
- 5 Fruit Salad Recipe: Vibrant Rainbow Layers With No Brown Spots - November 3, 2026