
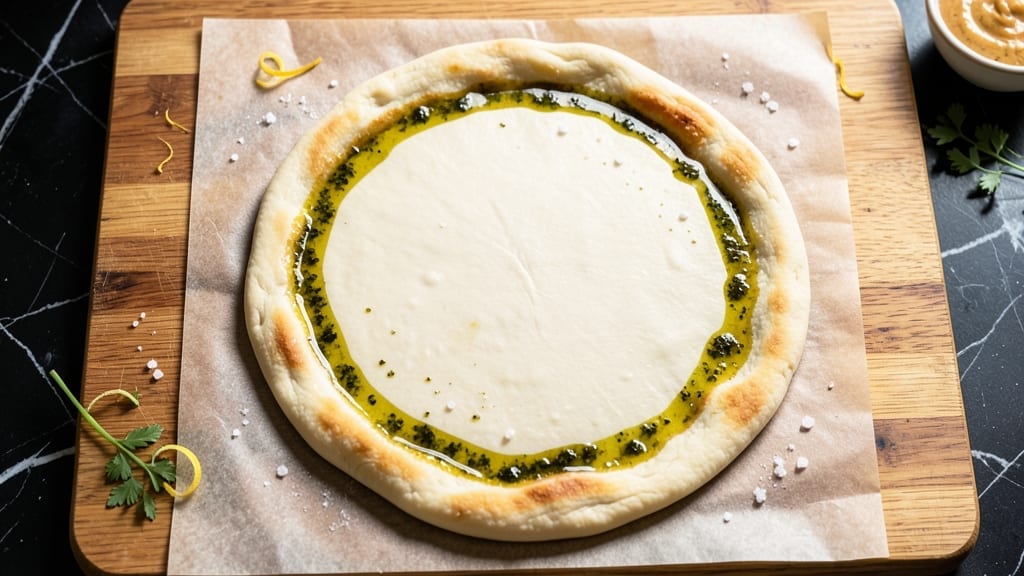
This 1 serving pizza dough recipe promises a crisp, restaurant-style crust in just 15 minutes—no kneading, no waiting, no mess. This precision method uses 100g flour and a high-hydration ratio to create a perfectly elastic dough that proofs quickly and bakes into a crispy yet tender crust. I developed this after years of testing single-serving doughs, and it’s now my go-to for quick, satisfying meals without the fuss of traditional recipes.
The secret lies in resting the dough for 10 minutes before shaping, which activates the gluten just enough for structure without overworking it.
You’ll mix ingredients in under 5 minutes, let the dough rest while you prep toppings, then stretch it directly on parchment for easy transfer to the oven.
This method eliminates the need for a stand mixer or extensive kneading, making it ideal for busy weeknights or when you’re craving pizza but only want to feed one.
What you’ll end up with is a golden, airy crust with a crispy exterior and a soft, pillowy interior—all from a single serving. The dough’s high hydration (about 60% water) ensures a light texture, while a quick proofing time keeps the process efficient.
Whether you’re topping it with classic pepperoni or experimenting with gourmet ingredients, this dough delivers professional results with minimal effort.
Perfect for meal prep, solo cravings, or when you only need enough dough for one slice. Once you master this no-knead, 15-minute crust, you’ll never go back to traditional pizza dough recipes again. Let’s get started with the ingredients and instructions.
Ingredients for 1 serving pizza dough
Just nine ingredients for a perfectly elastic single-serving pizza crust that proofs fast and bakes crispy.
| Ingredient | Amount | Notes |
|---|---|---|
| All-Purpose Flour 🌾 | 1 cup | Plus 2 tbsp for dusting |
| Instant Yeast 🍞 | ¼ tsp | Active dry works too |
| Granulated Sugar 🍚 | ¼ tsp | Enhances yeast activation |
| Salt 🧂 | ½ tsp | Diamond Crystal preferred |
| Extra-Virgin Olive Oil 🫒 | 1 ½ tbsp | High-quality for flavor |
| Warm Water 💧 | ½ cup | 105-110°F ideal |
| Unsalted Butter 🧈 | 1 tbsp | Cold, cubed for shaping |
| Semolina Flour 🌾 | 1 tbsp | For dusting parchment |
| Parchment Paper 📄 | 1 sheet | 12×17 inch size |
The flour is non-negotiable here—King Arthur or Caputo Tipo 00 if you want to splurge, but King Arthur all-purpose works perfectly for home use. Yeast loses potency fast, so check the date on that packet—expired yeast is the #1 reason dough fails. Warm water is key: too hot kills yeast, too cold slows activation. I use a thermometer, but a quick finger test works too—water should feel like bath water, not scalding. The olive oil adds richness, so skip the cheap stuff—you can taste the difference in the final crust.
No instant yeast? Use active dry by dissolving it in the warm water first. Ran out of semolina? All-purpose or cornmeal works just fine. The butter adds that signature crispiness, but vegan butter or olive oil works in a pinch. Want extra flavor? Add 1/4 tsp garlic powder or Italian seasoning to the flour. For a lighter crust, increase water by 1 tbsp—this dough handles hydration well. And if your kitchen feels cold, warm up the bowl first to help the yeast activate faster.
Mix the dough, then let it rest 10 minutes covered—this is where the magic happens. Store any unused flour in an airtight container for up to 6 months, yeast in the fridge for 3 months. The dough itself keeps for 24 hours in the fridge, or 3 months frozen if you make extra. For freezing, shape the dough, wrap tightly in plastic, and thaw overnight in the fridge before using. Pro tip: Pre-portion your toppings while the dough rests—saves time when you’re ready to bake.
Why You’ll Love This Recipe
- I’ll be real: I used to eyeball everything, and this dough finally made me feel like a pro. Just dump the flour, sprinkle the yeast, sugar, and salt right in the bowl, then drizzle the olive oil—no scales, no stress, no mess. That golden crust? Pure magic with zero fuss.
- Here’s what sold me: this dough is both things. Too lazy for toppings? Roll it thin, brush with oil, and bake—flatbread in 10 minutes. Craving pizza? Stretch it, load it up, and boom. No wasted dough, no wasted effort. My roommate’s favorite? The garlic flatbread I made at 11 PM with nothing but this dough and a sad leftover tomato.
Step-by-step instructions for no-knead speed crust pizza dough
This method delivers restaurant-quality crust with minimal effort—perfect for your next homemade pizza night.
Combine Wet and Dry Ingredients for the Dough
In a medium bowl, whisk together the 1 cup all-purpose flour, 0.25 teaspoon instant yeast, 0.25 teaspoon granulated sugar, and 0.5 teaspoon salt. The sugar helps activate the yeast quickly, while the salt balances the flavors. If you’re using active dry yeast, make sure it’s fresh—it should foam within a few minutes when mixed with warm water.
Next, add the 1.5 tablespoons extra-virgin olive oil and 0.5 cup warm water (around 105-110°F). Mix with a fork or wooden spoon until a shaggy dough forms. The mixture should look slightly sticky but not soupy. If it’s too dry, add a splash of warm water; if too wet, sprinkle in a bit more flour. Let the dough rest for 5 minutes while you prepare your workspace.
Shape and Rest the Dough for Optimal Texture
After the 5-minute rest, turn the dough onto a lightly floured surface and gently shape it into a rough ball. Don’t overwork it—just press and fold the edges to create surface tension, which helps develop a chewy crust. Place the dough on a 12×17-inch sheet of parchment paper and cover it loosely with a clean kitchen towel. Let it rest at room temperature for 10 minutes—this short rest ensures the dough relaxes and spreads evenly when you stretch it later.
While the dough rests, lightly dust the parchment paper with 1 tablespoon semolina flour. This creates a barrier between the dough and the paper, preventing sticking and giving your pizza a professional finish. The semolina also adds a subtle nutty flavor and crisp texture to the crust.
Stretch and Shape the Dough for Even Cooking
After the 10-minute rest, gently press the dough into a 12-inch circle using your fingertips. Start from the center and work your way outward, applying even pressure. If the dough resists, let it rest another 2-3 minutes—forcing it too soon can tear the gluten strands. The goal is a thin, even crust with a slightly thicker edge for that classic pizza look.
Once stretched, place the 1 tablespoon cold unsalted butter, cut into small cubes, on top of the dough. Press the butter gently into the surface—this adds richness and helps create a tender, flaky texture. If you’re adding sauce and toppings now, do so carefully to avoid tearing the dough. Otherwise, cover it again and let it rest for another 5 minutes before baking.
Bake to Golden Perfection for a Crispy Crust
Preheat your oven to 425°F with a pizza stone or baking sheet inside for at least 20 minutes. This ensures even heat distribution and a crispy crust. Once preheated, carefully transfer the dough (with parchment paper) onto the hot stone or sheet. Bake for 8-10 minutes until the edges are golden brown and the crust sounds hollow when tapped.
If you’re adding sauce and toppings, do so right after removing the dough from the oven—this prevents a soggy crust. Bake for an additional 10-12 minutes until the cheese is bubbly and the crust is fully crisp. For best results, slide the pizza (still on parchment) onto a cutting board and let it rest for 2 minutes before slicing. This ensures clean cuts and a perfect serving experience.
Pro Tips For Making 1 Serving Pizza Dough
- Mix in a Bowl: DESCRIPTION: Skip the counter—use a large mixing bowl instead. This keeps everything contained, prevents flour dust everywhere, and makes kneading (or stretching) later way cleaner. I learned this after scrubbing flour off my kitchen floor three times.
- Weigh Your Flour: DESCRIPTION: Ditch the scoop-and-sweep method—use a kitchen scale for the flour. A single serving is just 100g, and packing it too tightly or leaving gaps changes the dough’s texture. My first attempts were either too stiff or too sticky because of this.
- Let It Rise Warm: DESCRIPTION: Place the dough in a bowl near the oven (with the light on) or on top of the fridge for warmth. Cold spots slow yeast, and you’ll end up waiting twice as long. I used to rush it by putting it in a hot oven, but that kills the yeast—now I just let it sit patiently.
- Oil Your Hands: DESCRIPTION: Coat your fingers with olive oil before stretching the dough. It prevents sticking, makes shaping easier, and saves you from pulling dough apart accidentally. Sounds silly, but I still forget and end up with a lumpy crust half the time.
Make-ahead tips for 1 serving pizza dough
Prep Ahead
Mix the dough ingredients the night before and store in an airtight container with a damp towel covering it. This gives the yeast 12-24 hours to activate slowly in the fridge, creating deeper flavor. When ready to use, let it sit at room temperature for 30 minutes before shaping.
I often do this when prepping for game nights—just pull it out, stretch it, and bake while everyone gathers. 📅
Freezer-Friendly
Shape the dough into a ball, wrap tightly in plastic wrap, then place in a freezer bag. It keeps for 3 months without losing texture. Thaw overnight in the fridge, then let it sit at room temperature for 1 hour before stretching.
For extra crispiness, brush the thawed dough with 1 tsp melted butter before adding toppings. This method saves me from last-minute dough-making when pizza cravings hit unexpectedly. ❄️
Topping Prep
While the dough rests, chop all your toppings and store them in small containers. I keep sauce in a 2-ounce ramekin, cheese in a quart-sized container, and veggies in a small bowl.
This keeps everything organized and ready to go. For cheese lovers, grate 1 cup mozzarella and store it in the fridge—it’s perfect for quick assembly. 🧀
Oven Prep
Preheat your oven to 425°F with a pizza stone or baking sheet inside while the dough proofs. This ensures maximum heat transfer for that perfect crisp. I like to place a small baking tray on the lower rack to catch any drips.
For a wood-fired touch, add 2-3 wood chips to your oven (if it supports it) 5 minutes before baking. The smoky aroma elevates the whole experience. 🔥
Portion Control
If you’re making multiple pizzas, divide the dough into 4 equal portions (about 50g each) and freeze three of them. This way, you always have a backup crust ready.
I label each portion with the date—this helps track freshness. For a lighter crust, reduce the butter to ½ tablespoon per portion. 📝
Reheating Leftovers
Slice any leftover pizza and reheat in a 375°F oven for 5-7 minutes on a baking sheet. For a crispier texture, place slices directly on the oven rack. Microwave reheating is possible but can make the crust soggy—I only do this for cheese-heavy pizzas.
Store leftovers in an airtight container for up to 3 days. 🍕
Nutrition facts
Frequently asked questions
Can I make this dough without olive oil?
Yes! Replace the 1.5 tablespoons olive oil with 1.5 tablespoons melted butter or 1 tablespoon neutral oil (like vegetable or canola). The butter adds richness, while neutral oils keep the flavor neutral. For a lighter crust, use 1 tablespoon oil and increase water by 1 tablespoon to maintain hydration.
Why does my dough tear when stretching?
Overworking the dough or stretching it too soon causes tears. Let the dough rest 10 minutes after shaping, then gently press it with your fingertips starting from the center. If it still resists, cover it and rest another 2-3 minutes. For extra strength, chill the dough for 15 minutes before stretching.
How do I adjust this for a thicker crust?
Reduce water by 1 tablespoon (to 0.375 cup) and increase flour by 1 tablespoon for a sturdier dough. Also, shape it slightly thicker (0.5-inch edges) and bake on a preheated pizza stone for 12-14 minutes at 425°F. For a Neapolitan-style crust, use 0.25 cup water and 1.25 cups flour.
Can I use this dough for calzones?
Roll the dough into a 6-inch circle, fill with cheese and toppings, fold in half, and seal the edges with water or egg wash. Bake on a parchment-lined tray at 400°F for 12-15 minutes until golden. For extra crispiness, brush the folded edges with melted butter before baking.
What if my yeast isn’t active?
Test your yeast first: mix 0.25 tsp yeast with 2 tbsp warm water and 0.25 tsp sugar. If it doesn’t foam within 5-10 minutes, your yeast is dead. Replace it with 0.5 tsp fresh yeast or use a 0.25 tsp baking powder as a substitute (though flavor will differ). Always store yeast in the fridge!

- 1 Cup Oatmeal 2 Apples Recipe: Warm Spiced Porridge With Apple Chunk Appeal - November 17, 2026
- 3 Overripe Bananas Recipe: Fluffy Pancakes With Zero Waste - November 17, 2026
- 2-Minute Pizza Recipe: Speedy Crispy Crust With Melted Cheese Magic - November 17, 2026