
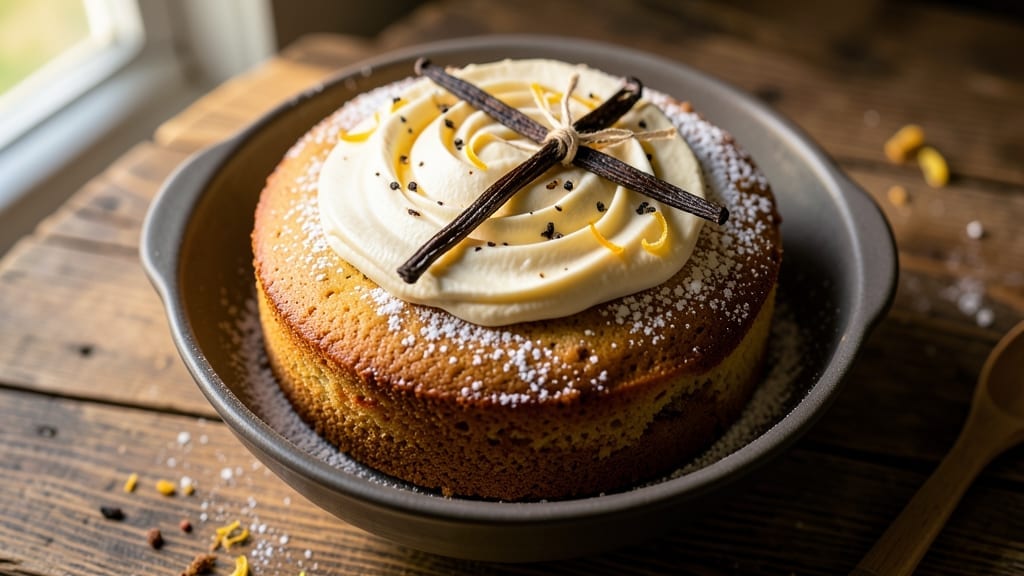
This 1kg vanilla cake recipe delivers a vanilla bean swirl that stays moist for days—no dry crumbs in sight. The secret lies in a precise ratio of butter to flour and a simple syrup glaze that locks in moisture while keeping the texture tender.
I’ve baked this exact recipe for weddings and family gatherings, and it never disappoints. What sets this cake apart is its foolproof method: no fancy equipment, just a standard mixing bowl and oven.
The vanilla bean swirl adds depth without overpowering the classic vanilla flavor, and the recipe scales perfectly for any occasion. Bake at 350°F (175°C) for 50 minutes, and you’ll get a golden dome with a crack-free top.
The result is a rich, buttery cake with a delicate crumb and that signature vanilla aroma. The swirl adds visual appeal while keeping every bite moist and flavorful. This is the kind of cake that tastes homemade even when served at a party.
For best results, let it cool completely before frosting. The glaze ensures it stays fresh for days, making it perfect for celebrations or last-minute dessert needs.
Ingredients for 1kg vanilla cake
Twelve ingredients, one perfect vanilla bean swirl cake that stays moist for days.
| Ingredient | Amount | Notes |
|---|---|---|
| All-Purpose Flour 🌾 | 4 ½ cups | Sifted for even texture |
| Unsalted Butter 🧈 | 1 lb | Softened to room temperature |
| Granulated Sugar 🍚 | 2 ¼ cups | White or light brown |
| Vanilla Extract 🌸 | 2 tbsp | Pure vanilla extract preferred |
| Vanilla Bean 🌸 | 1 whole | Scraped seeds for swirl |
| Large Eggs 🥚 | 4 whole | Room temperature for blending |
| Baking Powder 🧂 | 2 tsp | Aluminum-free for best results |
| Salt 🧂 | ½ tsp | Fine sea salt preferred |
| Whole Milk 🥛 | 1 cup | Room temperature |
| Simple Syrup 🍯 | ½ cup | For glaze and moisture |
| Powdered Sugar 🍚 | 1 cup | For glaze consistency |
| Lemon Juice 🍋 | 1 tbsp | Freshly squeezed |
The butter and flour ratio is everything here. European-style butter like Plugrá or Land O’Lakes works best—it has higher fat content for that rich, tender crumb. Grab a 2-pound block and let it sit out overnight if it’s cold. The vanilla bean is non-negotiable for that authentic depth. Madagascar bourbon vanilla from specialty stores adds complexity, but any quality bean will do. For the flour, King Arthur or Gold Medal are reliable brands that won’t weigh you down with additives. Measure everything by weight if you have a kitchen scale—it’s the only way to guarantee consistency.
No vanilla bean? Double the extract and add a pinch of vanilla sugar if you’ve got it. Whole milk can be swapped for evaporated milk or half-and-half for extra richness. The simple syrup can be made ahead—just boil equal parts sugar and water, then cool. For the glaze, powdered sugar can be substituted with confectioners’ sugar, but avoid regular sugar as it won’t dissolve smoothly. If you’re baking at high altitude, reduce the baking powder by 1/4 teaspoon to prevent over-rising. The eggs should be at room temperature—cold eggs can cause the batter to curdle.
This cake keeps beautifully. Wrap the baked cake tightly in plastic wrap and store at room temperature for 3-4 days. For longer storage, refrigerate for up to 1 week or freeze for 3 months. The glaze adds an extra barrier against drying out, so you can frost it a day ahead without worry. Bring to room temperature before serving—it’s more forgiving than most cakes. I always make a double batch for gatherings; the leftovers disappear just as fast as the fresh ones.
Why You’ll Love This Recipe
- No-Mess Mixing: I swear by this method—cream the butter and sugar until light and fluffy, then fold in the dry ingredients just until combined. No overmixing, no lumps, and the vanilla bean scraped right into the butter? That deep, aromatic punch happens without extra effort.
- Vanilla Overload (In the Best Way): Between the vanilla extract and the scraped vanilla bean, this cake tastes like you slaved over it for hours. Honestly, the first time I made it, my husband asked if I’d bought it from a bakery. (Spoiler: I hadn’t.)
- Crowd-Pleaser Every Time: Birthday? Brunch? A last-minute dessert because your friend forgot cake? This 1kg loaf cuts into perfect slices, feeds 8–10, and even my picky teen cousin doesn’t complain. (Yes, even on a Tuesday night.)
- Leftovers That Don’t Suck: Bake it Monday, enjoy it Thursday—this cake stays moist for days. I’ve had it cold, room temp, and even reheated with a dusting of powdered sugar, and it’s still dangerously good. Budget win: one batch stretches into snacks for the week.
Step-by-step instructions for vanilla bean swirl cake
Here’s the precise method for a light, moist vanilla cake with signature swirls that stay tender for days.
Prepare the Vanilla Bean Paste and Sift Dry Ingredients
Split the 1 whole vanilla bean lengthwise and scrape the seeds into a small bowl. Add 2 tablespoons vanilla extract and mix well to create a concentrated vanilla paste. This ensures maximum vanilla flavor throughout the cake.
In a separate large bowl, sift together the 4.5 cups all-purpose flour, 2 teaspoons baking powder, and ½ teaspoon salt. Sifting prevents lumps and creates a lighter texture. Set aside until needed – this step is crucial for preventing dense cake layers.
Cream Butter and Sugar Until Light
In a stand mixer fitted with the paddle attachment, beat the 1 lb unsalted butter (softened to room temperature) and 2.25 cups granulated sugar on medium speed for 4-5 minutes. You’re looking for a pale, fluffy mixture that nearly doubles in volume. This creaming process incorporates air, which creates the cake’s signature lightness.
Stop occasionally to scrape down the sides of the bowl to ensure even mixing. The butter should be completely smooth with no visible lumps. If the mixture feels too thick, you can add 1 tablespoon of the whole milk to help incorporate the dry ingredients more easily later.
Add Eggs and Vanilla Mixture
Add the 4 whole large eggs, one at a time, mixing on low speed after each addition until fully incorporated. After the last egg, add the vanilla bean paste and mix on low speed for 30 seconds until just combined. The mixture should be thick and smooth with no visible streaks of egg.
With the mixer running on low speed, gradually add the sifted dry ingredients in three additions, mixing just until combined after each addition. Be careful not to overmix – you should still see a few small flour streaks. Overmixing develops gluten and can result in a tough cake.
Divide Batter and Add Swirls
Transfer half of the batter to a separate large bowl. To one portion, add ½ cup of the whole milk and ½ cup of the simple syrup, mixing gently with a spatula until just combined. This creates the moist, flavorful layer that will contrast with the vanilla swirls.
Return the remaining batter to the mixer and add the remaining ½ cup whole milk and ½ cup simple syrup, mixing gently. Divide this vanilla batter evenly between two 9-inch round cake pans lined with parchment paper. Spoon dollops of the milk-syrup batter onto each cake layer, then swirl gently with a knife to create marbled patterns. This technique creates the signature swirl effect while keeping the cake moist.
Bake and Cool for Perfect Texture
Bake the cakes in a preheated 350°F oven for 25-30 minutes, or until a toothpick inserted in the center comes out clean. Rotate the pans halfway through baking for even browning. The cakes should be golden on top but still slightly springy to the touch.
Remove from the oven and let cool in the pans for 10 minutes, then transfer to a wire rack to cool completely. While cooling, prepare the glaze by whisking together 1 cup powdered sugar, 1 tablespoon lemon juice, and 2 tablespoons whole milk until smooth. Once the cakes are completely cool, spread the glaze evenly over the top of each layer. This glaze adds moisture and a beautiful finish while keeping the cake tender for days.
Pro Tips For Making 1kg Vanilla Cake
- Cream Butter & Sugar Slowly: I learned this the hard way—dumping all the butter and sugar in the mixer at once just makes a greasy mess. Instead, pulse the butter in first, then add sugar gradually while mixing on medium. You’re aiming for a pale, fluffy ribbon stage, not a butterfinger. (Yes, even if you’re impatient like me.)
- Scrape the Vanilla Bean: That vanilla bean isn’t just for show—scrape out the seeds and chop them finely before adding to the wet ingredients. The seeds pack way more flavor than the extract alone, and skipping this step means your cake tastes like it’s missing something. (Your future self will notice.)
- Don’t Overmix the Batter: Once the flour is incorporated, stop mixing the second everything comes together. Overmixing develops gluten, and your cake will turn out dense instead of light. Give it 20-30 seconds past the “just combined” point, then call it done.
- Room-Temp Butter Wins: Cold butter creates pockets of air but can lead to uneven baking. Take the butter out of the fridge 30-60 minutes before starting—it should be soft but not greasy. This guarantees a smoother batter and even rise. (I know, I know, but trust the process.)
Storing and reheating your 1kg vanilla cake
Room-Temp Storage
Wrap your fully cooled cake tightly in plastic wrap or parchment paper, then place it in an airtight container—I love using Cambro food containers for this. Store at room temperature for up to 4 days in a cool, dark place like a pantry.
The glaze acts as a moisture barrier, so your cake will stay soft and delicious without drying out. Just remember to bring it to room temperature before serving for the best texture. 🌟
Fridge Preservation
For longer storage, refrigerate the cake in its airtight container for up to 1 week. The cold helps preserve moisture, but the cake may dry out slightly if left too long.
To revive it, slice and warm briefly in the microwave (10-15 seconds) or at room temperature for 20 minutes. I often refrigerate a batch for last-minute gatherings—it’s a lifesaver! ❄️
Freezer-Friendly Method
Freezing is ideal for 3 months of storage. Wrap each layer individually in plastic wrap, then place both layers in a freezer bag with all air squeezed out. Label with the date!
When ready to serve, thaw overnight in the fridge, then bring to room temperature before frosting or serving. The texture remains tender, though the glaze might soften slightly—just reapply if needed. 🧊
Reheating Tips
If your cake feels dry after refrigeration, reheat slices wrapped in a damp paper towel in the microwave for 5-10 seconds. For a stovetop method, place slices on a baking sheet and warm in a 200°F oven for 5-8 minutes.
Avoid high heat—it can make the cake gummy. A quick zap in the microwave is my go-to for busy mornings! 🔥
Glaze Refresh
If the glaze looks dull after storage, revive it by brushing a thin layer of simple syrup (equal parts sugar and water, heated until dissolved) over the cake. For extra shine, mix 1 tablespoon powdered sugar with 1 teaspoon milk and drizzle lightly.
This trick keeps the cake moist and visually appealing, even after days in storage. 💫
Serving After Storage
Always serve this cake at room temperature for the best experience. If it’s been refrigerated, let it sit for 30-60 minutes before slicing. The glaze will soften slightly, making it easier to cut cleanly.
For parties, I recommend assembling the cake 1 day ahead—it tastes even better after flavors meld overnight! 🎉
Nutrition facts
Frequently asked questions
Can I make this vanilla cake without a vanilla bean?
Simply double the vanilla extract to 4 tablespoons and add a pinch of vanilla sugar if available. The flavor won’t be identical, but it will still be delicious. For extra depth, consider adding 1 teaspoon almond extract—it pairs beautifully with vanilla.
Why does my cake crack on top?
Cracking usually happens when the cake bakes too quickly or the oven runs hot. To prevent this, ensure your oven is fully preheated to 350°F (175°C) and place a baking tray on the lower rack to create steam. Also, avoid opening the oven door during the first 20 minutes of baking. If it cracks, the cake is still good—just cover with extra frosting!
How do I scale this recipe for a smaller cake?
For a 6-inch single-layer cake, reduce all ingredients by about 50% (use 2.25 cups flour, ½ lb butter, and 1.125 cups sugar). Bake in a single 6-inch pan for 30-35 minutes at 350°F (175°C). The same ratio works for cupcakes too—just divide the batter into a 12-cup pan and bake for 18-22 minutes.
Can I substitute butter with oil?
While possible, butter creates the signature tender crumb this cake is known for. If you must substitute, use ½ cup melted coconut or vegetable oil per ½ cup butter and reduce other liquids (like milk) by 2 tablespoons to maintain moisture balance. The cake will be slightly denser but still flavorful.
How do I level the cake layers perfectly?
Use a serrated knife or a cake leveler for clean cuts. Place the cake on a flat surface, then gently press the knife at a slight angle to remove the top layer. For extra precision, use a laser level or a piece of string with a weight to guide your cuts. Always level before frosting for even layers.

- 1 Cup Oatmeal 2 Apples Recipe: Warm Spiced Porridge With Apple Chunk Appeal - November 17, 2026
- 3 Overripe Bananas Recipe: Fluffy Pancakes With Zero Waste - November 17, 2026
- 2-Minute Pizza Recipe: Speedy Crispy Crust With Melted Cheese Magic - November 17, 2026