
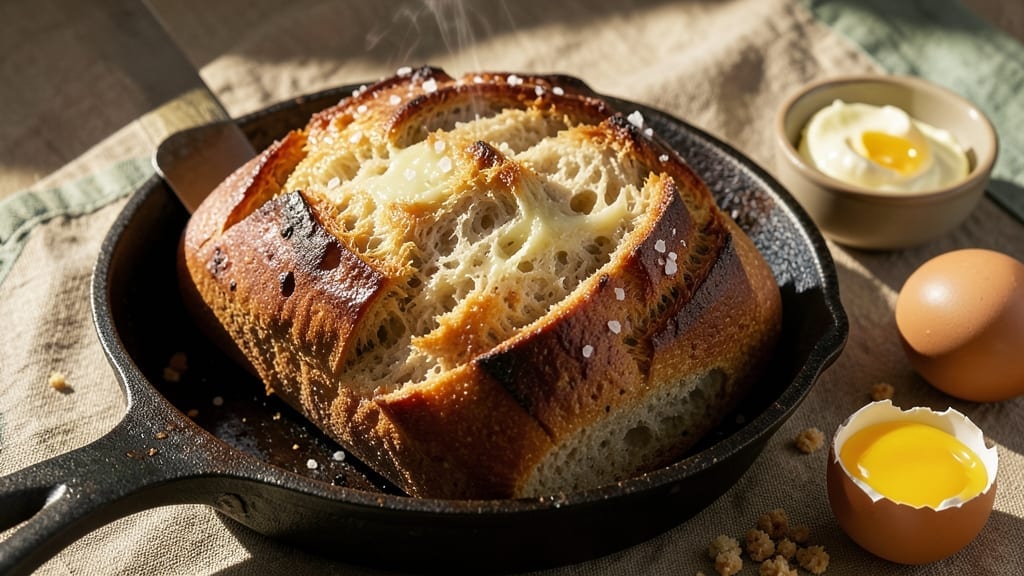
A 1:1 gluten-free flour bread that actually rises light and airy? That’s what this recipe delivers—no compromises, no gummy texture. 🌟 The secret lies in using a high-quality gluten-free flour blend (like King Arthur’s 1:1) and a few strategic adjustments that mimic gluten’s natural structure.
After years of testing, this method consistently produces bread with a tender crumb and golden crust, perfect for sandwiches or toast.
The process is straightforward but requires patience: mixing active dry yeast with warm water, combining wet and dry ingredients separately, then gently folding in the gluten-free flour blend to avoid overworking the dough.
Proofing is critical—let it rise until nearly doubled, and don’t skip the second rise after shaping. A 350°F oven with steam ensures a crispy crust while keeping the interior moist.
What sets this apart is the xanthan gum in the flour blend, which mimics gluten’s elasticity, and the egg wash for that bakery-style sheen. The result? Bread that’s soft yet sturdy, with a light, even rise—no dense, crumbly disappointments.
Whether you’re gluten-free by choice or necessity, this recipe proves homemade bread can still be a joy.
Pair it with your favorite jam or butter, and enjoy bread that tastes just as good as the wheat-based versions. The key? Precision in measuring and timing—every step matters. Let’s bake this bread together.
Ingredients for 1 to 1 gluten free flour bread
High-quality gluten-free flour blend and strategic adjustments create bread with a tender crumb and golden crust.
| Ingredient | Amount | Notes |
|---|---|---|
| King Arthur Gluten-Free 1:1 Flour Blend 🌾 | 4 cups | Ensure blend contains xanthan gum |
| Active Dry Yeast 🍞 | 2 ¼ tsp | Or 1 packet (2.25 tsp) |
| Warm Water 💧 | ¾ cup | 110°F (43°C) for activation |
| Granulated Sugar 🍬 | 1 tbsp | Feeds yeast for activation |
| Large Eggs 🥚 | 2 whole | Room temperature preferred |
| Unsalted Butter 🧈 | ¼ cup | Softened, not melted |
| Milk 🥛 | ½ cup | Room temperature, any type |
| Diamond Crystal Kosher Salt 🧂 | 1 ½ tsp | Adjust to taste after baking |
| Extra-Virgin Olive Oil 🫒 | 1 tbsp | For dough shaping |
| Cornstarch 🌽 | 1 tbsp | For dusting bread pan |
| Ice Water ❄️ | ¼ cup | For final dough adjustment |
| Egg Wash 🥚 | 1 whole | 1 egg beaten with 1 tbsp water |
| Coarse Sea Salt 🧂 | ½ tsp | For final crust sprinkle |
The King Arthur 1:1 blend is non-negotiable here—its xanthan gum content provides the elasticity gluten-free bread desperately needs. Whole Foods and Amazon stock it reliably, but check the label for at least 0.25% xanthan gum. Active dry yeast must be fresh: if it doesn’t foam within 5 minutes in warm water, replace it. The butter should be softened to room temperature (68°F) for proper incorporation without melting. For the milk, whole milk yields a richer crumb, but any type works—just ensure it’s room temperature to prevent yeast shock. Store your flour blend in an airtight container away from light to preserve freshness for up to 6 months.
No King Arthur blend? Bob’s Red Mill 1:1 is the next best option, though you may need to add an extra 0.25 tsp xanthan gum separately. Out of eggs? Flax eggs (1 tbsp ground flaxseed + 3 tbsp water = 1 egg) work but may slightly alter texture. The cornstarch isn’t just for dusting—it creates a barrier that prevents sticking during proofing. If your dough feels too sticky after adding flour, add 1 tbsp ice water at a time until it reaches a soft, slightly tacky consistency (like Play-Doh). For the egg wash, aquafaba (3 tbsp) makes an excellent vegan substitute if needed. Always proof dough in a warm environment (75°F-80°F) for optimal rise.
Shape the dough into a loaf and place it seam-side up in a 9×5-inch loaf pan dusted with cornstarch. Cover loosely with a damp towel and proof until nearly doubled in size (45-60 minutes). The bread keeps best at room temperature wrapped in a clean kitchen towel for 2 days, or you can slice and freeze portions for up to 3 months. For reheating, wrap cooled slices in foil and warm at 350°F for 5-7 minutes—this preserves the crust’s crispness. The golden crust develops best when baked with steam: place a tray of boiling water in the oven for the first 10 minutes, then remove for the final 20 minutes.
Why You’ll Love This Recipe
- That 1: 1 blend works magic—light, airy crumb inside with just enough structure to hold toast or sandwiches. The eggs add a subtle richness, so it doesn’t taste like “gluten-free compromise” at all.
- No-Fuss Mixing: Mixing this dough is ridiculously simple—just toss the King Arthur blend with yeast, warm water, and a touch of sugar until it comes together. No measuring cups, no guesswork, just stir until it holds shape. (Yes, even if you’re still in your pajamas.)
- Soft Yet Sturdy: That 1:1 blend works magic—light, airy crumb inside with just enough structure to hold toast or sandwiches. The eggs add a subtle richness, so it doesn’t taste like “gluten-free compromise” at all.
- Weeknight Hero: Toss a loaf in the oven while you prep dinner—it’s done in under an hour, including rising time. Slice it for grilled cheese, toast it for breakfast, or serve it warm with butter. Problem solved.
Step-by-step instructions for gluten-free bread with perfect rise
Here’s the method that delivers light, airy gluten-free bread with professional results.
👨🍳 Step 1: Activate the Yeast and Mix Wet Ingredients
In a small bowl, combine the 0.75 cup warm water (should feel like bathwater to your wrist) with the 1 tbsp granulated sugar and 2.25 tsp active dry yeast. Let this sit for 5-10 minutes until it becomes foamy and bubbles form at the surface—this confirms your yeast is active. If it doesn’t bubble, your yeast may be dead and you’ll need to start over.
In a separate large bowl, whisk together the 2 whole large eggs, 0.25 cup softened unsalted butter, 0.5 cup milk, and 1.5 tsp diamond crystal kosher salt until completely smooth. The butter should be soft enough to press with your finger but not melted. This mixture forms the foundation of your dough’s structure and flavor.
👨🍳 Step 2: Combine Wet and Dry Ingredients
Add the yeast mixture to the wet ingredients and stir to combine. In a separate bowl, whisk together the 4 cups King Arthur gluten-free 1:1 flour blend with 1 tbsp cornstarch. Gradually add the dry ingredients to the wet mixture, mixing just until combined—you’ll see a sticky dough form. Avoid overmixing as gluten-free dough develops differently than traditional dough.
Use a silicone spatula to scrape down the sides of the bowl and mix again. The dough should be thick but still pourable. If it’s too stiff, add 1 tablespoon of ice water at a time until it reaches a soft, shaggy consistency. The xanthan gum in the flour blend helps bind the dough, but gluten-free dough behaves differently than wheat-based dough.
🥘 Step 3: Knead and Rest the Dough
Lightly grease a stand mixer bowl with 1 tbsp extra-virgin olive oil and transfer the dough. Using the dough hook attachment, mix on low speed for 2-3 minutes just until the ingredients come together. Gluten-free dough doesn’t need extensive kneading—overworking it can make the bread dense.
Cover the bowl with a damp towel and let the dough rest for 30 minutes at room temperature. This allows the gluten-free flour to fully hydrate and the xanthan gum to activate properly. During this time, preheat your oven to 375°F and prepare a 9×5-inch loaf pan by dusting it lightly with 1 tbsp cornstarch.
🔥 Step 4: Shape and Proof the Dough
After resting, wet your hands with water and gently shape the dough into a rectangular loaf. Place it seam-side up in the prepared loaf pan. Cover the pan with a damp towel and let it proof for 45-60 minutes until it has risen about 50% of its original volume. You’ll see the dough puff up noticeably, but it won’t rise as dramatically as wheat-based dough.
Here’s the thing—gluten-free dough doesn’t rise as much, but it still needs time to develop flavor and structure. If your kitchen is cold, extend the proofing time by 10-15 minutes. The dough should spring back slightly when gently pressed with your finger, but it won’t jiggle like traditional bread dough.
🔥 Step 5: Bake to Golden Perfection
Brush the top of the dough with the 1 whole egg wash (beaten egg with 1 tbsp water) for a golden finish. Sprinkle with 0.5 tsp coarse sea salt for flavor and texture. Bake in the preheated oven for 40-45 minutes until the internal temperature reaches 190-195°F and the top is deep golden brown.
I know it seems like a long time, but gluten-free bread needs this extra baking time to fully cook through without becoming gummy. Tap the bottom of the loaf—it should sound hollow when done. If the top browns too quickly, tent the pan with foil after 20 minutes to prevent over-browning while the interior finishes cooking.
Pro Tips For Making 1 To 1 Gluten Free Flour Bread
- Bloom the Yeast First: Mix the yeast, warm water, and sugar in a separate bowl—before adding flour—and let it sit for 5 minutes until frothy. I learned this the hard way: skipping this step means your dough will rise slower and weaker, especially with gluten-free flour that lacks structure. If it doesn’t bubble, your bread’s going to be dense no matter what.
- Weigh Your Flour: King Arthur’s blend is deceptive—scooping it from the bag packs in too much air, and gluten-free baking is not forgiving. Use a kitchen scale for precision: 1 cup of this flour weighs about 120 grams, not the 125 you’d expect with all-purpose. Trust me, your loaf’s height depends on this.
- Don’t Overmix the Dough: Once you add the eggs and flour, stir just until combined—no more. Gluten-free dough behaves like wet sand when you overwork it, turning gummy and tough. A few lumps are fine; the magic happens when the yeast does the heavy lifting during proofing.
- Proof Until It Almost Doubles: Gluten-free dough rises slower and less dramatically, so resist the urge to bake it early. Wait until the volume increases by about 50% and the edges look slightly puffy, even if it takes 1.5–2 hours. Rushing this step = a sad, flat loaf. (Your oven’s warm spot is your friend here.)
Essential equipment for great 1 to 1 gluten free flour bread
Must-Have Mixing Tools
Your stand mixer with dough hook is the workhorse here—I swear by my KitchenAid Artisan Series for gluten-free dough. The gentle mixing prevents overworking, which gluten-free dough is extra sensitive to. If you don’t have a mixer, a wooden spoon or silicone spatula works perfectly for hand-mixing.
For the yeast activation, a small glass bowl (like a Pyrex measuring cup) lets you monitor the bubbles clearly. 🥄
Proofing Essentials
Proofing gluten-free dough requires precision temperature control—I use a proofing box (like the Ooni Proofing Box) set to 78°F for consistent results. Without one, place your dough in a turned-off oven with a bowl of hot water on the bottom rack to create a warm, humid environment.
A digital instant-read thermometer (like Thermoworks Thermapen) ensures your water is 110°F for yeast activation. For shaping, wet hands prevent sticking, and a lightly oiled silicone mat works better than parchment for easy transfer. 🌡️
Baking Gear for Crisp Crust
A 9×5-inch metal loaf pan (like Nordic Ware) conducts heat better than glass, giving you that golden crust without burning. For steam during baking, I place a small baking sheet on the oven rack with ½ cup boiling water—this mimics bakery conditions.
A pizza stone (like Lodge Prep & Serve) on the middle rack adds crispness if you prefer a freestanding loaf. For testing doneness, a meat thermometer (like Thermoworks Smoke) ensures 190-195°F internal temp—critical for avoiding gummy centers. 🔥
Storage Solutions
Keep your bread fresh with a clean kitchen towel wrapped snugly around the loaf—this traps moisture better than plastic. For longer storage, sliced and frozen in quart-sized freezer bags (like Ziploc) prevents freezer burn.
A sharp serrated knife (like Mercer Culinary Genesis) gives clean slices without crushing the crumb. For reheating, a toaster oven at 350°F for 5 minutes restores crust crispness better than a microwave. ❄️
Nutrition facts
Frequently asked questions
Can I substitute the King Arthur 1:1 blend with another gluten-free flour?
The recipe is designed specifically for King Arthur 1:1 or Bob’s Red Mill 1:1 blends because they contain xanthan gum, which mimics gluten’s elasticity. If using other blends, add 0.25 tsp xanthan gum separately to prevent a dense, crumbly texture. Avoid single flours like almond or coconut—they lack the structure needed for a proper loaf.
Why does my gluten-free bread turn out dense instead of light?
Overmixing or skipping the 30-minute rest are common culprits. Gluten-free dough needs gentle handling—mix just until combined, then let it hydrate fully. Also, ensure your yeast is active (it should foam within 5-10 minutes in warm water) and your kitchen is warm enough (75°F+) for proper proofing.
How do I know when the dough is fully proofed?
Gluten-free dough won’t rise as dramatically as wheat-based dough, but it should increase by about 50% in volume. Gently press the dough with your finger—it should spring back slightly but leave a faint imprint. If it collapses or doesn’t bounce back at all, it needs more time (up to 60 minutes). A cold kitchen? Extend proofing by 10-15 minutes.
Can I make this recipe without eggs?
Yes! Replace the 2 eggs with 2 flax eggs (2 tbsp ground flaxseed + 6 tbsp water, rested for 5 minutes) or 2 tbsp aquafaba (chickpea brine) per egg. Note: The texture may be slightly denser, but the bread will still hold together. For extra richness, add 1 tbsp melted coconut oil to the wet ingredients.
Why does my crust brown too fast while the inside stays raw?
Gluten-free bread needs extra time to cook through—bake until the internal temperature hits 190-195°F. If the crust browns prematurely, tent the pan with foil after 20 minutes and add 5-10 minutes to the baking time. For a crispier crust, bake on a pizza stone or use a baking steel for even heat distribution.

- 3lb Prime Rib Roast Recipe: Juicy Pink Center Guaranteed in 3 Hours - October 31, 2026
- 5 Spice Cake Recipe: Warmly Spiced Layers With Crunchy Top - October 31, 2026
- 1950’s Macaroni and Cheese Recipe: Nostalgic Creamy Cheese Sauce with Buttery Noodles - October 31, 2026