
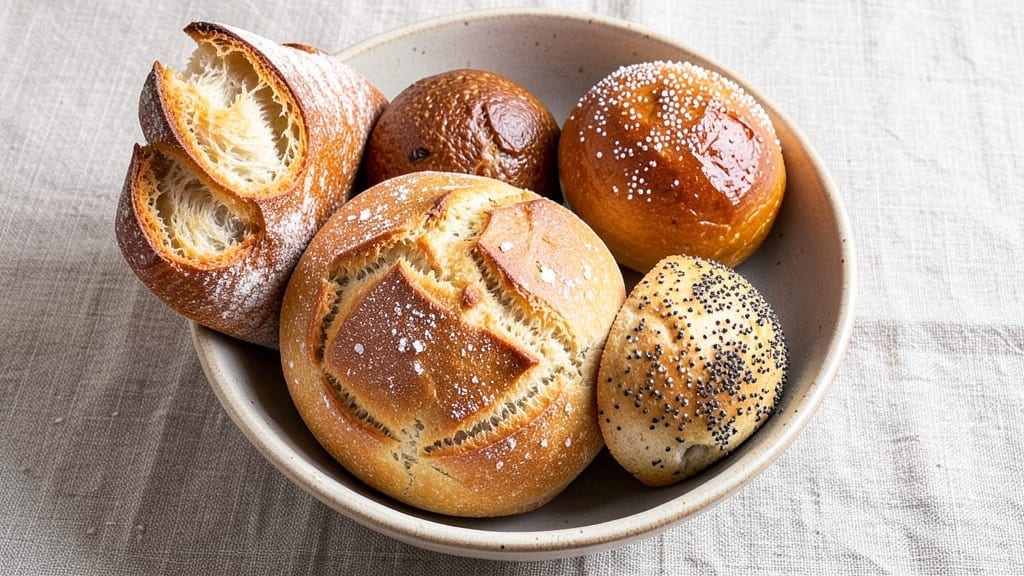
Mastering five artisan-style bread recipes transforms your kitchen into a bakery, where every loaf delivers a crispy crust and soft, airy interior. This collection includes sourdough, focaccia, baguette, brioche, and gluten-free bread—each designed to elevate your baking skills.
The secret lies in precise dough handling, proper proofing, and oven control to achieve restaurant-quality results at home.
From the tangy complexity of sourdough to the buttery richness of brioche, these recipes cater to every preference. The baguette delivers a crispy exterior with a tender crumb, while the focaccia offers a golden, olive-oil-drizzled masterpiece.
Even the gluten-free option achieves a satisfying texture, proving that quality bread isn’t limited by dietary restrictions.
Each recipe includes step-by-step instructions for dough preparation, proofing times, and baking temperatures, ensuring consistency every time. Whether you’re a beginner or an experienced baker, these techniques will help you achieve professional results. The key to success? Patience and attention to detail—both of which pay off in every bite.
Perfect for daily meals, gifting, or impressing guests, these bread recipes bring artisanal quality to your table. Let’s get started on your baking journey with these five essential loaves.
Ingredients for 5 bread
Five loaves, one masterpiece: flour, yeast, and patience create artisan breads with crispy crusts and soft interiors.
| Ingredient | Amount | Notes |
|---|---|---|
| Bread Flour 🌾 | 5 lb | High-protein, 12-14% for structure |
| Active Dry Yeast 🍞 | ¼ oz | Freshly opened for vitality |
| Granulated Sugar 🍚 | ½ cup | Feeds yeast for fermentation |
| Salt 🧂 | 2 tbsp | Diamond Crystal preferred |
| Unsalted Butter 🧈 | 1 cup | Cold, cubed for brioche |
| Large Eggs 🥚 | 2 whole | Room temperature for brioche |
| Whole Milk 🥛 | ½ cup | Warmed for brioche dough |
| Olive Oil 🫒 | ½ cup | Extra-virgin for focaccia |
| Gluten-Free Flour Blend 🌾 | 3 cups | 1:1 ratio for gluten-free |
| Xanthan Gum 🧪 | ¼ tsp | For gluten-free structure |
| Dried Yeast 🍞 | 1 packet | For gluten-free fermentation |
| Honey 🍯 | 2 tbsp | For sourdough starter |
| Sourdough Starter 🍞 | 1 cup | Active, bubbly culture |
| Cornmeal 🌽 | ¼ cup | For dusting baking sheets |
| Coarse Sea Salt 🧂 | 1 tbsp | For crust finishing |
The flour makes all the difference here. King Arthur or Caputo Caputo are my go-tos for sourdough and pizza dough, but any high-protein bread flour (12-14%) will work. For gluten-free baking, Bob’s Red Mill 1:1 blend is reliable—just don’t skip the xanthan gum. Your yeast needs to be fresh: if it’s been sitting in the fridge for months, toss it and grab a new packet. The butter for brioche? Cold cubes create flaky layers, so don’t let it soften before mixing. And that sourdough starter—it should smell tangy and look bubbly, like a tiny, fermented party in your jar.
No brioche butter? Substitute equal parts cold vegetable shortening—it won’t be as rich, but it’ll still puff up nicely. Short on gluten-free flour? Mix 2 cups white rice flour with 1 cup tapioca starch as a backup, though texture won’t be identical. Running out of honey for your starter? Maple syrup works too, though the flavor will differ slightly. The coarse sea salt for finishing? Maldon or Jacobsen flakes are ideal, but any kosher salt in flake form will do. And if you’re making focaccia, those olive oil drizzles? Don’t skimp—it’s what makes it shine.
Store your dough in the fridge between kneading and baking—up to 24 hours for most recipes, 48 hours for sourdough. Gluten-free loaves brown faster, so keep an eye on them after 15 minutes in the oven. Brioche keeps best wrapped in plastic for 3 days at room temperature, while sourdough freezes beautifully for up to 3 months. Pro tip: slice your baguette fresh out of the oven—it’s when the crust is at its crispest. And if you’re prepping ahead, proof your dough overnight in the fridge for deeper flavor development.
Why You’ll Love This Recipe
- No-Knead Magic: I swear by this—just mix, let it rise, and bake. The butter and yeast do all the heavy lifting while you sip coffee or scroll. Honestly, I’ve made this on lazy Sundays and still had energy left for the rest of the day.
- Buttery Crust Promise: That first bite? Rich, golden crust with a tender crumb inside—all thanks to the butter and sugar working their charm. It’s the kind of bread that makes you pause mid-slice, like, “Wait, is this really homemade?”
- Weeknight Wonder: Toss in a loaf for sandwiches, toast it for breakfasts, or freeze slices for quick meals. I keep a batch in the fridge all week—perfect for when I’m too tired to think past dinner.
- Budget-Friendly Staple: Five simple ingredients stretch far, and the dough keeps for days. Between us, I’ve fed a houseful with one batch—no fancy stores, no wasted dough. Just pure, reliable bread that doesn’t break the bank.
Step-by-step instructions for artisan-style crust and soft interior
This recipe delivers a bakery-worthy loaf with a crisp exterior and tender crumb—here’s how to nail it.
Prepare the Gluten-Free and Bread Flour Doughs Separately
For the gluten-free portion, whisk together the 3 cups gluten-free flour blend and 0.25 teaspoon xanthan gum in a medium bowl. In a separate large bowl, combine the 5 pounds bread flour, 0.5 cup granulated sugar, 2 tablespoons salt, and 1 packet dried yeast. Create a well in the center and add the 1 cup sourdough starter, 2 tablespoons honey, 0.5 cup whole milk, and 0.5 cup olive oil. Mix until a shaggy dough forms.
For the gluten-free dough, combine the gluten-free flour blend with 0.5 cup olive oil, 0.5 cup whole milk, and 0.25 teaspoon xanthan gum. Mix until a cohesive dough forms—it should be slightly stickier than traditional dough. Cover both bowls with damp towels and let rest at room temperature for 30 minutes. This step ensures proper gluten development in the bread flour dough while allowing the gluten-free blend to hydrate fully.
Combine and Knead the Doughs for Optimal Texture
After resting, transfer the bread flour dough to a lightly floured surface and knead for 10 minutes until smooth and elastic. For the gluten-free dough, gently fold it into the bread flour dough using wet hands to prevent sticking. The gluten-free portion will add moisture and structure without overpowering the bread flour’s strength.
Return the combined dough to the bowl, cover, and let rise in a warm place for 1.5 to 2 hours, or until doubled in size. You’ll know it’s ready when the dough springs back slowly when poked—this indicates proper fermentation. Meanwhile, prepare your baking sheet by lightly dusting it with 0.25 cup cornmeal to prevent sticking and ensure a crispy bottom crust.
Shape and Proof for the Perfect Crumb Structure
Gently deflate the risen dough and shape it into a round loaf, tucking the edges under for a tight seal. Place the loaf seam-side down on the prepared baking sheet and cover loosely with a damp towel. Let it proof for another 30 to 45 minutes until it rises about 50%—this second rise develops the open crumb structure we’re after.
While the dough proofs, preheat your oven to 375°F. Here’s where the magic happens: just before baking, make a deep slash down the center of the loaf using a sharp razor or knife. This creates steam escape and prevents bursting, giving you that beautiful artisan-style crust. The slash should be about ½ inch deep—deep enough to see the golden interior but not so deep it tears the dough.
Bake for a Crisp Exterior and Soft Interior
Bake the loaf for 35 to 40 minutes until the crust is deep golden brown and sounds hollow when tapped on the bottom. The internal temperature should reach 190°F—this ensures a soft, fully baked interior. I like to spray the oven walls with water during the first 10 minutes of baking to create steam, which enhances the oven spring and keeps the crumb tender.
For that signature crust, brush the hot loaf with melted 1 cup unsalted butter (melted and cooled slightly) immediately after removing it from the oven. Sprinkle generously with 1 tablespoon coarse sea salt while the butter is still warm. Let the loaf cool on a wire rack for at least 1 hour before slicing—this resting period allows the crumb to set properly and prevents a gummy texture.
Finish with Egg Wash for Shine and Serve
For an optional but stunning finish, whisk together the 2 whole large eggs with 1 tablespoon water and brush this egg wash over the cooled loaf. Place it under a broiler for 1 to 2 minutes until the egg wash sets into a beautiful golden sheen. The loaf should have a crisp, crackly exterior that gives way to a soft, airy crumb with just the right amount of chew.
Slice the loaf with a serrated knife for clean cuts that showcase the beautiful crumb structure. Serve warm with your favorite butter or jam—this bread pairs perfectly with soups, salads, or simply enjoyed on its own. The combination of bread flour and gluten-free blend creates a texture that’s both familiar and exciting, with a crust that rivals any artisanal bakery.
Pro Tips For Making 5 Bread
- Bloom the Yeast: Skip the guesswork—mix the yeast with warm water (110°F) and a pinch of sugar first, then wait 5-10 minutes until it foams like a latte. If it’s sluggish, your bread will be too, and no amount of kneading fixes that.
- Salt the Water: Toss the salt directly into the water before mixing, not after. I learned this the hard way—adding it later creates pockets of saltiness instead of an even flavor. Trust me, your bread will taste like it was made by someone who actually reads instructions.
- Knead Until Smooth: Stop when the dough springs back slowly when poked, not when it’s perfectly elastic. Over-kneading makes bread tough, and under-kneading? You’ll regret it when it collapses in the oven. Aim for 8-10 minutes by hand or 5-6 on a stand mixer.
- Butter at Room Temp: Cut the cold butter into small cubes and let it sit on the counter for 30 minutes before mixing—this ensures even distribution and prevents greasy lumps. I used to melt it, but the texture suffers. Cold butter = dense bread. Warm butter = flaky layers.
Best sauces and condiments for this recipe
Butter and Herb
For a rich, savory twist, brush warm bread with melted unsalted butter (about 2 tablespoons) mixed with 1 tablespoon chopped fresh rosemary and 1 teaspoon minced garlic.
Bake until golden, then sprinkle with flaky sea salt. This works beautifully on focaccia or brioche—the butter infuses the crust while the herbs add aromatic depth. 🌿
Garlic and Olive Oil
Infuse ¼ cup extra-virgin olive oil with 4 minced garlic cloves and 1 teaspoon red pepper flakes, then drizzle generously over focaccia or sourdough before baking. For extra flavor, let the oil sit with garlic for 10 minutes before brushing.
The result? A fragrant, slightly spicy crust that pairs perfectly with soups or dips. 🧄
Honey and Spice
Combine 2 tablespoons honey with ½ teaspoon cinnamon and ¼ teaspoon cayenne pepper, then brush onto baguette or gluten-free loaf before baking. The honey caramelizes into a glossy finish, while the spices add warmth. This glaze elevates sourdough for breakfast or sandwiches—trust me, it’s a game-changer. 🍯
Cheesy Garlic
Mix ½ cup shredded mozzarella with 1 tablespoon minced garlic and 1 teaspoon dried oregano, then sprinkle over focaccia or brioche before the final 10 minutes of baking.
The cheese melts into a golden, stretchy blanket, while the garlic adds a bold punch. Perfect for a hearty appetizer or pizza-style bread. 🧀
Everything Bagel Seasoning
Sprinkle 1 tablespoon everything bagel seasoning (sesame seeds, poppy seeds, garlic, onion, salt) over baguette or gluten-free loaf after baking. For extra crunch, toast the bread lightly before seasoning. This blend turns simple bread into a flavorful snack—ideal for breakfast or as a side with hummus. 🥨
Herb-Infused Compote
Simmer ½ cup apple cider with 1 tablespoon brown sugar, 1 sprig thyme, and 1 cinnamon stick until reduced by half. Brush onto sourdough or brioche before serving. The sweet-tart compote adds moisture and complexity, making every bite irresistible. Save this for special occasions—it’s worth the effort! 🍎
Nutrition facts
Frequently asked questions
Can I substitute all-purpose flour for bread flour in these recipes?
While it’s possible, your bread won’t have the same structure or chew. Bread flour has a higher protein content (12-14%) that develops gluten better for that signature artisan texture. For best results, use the specified flour types—especially for sourdough and baguette where gluten development is critical. If you must substitute, add 1 teaspoon vital wheat gluten per cup of all-purpose flour to improve elasticity.
How do I know when my sourdough starter is ready to use?
Your starter should be bubbly, have a doubled volume within 4-6 hours after feeding, and smell pleasantly tangy (not sour or alcoholic). For these recipes, use 1 cup of active starter—this means it should float in water when dropped in. If it’s sluggish, feed it with equal parts flour and water 2-3 times before using to wake it up.
Why did my gluten-free bread turn out dense instead of light?
Gluten-free dough behaves differently—it needs extra care! Make sure you’re using a 1:1 gluten-free flour blend with xanthan gum (never skip the gum), and don’t overmix. The dough should be slightly sticky but cohesive. Also, gluten-free bread browns faster—check it at 15 minutes in the oven. For lighter texture, try adding ½ teaspoon baking powder to the gluten-free portion.
Can I make these breads ahead of time?
Most breads freeze beautifully. For sourdough and baguette, wrap tightly in plastic and freeze for up to 3 months. Thaw at room temperature for 2-3 hours, then warm in a 350°F oven for 10 minutes to restore freshness. Brioche keeps 3 days at room temperature, while gluten-free bread is best eaten within 2 days for optimal texture.
What’s the best way to revive stale bread?
For most breads, the oven is your friend! Wrap the bread in aluminum foil and heat at 300°F for 5-10 minutes until warm. For extra crispiness, place it directly on the oven rack for the last 2 minutes. For gluten-free bread, use 250°F for 5 minutes to prevent over-browning. A quick spritz with water before reheating helps restore moisture—just don’t overdo it!

- 3lb Prime Rib Roast Recipe: Juicy Pink Center Guaranteed in 3 Hours - October 31, 2026
- 5 Spice Cake Recipe: Warmly Spiced Layers With Crunchy Top - October 31, 2026
- 1950’s Macaroni and Cheese Recipe: Nostalgic Creamy Cheese Sauce with Buttery Noodles - October 31, 2026