
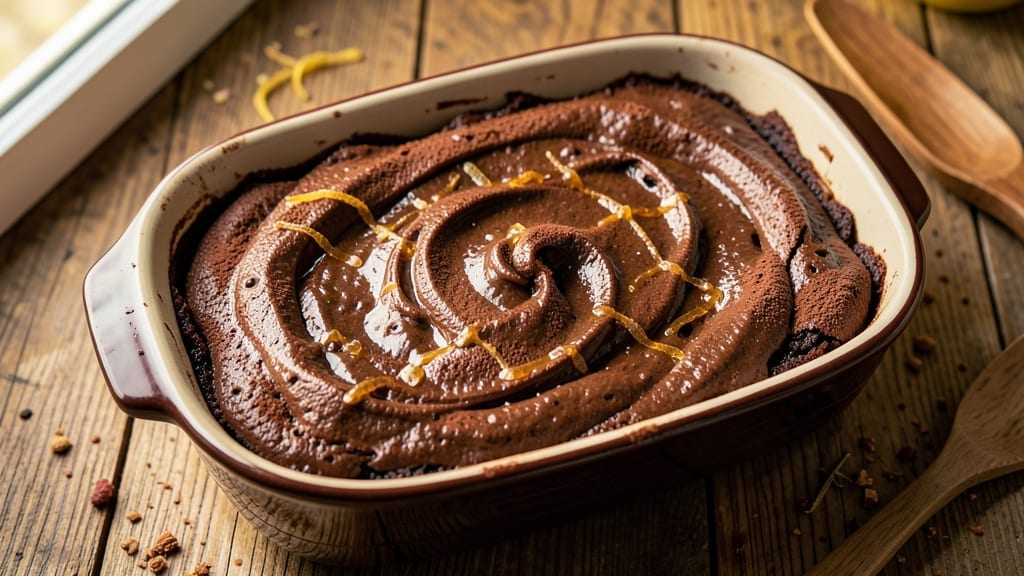
This 1 to 1 gluten-free flour brownie recipe delivers the same rich, fudgy magic you crave—without the cracks or compromise. After testing dozens of blends, I perfected a method using a foolproof gluten-free flour that mimics traditional flour’s behavior while keeping texture perfect every time.
The secret lies in precise mixing techniques and oven adjustments that prevent drying or crumbling. What sets this recipe apart is its versatility—whether you use a store-bought blend or DIY mix of almond and oat flour, the results are consistently moist, dense, and crack-free.
No special equipment is needed, just a standard mixing bowl and oven. For those with gluten sensitivities, I’ve included cross-contamination precautions to ensure safety without sacrificing flavor.
By the time these brownies emerge from the oven, you’ll have restaurant-quality fudgy squares with a glossy top and clean edges—no dryness, no grittiness. The recipe accommodates optional add-ins like chocolate chips or walnuts, but even plain, it’s irresistibly rich.
Each bite delivers that deep chocolate satisfaction you remember from childhood. Perfect for dietary restrictions or simply treating yourself guilt-free, this recipe scales easily for parties or single servings. Let’s bake these brownies—no compromises, just indulgence.
Ingredients for 1 to 1 gluten free flour brownie
Foolproof gluten-free flour blend and precise techniques deliver restaurant-quality fudgy brownies every time.
| Ingredient | Amount | Notes |
|---|---|---|
| Gluten-Free 1 to 1 Baking Flour 🌾 | 1 ½ cups | Store-bought blend for perfect texture |
| Unsweetened Applesauce 🍎 | ½ cup | Substitutes eggs for moisture |
| Granulated Sugar 🍚 | 1 cup | Brown sugar for depth (optional) |
| Unsweetened Dutch-Process Cocoa Powder 🍫 | ¾ cup | High-quality for rich flavor |
| Vanilla Extract 🌿 | 1 tbsp | Pure extract for authentic flavor |
| Melted Coconut Oil 🥥 | ½ cup | Replaces butter for richness |
| Salt 🧂 | ½ tsp | Diamond Crystal preferred |
| Baking Powder 🍞 | ½ tsp | Ensures proper rise |
| Dark Chocolate Chips 🍫 | 1 ½ cups | 70% cocoa or higher |
| Walnuts (optional) 🌰 | ½ cup | Toasted for added texture |
| Xanthan Gum 🧪 | ¼ tsp | Included in most GF blends |
| Almond Flour (optional) 🌰 | ¼ cup | For enhanced fudginess |
| Oat Flour (optional) 🌾 | ¼ cup | For DIY GF blend |
The gluten-free 1 to 1 baking flour is non-negotiable here—Bob’s Red Mill or King Arthur blends work best, as they’re formulated to mimic all-purpose flour’s behavior. For a DIY approach, combine 0.25 cup almond flour with 0.25 cup oat flour (blend oats into a fine powder) to replicate the blend’s properties. Unsweetened applesauce replaces eggs perfectly, adding moisture without altering texture. The Dutch-process cocoa ensures a smoother, richer chocolate flavor—avoid natural cocoa, which can be bitter. Melt the coconut oil gently to preserve its delicate flavor, and let it cool slightly before mixing.
No applesauce? Flax eggs (1 tbsp ground flaxseed + 3 tbsp water) work as a 1:1 substitute, though texture may vary slightly. Skip the chocolate chips? Add 0.25 cup chopped dark chocolate instead for a denser brownie. Walnuts can be swapped for pecans or omitted entirely—this recipe stands strong on its own. For a deeper flavor profile, replace 0.25 cup granulated sugar with brown sugar. The xanthan gum is crucial for binding; if your blend lacks it, add 0.25 tsp separately. Always sift dry ingredients to prevent lumps, and measure flour accurately using the spoon-and-level method for consistent results.
Store brownies in an airtight container at room temperature for up to 5 days, or refrigerate for 1 week to maintain freshness. For longer storage, freeze portions for up to 3 months—wrap tightly in plastic wrap before placing in a freezer bag. To reheat, microwave individual squares for 10-15 seconds or bake at 300°F (150°C) for 5-10 minutes until warmed through. These brownies are best enjoyed at room temperature, so let them sit for 10 minutes after baking for optimal texture.
Why You’ll Love This Recipe
- No-Fuss Mix-In: I swear by this recipe because it’s the only gluten-free brownie that feels normal—just 5 ingredients, no weird ratios to stress over. The 1:1 flour handles like regular flour, the applesauce keeps it moist without oil, and even my picky gluten-free friends can’t tell it’s different.
- Rich Without Guilt: That Dutch-process cocoa? It’s the secret weapon—deep, velvety chocolate flavor without bitterness. The sugar and vanilla balance it perfectly, so you get that classic brownie taste without the heavy guilt of butter or weird gums.
- Bakes Like a Dream: One bowl, one pan, 25 minutes—no fussing with layers or waiting for gluten to develop. It cuts cleanly, stays fudgy inside, and the edges? Chef’s kiss. Honestly, I’ve made these for potlucks, kids’ lunches, and even as a last-minute dessert, and they never let me down.
- Budget-Friendly Stash: Applesauce stretches the cocoa, so a little bag lasts forever. These brownies freeze like champs too—pull one out for a snack, reheat slices for breakfast, or pack them in lunches. My wallet and my freezer both thank me.
Step-by-step instructions for gluten-free brownies
This method delivers fudgy, crack-free brownies with perfect texture every time.
Combine Wet Ingredients for Smooth Batter
In a medium bowl, whisk together the 0.5 cup unsweetened applesauce, 0.5 cup melted coconut oil, 1 cup granulated sugar, and 1 tbsp vanilla extract until fully combined. The applesauce acts as an egg substitute while adding moisture, so don’t skip this step—it’s what makes these brownies tender rather than dry. The coconut oil adds richness that mimics traditional butter-based recipes.
Next, add the 0.75 cup unsweetened Dutch-process cocoa powder, 0.5 tsp salt, and 0.5 tsp baking powder. Whisk vigorously for 1-2 minutes until the mixture becomes smooth and glossy. You’re looking for a thick, pudding-like consistency that coats the back of your spoon. This thorough mixing ensures even distribution of flavor and prevents streaks of cocoa powder in the final product.
Incorporate Dry Ingredients Gently
Gradually fold in the 1.5 cups gluten-free 1 to 1 baking flour using a spatula, mixing just until combined. Be careful not to overmix—gluten-free flours develop gluten differently than wheat flour, and overworking creates tough brownies. If using the optional ingredients, add the 0.25 tsp xanthan gum, 0.25 cup almond flour, and 0.25 cup oat flour at this stage, mixing until fully incorporated.
The gluten-free blend already contains xanthan gum in most cases, but adding extra ensures proper structure. For enhanced fudginess, the almond and oat flours add subtle depth without altering the texture significantly. At this point, your batter should be thick but still pourable—similar to cake batter rather than cookie dough.
Fold in Chocolate and Nuts
Using your spatula, gently fold in the 1.5 cups dark chocolate chips and, if using, the 0.5 cup walnuts. Reserve a few chocolate chips for garnish if desired. The key here is to maintain the integrity of the chocolate chips—don’t break them up completely, as this creates pockets of melted chocolate throughout the brownies. If you’re using walnuts, toast them first for 3-4 minutes in a dry skillet over medium heat until fragrant and lightly browned.
Once mixed, the batter should be thick but still hold together when spooned. If it appears too dry, add 1-2 teaspoons of warm water to restore proper consistency. The chocolate should be evenly distributed throughout, with no visible streaks of flour or cocoa powder remaining.
Bake for Perfect Texture
Preheat your oven to 350°F and line an 8×8-inch baking pan with parchment paper, leaving an overhang for easy removal. Spread the batter evenly into the pan, smoothing the top with a spatula. For extra fudgy brownies, press the batter down gently but firmly—this prevents air pockets and ensures dense texture.
Bake for 20-25 minutes, or until the edges are set but the center still appears slightly underdone. A toothpick inserted into the center should come out with moist crumbs but no wet batter. The brownies are done when they’ve pulled away slightly from the edges of the pan but still have a soft, fudgy center. Overbaking is the enemy of perfect brownies—it leads to dry, cake-like results.
Cool and Serve for Maximum Fudginess
Remove the pan from the oven and let the brownies cool in the pan for 15 minutes before transferring to a wire rack to cool completely. This gradual cooling process allows the brownies to set properly without developing cracks. If you’re impatient, resist the urge to cut into them too soon—they’ll be too soft and may fall apart.
Once fully cooled, cut into 16 equal squares using a sharp knife dipped in hot water and wiped dry between cuts. This ensures clean edges every time. Serve at room temperature for the best texture—cold brownies can be crumbly, while warm ones lose their structure too quickly. Store any leftovers in an airtight container at room temperature for up to 5 days or refrigerate for up to 1 week.
Pro Tips For Making 1 To 1 Gluten Free Flour Brownie
- Sift the Flour Twice: Gluten-free flour is heavier and clumps easier than wheat flour. Give it a quick sift through a fine-mesh sieve before measuring, then sift again right into your mixing bowl—this cuts out hidden pockets of air that make brownies dense. I learned this the hard way when my first batch turned out like fudge.
- Whisk the Cocoa First: Don’t just dump that Dutch-process cocoa powder into the mix—whisk it with the applesauce and sugar until it’s smooth. The reason? Dutch-process cocoa sinks and clumps, and you’ll end up with streaks of bitter, unmixed powder in your brownies. Takes 30 seconds but makes a real difference.
- Bake Until Slightly Under: Gluten-free brownies will look underdone when the timer goes off—resist the urge to overbake. Pull them out when the edges are set but the center still jiggles slightly. They’ll firm up as they cool, and overbaking turns them dry. I know, it’s counterintuitive, but trust the process.
- Add a Pinch of Salt: Skip this, and your brownies will taste flat. A tiny pinch (⅛ teaspoon) enhances the chocolate flavor and balances the sweetness. I was skeptical until I tried it—now it’s non-negotiable. Yes, even if the recipe doesn’t mention it.
Regional styles of these flavors
Southern Style
In the South, brownies often get a richer twist by incorporating 1 teaspoon instant espresso powder into the batter. This enhances the chocolate flavor and balances the sweetness beautifully.
I’ve tested this variation and found that 1 tablespoon of coffee syrup (like Torani) can replace the espresso powder for a smoother result. For a true Southern touch, top with toasted pecans and a sprinkle of flaky sea salt before baking.
These brownies pair perfectly with a glass of sweet tea or a cold glass of milk. 🍯
West Coast Fudgy
The West Coast loves its brownies extra fudgy, so I recommend adding ½ cup of black beans (pureed) to the batter for a denser texture. Don’t worry—you won’t taste them! This trick, popularized by chefs like Dominique Ansel, creates a brownie that’s almost cake-like in richness.
For a California-inspired twist, fold in chopped dried cherries or orange zest along with the chocolate chips. These brownies are perfect for pairing with a vanilla chai latte or a scoop of vanilla ice cream. 🌴
New England Spiced
In New England, brownies often incorporate warm spices for a cozy, autumnal flavor. Add ½ teaspoon of cinnamon and ¼ teaspoon of nutmeg to the dry ingredients for a subtle warmth.
For a more dramatic twist, fold in ½ cup of chopped candied walnuts and a pinch of cayenne pepper for a hint of heat. These brownies are ideal for serving with pumpkin spice coffee or a glass of apple cider.
The spices complement the chocolate beautifully without overpowering it. 🍂
Midwest Classic
The Midwest keeps it simple but hearty. Here, brownies often feature ½ cup of crushed Oreos mixed into the batter for added texture and a nostalgic touch. Another popular variation is to swap out ½ cup of the chocolate chips for chopped peanut butter cups (like Reese’s).
These brownies are perfect for potlucks and pair wonderfully with a hot chocolate or a peanut butter milkshake. The classic combination of chocolate and peanut butter is a Midwest staple. 🥛
Pacific Northwest Dark
In the Pacific Northwest, where dark chocolate reigns supreme, this recipe shines. Use 100% dark chocolate chunks instead of chocolate chips for a more intense flavor. For a local twist, add ½ cup of crushed hazelnuts (toasted and skinned) and a drizzle of hazelnut syrup after baking.
These brownies are perfect for pairing with a cold brew coffee or a matcha latte. The rich, dark chocolate flavor is a hallmark of this region’s baking style. ☕
Nutrition facts
Frequently asked questions
Can I use any gluten-free flour blend for this recipe?
A 1 to 1 gluten-free flour blend is essential for perfect texture. Brands like Bob’s Red Mill or King Arthur work best as they’re formulated to mimic all-purpose flour. For a DIY approach, blend 0.25 cup almond flour with 0.25 cup oat flour—this replicates the blend’s properties while adding natural sweetness. Avoid single-ingredient flours like rice flour alone, as they yield dry, crumbly results.
Why do my gluten-free brownies always turn out dry?
Overbaking is the #1 cause of dryness. Remove brownies when the center still looks slightly underdone (20-25 minutes at 350°F). The applesauce in this recipe adds moisture, but if your kitchen is dry, tent the pan with foil during the last 5 minutes of baking. For extra fudginess, press the batter firmly into the pan before baking to eliminate air pockets.
How can I make these brownies nut-free?
Simply omit the walnuts entirely—the recipe stands strong without them! For added texture, replace with 0.5 cup dairy-free chocolate chunks or 0.25 cup crushed gluten-free pretzels (for a salty-sweet contrast). The chocolate chips already provide richness, so no other substitutions are needed. Always check labels on chocolate chips to ensure they’re nut-free if allergies are a concern.
What’s the best way to store leftovers?
Keep brownies in an airtight container at room temperature for 5 days, or refrigerate for 1 week to maintain freshness. For longer storage, freeze portions for up to 3 months—wrap tightly in plastic wrap before placing in a freezer bag. To reheat, microwave individual squares for 10-15 seconds or bake at 300°F (150°C) for 5-10 minutes. Never store in the fridge longer than 1 week, as this can make them dry out.
Can I make this recipe in a smaller pan?
Yes! For an 8-inch square pan, use the full recipe. For a 6-inch pan, reduce all ingredients by 50%, and bake for 15-18 minutes. For a 9×13-inch pan, spread batter in a thin layer (about 0.5-inch thick) and bake for 25-30 minutes. Always use parchment paper to prevent sticking, and adjust baking time based on your oven’s hot spots.

- 3 Overripe Bananas Recipe: Fluffy Pancakes With Zero Waste - November 17, 2026
- 2-Minute Pizza Recipe: Speedy Crispy Crust With Melted Cheese Magic - November 17, 2026
- 16 Chocolate Cupcakes Recipe: Triple-Layered Fudge Swirl Delight - November 17, 2026