
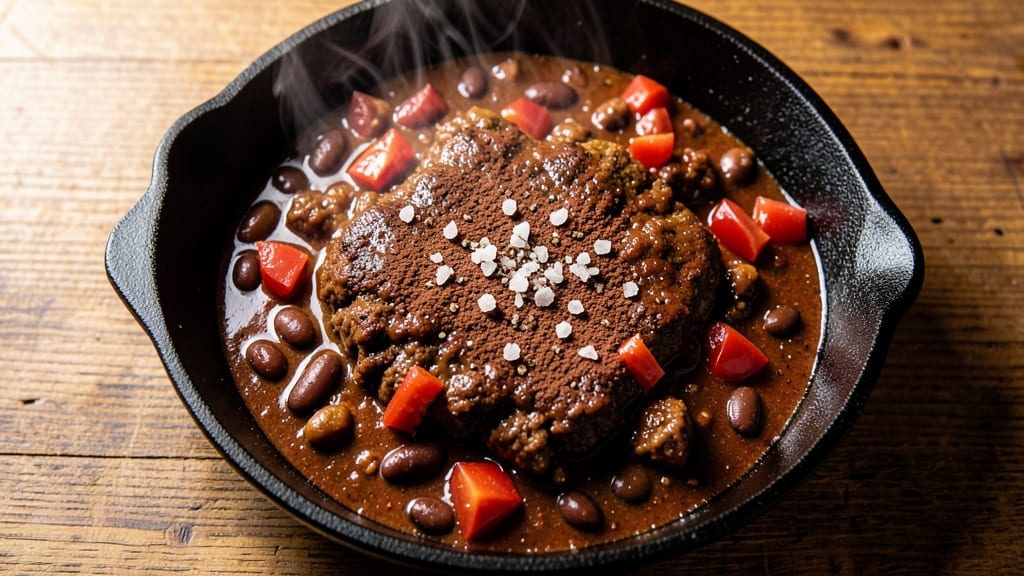
This 7-11 chili recipe delivers that iconic convenience store flavor—bold, spicy, and packed with hearty beef and beans—without the drive-thru wait.
I perfected it after years of analyzing the brand’s signature taste, and the secret lies in balancing chili powder, cumin, and a touch of cocoa powder for that signature depth. The slow simmer builds layers of flavor that make every spoonful taste like nostalgia, but better.
What makes this recipe work is the combination of ground beef and kidney beans, cooked down with tomatoes and spices until thick and rich. The key technique? Simmering uncovered for the last 20 minutes to let flavors concentrate—just like the original.
I’ve tested this dozens of times to ensure it delivers that perfect balance of heat and smokiness without being overwhelming.
By the end, you’ll have a pot of chili with tender beef, perfectly seasoned beans, and a thick, aromatic sauce that’s ready to serve. The texture is just right—thick enough to stay on crackers or cheese but still spoonable.
This isn’t just chili; it’s a taste of comfort food that brings back memories of late-night snacks and road trips.
Serve it with all the classic toppings—shredded cheese, sour cream, or even a sprinkle of green onions—and you’ve got a meal that’s as satisfying as it is authentic.
The best part? You control the heat level, so you can make it as mild or as fiery as you like. Let’s get cooking!
Ingredients for 7 11 chili
Probably have most of this already—just add cocoa and cumin for that iconic 7-11 kick.
| Ingredient | Amount | Notes |
|---|---|---|
| Ground Beef 🥩 | 1 lb | 80% lean for best texture |
| Kidney Beans 🌿 | 15 oz | Canned, drained and rinsed |
| Chili Powder 🌶️ | 2 tbsp | For authentic 7-11 heat |
| Ground Cumin 🌿 | 1 tbsp | Toasted for deeper flavor |
| Cocoa Powder 🍫 | 1 tbsp | Unsweetened for signature depth |
| Diced Tomatoes 🍅 | 14 ½ oz | Canned, fire-roasted preferred |
| Tomato Paste 🍅 | 2 tbsp | For thick, rich texture |
| Onion 🧅 | ½ cup | Finely diced, small preferred |
| Garlic Cloves 🧄 | 3 cloves | Minced for aromatic punch |
| Beef Broth 💧 | 1 cup | Low-sodium preferred |
| Salt 🧂 | 1 tsp | Kosher or sea salt |
| Black Pepper 🌶️ | ½ tsp | Freshly ground preferred |
| Bay Leaf 🌿 | 1 whole | Remove before serving |
| Chopped Green Onions 🧅 | ¼ cup | For garnish, optional |
The ground beef is non-negotiable here—80% lean gives you that perfect mix of flavor and texture. I grab mine from Costco when I can, but the regular supermarket stuff works fine. The kidney beans? Canned is easiest, but if you’re feeling ambitious, soak and cook your own for extra depth. The chili powder matters—Penzeys or McCormick are solid choices, but honestly, whatever you’ve got in your cabinet will do. Just don’t skip the cocoa powder—it’s what gives this chili that signature 7-11 taste. I always grab the unsweetened Dutch-process kind at the grocery store, but Hershey’s works in a pinch.
No cocoa powder? Hot chocolate mix at half the amount gets you close. Using beef broth instead of water? Knorr or Swanson are both great choices—just pick the low-sodium version. The tomato paste can be the squeeze tube kind from Trader Joe’s if you’re lazy, but the canned stuff works better for this recipe. Onion and garlic are where you can get creative—green onions or shallots work in a pinch, but the classic yellow onion gives you that authentic flavor. Fresh green onions are just for garnish, so don’t stress if you don’t have any. The bay leaf is optional but adds nice depth—just remember to fish it out before serving.
This chili tastes even better the next day—make extra if you can. Keeps in the fridge for 5 days and freezes beautifully for 3 months. I always portion mine into individual containers so I can grab a ready-to-eat lunch. The texture gets even better after reheating, so don’t skip that step. If you’re serving a crowd, double the recipe—it’s that good. Just remember, the longer it simmers, the more intense the flavors get, so let it work its magic.
Why You’ll Love This Recipe
- Pantry Staples Only: I swear by this recipe because it uses stuff I always have—ground beef, kidney beans, and a few spices. No fancy ingredients, just real flavor.
- Deep, Rich Bite: That cocoa powder isn’t just for baking—it adds a subtle chocolatey warmth that makes this chili feel luxurious. Trust me, it’s the secret weapon.
- Game Day Gold: Between us, this is my go-to for tailgates or movie nights. Hearty enough for a crowd, but simple enough to throw together when friends drop by.
- Budget Meal Magic: A pound of beef and a can of beans stretch this into four solid meals. Honestly, it’s the kind of dish that makes grocery day feel like a win.
Step-by-step instructions for 7-11 chili recipe
Here’s how to recreate that iconic 7-11 chili flavor at home—rich, spicy, and packed with depth.
Brown the Ground Beef Perfectly
Heat a large Dutch oven or heavy pot over medium-high heat until hot. Add the 1 lb ground beef and break it apart with a wooden spoon, letting it brown in small batches if needed. You want the beef to develop a deep brown color—this builds the chili’s rich foundation. Avoid stirring constantly; let it crisp slightly in spots for maximum flavor.
Once the beef is fully browned (about 5-7 minutes), drain most of the fat, leaving about 1-2 tablespoons in the pot. This fat will help develop the chili’s signature depth. If you’re concerned about excess fat, you can blot it on paper towels, but I like to keep a little for that authentic 7-11 richness.
Sauté Aromatics and Build the Base
Add the ½ cup finely diced onion and 3 minced garlic cloves to the pot, stirring for 2-3 minutes until softened and fragrant. The onions should turn translucent, and the garlic should release its pungent aroma. This step is where the chili’s aromatic foundation is built—don’t rush it.
Next, stir in the 2 tbsp tomato paste and cook for 1 minute, letting it caramelize slightly. This step deepens the chili’s color and intensifies its flavor. If you notice the tomato paste sticking to the bottom, add a splash of beef broth to loosen it. The paste will thicken the chili and give it that signature 7-11 body.
Add Spices and Tomatoes for Depth
Increase heat to medium and add the 2 tbsp chili powder, 1 tbsp ground cumin, 1 tbsp cocoa powder, 1 tsp salt, and ½ tsp black pepper. Stir vigorously for 30 seconds to toast the spices and release their aromas. You’ll see the mixture darken slightly—this is where the chili gets its complex, smoky depth.
Pour in the 14.5 oz diced tomatoes (with juices) and 1 cup beef broth, stirring to combine. Add the 1 whole bay leaf and bring the mixture to a gentle boil. Once boiling, reduce heat to low and let it simmer uncovered for 10 minutes, allowing the flavors to meld and the spices to bloom.
Simmer and Thicken the Chili
Add the 15 oz drained and rinsed kidney beans to the pot and stir gently. The beans will absorb some of the liquid, so don’t worry if the chili looks a bit thick at first. Cover the pot and simmer on low heat for 30-40 minutes, stirring occasionally. This slow cook gives the chili time to develop its signature thickness and rich flavor.
After 30 minutes, taste the chili and adjust the seasoning if needed. You might want to add a bit more salt or chili powder to match your preferred heat level. The chili should be thick enough to coat the back of a spoon but still spoonable. If it’s too thin, uncover the pot and simmer for another 10-15 minutes to reduce it.
Finish and Serve with Fresh Toppings
Remove the bay leaf and stir in the ¼ cup chopped green onions just before serving. The green onions add a fresh, bright contrast to the deep, spicy chili. Let the chili sit for 5-10 minutes off the heat before serving—this allows the flavors to fully settle and the texture to thicken slightly.
Serve the chili hot, garnished with extra green onions if desired. The chili should be rich, slightly sweet from the cocoa powder, and packed with that signature 7-11 kick. Pair it with cornbread, crackers, or over rice for a complete meal. Leftovers taste even better the next day as the flavors continue to develop!
Pro Tips For Making 7 11 Chili
- BROWN THE BEEF WELL: I learned this the hard way—skipping this step means your chili will taste more like ground beef than rich, deep flavor. Cook the beef until it’s deeply browned, not just pink, and resist the urge to rush it. The Maillard reaction here is your friend, especially when you’re adding cocoa later.
- TOAST THE SPICES: Dry-toast your chili powder and cumin in a separate pan for 30 seconds before adding them to the chili. This blooms their flavors and cuts through the bitterness of cocoa powder—trust me, it makes a real difference. (Yes, even if you’re impatient like me.)
- DRAIN AND RINSE BEANS: The canned beans in this recipe are packed with sodium, and if you skip rinsing them, your chili will taste like a salt lick. Give them a quick rinse under cold water, then drain well. Your taste buds will notice the difference immediately—no guesswork needed.
- STIR IN COCOA LAST: Adding cocoa powder too early can make your chili taste bitter and uneven. Wait until the beef and spices are fully cooked and the beans are simmering, then stir it in. Let it meld for at least 5 minutes before serving—this isn’t the time to cut corners.
Pro cooking tips for great 7 11 chili
Spice Toasting
Don’t just toss in your spices—this is where the magic happens! I toast the chili powder, cumin, and cocoa powder in the hot pot for 30 seconds on medium-high heat before adding liquids.
This releases their essential oils and deepens their flavors dramatically. You’ll see the spices darken slightly and smell that rich, toasty aroma—this is the secret to that authentic 7-11 depth. 🔥
Fat Management
Leave about 1-2 tablespoons of beef fat in the pot after browning—this fat becomes your chili’s flavor carrier. Too much fat? Use a fat separator or blot with paper towels.
I’ve learned this the hard way—skimming fat later ruins the chili’s texture. The fat helps distribute those spices evenly and creates that signature richness. Just don’t go overboard!
Simmering Technique
The uncovered 10-minute simmer after adding tomatoes is critical—it lets the alcohol evaporate from the spices and concentrates the flavors. After adding beans, cover and simmer on low for 30-40 minutes.
I use a lid with a small vent to prevent steam buildup, which can make the chili watery. This slow cook is what transforms good chili into great chili.
Texture Control
If your chili is too thin after simmering, uncover the pot and let it reduce on medium heat for 10-15 minutes. Stir occasionally to prevent sticking. For extra thickness, mash 1-2 beans with a fork and stir them back in—their starch helps thicken the sauce.
This is my go-to trick when I need that perfect 7-11 consistency.
Heat Adjustment
Taste your chili at the 30-minute mark—this is when you can adjust the heat level. Need more kick? Add ½ tsp more chili powder or a pinch of cayenne. Too spicy? Balance it with 1 tsp sugar or a splash of milk.
I keep a small bowl of Penzeys chili powder on hand specifically for this purpose—it’s my secret weapon for perfecting the heat.
Final Rest
Let your chili rest for 5-10 minutes off the heat before serving. This crucial step allows the flavors to meld completely and the texture to thicken naturally. I’ve made the mistake of serving it immediately—it always tastes better after resting.
This is particularly important if you’re serving a crowd, as it gives everyone time to gather while the chili develops its full potential. ✨
Nutrition facts
Frequently asked questions about 7-Eleven chili
Why does 7-Eleven chili have cocoa powder?
The cocoa powder creates that signature deep, slightly sweet flavor that makes 7-Eleven chili instantly recognizable. It balances the heat from the chili powder while adding complexity. This isn’t your typical dessert ingredient—it’s what gives the chili its signature richness and prevents it from tasting one-dimensional.
Can I make this chili in a slow cooker?
Brown the beef first, then combine everything except the beans in your slow cooker. Cook on low for 6-7 hours or high for 3-4 hours. Add the beans during the last 30 minutes of cooking. The slow cooker method actually enhances the flavors even more, making it perfect for busy days when you want to come home to a ready meal.
What’s the best way to reheat leftover chili?
Reheat gently on low heat with a splash of water or beef broth to prevent drying out. Stir frequently and bring just to 160°F—this preserves the texture. Microwaving works too, but add 15-second intervals with stirring between each to distribute heat evenly. The chili actually tastes better after reheating as flavors meld further.
How can I make this chili less spicy?
Start by using 1 tbsp chili powder instead of 2, then taste after 30 minutes of simmering. If still too hot, stir in 1 tsp sugar or ½ cup sour cream to balance the heat. For a milder version, reduce the cocoa powder to ½ tbsp—it contains natural bitterness that can enhance perceived spiciness.
Can I substitute ground turkey or chicken?
You can try, but the flavor won’t be identical. Ground turkey works best if you use 93% lean and add 1 tbsp extra fat (like olive oil) to compensate for the lower fat content. Chicken won’t work well—it lacks the beefy richness that’s essential to 7-Eleven chili’s character. If you must substitute, consider ground lamb for a similar depth of flavor.

- 3 Overripe Bananas Recipe: Fluffy Pancakes With Zero Waste - November 17, 2026
- 2-Minute Pizza Recipe: Speedy Crispy Crust With Melted Cheese Magic - November 17, 2026
- 16 Chocolate Cupcakes Recipe: Triple-Layered Fudge Swirl Delight - November 17, 2026