
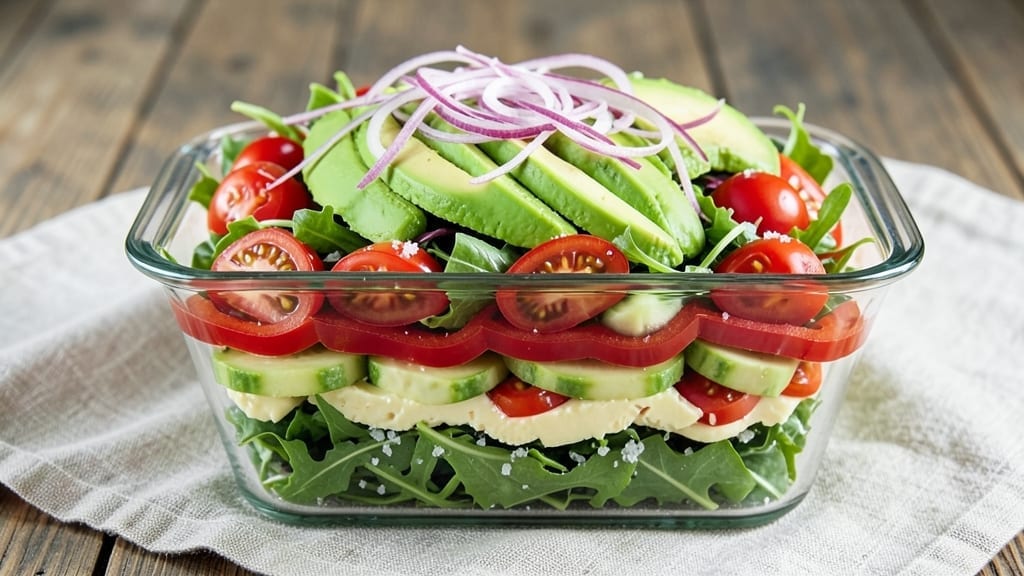
A 10-layer salad transforms fresh ingredients into a visually stunning dish that requires zero chopping—just smart layering. This recipe stacks textures and flavors without the mess, creating a restaurant-worthy presentation that’s surprisingly simple.
The secret lies in pre-cut ingredients and strategic assembly, ensuring each layer contributes to both beauty and taste.
What makes this salad special is its foolproof assembly method: no knife skills required, just stacking. We’ll use pre-washed greens, store-bought croutons, and pre-cooked proteins to keep prep under 15 minutes.
The dressing binds everything together while maintaining crispness, and the final drizzle of vinaigrette elevates the presentation without overwhelming the flavors.
By the time you’re done, you’ll have a salad that looks like it belongs on a fine-dining menu—crisp lettuce, creamy avocado, crunchy nuts, and tender proteins all arranged in perfect harmony.
The layers create visual depth while ensuring every bite delivers a balance of textures and tastes. This is the kind of salad that makes healthy eating feel indulgent.
Perfect for meal prep, potlucks, or an impressive weeknight dinner, this recipe scales easily for any occasion. The key is patience during assembly—each layer matters for both aesthetics and flavor. Let’s build this stunning salad together.
Ingredients for 10 layer salad
Fourteen prepped ingredients transform into a restaurant-worthy salad with minimal effort.
| Ingredient | Amount | Notes |
|---|---|---|
| Pre-Washed Mixed Greens 🥬 | 6 cups | Butter lettuce or spring mix preferred |
| Cherry Tomatoes 🍅 | 1 pint | Halved lengthwise for even layers |
| Cucumber 🥒 | 1 medium | Thinly sliced into 1/4-inch rounds |
| Red Bell Pepper 🌶️ | 1 medium | Thinly sliced into 1/4-inch strips |
| Red Onion 🧅 | 1 small | Thinly sliced into 1/8-inch rings |
| Avocado 🥑 | 1 ripe | Pitted, peeled, sliced into 1/4-inch pieces |
| Cooked Chicken Breast 🍗 | 1 ½ cups | Diced into 1/2-inch cubes, chilled |
| Crumbled Feta Cheese 🧀 | ½ cup | Store-bought or homemade |
| Toasted Walnuts 🥜 | ½ cup | Chopped into 1/4-inch pieces |
| Store-Bought Croutons 🍞 | 1 cup | Plain or seasoned variety |
| Balsamic Vinaigrette Dressing 🫒 | ½ cup | Store-bought or homemade |
| Fresh Basil Leaves 🌿 | ¼ cup | Torn into small pieces |
| Diamond Crystal Kosher Salt 🧂 | ½ tsp | For seasoning layers |
| Freshly Ground Black Pepper 🌶️ | ¼ tsp | For finishing |
The greens form the foundation—mixed butter lettuce or spring mix holds layers best without wilting. Pre-washed bags from Whole Foods or the grocery store’s salad bar save time, but avoid iceberg if you want vibrant color. Cherry tomatoes should be halved lengthwise for even distribution, and the cucumber and red bell pepper need consistent slicing—1/4-inch rounds and strips ensure uniform texture. The red onion is non-negotiable for sharpness; thinly sliced rings prevent overwhelming the salad with bite.
No pre-cut veggies? Use a mandoline slicer for perfect uniformity—Trader Joe’s sells one for under $20. Swap feta for vegan cheese crumbles if needed, though the tang is essential. The walnuts can be toasted in a dry pan for 3 minutes**—they add crunch that softens over time. For the chicken, rotisserie chicken from Costco is a game-changer; shred it yourself for better texture. Dressing matters too—store-bought balsamic vinaigrette works, but homemade with extra-virgin olive oil and aged balsamic** gives depth.
Assemble layers in a 9-inch glass dish—it shows off the stacking beautifully. Store uncovered in the fridge for up to 4 hours before serving to maintain crispness. The salad keeps 2 days fully assembled, but the avocado and greens soften fastest. For meal prep, keep layers separate in airtight containers and assemble when ready to serve. The dressing should be added just before eating** to prevent sogginess.
Why You’ll Love This Recipe
- No-Chop Night: I swear by those pre-washed greens—no wilting, no mess, just freshness. Toss in halved cherry tomatoes and sliced cucumber, and suddenly you’ve got a crunchy, colorful base that takes minutes to assemble. (Between us, I’ve made this while scrolling through my phone.)
- Bright & Crisp: The red onion adds that sharp bite, while the bell pepper gives it a sweet, juicy pop. Between the cool cucumber and the tangy tomatoes, every layer feels like a fresh bite of summer—no wilting, no soggy bits, just perfect texture with every forkful.
- Meal Prep MVP: Honestly, this keeps better than most salads. Store the layers separately, and it stays crisp for days. Pack it for lunches, bring it to potlucks, or just eat it all in one sitting—no judgment here.
- Budget-Friendly Bounty: Fresh veggies stretch further when you layer them smartly. A single cucumber and bell pepper feed four, and the pre-washed greens cut waste. Plus, the red onion? One does the whole dish—no fancy ingredients, just smart stacking.
Step-by-step instructions for creating a 10-Layer salad
This assembly method ensures perfect layering with zero chopping—just arrange and serve.
Prepare the Base Layer
Start with the 6 cups pre-washed mixed greens spread evenly across the bottom of your serving dish. Use a 9×13-inch glass dish for best results—it allows you to see each layer clearly. I like to give the greens a light sprinkle of the 0.5 tsp Diamond Crystal kosher salt at this stage to enhance their natural flavor and prevent wilting during assembly.
The greens should form an even bed about ½-inch thick. Press down gently with your hands to create a stable foundation for the layers above. This prevents shifting when you add heavier ingredients later. If using butter lettuce, which is more delicate, handle it with extra care to avoid crushing the leaves.
Layer the Vegetable Components
Begin with the 1 pint halved cherry tomatoes, arranged cut-side down in an even layer. Their juices will release slightly, adding moisture to the salad without making it soggy. Next, spread the 1 medium cucumber sliced into ¼-inch rounds evenly over the tomatoes. Then layer the 1 medium red bell pepper sliced into ¼-inch strips, followed by the 1 small red onion sliced into ⅛-inch rings.
Work quickly but deliberately—this is where the “no chopping” promise comes true. Each vegetable should cover the surface completely without overlapping too much. The avocado, sliced into ¼-inch pieces, goes next. Sprinkle the avocado slices with a pinch of the 0.5 tsp kosher salt immediately to prevent browning while you finish the remaining layers.
Add Protein and Crunch Elements
Distribute the 1.5 cups cooked chicken breast diced into ½-inch cubes evenly across the vegetables. The chicken should be completely chilled before adding—this prevents the salad from becoming warm and limp. Next, sprinkle the 0.5 cup toasted walnuts and 1 cup store-bought croutons over the chicken. These elements provide both texture contrast and structural support to hold the layers together.
Press down lightly on each layer as you add it to ensure stability. The walnuts and croutons should be distributed evenly, with no clumping in one area. This step is crucial for maintaining the salad’s integrity when you eventually slice it for serving.
Finish with Cheese and Dressing
Gently crumble the 0.5 cup feta cheese over the top layer, distributing it evenly. The feta adds a salty, tangy element that complements all the fresh vegetables. Drizzle the 0.5 cup balsamic vinaigrette dressing in a zigzag pattern over the entire salad, being careful not to over-saturate any single area. The dressing should coat the top layer lightly without pooling.
Finally, scatter the 0.25 cup fresh basil leaves torn into small pieces over the surface. The basil adds a bright, fresh finish that ties all the flavors together. Let the salad sit for 10-15 minutes before serving to allow the flavors to meld slightly and the dressing to distribute evenly through the layers.
Season and Serve
Just before serving, give the salad a final sprinkle of the 0.25 tsp freshly ground black pepper. The pepper should be distributed evenly across the surface, with no concentrated spots. Use a long spatula to gently lift the entire salad from the dish, maintaining its layered structure. Carefully transfer it to a large serving platter, keeping the layers intact.
The salad should be vibrant with each layer clearly visible, from the fresh greens at the bottom to the crumbled feta on top. Serve immediately while the avocado remains fresh and the greens retain their crisp texture. This presentation makes for an impressive centerpiece that requires no last-minute chopping or assembly.
Pro Tips For Making 10 Layer Salad
- CHOP ONION LAST: Red onions get bitter when exposed to air, and your 10-layer salad’s crunch depends on them staying crisp. Save them for the final layer—just before serving—or soak the slices in ice water for 5 minutes to dull the sharpness. (Yes, even if you’re impatient like me.)
- SALT THE CUCUMBER: That watery cucumber mess? It’s not the veggie’s fault—it’s the lack of salt. Toss cucumber slices with ½ teaspoon of kosher salt and let them sit for 10 minutes before draining. This removes excess moisture so your layers stay distinct and your greens don’t turn soggy halfway down.
- LAYER THINLY: I used to pile ingredients like I was building a tower, and by the third bite, everything collapsed into a sad, mushy pile. Instead, spread each layer evenly and sparingly—think “dusting” with veggies, not smothering. The salad holds its shape, and every forkful gets that perfect mix of textures.
- SKIP THE HALVED TOMATOES: Cherry tomatoes burst when sliced, turning your pretty layers into a juicy disaster. Leave them whole or quarter them just before serving—they’ll release less liquid and keep the greens crisp. (Your future self will thank you when the salad doesn’t turn into a salad soup.)
Creative variations of 10 layer salad
Protein Swaps
Need to change up the protein? Swap the chicken for 1.5 cups cooked shrimp (peeled and deveined) or ½ cup chickpeas for a vegetarian option. For heartier meals, add ½ cup cooked quinoa—it adds substance without overpowering. Always chill proteins before layering to keep the salad crisp. 🥗
Cheese Alternatives
Skip the feta for goat cheese crumbles (softer texture) or vegan cheese (like Miyoko’s) for dairy-free versions. For extra richness, add ¼ cup crumbled blue cheese—its bold flavor stands up to the fresh veggies. Just reduce the dressing slightly if using stronger cheeses to balance the tang.
Nutty Variations
Toasted walnuts are classic, but try pecans or almonds for a sweeter crunch. For nut-free options, use ¼ cup sunflower seeds or ½ cup croutons with seeds (like Everything Bagel seasoning). Toasting nuts in a dry pan for 3-4 minutes enhances their flavor—don’t skip this step!
Dressing Upgrades
Trade balsamic vinaigrette for lemon-tahini dressing (tahini + lemon juice + garlic) for a creamy twist. Or try avocado-lime dressing (blended avocado + lime + olive oil) for a richer mouthfeel. Always add dressing last—it keeps the layers crisp. 🍋
Seasonal Swaps
Summer? Swap red onion for shaved fennel (sweet and crunchy). Winter? Add roasted butternut squash (½ cup, cubed) for warmth. Spring calls for strawberries (halved) instead of tomatoes—just reduce the dressing slightly to balance the fruit’s juiciness.
Make-Ahead Tips
Prep layers separately in airtight containers (store greens, veggies, and proteins in one; cheese, nuts, and dressing in another). Assemble within 2 hours** of serving to prevent sogginess. For overnight prep, store dressing separately and toss just before eating—this keeps everything fresh. ✨
Nutrition facts
Frequently asked questions
Can I make this layered salad ahead of time?
For best results, assemble the salad within 2 hours of serving to keep the greens crisp. Store layers separately in airtight containers—greens, veggies, and proteins in one container; cheese, nuts, and dressing in another. When ready to serve, layer and drizzle with dressing just before eating. This prevents sogginess and maintains texture.
What if I don’t have all the ingredients?
No problem! Swap ingredients based on what you have. Use spinach instead of mixed greens, apples for crunch (instead of cucumber), or hard-boiled eggs for protein. The key is maintaining a balance of textures—keep one creamy (avocado/cheese), one crunchy (nuts/croutons), and one fresh (greens/tomatoes).
How do I keep the layers from sliding when slicing?
Press each layer gently as you add it to create stability. Use a 9-inch glass dish—its smooth sides help prevent shifting. Chill the salad for 15 minutes before slicing to firm up the ingredients slightly. When ready, slice with a long, sharp knife and use a spatula to lift the entire piece.
Can I make this salad gluten-free?
Skip the croutons and use gluten-free crackers or toasted pumpkin seeds instead for crunch. Check that your dressing and cheese are also gluten-free. For extra stability, add a layer of cooked quinoa (½ cup) between the greens and veggies. This keeps the salad cohesive without gluten.
Why does my salad look messy after slicing?
This usually happens if layers weren’t pressed firmly enough or if the dish wasn’t chilled before slicing. Try using a smaller, round dish** (like a 6-inch cake pan) for cleaner slices. Also, arrange ingredients in concentric circles rather than random piles—this creates visual symmetry. Practice makes perfect!

- 6 Egg Cake Recipe with Oil: Light as Air With Buttery Moisture - October 4, 2026
- 4 Bean Casserole Recipe: One-Pan Heartiness With Smoky Paprika Depth - October 4, 2026
- 3-Ingredient Keto Mug Cake Recipe: Microwave Magic in 2 Minutes - October 4, 2026