
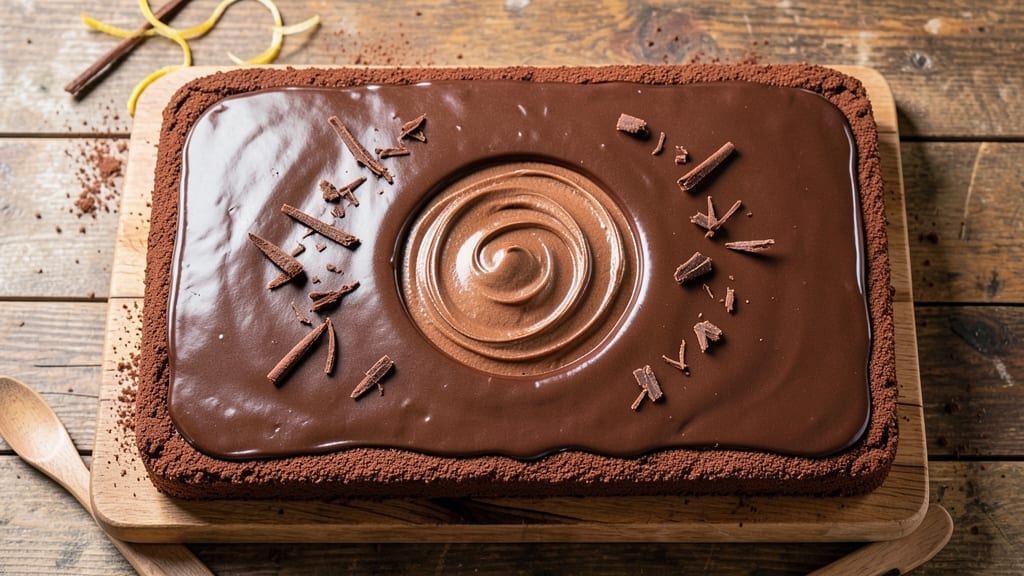
An 11×15 chocolate sheet cake delivers the perfect balance of rich, fudgy layers and velvety frosting that always disappears too fast. This recipe is designed to fit standard sheet pans, making it ideal for parties, potlucks, or satisfying a chocolate craving without fuss.
The secret lies in precise measurements and gentle baking to avoid a dry crumb—just like my grandmother’s famous version, but with modern convenience.
What sets this recipe apart is the two-stage mixing technique that creates a moist, tender crumb while maintaining that signature chocolate intensity. We’ll use a blend of cocoa powder and melted butter for maximum richness, then top it with a buttery cream cheese frosting that’s easy to spread and irresistible.
The result? A cake that’s sturdy enough for cutting but still tender enough to melt in your mouth.
This sheet cake bakes in just 30-35 minutes at 350°F, yielding a fudgy yet fluffy texture with no dry edges. The frosting is thick enough to hold its shape but light enough to let the chocolate shine through.
Whether you’re feeding a crowd or treating yourself, this recipe delivers restaurant-quality results with minimal effort.
For serving, consider dusting with cocoa powder or adding chocolate shavings for extra flair. The cake keeps well at room temperature for 3-4 days, making it perfect for meal prep. Let’s get started—your taste buds will thank you.
Ingredients for 11×15 chocolate sheet cake
Twelve ingredients for a crowd-pleasing chocolate sheet cake that’s fudgy, rich, and always disappears fast.
| Ingredient | Amount | Notes |
|---|---|---|
| All-Purpose Flour 🌾 | 2 ½ cups | Sifted for light texture |
| Unsalted Butter 🧈 | 1 ½ cups | Cold, cubed for even baking |
| Granulated Sugar 🍚 | 2 cups | White or light brown |
| Cocoa Powder 🍫 | ¾ cup | Dutch-processed for smoothness |
| Large Eggs 🥚 | 2 whole | Room temperature for even mixing |
| Baking Powder 🧂 | 1 ½ tsp | Aluminum-free preferred |
| Salt 🧂 | ½ tsp | Fine sea salt |
| Vanilla Extract 🌿 | 1 tbsp | Pure, high-quality extract |
| Milk 🥛 | 1 cup | Whole milk for richness |
| Cream Cheese 🧀 | 8 oz | Room temperature for frosting |
| Powdered Sugar 🍚 | 3 cups | Sifted for smooth frosting |
| Heavy Whipping Cream 🥛 | ½ cup | Cold for whipping |
| Dark Chocolate Chips 🍫 | 1 cup | Semi-sweet for garnish |
The cocoa powder makes or breaks this cake. Dutch-processed is ideal—it’s smoother and less bitter than natural cocoa, giving you that deep chocolate flavor without overpowering. I always grab Ghirardelli or Hershey’s Special Dark from the baking aisle, but any good-quality brand works. The butter? Cold cubes are non-negotiable—this creates the perfect flaky, tender crumb. If your kitchen’s warm, chill the butter for 20 minutes before mixing. For the cream cheese frosting, Philadelphia is my go-to, but any full-fat brand will do. Room temperature is key—it whips up light and fluffy, not grainy.
No cocoa powder? Melted dark chocolate works in a pinch—use 3 oz of 70% dark chocolate, melted and cooled. Short on powdered sugar? Granulated sugar plus 1 tbsp cornstarch mimics the texture. The chocolate chips are optional but worth it—they add pockets of gooey goodness that make this cake irresistible. If you’re feeling fancy, swap them for white chocolate or sea salt caramels. For the milk, any kind works, but whole milk gives the best moisture. Skimping here leads to dryness. The eggs should be room temperature—cold eggs can cause the batter to curdle.
This cake keeps beautifully for 3-4 days at room temperature, wrapped tightly in plastic. For longer storage, freeze the unfrosted cake for up to 3 months—thaw overnight in the fridge before frosting. The frosting? It’s stable at room temperature for 2 days, but if you’re prepping ahead, store it in the fridge and let it soften for 10 minutes before spreading. Pro tip: Dust the top with cocoa powder right after frosting—it adds a professional touch and keeps the frosting from sticking to your knife.
Why You’ll Love This Recipe
- Here’s what sold me: it uses basic pantry staples—flour, sugar, butter, eggs—and still feels like a special dessert. A single 11×15 pan feeds 12-15 people, so it’s cheaper than buying individual slices. Plus, the rich flavor means smaller portions stretch further. My wallet and my taste buds both win.
- One-Bowl Wonder: I swear by this recipe because it’s literally one bowl—no messy mixing stations, no extra dishes. Just cream butter and sugar, toss in the eggs and dry ingredients, and fold in that rich cocoa powder. The cake comes out perfectly moist every single time, and cleanup? Zero stress.
- Rich Without Effort: That deep chocolate flavor comes from the cocoa powder and melted butter, but here’s the secret: the sugar keeps it from tasting bitter. It’s like a hug in cake form—decadent but not heavy, and the texture? Crumbly on the edges, fudgy in the middle. Honestly, my kids ask for this over store-bought any day.
- Party or Pantry: Between us, this recipe is my go-to for birthdays, potlucks, or just because. Cut it into squares, and it’s a crowd-pleaser—no one will guess it’s from a sheet pan. Leftovers? Wrap them up, and they stay fresh for days. I’ve even frozen slices for last-minute treats. Versatile enough for any occasion, but simple enough for a Tuesday.
Step-by-step instructions for fudgy chocolate sheet cake
Here’s how to create rich, moist layers with a velvety frosting that’ll make your taste buds dance.
Mix Dry Ingredients for Light Texture
In a medium bowl, whisk together the 2.5 cups all-purpose flour, 1.5 tsp baking powder, and 0.5 tsp salt. Sift the mixture through a fine-mesh sieve directly into a large mixing bowl to aerate the flour and prevent dense cake layers. I like to press down gently on the sift to ensure even distribution of the baking powder throughout.
The reason we sift is simple—it removes lumps and incorporates air, which creates a lighter, more tender crumb. Don’t skip this step; uneven baking powder distribution leads to cake that rises unevenly or sinks in the center. Set this mixture aside for now while we prepare the wet ingredients.
Cream Butter and Sugar for Maximum Flavor
In a stand mixer fitted with the paddle attachment, beat the 1.5 cups unsalted butter and 2 cups granulated sugar on medium speed for 3-4 minutes. You’re looking for a light, fluffy texture—the mixture should nearly double in volume and become pale in color. This creaming process incorporates air, which helps create that signature tender crumb.
Here’s the thing—if you rush this step, your cake will be dense. I’ve found that using cold, cubed butter (as specified in the ingredients) gives you better control during creaming. The butter should be soft enough to press an indent with your finger but not melted. Add the 1 tbsp vanilla extract and mix for another 10 seconds to distribute the flavor evenly.
Combine Wet Ingredients and Fold in Dry Mixture
Add the 2 whole large eggs, one at a time, mixing on low speed for 30 seconds after each addition. Then gradually add the 1 cup milk while mixing on low speed until just combined. Scrape down the sides of the bowl with a spatula to ensure all ingredients are fully incorporated.
With the mixer on low speed, gradually add the sifted dry ingredients in three additions, mixing just until combined after each addition. Be careful not to overmix—you should still see a few flour streaks. The batter should be thick and smooth. Finally, fold in the 0.75 cup cocoa powder and 1 cup dark chocolate chips by hand using a silicone spatula. This ensures even distribution of the chocolate throughout the cake.
Bake to Perfect Doneness
Preheat your oven to 350°F and grease an 11×15-inch baking pan thoroughly with butter or baking spray. Pour the batter evenly into the prepared pan and smooth the top with a spatula. Bake for 30-35 minutes until a toothpick inserted in the center comes out with a few moist crumbs (not wet batter). The edges should be set, but the center should still look slightly underdone—it continues cooking as it cools.
I know it’s tempting to open the oven door to check, but resist! Every time you open the oven, you add 5-10 minutes to your bake time. The cake needs that steady, even heat to rise properly. If the top starts browning too quickly, loosely tent the pan with aluminum foil after 20 minutes of baking.
Prepare the Buttery Cream Cheese Frosting
While the cake bakes, prepare the frosting by beating the 8 oz cream cheese and 1.5 cups unsalted butter (softened) together in a large bowl using an electric mixer until smooth and creamy. This should take about 2-3 minutes. The mixture should be light and fluffy—almost like whipped cream.
Gradually add the 3 cups powdered sugar and mix on low speed until combined. Then add the 0.5 cup cold heavy whipping cream and mix until smooth. Finally, add the 1 tbsp vanilla extract and mix for another 30 seconds. The frosting should be thick but spreadable. If it’s too thick, add 1-2 tablespoons milk to reach your desired consistency.
Frost and Garnish for Showstopping Results
Once the cake has cooled completely (at least 1 hour), spread the frosting evenly over the top using an offset spatula. I like to start from the center and work my way out to ensure even coverage. For extra flair, sprinkle additional dark chocolate chips over the top before the frosting sets.
Let the cake sit at room temperature for 30 minutes before slicing to allow the frosting to set slightly. This ensures clean cuts and prevents the frosting from smearing. Serve at room temperature for the best texture—cool enough to enjoy the frosting without it melting, but not so cold that the cake becomes dense.
Pro Tips For Making 11×15 Chocolate Sheet Cake
- Melt Butter Slowly: I learned this the hard way—dumping cold butter into hot liquid makes clumps that never dissolve, no matter how long you whisk. Instead, cut the butter into small cubes and melt it gently in the microwave (30-second bursts) or over low heat until just liquid, then stir it into your cocoa-sugar mix. The goal is silky smoothness, not scrambled butter.
- Sift That Cocoa: That cheap cocoa powder you grabbed on sale? It’s full of lumps that turn into dry pockets in your cake. Sift it twice—once before mixing with dry ingredients, and again after combining with wet ingredients. Yes, it’s extra work, but your cake will be lighter and more uniform. (And if you’re lazy, at least sift it once with the flour.)
- Test for Doneness Early: The second you open the oven, stick a toothpick in the center. If it comes out with just a few moist crumbs (not wet batter, not dry flour), your cake’s done. After burning three batches waiting for the edges to pull away, I now set a timer for 5 minutes before the recipe’s suggested time and check. Chocolate cakes finish cooking fast once they’re out of the oven.
- Upgrade with Brown Sugar: Swap ¼ cup of the granulated sugar for light brown sugar. It adds subtle caramel notes and keeps the cake moist longer—no extra effort, just swap and mix. I was skeptical until I tried it; now I can’t go back. (If you’re using Dutch-process cocoa, this makes the flavor even richer.)
Pro cooking tips for 11×15 chocolate sheet cake
Batter Consistency
The secret to a perfectly moist chocolate sheet cake lies in achieving the right batter consistency. After mixing your wet and dry ingredients, the batter should be thick but pourable—like heavy pudding. If it’s too thin, your cake will be dense; too thick, and it won’t rise properly.
I test consistency by lifting the spatula: the batter should hold a peak but still flow gently back into the bowl.
For extra insurance, let the batter rest for 10-15 minutes before baking—this allows the flour to fully hydrate and the air bubbles to rise, resulting in a lighter texture. 💡
Pan Prep Matters
Greasing your 11×15-inch pan is non-negotiable, but how you do it makes all the difference. Use a mix of butter and flour: first coat the pan with melted butter, then dust with flour, tapping out excess.
This creates a non-stick barrier that prevents sticking and adds a subtle buttery flavor. For extra insurance, line the pan with parchment paper cut to size—just make sure it extends slightly up the sides for easy removal.
I always use Reynolds Wrap because it’s sturdy and won’t tear when lifting the cake. ⚡
Baking Time Hacks
Your oven might run hot or cold, so always check doneness with a toothpick test—it should come out with a few moist crumbs, not wet batter. If the edges brown too quickly, tent the pan with foil after 20 minutes to prevent over-browning while the center cooks.
Pro tip: Rotate the pan halfway through baking for even heat distribution. I’ve found that 325°F (instead of 350°F) works wonders for a more even bake, especially in older ovens. 🌡️
Frosting Tricks
For a flawless frosting spread, chill your offset spatula in the freezer for 5 minutes before using—it glides smoothly and prevents dragging. If your frosting is too thick, add 1 tbsp milk at a time until it reaches a spreadable consistency.
For a professional finish, use a bench scraper to create clean edges. I like to dip the scraper in warm water between swipes to prevent sticking. The frosting should be thick enough to hold its shape but still soft enough to spread evenly. ✨
Cooling is Key
Patience here pays off—letting the cake cool completely in the pan for 1 hour before frosting prevents it from sinking or tearing. Once cooled, run a thin knife around the edges to loosen it from the pan before transferring to a wire rack.
This step is especially important for sheet cakes, which are more prone to cracking if moved too soon. For extra stability, place a baking sheet under the rack to catch any crumbs. Trust me, this small step makes all the difference in presentation. 💪
Nutrition facts
Frequently asked questions
Can I make this chocolate sheet cake in a 9×13-inch pan instead?
Yes, but you’ll need to adjust the baking time and portion size. For a 9×13-inch pan, reduce the recipe by about 25% (use 1.875 cups flour, 1.125 cups butter, etc.) and bake for 25-30 minutes at 350°F. The cake will be thicker, so check for doneness with a toothpick. The frosting quantity should also be reduced proportionally.
How do I prevent my chocolate sheet cake from cracking?
Cracking often happens when the cake cools too quickly or isn’t properly rested. Let the cake cool in the pan for 1 hour before removing it, then transfer to a wire rack. Avoid placing it in the fridge immediately—let it sit at room temperature for 2-3 hours first. Also, don’t overmix the batter, as this can create air bubbles that pop during cooling.
Can I substitute vegetable oil for butter in this recipe?
You can try, but the texture and flavor will change. Butter creates a richer, more tender crumb, while oil makes the cake denser. If substituting, use 1 cup vegetable oil instead of the 1.5 cups butter, and reduce the milk by 2 tablespoons to maintain moisture balance. The frosting will also need 1 cup oil instead of butter.
What’s the best way to store leftovers?
Store your sheet cake at room temperature, wrapped tightly in plastic wrap, for up to 3-4 days. For longer storage, freeze the unfrosted cake (wrapped in plastic and foil) for up to 3 months. Thaw overnight in the fridge, then frost and serve. Keep the frosted cake refrigerated for no more than 2 days—bring it to room temperature before serving for the best texture.
How can I make this cake gluten-free?
Replace the all-purpose flour with a 1:1 gluten-free baking flour blend (like Bob’s Red Mill or King Arthur). You may need to add 1 extra teaspoon of xanthan gum to improve structure. For the frosting, use a gluten-free powdered sugar. Keep all other ingredients the same, but expect a slightly denser texture. Test the recipe first with a small batch to adjust consistency.

- 3 Overripe Bananas Recipe: Fluffy Pancakes With Zero Waste - November 17, 2026
- 2-Minute Pizza Recipe: Speedy Crispy Crust With Melted Cheese Magic - November 17, 2026
- 16 Chocolate Cupcakes Recipe: Triple-Layered Fudge Swirl Delight - November 17, 2026