
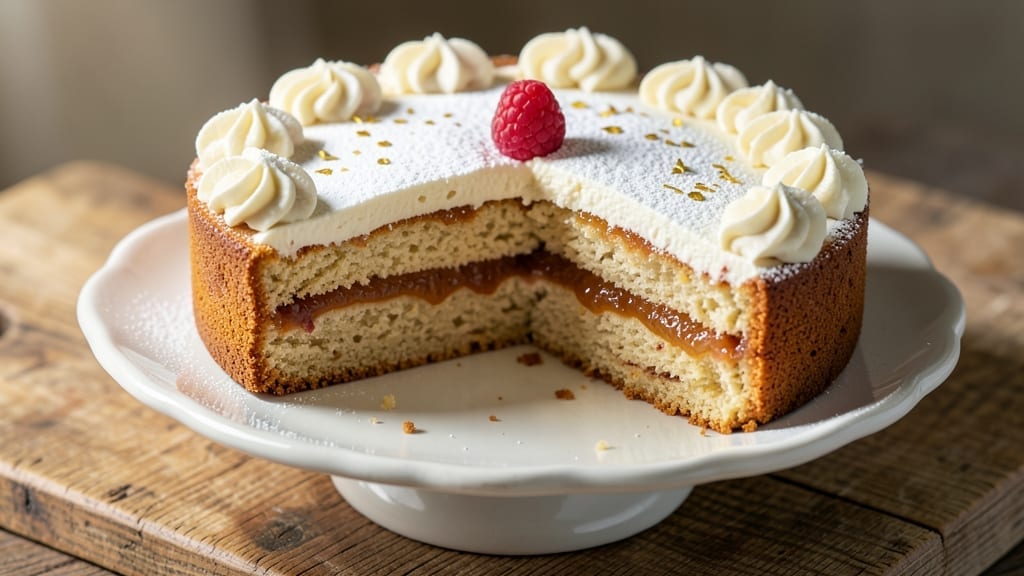
This 1/2 cake recipe solves the problem of baking a full-sized dessert when you only need a small batch—perfect for testing flavors, feeding two, or avoiding food waste. 💛 The beauty of this scaled-down version lies in its precision: every ingredient is halved from a standard 9-inch cake recipe, ensuring the same rich texture and moist crumb without the leftovers.
I developed this after realizing how often I’d bake full cakes only to have half go uneaten, so I perfected a method that delivers restaurant-quality results in a single 6-inch pan.
The key to success is using the right proportions—like reducing butter to ½ cup and flour to 1 cup—while maintaining the balance of leavening agents.
This recipe works for vanilla, chocolate, or even specialty flavors like lemon or red velvet, giving you the flexibility to experiment without committing to a full batch.
The baking time adjusts slightly too, with a 30-35 minute bake in a preheated oven, ensuring a perfectly golden top and tender interior every time.
What you’ll end up with is a mini cake that’s just as impressive as its full-sized counterpart, but with none of the waste. The frosting—whether buttercream, cream cheese, or ganache—scales down just as easily, creating a beautifully decorated dessert that’s ideal for celebrations, gifts, or satisfying a single craving.
The best part? You can double the recipe later if you fall in love with the flavor, knowing you’ve already perfected the base.
Perfect for special occasions, small gatherings, or when you just want a slice without the commitment of a full cake. Here’s how to make it—no waste, all flavor.
Ingredients for 1/2 cake
Twelve ingredients, zero waste—this mini cake is your new baking MVP for testing flavors or small celebrations.
| Ingredient | Amount | Notes |
|---|---|---|
| Unsalted Butter 🧈 | ½ cup | Softened to room temperature |
| Granulated Sugar 🍚 | ¾ cup | Superfine for smoother texture |
| All-Purpose Flour 🌾 | 1 cup | Sifted for lightness |
| Baking Powder 🍞 | 1 ½ tsp | Freshly opened for lift |
| Salt 🧂 | ¼ tsp | Fine sea salt preferred |
| Vanilla Extract 🌿 | 1 tsp | Pure Madagascar bourbon |
| Large Eggs 🥚 | 2 whole | Room temperature for blending |
| Whole Milk 🥛 | ¼ cup | Room temperature for best texture |
| Cocoa Powder 🍫 | ¼ cup | Dutch-processed for richness |
| Buttercream Frosting 🎂 | 1 cup | Scaled-down recipe (see tips) |
| Food Coloring 🎨 | ¼ tsp | Optional, gel-based preferred |
| Powdered Sugar 🍚 | ½ cup | For dusting and extra sweetness |
The butter and sugar are your foundation here. European-style butter (like Plugrá or Land O’Lakes European) gives that ultra-rich flavor without being overly salty. For the sugar, superfine works best—it blends smoother and creates a finer crumb, but regular granulated sugar in a food processor will do in a pinch. The cocoa powder is non-negotiable for chocolate flavor—Dutch-processed like Hershey’s Special Dark or Valrhona is what I reach for, but regular natural cocoa works too. Pro tip: measure your flour by weight if you can—1 cup sifted flour is 4 oz, not 5 oz like most measuring cups suggest. Trust me, your cake will thank you.
No vanilla extract? Vanilla bean paste or even a scraped vanilla bean will give you that authentic depth. Short on milk? Heavy cream or even water in a bind, but the fat content matters for that tender crumb. The frosting is where you can get creative—cream cheese frosting works beautifully for a tangy twist, or swap buttercream for ganache if you’re feeling decadent. Need to adjust sweetness? Taste your batter before baking—add powdered sugar 1 tbsp at a time until it hits your sweet spot. And if you’re making this for a special occasion, gel food coloring is your friend—it won’t alter the texture like liquid dyes.
This mini cake keeps beautifully—3 days at room temperature covered loosely, or 1 week refrigerated in an airtight container. For longer storage, freeze the unfrosted cake for up to 3 months. The frosting? Store it separately in the fridge and rewhip before using. Pro move: bake your cake in a 6-inch round pan for that perfect single-serving size, or use a 6×6-inch square pan if you prefer cutting squares. Double the recipe later when you’re ready—just scale everything up by 2x and bake in a 9-inch pan. The beauty of this method is you’ve already perfected the base!
Why You’ll Love This Recipe
- Half the Pan, Full Flavor: I swear by this scaled-down version—same rich butter-sugar base, but with half the mess. No need to grease two pans or juggle double the batter; just one bowl, one pan, and that golden crumb you crave.
- Butter-Sugar Magic: That creamy butter and sugar combo? It’s the secret weapon. The texture is tender but sturdy, with a subtle crackle on top that makes every bite feel special. (Yes, even when you’re eating it straight from the pan.)
- Weeknight or Celebration: Too small for a party? Perfect for a cozy night in. Too big for one serving? Split it into squares and freeze half for later. It’s my go-to for impromptu dessert or a last-minute treat.
- Budget-Friendly Baking: Uses pantry staples you already own—no fancy ingredients, no wasted leftovers. The recipe stretches my grocery budget, and I always end up with slices for days. Honestly, it’s the kind of cake that makes me feel like I’ve won.
Step-by-step instructions for mini batch with no waste, double flavor
Here’s how to create a perfect half-cake with rich layers of flavor—no waste, just delicious results.
👨🍳 Step 1: Cream Butter and Sugar to Fluffy Perfection
In a stand mixer fitted with the paddle attachment, beat the 0.5 cup unsalted butter and 0.75 cup granulated sugar on medium speed for 3-4 minutes until light and fluffy. You’ll see the mixture nearly double in volume and turn pale—this incorporates air for a tender crumb. I like to scrape down the sides every minute to ensure even mixing.
Here’s the thing—if you use room-temperature butter, it blends smoothly without lumps. If it looks too soft, chill the bowl for 10 minutes before continuing. The goal is a ribbon consistency when you lift the paddle—it should leave a trail that holds its shape for a few seconds.
👨🍳 Step 2: Add Eggs and Dry Ingredients in Stages
Add the 2 whole large eggs, one at a time, mixing just until each is fully incorporated. Then stir in the 1 tsp vanilla extract and 0.25 cup whole milk. The mixture will look slightly curdled, but don’t worry—this will smooth out.
In a separate bowl, whisk together the 1 cup all-purpose flour, 1.5 tsp baking powder, and 0.25 tsp salt. Sift the 0.25 cup cocoa powder into the dry ingredients to create a marbled effect. With the mixer on low speed, gradually add the dry ingredients to the wet, mixing just until combined—you should still see small flour streaks. Overmixing develops gluten, which makes cakes tough.
🍳 Step 3: Divide and Bake for Even Rise
Preheat your oven to 350°F and grease a 6-inch round cake pan or line it with parchment paper. Divide the batter evenly between two 3-inch round pans (or one 6-inch pan if baking a single layer). For the double-flavor effect, I like to swirl 1 tablespoon of the cocoa powder into the top layer before baking—this creates beautiful marbling.
Bake for 20-25 minutes until a toothpick inserted in the center comes out clean and the edges are golden brown. Real talk: your oven might run hot, so start checking at the 20-minute mark. If the tops brown too quickly, tent loosely with foil to prevent overbrowning while the centers finish baking.
🥘 Step 4: Cool and Assemble with Buttercream Magic
Let the cakes cool in their pans for 10 minutes, then transfer to a wire rack to cool completely. Once fully cooled, level the tops if needed with a serrated knife. Here’s where the fun begins—spread ½ cup of the buttercream frosting on the first layer, then place the second layer on top.
For the double-flavor twist, I like to tint ½ cup of the buttercream frosting with the 0.25 tsp food coloring (optional) and spread it on the sides of the cake. Pipe the remaining ½ cup frosting on top for a smooth finish. Dust with 0.5 cup powdered sugar for a snowy effect and extra sweetness.
⏰ Step 5: Chill and Serve for Perfect Texture
Refrigerate the cake for 30 minutes before slicing—this helps the frosting set and makes clean cuts. The layers should be moist but not soggy, with a tender crumb and rich cocoa notes. Serve at room temperature for the best texture, and enjoy the satisfaction of using every ingredient without waste!
Pro Tips For Making 1/2 Cake
- Weigh the Butter: Butter expands when creamed, so scooping it straight from the fridge leads to a dry cake. Use a kitchen scale for ½ cup (1 stick) and let it sit at room temp for 30-45 minutes until soft but not greasy—your mixer will thank you.
- Mix Dry Ingredients First: I learned this the hard way—adding baking powder to wet ingredients too early kills its lift. Whisk flour, sugar, baking powder, and salt together before cutting in the butter. This keeps the texture light and prevents a dense, heavy crumb.
- Skip Overmixing the Batter: Once the butter’s incorporated, fold just until combined—no need to make it smooth. Overworking the batter develops gluten, which turns your tender cake into a chewy brick. Stop when there are a few streaks of flour left.
- Bake Until Springy: A toothpick test is overrated—this cake’s done when the edges pull away from the pan and the center springs back when pressed. If the top browns too fast, tent loosely with foil early. Underbaking is worse than overbaking here.
Common mistakes when making great 1/2 cake
Overmixing the Batter
I’ve made this mistake more times than I’d admit—overmixing the batter turns your tender cake into a tough, dense brick. The moment you see no more flour streaks (about 10-15 seconds of mixing after all dry ingredients are added), stop immediately.
Overmixing develops gluten, which creates a chewy texture instead of the light, airy crumb you want. If your batter looks curdled, that’s normal—it’ll smooth out during baking. 💛
Incorrect Pan Size
Using the wrong pan size throws off everything—baking time, texture, and even rise. A 6-inch round pan is perfect for this recipe, but if you use a 7-inch pan, your cake will bake faster and potentially overcook before the center is done.
Conversely, a 5-inch pan will take longer and may result in a dense center. Always check your pan’s diameter before baking, and adjust the time accordingly.
Skipping Room Temperature Ingredients
Cold butter, eggs straight from the fridge, or chilled milk can sabotage your cake’s texture. Room-temperature ingredients blend smoothly, creating a lighter crumb. Let your butter and eggs sit at room temperature for 30-60 minutes before starting.
For milk, just let the carton sit out for 10 minutes—no need to overcomplicate it. Trust me, your cake will thank you with every fluffy bite.
Opening the Oven Too Soon
Peeking at your cake too early causes the batter to sink and can lead to uneven baking. The first 20 minutes are critical—resist the urge to check until you’re sure the time is up.
If you’re worried, use the toothpick test at the 20-minute mark instead of opening the oven early. A clean toothpick means your cake is ready; crumbs mean it needs more time. Patience here ensures a perfectly domed top.
Ignoring the Cooling Phase
Rushing to frost your cake while it’s still warm is a recipe for disaster—soggy layers and melted frosting await. Let your cake cool completely in the pan for 10 minutes, then transfer it to a wire rack to cool for at least 1 hour.
This step is non-negotiable for a clean slice and professional finish. If you’re in a hurry, chill the cake in the fridge for 20 minutes, but it’ll still need time to firm up before frosting.
Using Old Leavening Agents
Baking powder and baking soda lose their lift over time, leading to flat, dense cakes. Always check the expiration date on your baking powder—if it’s older than 6 months, toss it and buy fresh.
For a quick test, mix 1 tsp baking powder with ¼ cup hot water—it should bubble vigorously. If it fizzles weakly, replace it. Fresh leavening is the secret to that perfect rise. ✨
Nutrition facts
Frequently asked questions
Can I make this 1/2 cake recipe in a different pan size?
A 6-inch round pan works perfectly, but you can adapt to other sizes with adjustments. For a 7-inch pan, reduce baking time by 3-5 minutes to avoid overcooking. A 5-inch pan may need 5-7 minutes extra baking time. Always use the toothpick test—insert it at the center and check for clean results. The key is balancing pan size with oven temperature and baking duration.
How do I scale this recipe up to a full-sized cake?
Double every ingredient—1 cup butter, 1.5 cups sugar, 2 cups flour, etc.—and use a 9-inch round pan. Bake at 350°F for 35-40 minutes, checking with a toothpick. The same mixing and cooling techniques apply. This method ensures consistent texture whether you’re making a mini or full-sized cake.
Can I substitute milk with another liquid?
Yes! Use heavy cream for richer flavor or water in a pinch, though milk provides the best texture. If using water, add 1 tsp vanilla extract for flavor. For a dairy-free option, try unsweetened almond milk or oat milk—just note the cake may be slightly denser. Always use room-temperature liquids for optimal results.
Why did my cake turn out dense instead of fluffy?
Density usually comes from overmixing, cold ingredients, or old leavening agents. Mix just until combined (no flour streaks), use room-temperature butter/eggs, and check baking powder expiration. Another culprit? Overbaking—pull the cake when a toothpick comes out clean (not dry). For extra fluffiness, sift your flour and avoid opening the oven early.
How long will this mini cake keep?
Store unfrosted cake at room temperature for 3 days covered loosely, or 1 week refrigerated in an airtight container. For longer storage, freeze the unfrosted cake for up to 3 months. Frosting should be stored separately and rewhipped before use. The cake’s texture remains best when refrigerated but can be brought to room temperature before serving.

- 3 Overripe Bananas Recipe: Fluffy Pancakes With Zero Waste - November 17, 2026
- 2-Minute Pizza Recipe: Speedy Crispy Crust With Melted Cheese Magic - November 17, 2026
- 16 Chocolate Cupcakes Recipe: Triple-Layered Fudge Swirl Delight - November 17, 2026