
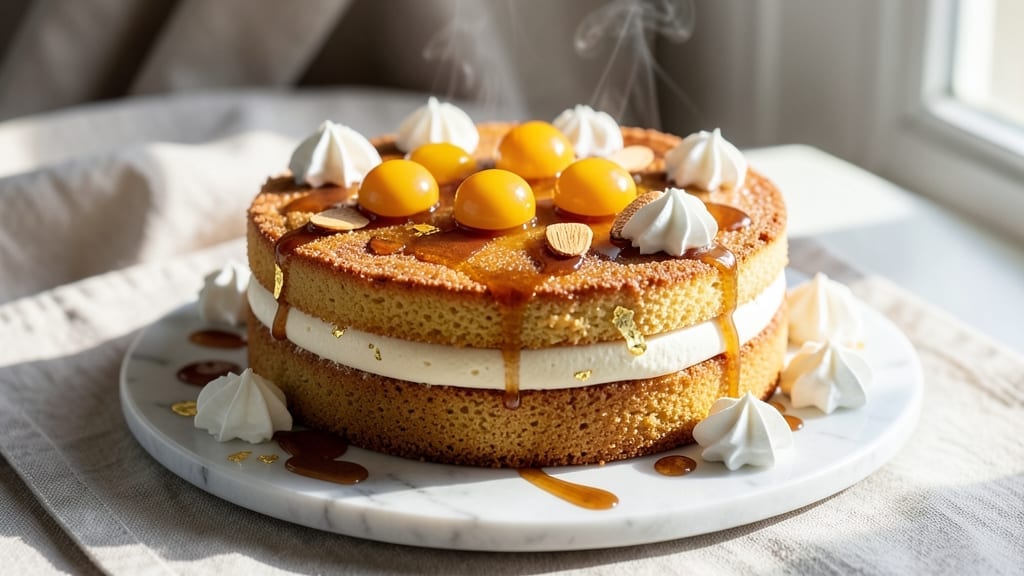
A 12 egg yolk sponge cake delivers the perfect balance of airy lightness and luxurious richness—no one will guess it’s made with yolks instead of whole eggs. 💛 The secret lies in the yolks’ natural fat content, which creates a velvety crumb while maintaining that signature cloud-like texture.
This recipe transforms a simple sponge into something restaurant-worthy, with a tender crumb that stays moist for days.
What sets this apart is the precise technique: folding egg whites to their peak stiffness before gently incorporating them into the yolk mixture. This method prevents deflation and ensures a uniform, crack-free cake.
The result? A golden, domed cake with a delicate interior that melts in your mouth—ideal for celebrations or when you crave something truly special.
Baking at the right temperature (350°F) and for the correct time (25-30 minutes) is critical to avoid dryness. Once cooled, you can serve it plain, dusted with powdered sugar, or layered with whipped cream and fresh berries. The versatility makes it perfect for any occasion.
Troubleshooting common issues—like cracking or a dense texture—is simple with the right adjustments. The key is patience: don’t overmix the batter, and ensure your egg whites are fully stabilized before folding. With these steps, you’ll achieve a foolproof, showstopping dessert every time.
Ingredients for 12 egg yolk sponge cake
Twelve yolks, one secret to cloud-light perfection—this isn’t your grandmother’s sponge cake.
| Ingredient | Amount | Notes |
|---|---|---|
| Large Egg Yolks 🥚 | 12 whole | Room temperature for best incorporation |
| Granulated Sugar 🍚 | 2 cups | Superfine preferred for smooth texture |
| Unsalted Butter 🧈 | ¾ cup | Softened but not melted (67°F) |
| All-Purpose Flour 🌾 | 1 ½ cups | Sifted for lightest texture |
| Large Egg Whites 🥚 | 4 whole | Room temperature, no yolks |
| Cream of Tartar 🧂 | ¼ tsp | Stabilizes egg whites perfectly |
| Vanilla Extract 🌿 | 1 tsp | Pure Madagascar preferred |
| Powdered Sugar 🍚 | 1 cup | For dusting finished cake |
| Fresh Lemon Juice 🍋 | 1 tbsp | Brightens the yolk mixture |
| Kosher Salt 🧂 | ¼ tsp | Fine grain for delicate flavor |
| Cornstarch 🌾 | 1 tbsp | For extra lightness (optional) |
| Unsalted Butter 🧈 | ¼ cup | For greasing pans (melted) |
| Parchment Paper 📄 | 1 sheet | For lining cake pans |
The yolks are everything here. Room temperature is non-negotiable—cold yolks won’t incorporate properly. I grab mine from the fridge 30 minutes before starting. For the butter, European-style brands like Plugrá or President have more fat content, which gives that signature richness. The flour? King Arthur or Gold Medal are my go-tos—they’re finely milled and consistent. Pro tip: weigh your ingredients if you can—cups can vary wildly. The vanilla extract should smell like pure Madagascar bourbon, not artificial. Walmart’s store brand is surprisingly good for the price, but if you want to splurge, Lor Ann Oils is worth it.
No cream of tartar? Substitute with lemon juice at double the amount—it’s the same acidity, just different chemistry. Running short on egg whites? Aquafaba (chickpea brine) works at 3x the volume, though texture will be slightly denser. The cornstarch is optional but makes a noticeable difference—Bob’s Red Mill is my preferred brand. For the sugar, superfine is ideal, but if you only have regular granulated, pulse it in a food processor for 30 seconds. The lemon juice can be bottled, but fresh is brighter. And whatever you do, don’t skip the salt—it balances all that sweetness.
This batter is delicate—work quickly once mixed. Room temperature ingredients are key: yolks, whites, butter, everything. The cake keeps best in an airtight container at room temperature for 2 days, though it’s at its peak on day one. For longer storage, slice and freeze between parchment—3 months with no texture loss. Reheat slices at 300°F for 5 minutes to restore that cloud-like texture. And if you make extra batter? Pour into a loaf pan for a lighter pound cake—game changer.
Why You’ll Love This Recipe
- No Separate Bowl Chaos: I swear by this method—just yolks, sugar, and butter whipped until it’s almost buttercream, then folded into flour like a dream. No messy egg white separations mid-recipe, no sticky fingers from overworking the batter.
- Rich Without Overpowering: That first bite? Pure yolk magic—creamy, tender, but not heavy. The butter and sugar marry so well with the flour that it’s dangerously easy to eat the whole pan, no frosting needed.
- Bake-Once, Use-Twice: Slice it warm for breakfast with jam, or let it cool for a dessert that lasts days. Honestly, I’ve had this cake for lunch, dinner, and even a midnight snack—it’s that good.
- Pantry Staple Power: Five ingredients, all of which I already have. No specialty items, no last-minute grocery runs. And since it uses all the egg yolks (no waste!), it’s the kind of recipe that makes me feel like I’m winning at baking.
Step-by-step instructions for 12 egg yolk sponge cake
Here’s how to create that legendary cloud-like texture while keeping it rich and moist.
👨🍳 Step 1: Prepare the Yolk Mixture for Maximum Lightness
In a heatproof bowl, combine the 12 whole large egg yolks, 2 cups granulated sugar, 1 tbsp fresh lemon juice, 1 tsp vanilla extract, and 0.25 tsp kosher salt. Place this bowl over a pot of simmering water (double boiler setup) and whisk constantly for 8-10 minutes until the mixture reaches 160°F and triples in volume. You’ll see it go from pale yellow to thick and ribbony when you lift the whisk—this is your signal it’s ready.
Remove from heat immediately and let cool to room temperature while you prepare the egg whites. The reason we cook the yolks is to incorporate air and create that signature cloud-like texture without adding extra volume from whipped whites. If you rush this step, your cake will be dense instead of ethereal.
🍳 Step 2: Whip Egg Whites to Stiff Peaks with Precision
In a separate clean, grease-free bowl, combine the 4 whole large egg whites and 0.25 tsp cream of tartar. Using a stand mixer with the whisk attachment, beat on low speed until frothy, then increase to high speed and whip for 5-7 minutes until stiff peaks form. The peaks should stand straight up when you lift the whisk—if they flop over, whip for another 30 seconds.
Here’s the thing—don’t overmix or you’ll develop gluten. Gently fold 1 tbsp cornstarch into the whites using a spatula in a J motion to maintain volume. The cornstarch helps stabilize the structure for that perfect crumb. Keep the bowl nearby but don’t fold the whites into the yolks just yet—timing matters.
🥘 Step 3: Combine Yolks and Whites with Gentle Folding
Now carefully fold one-third of the whipped egg whites into the yolk mixture using a spatula, cutting through the center to create swirls. This gradually incorporates air without deflating the whites. Then gently fold in the remaining whites in two additions, being careful not to overmix. You want to maintain that airy texture we worked so hard to create.
Next, sift the 1.5 cups all-purpose flour over the mixture and fold just until combined—you should still see some white streaks. The flour should be evenly distributed but not overworked. If you see the batter deflate, don’t panic—just gently fold a few more times to restore volume. This is where patience pays off for that signature light texture.
🔥 Step 4: Bake in Two Layers for Perfect Rise
Preheat your oven to 350°F. Grease two 8-inch round cake pans with the 0.25 cup melted unsalted butter and line the bottoms with the parchment paper. Divide the batter evenly between the pans and smooth the tops. Bake for 25-30 minutes until a toothpick inserted comes out clean and the edges pull away slightly from the pan.
Here’s where it gets tricky—don’t open the oven during baking or the cakes will sink. The moment they’re done, remove from oven and immediately invert onto a wire rack to cool completely. This prevents the cakes from collapsing as they set. Let them cool for at least 1 hour before assembling—this is critical for clean layers.
🍽️ Step 5: Assemble and Dust for Showstopping Finish
Once completely cool, place one cake layer on a serving plate and dust generously with 1 cup powdered sugar using a fine-mesh sieve. Place the second layer on top and dust with the remaining powdered sugar. For extra richness, you can add a thin layer of whipped cream or lemon curd between the layers if desired—just keep it minimal so you don’t weigh down that delicate structure.
Slice through the center to reveal that signature cloud-like crumb with its rich yolk flavor. The outside should be lightly golden, the inside completely airy with just a hint of lemon brightness. Serve immediately while still fresh—this cake is best enjoyed within 24 hours of baking when it’s at its lightest.
Pro Tips For Making 12 Egg Yolk Sponge Cake
- Whip yolks cold: Grab your mixing bowl and chill it in the freezer for 5 minutes before starting—this keeps the yolks from overheating when you add the sugar. I learned this the hard way after ending up with a cake that tasted like warm custard instead of rich, tender sponge.
- Soften butter properly: Unsalted butter should be just soft enough to press into with your finger, not melted or crumbly. If it’s too cold, the cake will be dense; if it’s too warm, the yolks will curdle. Take it out of the fridge 30 minutes before using, then let it sit while you whip the yolks.
- Fold whites in gently: The egg whites should be folded into the yolk mixture in three additions, using a spatula to cut through the center and lift from the bottom. Rushing this step collapses the air and flattens your cake—think “scoop and rotate” like you’re tucking in a blanket, not dumping.
- Check oven temp early: Preheat your oven to 350°F (175°C), but stick an oven thermometer in to confirm—many run hot. If the cake browns too fast, tent it with foil at 15 minutes, then uncover to finish. I skip this step half the time, and the top always ends up either raw or burnt.
Essential equipment for perfect results
Stand Mixer Essentials
Your stand mixer is the MVP for this recipe—I swear by my KitchenAid Artisan Series with the flat beater attachment for the yolk mixture and the whisk attachment for the egg whites.
The 5-quart bowl gives you plenty of room to work without spills, and the variable speed control lets you go from low to high with precision. If you’re on a budget, the Cuisinart SM-50BC delivers similar power for less. 💛
Precision Tools for Yolks
For the yolk mixture, you’ll need a heatproof mixing bowl that fits snugly over your pot (I use a stainless steel double boiler bowl from OXO). A candy or instant-read thermometer (like the Thermoworks Thermapen) is non-negotiable to hit that 160°F target.
Pro tip: Use a spatula with a flexible silicone tip to gently scrape down the sides during cooking—this prevents hot spots that can cook the yolks unevenly.
Egg White Whipping Kit
Whipping egg whites requires a clean, grease-free bowl—I use a glass mixing bowl from Pyrex because it’s non-reactive and easy to clean. The KitchenAid whisk attachment is ideal, but if you don’t have a mixer, a handheld electric mixer like the Hamilton Beach 62150R works in a pinch.
For folding, a flexible silicone spatula (like the OXO Good Grips) helps maintain volume without deflating the whites.
Baking Pans and Racks
Two 8-inch round cake pans with removable bottoms (I use Wilton Perfect Results) are essential for even baking. Line the bottoms with parchment paper to prevent sticking, and grease with melted butter using a pastry brush (like the West Bend silicone one).
For cooling, a wire cooling rack (I prefer the Nordic Ware Half Moon) is a must—it allows air to circulate evenly and prevents soggy bottoms.
Optional but Helpful Extras
A fine-mesh sieve (like the Microplane food mill) makes dusting powdered sugar effortlessly. For assembling layers, a serrated knife (I use the Mercer Culinary Genesis) gives clean cuts. If you’re adding fillings, a piping bag with a star tip (like the Ateco 807) helps create decorative patterns.
And trust me, a digital kitchen scale (like the OXO Good Grips) ensures accuracy—cups can vary wildly with different flours.
Nutrition facts
Frequently asked questions
Why use only egg yolks in this sponge cake?
The yolks create a rich, moist texture while maintaining that signature cloud-like lightness. Their natural fat content adds richness without heaviness, and they incorporate air better than whole eggs for a tender crumb. Plus, they prevent the cake from drying out quickly!
Can I substitute regular granulated sugar for superfine?
Yes, but pulse 2 cups granulated sugar in a food processor for 30 seconds to break it down. Superfine sugar dissolves faster, creating a smoother texture, but this works in a pinch. Just ensure all sugar is fully dissolved in the yolk mixture.
How do I fix cracked tops on my cake?
Cracking usually happens from overmixing or opening the oven too soon. To prevent it, fold the whites gently and avoid opening the oven during baking. If it happens, dust with extra powdered sugar before serving—it camouflages cracks beautifully!
Can I make this cake in a single layer?
Use a 9-inch round pan and bake for 25-30 minutes at 350°F. The same batter ratio works—just adjust baking time slightly. A single layer is perfect for smaller gatherings or as a base for fillings.
How long can I store the baked cake?
Keep it in an airtight container at room temperature for 2 days for best texture. For longer storage, slice and freeze between parchment for up to 3 months. Thaw slices at room temperature for 1-2 hours before serving.

- 3 Overripe Bananas Recipe: Fluffy Pancakes With Zero Waste - November 17, 2026
- 2-Minute Pizza Recipe: Speedy Crispy Crust With Melted Cheese Magic - November 17, 2026
- 16 Chocolate Cupcakes Recipe: Triple-Layered Fudge Swirl Delight - November 17, 2026