
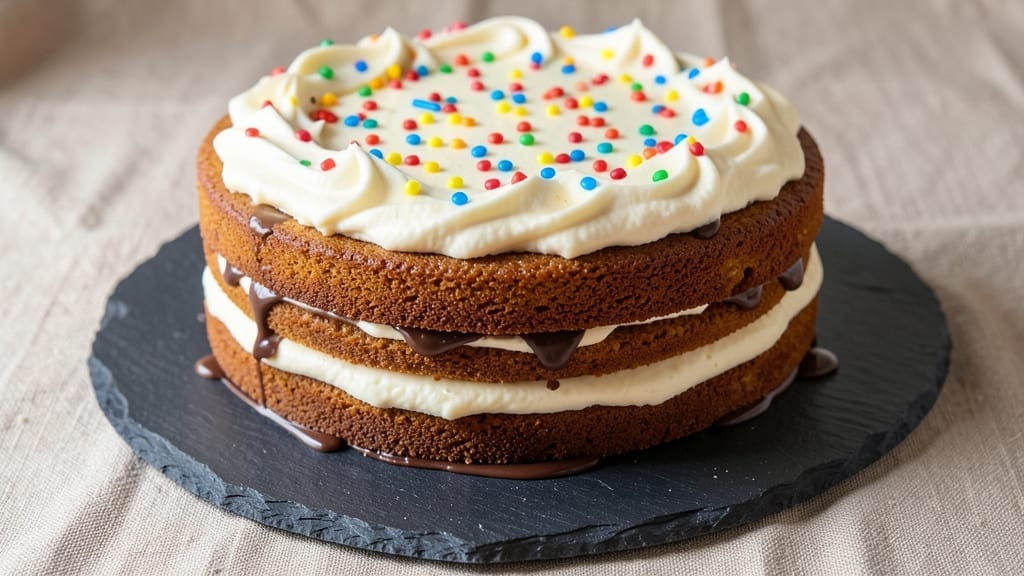
A 4-inch round cake delivers the perfect balance of elegance and portion control—ideal for intimate gatherings, baby showers, or even single-serving indulgence. This recipe focuses on precision: a tender crumb, even bake, and adaptable flavors that work for vanilla, chocolate, or citrus variations.
The secret lies in proper pan preparation and gentle handling to maintain structure during slicing.
What sets this cake apart is its foolproof technique for consistent results, whether you’re baking one layer or a full tower. A standard 350°F oven ensures even doneness, while room-temperature ingredients prevent cracks.
The recipe scales effortlessly for dietary needs—swap butter for oil, or use almond flour for gluten-free versions without compromising texture.
By the time you pull it from the oven, you’ll have a golden, perfectly domed cake with a moist interior that stays fresh for days. The thin layers (about 1.5 inches each) make assembly simple, whether you’re piping buttercream or keeping it naked for a rustic finish.
Each slice serves as a statement piece—light enough to enjoy without guilt, yet rich enough to impress.
This recipe works for any occasion: gift a single layer in a decorative box, stack two for a mini celebration cake, or use the same batter to make cupcakes.
The versatility makes it a staple for bakers who want professional results with minimal fuss. Let’s get started with the foundation every great cake needs.
Ingredients for 4 inch round cake
Precision ingredients for a flawless 4-inch round cake with professional results every time.
| Ingredient | Amount | Notes |
|---|---|---|
| All-Purpose Flour 🌾 | 1 ¼ cups | Sifted for even texture |
| Granulated Sugar 🍚 | 1 cup | White or light brown |
| Unsalted Butter 🧈 | ⅔ cup | Room temperature, cubed |
| Large Eggs 🥚 | 2 whole | Room temperature preferred |
| Vanilla Extract 🌿 | 1 tbsp | Pure, high-quality extract |
| Baking Powder 🍞 | 1 ½ tsp | Diamond Crystal preferred |
| Salt 🧂 | ½ tsp | Fine sea salt preferred |
| Milk 🥛 | ½ cup | Whole milk for richness |
| Lemon Zest 🍋 | 1 tbsp | Fresh, finely grated |
| Vegetable Oil 🫒 | ¼ cup | Light, neutral flavor |
| Cake Flour 🌾 | ¼ cup | Optional for finer crumb |
| Powdered Sugar 🍚 | ½ cup | For buttercream (optional) |
| Heavy Cream 🥛 | ½ cup | For buttercream (optional) |
The flour is non-negotiable here—King Arthur or Gold Medal brands deliver consistent texture. Cake flour, if using, should be sifted separately for a lighter crumb. Store-bought butter like Land O’Lakes or Plugrá works, but European-style (like President) adds richness. Room temperature is critical: cold butter creates lumps, and overly soft butter can cause collapse. For the vanilla, Heinz or Nielsen-Massey extracts are reliable, but avoid imitation varieties. The lemon zest should be freshly grated—pre-packaged zest loses potency quickly. If you’re scaling this for multiple layers, increase ingredients by 25% for a second 4-inch cake.
No vanilla extract? Vanilla bean paste or seeds from one bean work beautifully. Substituting milk? Almond or oat milk reduces richness but maintains moisture. For a gluten-free adaptation, replace all-purpose flour with a 1:1 blend like Bob’s Red Mill, but expect a slightly denser texture. The optional buttercream can be made with cream cheese or mascarpone for a lighter finish. If you’re baking in high-altitude areas, reduce baking powder by 0.25 tsp and add 1 tbsp extra flour. For a chocolate variation, replace 0.25 cup sugar with unsweetened cocoa powder and add 0.25 cup extra milk to compensate for dryness.
Store batter in an airtight container in the fridge for up to 24 hours—perfect for baking the next day. Baked layers keep well wrapped in parchment for 3 days at room temperature or 1 week refrigerated. For longer storage, freeze layers between parchment, thawing at room temperature before assembling. Buttercream can be made 2 days ahead and stored in the fridge, rewhipped with a splash of milk before use. To maintain dome shape, bake in a preheated 350°F oven for exactly 25-30 minutes, then invert immediately onto a wire rack to cool. This prevents sinking and ensures clean slices every time.
Why You’ll Love This Recipe
- No Mixer Needed: I swear by this one—just cream butter and sugar by hand until it’s light and fluffy. The eggs fold in like butter, and the vanilla ties everything together without fuss. (Yes, even if your mixer’s on strike.)
- Butter-Sugar Magic: That creamed butter and sugar combo? It’s the secret weapon here. The cake turns out tender but sturdy, with just enough richness from the butter to make every bite feel special. Honestly, it’s the kind of flavor that makes you want to skip dessert.
- Crowd-Pleaser Slices: Four-inch rounds are perfect for parties or picnics—no one feels left out, and they’re easy to stack or serve individually. I’ve used these for birthdays, office treats, and even as a base for mini desserts. (They’re also great for meal prep—slice, wrap, and freeze!)
- Budget-Friendly Luxury: Flour, sugar, butter, eggs—it’s a short ingredient list with big payoff. No fancy add-ins needed, but if you want to splurge, a sprinkle of vanilla bean or a dusting of powdered sugar takes it to the next level. (Leftovers? They disappear fast.)
Step-by-step instructions for 4 inch round cake
Here’s the precise method for baking delicate, perfectly proportioned individual cakes that stack beautifully.
Prepare the Cake Batter
Preheat your oven to 350°F and grease four 4-inch round cake pans with vegetable oil, then line the bottoms with parchment rounds. I use a small offset spatula to ensure the oil coats every inch—this prevents sticking and guarantees clean release after baking.
In a large mixing bowl, whisk together the 1.25 cups all-purpose flour, 1.5 teaspoons baking powder, and 0.5 teaspoon salt. Sift this dry mixture directly into the bowl to eliminate lumps and ensure even distribution. In a separate bowl, cream the 0.67 cup unsalted butter and 1 cup granulated sugar on medium speed until light and fluffy—this should take about 3-4 minutes and nearly double in volume.
Add the 2 whole large eggs one at a time, mixing well after each addition. Stir in the 1 tablespoon vanilla extract, 1 tablespoon lemon zest, and 0.5 cup milk until fully combined. With the mixer on low speed, gradually add the dry ingredients, mixing just until incorporated. Avoid overmixing—you should still see small streaks of flour. Finally, pour in the 0.25 cup vegetable oil and mix until smooth. If using the optional 0.25 cup cake flour, fold it in at the end for a finer crumb.
Divide and Bake the Layers
Divide the batter evenly among the prepared pans, tapping each pan gently on the counter to remove any air bubbles. Fill each pan about ⅔ full—overfilling causes overflow and uneven baking. Bake for 20-25 minutes or until a toothpick inserted into the center comes out clean. The edges should be golden brown, and the top should spring back when pressed lightly.
I recommend rotating the pans halfway through baking to ensure even heat distribution. The cakes are done when the internal temperature reaches 205-210°F. Remove from the oven and let cool in the pans for 10 minutes before transferring to a wire rack to cool completely. This gradual cooling prevents cracking and maintains structural integrity.
Prepare the Buttercream Filling (Optional)
For the classic buttercream filling, beat the 0.67 cup unsalted butter (softened) and 0.5 cup powdered sugar together until smooth. Add the 0.5 cup heavy cream and 1 tablespoon vanilla extract, then whip on high speed until light and fluffy. If the buttercream is too thick, add 1 teaspoon milk at a time until it reaches a spreadable consistency. The ideal texture should be thick enough to hold its shape but still pipe smoothly.
This buttercream works beautifully between layers and for decorating. For a citrus twist, you can fold in 1 teaspoon lemon zest or a few drops of lemon extract. Keep the buttercream chilled until ready to use—this prevents it from melting too quickly when assembling the cake.
Assemble and Decorate the Cake
Once the cakes are completely cool, level the tops if necessary using a serrated knife. Place the first cake layer on a cake stand or plate, then spread a thin layer of buttercream over the top. This “crumb coat” prevents filling from seeping through to the exterior. Add the second layer and repeat the process, then stack the remaining two layers in the same manner.
For a smooth finish, apply a final layer of buttercream over the entire cake and use a bench scraper to create clean edges. Decorate with fresh berries, edible flowers, or a dusting of powdered sugar. If serving immediately, chill for 15-20 minutes to set the buttercream. These individual cakes are perfect for special occasions, gift boxes, or elegant desserts.
Pro Tips For Making 4 Inch Round Cake
- Measure Butter Cold: Take that butter straight from the fridge—no softening needed. I used to melt it by mistake once, and the cake turned dense as a brick. For a 4-inch round, stick to ½ cup (1 stick) cut into cubes, and let the oven’s heat do the work.
- Whisk Eggs First: Beat those eggs until they’re pale and triple in volume before mixing them into the dry ingredients. I skipped this once and ended up with a cake that looked like it had a fight with a fork. A full 2 minutes with a whisk makes all the difference.
- Skip Overmixing: Once the flour hits the butter, mix just until combined—about 10 strokes max. I learned this the hard way after kneading the batter like dough, and the cake turned tough as a boot. Let the sugar do the sweet work.
- Test Doneness Early: Pull the cake when the edges are set but the center still jiggles slightly—no need to wait for a toothpick to come out clean. For a 4-inch pan, that’s usually around 25-30 minutes at 350°F, but ovens lie. Trust your eyes more than the clock.
Wine and beer pairings for these flavors
Citrus-Inspired Whites
Bright, zesty whites complement the lemon zest in this cake beautifully. A dry Riesling from Germany, like Dr. Loosen Blue Slate, balances the sweetness with crisp acidity—its mineral notes cut through the buttercream richness.
For something lighter, try a Sauvignon Blanc from New Zealand, such as Oyster Bay, which adds a refreshing herbal contrast. Both wines are versatile enough to pair with vanilla or chocolate variations. 🍷
Fruity Red Options
If you prefer red wine, opt for a Pinot Noir with delicate fruit flavors. A Willamette Valley Pinot like Domaine Serene has bright cherry notes that won’t overpower the cake’s subtle sweetness.
For a bolder choice, a Zinfandel from California—like Ravenswood—adds a jammy richness that mirrors the cake’s texture. Serve slightly chilled for the best experience.
Beer Pairings
A crisp Belgian Witbier, like Hoegaarden, is my go-to beer pairing. Its coriander and citrus notes enhance the lemon zest in the cake while keeping the palate clean.
For a malty option, try a light American lager such as Corona or Miller Lite—their subtle sweetness complements the vanilla without competing. Avoid heavy stouts or IPAs, which can overwhelm the delicate flavors.
Non-Alcoholic Choices
For a refreshing non-alcoholic option, serve a sparkling apple cider, like Martinelli’s, which adds a crisp, fruity contrast. Alternatively, a citrus-infused iced tea—made with lemon and mint—enhances the cake’s brightness. Chill the tea thoroughly and serve over ice for a refreshing finish. 💧
Coffee or Tea Pairings
If you’re serving the cake after dinner, a light roast coffee—like a Colombian or Ethiopian—balances the sweetness without overpowering it. For a tea pairing, an Earl Grey** with its bergamot notes adds an aromatic complexity that complements the vanilla and citrus.
Brew the tea strong and serve it hot or iced, depending on the season.
Nutrition facts
Frequently asked questions about 4-Inch round cakes
Can I bake these cakes in a different size pan?
Yes, but adjust the baking time carefully. For a 3-inch pan, bake 15-18 minutes—the smaller diameter means faster cooking. For a 5-inch pan, increase time to 30-35 minutes and check for doneness at 25 minutes. Always use the toothpick test and reduce oven temperature by 25°F for larger pans to prevent over-browning.
How do I prevent cracks on the top?
Cracks usually happen from overmixing or sudden temperature changes. First, mix just until combined—stop when small flour streaks remain. Second, let the batter rest for 10 minutes before baking to relax the gluten. Finally, avoid opening the oven door during the first 20 minutes of baking to maintain steady heat.
Can I make this recipe gluten-free?
Replace the 1.25 cups all-purpose flour with a 1:1 gluten-free blend like Bob’s Red Mill or King Arthur. Add 0.5 teaspoon xanthan gum if your blend doesn’t include it. Expect a slightly denser texture—bake 2-3 minutes longer and check for doneness early. For best results, use cake flour in the blend for a lighter finish.
What’s the best way to store baked layers?
Wrap each cooled layer tightly in plastic wrap, then place in an airtight container with parchment between them. They’ll stay fresh for 3 days at room temperature or 1 week refrigerated. For longer storage, freeze layers individually for up to 3 months. Thaw overnight in the fridge before assembling.
How do I make these cakes chocolate instead of vanilla?
Replace 0.25 cup granulated sugar with 0.25 cup unsweetened cocoa powder and add 0.25 cup extra milk to maintain moisture. Use 1 teaspoon instant espresso powder for deeper flavor. For a richer version, swap 0.25 cup butter with melted dark chocolate. Keep all other ingredients identical—this ensures the same tender crumb.

- 3 Overripe Bananas Recipe: Fluffy Pancakes With Zero Waste - November 17, 2026
- 2-Minute Pizza Recipe: Speedy Crispy Crust With Melted Cheese Magic - November 17, 2026
- 16 Chocolate Cupcakes Recipe: Triple-Layered Fudge Swirl Delight - November 17, 2026