
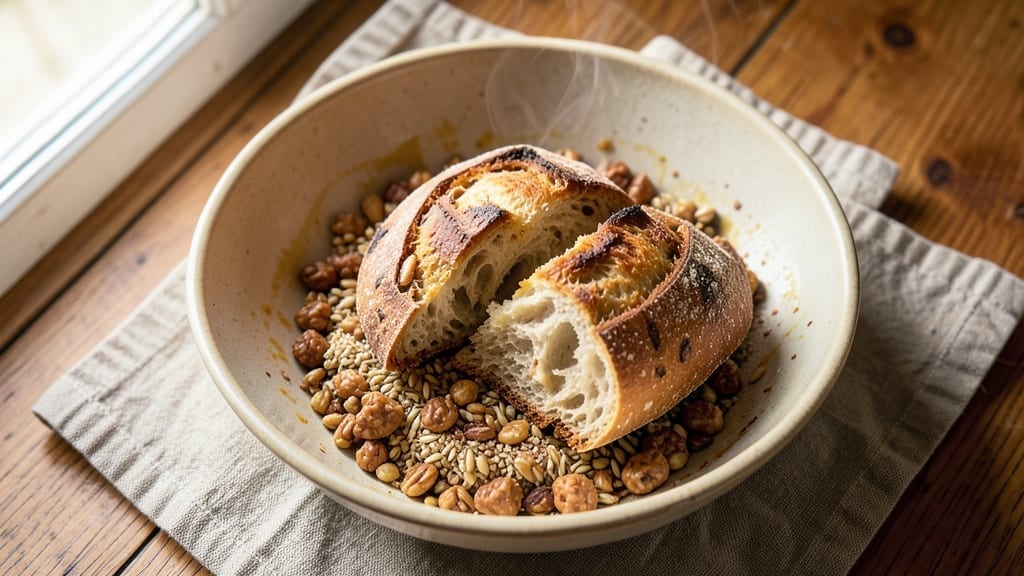
This 12-grain sourdough bread recipe delivers a symphony of textures—crisp golden crust, deep nutty crunch, and an open, airy crumb that crumbles like cloud. The secret lies in blending whole wheat, rye, barley, and nine other grains for complexity, while precise fermentation unlocks that signature sourdough tang.
I’ve baked this loaf for years, perfecting the balance of flavor and structure that makes it worth every 24-hour wait.
The magic starts with a robust starter—fed daily for five days to develop wild yeast and bacteria that transform simple flour into flavor. Each grain plays a role: rye adds earthiness, barley brings chewiness, while millet and amaranth contribute subtle sweetness.
After autolyse (resting the dough to hydrate fully), we build strength through bulk fermentation, then shape with care to avoid tearing that delicate crumb.
By the time it emerges from the Dutch oven, your loaf will have a crispy, caramelized crust with a crackling surface that shatters under pressure, revealing pockets of air like a well-aged cheese.
The interior stays open and tender, with each grain contributing its own texture—crunchy, chewy, or powdery—while the sourdough tang cuts through the richness. This isn’t just bread; it’s a centerpiece that commands attention at any table.
Perfect for sandwiches, toast, or serving alongside soups, this loaf keeps well for days, with flavor deepening as it stales. The recipe yields one 9×5-inch loaf with enough dough for a second if you’re ambitious. Let’s get started—your kitchen will smell like a bakery in no time.
Ingredients for 12 grain sourdough bread
Twelve grains, one loaf—each flour plays its part in this symphony of textures and flavors.
| Ingredient | Amount | Notes |
|---|---|---|
| Active Sourdough Starter 🍞 | ¼ cup | 100% hydration, fed daily for 5 days |
| Whole Wheat Flour 🌾 | 1 ½ cups | High-protein, stone-ground preferred |
| Rye Flour 🌾 | ½ cup | Dark rye for deep flavor |
| Barley Flour 🌾 | ½ cup | Pearled barley for chewiness |
| Millet Flour 🌾 | ¼ cup | Freshly ground for best texture |
| Amaranth Flour 🌾 | ¼ cup | Lightly toasted for nutty depth |
| Buckwheat Flour 🌾 | ¼ cup | Not gluten-free despite name |
| Spelt Flour 🌾 | ¼ cup | Stone-ground for texture |
| Oat Flour 🌾 | ¼ cup | Blended from rolled oats |
| Quinoa Flour 🌾 | ¼ cup | Finely ground for smooth dough |
| Chickpea Flour 🌾 | ¼ cup | Adds protein and subtle flavor |
| White Whole Wheat Flour 🌾 | ½ cup | Balances the heavier grains |
| Water 💧 | 2 ½ cups | Filtered preferred for clarity |
| Kosher Salt 🧂 | 1 ½ tsp | Diamond Crystal preferred |
| Instant Yeast 🍞 | ¼ tsp | Optional for extra lift |
The flours make or break this recipe. King Arthur’s or Bob’s Red Mill are my go-tos for most grains—especially the millet, amaranth, and buckwheat, which can be hard to find elsewhere. For rye, Pillsbury’s dark rye is reliable, but if you’re ambitious, grind your own from whole rye berries. The oat flour? Blend your own from rolled oats—pre-made versions often have weird aftertastes. Store all flours in airtight containers in a cool, dark place to preserve freshness. The sourdough starter needs daily feeding for five days before using—this builds the robust flavor foundation that separates good bread from extraordinary.
No buckwheat flour? Substitute with more rye or barley—it won’t be identical, but the dough will still develop character. Running low on quinoa flour? Use more oat flour at the same amount, though the texture will be slightly less open. For the yeast, if you’re committed to pure sourdough fermentation, skip it entirely—just extend the bulk fermentation by 2-3 hours. The salt is non-negotiable though; Diamond Crystal measures differently than Morton’s, so if your recipe calls for 1.5 tsp of one, use 1 tsp of the other. Water quality matters too—if yours tastes metallic or has a strong chlorine smell, filter it first. The grains should all be freshly ground if possible, especially the millet and amaranth, which lose their punch when stored too long.
This dough is a patient recipe—plan for 24 hours from start to finish. The shaped loaves can be refrigerated overnight for even better flavor development, then baked straight from the fridge. Wrap cooled loaves in bee’s wrap or a cotton towel to keep them fresh for 5-7 days at room temperature. For longer storage, freeze slices wrapped in parchment—3 months with no quality loss. The crust gets crunchier as it stales, which I actually prefer. If you make a second loaf, consider freezing the extra dough as balls—thaw and bake whenever you need a fresh loaf without the full prep time.
Why You’ll Love This Recipe
- No-Fuss Mixing: I swear by this—just toss the flours (whole wheat, rye, barley, millet) with your starter and water. No kneading, no fuss, just a quick stretch-and-fold while you sip coffee.
- Earthy Depth: That rye and barley? They bring this bread a nutty, almost caramelized richness when toasted. Honestly, it’s the kind of flavor that makes you slow down and actually enjoy your breakfast.
- Weekend Project: Bake it once, and suddenly you’ve got sandwich loaves, croutons for salads, or dinner rolls for guests. I’ve even used the extra slices as a base for open-faced meals—versatile like that.
- Pantry Stretch: Between us, this recipe uses up odd bits of flour you’d otherwise toss. The millet adds texture, the whole wheat keeps it hearty, and the rye? It’s my secret weapon for making a small bag of flour last twice as long.
Step-by-step instructions for 12 grain sourdough bread
Here’s how to transform these diverse flours into a loaf with incredible depth and texture.
Mix the Dough for Maximum Flavor Development
In a large mixing bowl, combine the 0.25 cup active sourdough starter with the 2.5 cups water and let it sit for 10 minutes to activate. This starter is your flavor foundation—its tangy complexity will shine through all those nutty grains.
Add the 1.5 cups whole wheat flour, 0.5 cup rye flour, 0.5 cup barley flour, and 1.5 tsp kosher salt to the bowl. Mix vigorously with a wooden spoon or dough whisk until no dry patches remain. The rye and barley will create a rich, earthy base that pairs beautifully with the lighter grains.
Next, incorporate the remaining specialty flours: 0.25 cup each of millet, amaranth, buckwheat, spelt, oat, quinoa, and chickpea flour, plus the 0.5 cup white whole wheat flour. The chickpea flour adds protein while the amaranth and quinoa bring nutty sweetness. Mix until the dough forms a shaggy mass—it’ll be thicker than traditional sourdough dough due to all these dense ingredients.
Autolyse for Improved Gluten Structure
Cover the bowl with a damp kitchen towel and let the dough rest for 30-60 minutes. This autolyse step hydrates the flours and begins gluten development without handling the sticky dough. You’ll notice the dough become smoother and more cohesive as the flours absorb the water.
After resting, sprinkle the 0.25 tsp instant yeast over the dough and perform a series of stretch-and-folds every 30 minutes for 2 hours total. Wet your hands to prevent sticking, then grab one side of the dough, stretch it upward, and fold it over itself. Rotate the bowl and repeat. These folds strengthen the gluten network needed to support all these dense grains.
Bulk Ferment at Room Temperature
After the final stretch-and-fold, let the dough rest uncovered at room temperature for 4-6 hours, or until it has nearly doubled in volume and shows good activity around the edges. The diverse flours will create a slower fermentation—be patient. You’re looking for about 50-75% increase in volume, with bubbles forming on the surface.
During this time, the sourdough starter will work its magic, developing complex flavors that complement each grain’s unique character. The dough will feel slightly sticky but should hold its shape when gently poked. If it’s too wet, you may need to add 1-2 tablespoons of whole wheat flour during the next steps.
Shape and Cold Proof for Crispy Crust
Turn the dough onto a lightly floured surface and gently shape it into a round boule. The dense flours make this dough particularly sticky—wet your hands frequently to prevent tearing. For best results, use a bench scraper to help manipulate the dough without sticking to your hands.
Place the shaped dough in a well-floured banneton or bowl, seam-side up. Cover and refrigerate for 12-16 hours. This cold proofing develops incredible flavor and creates that coveted crispy crust. The long fermentation allows the grains to fully hydrate and develop their unique flavors without overproofing.
Bake for Deep Flavor and Crispy Texture
Preheat your oven to 450°F with a Dutch oven inside for 45 minutes. This high heat creates steam that develops the bread’s signature open crumb. Remove the Dutch oven, then carefully transfer the dough (still in its proofing container) into the hot pot.
Bake covered for 30 minutes, then remove the lid and bake for another 20-25 minutes until the crust is deep golden brown and sounds hollow when tapped on the bottom. The diverse flours will create a beautiful contrast between the crispy exterior and airy interior.
Remove the bread from the Dutch oven and cool on a wire rack for at least 1 hour before slicing. The internal temperature should reach 205°F before removing from the oven. This resting period allows the steam to escape, preventing a gummy crumb.
Pro Tips For Making 12 Grain Sourdough Bread
- Sift the Heavy Grains: Whole wheat, rye, and barley flours pack like bricks—don’t just dump them in. Sift them first (even if it’s a pain) to avoid dense pockets in your bread. I learned this after cutting into a loaf that looked like a brick wall inside.
- Hydrate the Starter Last: Mix your sourdough starter after adding all the dry ingredients. This keeps the fermentation consistent—adding it first can make the dough too wet and gummy, especially with all those absorbent whole grains. Trust me, the texture will thank you.
- Skip the Over-Kneading: This isn’t classic baguette dough—it’s got too many dense flours to handle rough handling. Stretch and fold gently during bulk fermentation, or you’ll fight gluten development instead of encouraging it. Think “coax,” not “pummel.”
- Proof in a Cool Spot: The rye and barley flours speed up fermentation, so don’t let the dough get too warm. Proof it in the fridge overnight (yes, even if the recipe says room temp) for better flavor and control. Your dough will rise slower but taste deeper.
Common mistakes when making this recipe
Overmixing the Dough
This dense dough with twelve grains needs gentle handling—overmixing develops too much gluten, making the bread tough instead of tender. Stop mixing as soon as the dough comes together into a shaggy mass.
The rye and barley flours already contribute natural chewiness, so resist the urge to “fix” the texture with extra kneading. I’ve ruined loaves this way, and the result was more like dense crackers than airy bread. 🥖
Skipping Autolyse
Autolyse—resting the dough before kneading—is your secret weapon for handling these sticky flours. Without it, the dough becomes nearly impossible to work with, and the gluten structure weakens. I once skipped this step and ended up with a dense, gummy loaf.
Give the dough 30-60 minutes to hydrate fully before adding yeast—it makes all the difference in texture and ease of shaping.
Ignoring Hydration Levels
These flours absorb water differently than all-purpose flour, so don’t assume you can eyeball hydration. If your dough feels too dry, add water 1 tablespoon at a time until it’s just cohesive. Too wet?
Sprinkle in 1 tablespoon of flour and mix gently. I’ve had doughs that were either too sticky to shape or too stiff to rise properly—both are avoidable with patience and attention to consistency.
Underestimating Fermentation Time
The diverse flours slow fermentation, so don’t rush the 4-6 hour bulk ferment. A loaf that rises too quickly often collapses during baking. The dough should nearly double in size and show bubbles before shaping.
I once cut fermentation short and ended up with a flat, dense loaf that lacked the signature open crumb. Trust the process—this bread rewards patience with incredible flavor and texture.
Shaping Too Early
Shaping the dough too soon disrupts the gluten structure and weakens the loaf. Wait until the dough has fully fermented and shows good volume before handling. Wet your hands thoroughly to prevent sticking, and use a bench scraper if needed.
I’ve struggled with sticky doughs that tore during shaping, leading to uneven baking and a less appealing final product. Take your time—this step is crucial for a well-formed loaf.
Baking Without Steam
That Dutch oven isn’t just for aesthetics—it traps steam, which is essential for developing the bread’s open crumb. Without it, the crust will be too thick, and the interior may turn out dense. Preheat the Dutch oven for 45 minutes before baking to ensure maximum steam.
I’ve baked loaves without it, and while they were still edible, they lacked the crispy crust and airy texture that make this bread special. 💫
Nutrition facts
Frequently asked questions
Why does this recipe use so many different grains?
Each grain contributes unique texture and flavor—rye adds earthiness, barley brings chewiness, while millet and amaranth offer subtle sweetness. The combination creates a complex, nutty profile that’s far more interesting than single-grain bread. The diverse flours also improve nutrition by increasing fiber, protein, and minerals.
Can I make this without a Dutch oven?
Yes, but your crust won’t be as crispy. Use a baking stone with steam by placing a metal tray with boiling water in the oven during the first 20 minutes of baking. For best results, try a steel pan with a lid to mimic the Dutch oven’s steam retention. The crumb will still be good, but the crust will be less dramatic.
How do I store leftover slices without them getting stale?
Wrap individual slices in parchment paper, then place them in an airtight container with a slice of bread or a damp paper towel. This prevents drying while keeping them fresh for 3-4 days. For longer storage, freeze slices wrapped in parchment—they’ll stay fresh for 3 months when reheated in a toaster or oven.
What’s the best way to revive stale 12-grain sourdough?
Preheat your oven to 350°F and wrap the cold loaf in foil. Bake for 10-15 minutes until warmed through. For extra crispiness, brush with water and bake 5 minutes uncovered. The grains actually develop more flavor as the bread stales, so don’t discard it—just refresh it this way!
Can I substitute any of the specialty flours?
Yes, but with adjustments. Replace millet or amaranth with equal parts oat flour, or swap buckwheat for more rye. For chickpea flour, use white whole wheat instead—it maintains protein but changes the texture slightly. The key is maintaining the 1:1 ratio of specialty to whole wheat flours to keep the dough workable.

- 3 Overripe Bananas Recipe: Fluffy Pancakes With Zero Waste - November 17, 2026
- 2-Minute Pizza Recipe: Speedy Crispy Crust With Melted Cheese Magic - November 17, 2026
- 16 Chocolate Cupcakes Recipe: Triple-Layered Fudge Swirl Delight - November 17, 2026