
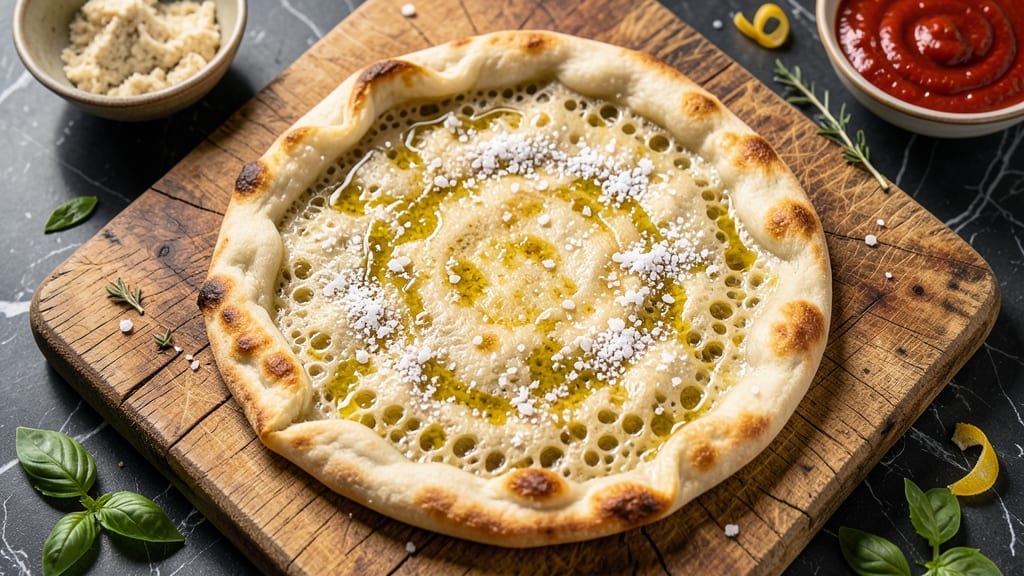
Mastering a 48-hour pizza dough recipe transforms homemade pizza into a restaurant-quality experience with minimal effort. The secret lies in slow fermentation at room temperature followed by cold proofing—this process develops deep flavor and creates that signature chewy, airy crust without requiring any kneading.
I’ve perfected this method over years of testing, and the results speak for themselves: a dough that’s impossibly stretchy yet sturdy enough to handle any toppings.
What sets this recipe apart is the zero-knead technique, which relies on time rather than physical labor to build gluten structure. After mixing flour, water, yeast, and a touch of sugar, the dough rests at room temperature for 24 hours before transferring to the refrigerator for another 24 hours.
This extended fermentation not only enhances flavor but also makes the dough easier to handle when shaping—no stiff, resistant dough here. The texture is consistently chewy on the inside with a crispy, blistered crust when baked, regardless of your skill level.
By the time you pull that pizza from the oven, you’ll have a slice that’s worth every minute of waiting: golden edges, a soft yet resilient crust, and a flavor depth that store-bought dough simply can’t match.
The dough’s improved digestibility is a bonus, making it a win for both taste and comfort. Whether you’re feeding a crowd or treating yourself to a solo meal, this method delivers foolproof results that feel like a professional secret.
Pair it with a simple marinara and mozzarella for a classic Neapolitan-style pizza, or get creative with toppings like caramelized onions, fresh basil, or spicy salami. The dough’s versatility makes it perfect for any occasion—from weeknight dinners to weekend gatherings. Here’s how to make it, step by step.
Ingredients for 48hr pizza dough
Eight essential ingredients transform ordinary flour into restaurant-quality pizza dough with just time and patience.
| Ingredient | Amount | Notes |
|---|---|---|
| All-Purpose Flour 🌾 | 4 cups | Unbleached preferred for better texture |
| Active Dry Yeast 🍞 | ¼ tsp | Ensure yeast is fresh for reliable fermentation |
| Granulated Sugar 🍚 | ¼ tsp | Feeds yeast for optimal activation |
| Warm Water 💧 | 1 ½ cups | 105-110°F for ideal yeast activation |
| Extra-Virgin Olive Oil 🫒 | ¼ cup | High-quality for authentic flavor |
| Diamond Crystal Kosher Salt 🧂 | 1 ½ tsp | Adjusts to taste after fermentation |
| Semolina Flour 🌾 | ½ cup | For dusting and enhanced crust texture |
| Cornmeal 🌽 | ¼ cup | Optional for pre-baking crust |
The flour is the foundation—King Arthur or Caputo Tipo 00 deliver the best results, but Bob’s Red Mill all-purpose works in a pinch. Yeast quality is non-negotiable: Saf-Instant or Red Star Active Dry are my go-tos, stored in the freezer for maximum freshness. Warm water temperature is critical—use a thermometer to hit 105-110°F; too hot kills yeast, too cool slows fermentation. Olive oil should be cold-pressed extra-virgin like Colavita or Bertolli for that authentic Italian flavor. Semolina and cornmeal aren’t just for show; they create that perfect crispy crust texture. I always buy semolina in bulk from Whole Foods—it’s worth the investment for serious pizza makers.
No instant yeast? Active dry yeast dissolved in warm water with sugar works identically—just let it proof for 5 minutes before mixing. Running short on olive oil? Avocado oil maintains neutral flavor, but vegetable oil can make your dough taste flat. For a lower-carb option, substitute half the flour with white whole wheat—the texture stays chewy but gains nutty depth. The salt can be omitted during fermentation but must be added before shaping—Diamond Crystal measures differently than table salt, so use the same brand consistently. If you’re gluten-sensitive, Bob’s Red Mill 1-to-1 Gluten Free Flour Blend can replace 25% of the all-purpose flour, though texture will differ slightly.
This dough improves with age—ferment longer if possible for even deeper flavor. Store the shaped dough balls in the fridge for up to 5 days or freeze for 3 months by wrapping tightly in plastic. For best results, let dough come to room temperature before shaping—transfer to the counter 1 hour before use. The semolina and cornmeal can be stored in airtight containers for 6-12 months in a cool, dark pantry. I always make a double batch: one for immediate use, one frozen for lazy pizza nights. The flavor development during cold proofing is what makes this method truly special—don’t rush it if you want that authentic Neapolitan taste.
Why You’ll Love This Recipe
- I’ll be real: the 48-hour cold rise transforms this dough into something ridiculously tender. No kneading, no stress—just mix flour, yeast, sugar, and water, let it rest, and wake up to dough that’s practically begging for sauce.
- No-Fuss Overnight Magic: I’ll be real: the 48-hour cold rise transforms this dough into something ridiculously tender. No kneading, no stress—just mix flour, yeast, sugar, and water, let it rest, and wake up to dough that’s practically begging for sauce.
- Crispy-Chewy Gold Standard: That olive oil infusion? It’s what makes this dough sing—crispy edges with a pillowy center every single time. Honestly, my kids now ask for this dough over store-bought, and I’m not ashamed to admit I’ve been known to eat a slice straight from the counter.
- Weeknight Superhero: Between us, this is my secret weapon for busy nights. Make the dough Sunday, stash it in the fridge, and by Thursday, you’ve got dinner covered. Slap on whatever toppings you’re craving—no last-minute grocery runs needed.
Step-by-step instructions for 48-Hour pizza dough
Master this zero-knead method for restaurant-quality crust with minimal effort.
Activate the Yeast and Mix the Dough
In a large mixing bowl, combine the 4 cups all-purpose flour and 1.5 tsp diamond crystal kosher salt. Create a well in the center and add the 0.25 tsp active dry yeast and 0.25 tsp granulated sugar. The sugar helps activate the yeast, so don’t skip this step even if you’re not sweet-toothed.
Pour in 1.5 cups warm water (between 105-110°F) and 0.25 cup extra-virgin olive oil. Using a wooden spoon, stir until a shaggy dough forms. You’re aiming for a sticky but workable consistency—this isn’t a traditional dough. Let the mixture sit for 5 minutes while the yeast begins its work. You’ll see bubbles forming on the surface, indicating active fermentation.
Cover and Ferment at Room Temperature
Lightly oil a large bowl with olive oil, then transfer the dough to this bowl. Cover tightly with plastic wrap or a damp kitchen towel. Place the bowl in a warm, draft-free spot (I use my oven with the light on) and let it ferment for 48 hours. This extended fermentation develops complex flavors and creates that signature chewy texture.
After 24 hours, check the dough. It should have risen significantly and developed small bubbles throughout. If it hasn’t risen much, your yeast might be inactive—try using fresh yeast or warming the environment slightly. After 48 hours, the dough will be noticeably puffy and may have spread to fill the bowl. This is perfect—don’t rush it.
Shape and Prepare for Baking
Turn the dough onto a lightly floured surface (I use semolina flour for its gritty texture). Gently fold the dough over itself 3-4 times to redistribute the gases. This step isn’t about kneading—just gently working the dough to even out the texture. Divide the dough into 4 equal portions (about 8 ounces each) and shape each into a ball.
Let the shaped dough rest for 30 minutes at room temperature. This final rest relaxes the gluten, making it easier to stretch without tearing. While the dough rests, preheat your oven to 500°F with a pizza stone or baking sheet inside. I also turn on the broiler for maximum heat.
Stretch and Bake the Pizza
Working with one ball at a time, dip your fingers in water and gently press the center of the dough to stretch it outward. Rotate the dough as you stretch, using gravity to help thin the edges. Aim for a 12-inch circle with slightly thicker edges. If the dough resists, let it rest another 5 minutes—forcing it will cause tears.
Transfer the stretched dough to a piece of parchment paper dusted with cornmeal (this prevents sticking). Top with your favorite sauce, cheese, and toppings, keeping it simple to avoid a soggy crust. Slide the pizza (with parchment) onto the preheated stone or sheet. Bake for 10-12 minutes until the crust is deep golden brown and the cheese is bubbly.
Finish and Serve Immediately
Remove the pizza from the oven and let it cool for 2 minutes before slicing. The crust should be chewy yet crisp, with a slightly charred edge from the broiler. Serve immediately while the cheese is still melty and the crust retains its perfect texture.
This dough keeps well in the refrigerator for up to 72 hours, making it ideal for meal prep. For best results, let it come to room temperature before shaping and baking. The longer it ferments, the more flavorful your pizza will be—don’t be afraid to extend the fermentation time if possible.
Pro Tips For Making 48hr Pizza Dough
- Weigh Your Flour: Skip the scooping—use a kitchen scale for the flour. A cup of all-purpose flour can vary by 20-30 grams between brands, and this dough is that sensitive to precision. I learned this after my first batch turned out either too stiff or too sticky, and now I measure every time.
- Proof the Yeast First: Before mixing everything, dissolve the yeast and sugar in warm water (not hot—think baby bath temperature) and let it foam for 5-10 minutes. If it doesn’t bubble, your yeast is dead, and you’ll waste hours waiting for a dough that never rises. Trust me, check this step.
- Stretch, Don’t Slam: When shaping the dough after bulk fermentation, gently stretch it from the center outward—not by slamming it down like you’re mad at it. This prevents tearing and gives you that silky, professional-looking crust. I used to manhandle it, and the dough would fight back with weak spots.
- Oil the Bowl Twice: Lightly coat your fermentation bowl with olive oil, then add the dough and give it another light toss of oil before covering. This keeps the dough from sticking to the sides during the long cold proof, and you won’t lose any dough clinging to the bowl when you pull it out. (Yes, I’ve done that too.)
Storing and reheating this recipe
Cold Storage Secrets
The magic of this dough lies in its cold fermentation, but proper storage extends its life without sacrificing quality. After your initial 48-hour room-temperature fermentation, transfer the dough to an airtight container lined with plastic wrap.
Store it in the refrigerator for up to 5 days—the cold slows fermentation while deepening flavor. I like using glass containers (like Pyrex) because they prevent freezer burn better than plastic. 🥫
For longer storage, freeze the shaped dough balls individually wrapped in plastic wrap and placed in a freezer bag. This keeps them fresh for up to 3 months. When ready to use, thaw overnight in the fridge—never microwave, as this kills the yeast and ruins texture.
The dough will still be cold but pliable when you’re ready to shape.
Reviving Frozen Dough
Thawing frozen dough properly is key to perfect results. Place the frozen balls in the refrigerator 24 hours before use—this gradual thaw prevents condensation buildup that can make the dough sticky.
For a quicker option, transfer the frozen dough to a sealed container and let it sit at room temperature for 4-6 hours, flipping the container occasionally. The dough should feel soft and slightly tacky when ready to shape. 🧊
If your dough feels too cold or stiff after thawing, let it sit on the counter for an additional 30-60 minutes. This extra rest time helps relax the gluten, making it easier to stretch without tearing. Avoid rushing this step—patience here prevents frustrating dough tears during shaping.
Reheating Shaped Dough
If you’ve shaped your dough but aren’t ready to bake, store the balls in an airtight container in the fridge for up to 24 hours. When ready to bake, let them sit at room temperature for 1 hour before stretching.
This prevents the dough from shrinking during baking. For a quick reheat, place shaped dough in a proofing basket or bowl lined with a damp kitchen towel—the moisture keeps the surface from drying out. 🔥
For dough that’s been refrigerated for more than 48 hours, you may need to extend the final proofing time by 15-30 minutes. The cold slows fermentation, so the dough will take longer to rise. Keep an eye on it—it’s ready when it springs back slowly when pressed gently.
Baking from Cold
One of my favorite shortcuts is baking pizza directly from the refrigerator—no need to let it come to room temperature! Simply stretch the cold dough onto parchment, add toppings, and bake as usual.
The cold dough will take 2-3 minutes longer to cook through, but the results are just as delicious. This method works particularly well for thick-crust pizzas where extra baking time enhances flavor development. 🍕
The only downside is slightly longer baking times, but the flavor payoff is worth it. For best results, preheat your oven 10 minutes longer than usual to ensure maximum heat when the pizza goes in. The broiler should still be on high for that perfect char on the crust edges.
Nutrition facts
Frequently asked questions
Why does this dough need 48 hours instead of the usual 12-24?
The extended 48-hour fermentation creates a deeper, more complex flavor through slow yeast activity. This process also develops a chewy yet airy texture that’s impossible with quick methods. The first 24 hours at room temperature builds structure, while the cold 24-hour proof enhances digestibility and improves gluten relaxation for easier stretching.
Can I use this dough for other baked goods besides pizza?
While optimized for pizza, this dough works beautifully for calzones, garlic knots, or even focaccia. The long fermentation makes it more forgiving for shaping, though you may need to adjust baking times. For calzones, bake at 375°F for 20-25 minutes until golden. The flavor improvement is worth the extra effort!
What if my dough doesn’t rise after 24 hours?
Check your yeast first—it may be expired. Try activating 0.5 tsp fresh yeast in 0.25 cup warm water with 1 tsp sugar for 5 minutes. If it foams, your original yeast was likely inactive. Also ensure your environment is 70-75°F—use an oven light or warm water bath if needed. Cold drafts or old yeast are the most common culprits.
How do I prevent my pizza crust from getting soggy?
Prevent soggy crust by baking toppings separately when possible. For wet toppings like tomatoes, pat them dry or pre-bake for 3-4 minutes before adding cheese. Use mozzarella with 30-40% fat content for proper melt. Bake on a preheated pizza stone or steel at 500°F to ensure even heat distribution. The 48-hour fermentation also makes the crust more resilient!
Can I make this dough in a bread machine?
While possible, bread machines struggle with the sticky, wet dough consistency and long fermentation. If attempting, use the dough setting with 1.5 cups water and 4 cups flour, but reduce yeast to 0.125 tsp. Monitor closely—most machines can’t handle the 48-hour process. For best results, stick to the manual method for optimal flavor development.

- 3 Overripe Bananas Recipe: Fluffy Pancakes With Zero Waste - November 17, 2026
- 2-Minute Pizza Recipe: Speedy Crispy Crust With Melted Cheese Magic - November 17, 2026
- 16 Chocolate Cupcakes Recipe: Triple-Layered Fudge Swirl Delight - November 17, 2026