
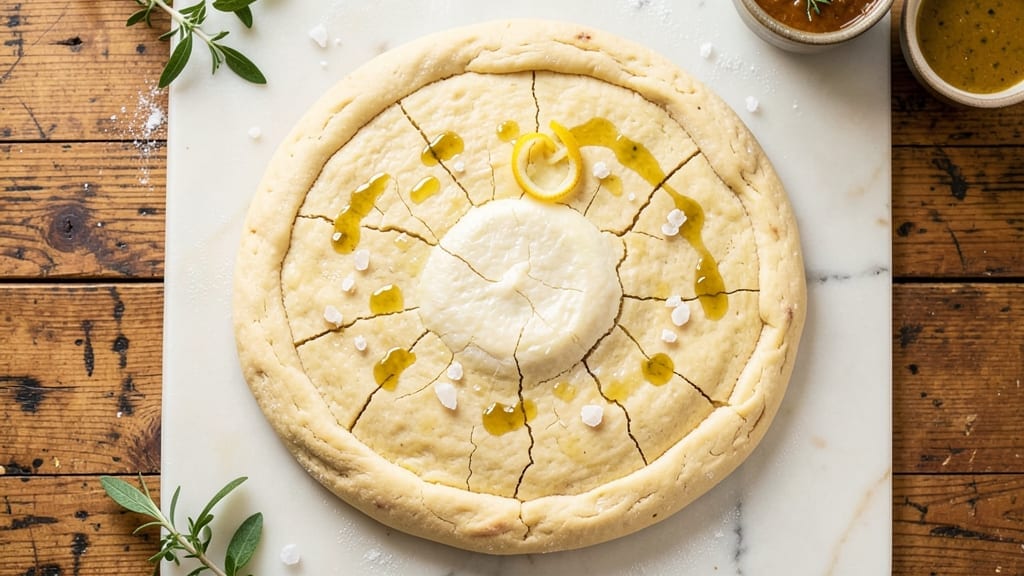
A 12-hour pizza dough recipe transforms ordinary pizza nights into a gourmet experience with its chewy, airy perfection—this isn’t your typical quick dough. The magic lies in the slow fermentation, which develops deep flavor and an ideal texture that rivals any pizzeria.
I’ve perfected this method after years of testing, and the results speak for themselves: a crust that’s crisp at the edges yet soft and pillowy inside, with just the right amount of chew. This isn’t just dough; it’s the foundation for a restaurant-quality pizza you can make at home.
The process is straightforward but requires patience—mixing, kneading, and a 12-hour cold fermentation in the fridge. This slow rise allows the gluten to relax and the flavors to meld, creating a dough that’s easier to handle and far more flavorful than anything you’d get from a quick rise.
The key is consistency: use high-protein flour, measure your ingredients precisely, and let the dough rest undisturbed. Trust the process, and you’ll end up with a dough that’s impossible to resist shaping into your favorite pizza.
Once baked, this dough delivers on every promise—golden, blistered edges, a chewy yet tender bite, and that perfect balance of crisp and soft. The long fermentation also makes it more digestible, so you can enjoy every slice without the heaviness.
Whether you’re going for a classic Margherita, a loaded meat lover’s, or a veggie-packed masterpiece, this dough is the secret weapon that elevates your pizza game. The best part? You can prep it ahead of time, so dinner is always just minutes away from delicious.
For even better results, try baking on a preheated pizza stone or in a cast-iron skillet for that signature wood-fired crust. Top with fresh mozzarella, san marzano tomatoes, and your choice of herbs for the ultimate homemade pizza experience.
This dough isn’t just a recipe—it’s a game-changer for anyone who loves pizza. Let’s get started on creating your perfect crust.
Ingredients for 12 hour pizza dough
High-protein flour and slow fermentation create restaurant-quality pizza dough at home.
| Ingredient | Amount | Notes |
|---|---|---|
| High-Protein Bread Flour 🌾 | 3 ½ cups | 12-14% protein for ideal gluten development |
| Active Dry Yeast 🍞 | ½ tsp | Ensure yeast is fresh and active |
| Granulated Sugar 🍚 | 1 tbsp | Feeds yeast for fermentation |
| Salt 🧂 | 1 ½ tsp | Kosher or sea salt preferred |
| Extra-Virgin Olive Oil 🫒 | 1 tbsp | High-quality for richness |
| Warm Water 💧 | 1 ¼ cups | 105-110°F for optimal yeast activation |
| Semolina Flour 🌾 | ½ cup | For dusting and rolling |
| Cornmeal 🌽 | ¼ cup | For pizza peel or baking sheet |
The bread flour is non-negotiable here—King Arthur or Caputo are my go-tos for that perfect chew. 12-14% protein gives you the gluten structure you need for that signature pizza texture. Yeast is your secret weapon, so check the expiration date—old yeast won’t activate properly. For the olive oil, California Olive Ranch or Bertolli are reliable brands that won’t overpower the dough. Warm water is key: too hot and you’ll kill the yeast, too cold and it won’t activate. Aim for 105-110°F—that’s about as hot as a warm bath. The sugar feeds the yeast, but don’t overdo it or your dough will rise too fast.
No high-protein flour? Bread flour blends work in a pinch, but the texture won’t be quite the same. Yeast not activating? Add 1 tsp sugar and let sit 10 more minutes. Olive oil shortage? Avocado oil or melted vegan butter keeps the flavor neutral. The semolina and cornmeal can be swapped—all-purpose flour works too, but they give that classic pizza texture. For a gluten-free version, King Arthur gluten-free flour blend is your best bet, though texture will differ. And if you’re short on time, reduce fermentation to 6-8 hours, though flavor will be less developed.
This dough is all about patience—12 hours in the fridge is ideal, but it’ll keep for up to 48 hours if you need to. Bring it to room temp before shaping, about 1-2 hours out of the fridge. For best results, portion into 16-oz balls and freeze extras for up to 3 months. The longer it ferments, the better it tastes—trust the process! Once baked, it reheats beautifully in a 350°F oven for 5-10 minutes if you have leftovers.
Why You’ll Love This Recipe
- Set-and-Forget Magic: I’ll admit it—I’m terrible at remembering to start dough early. But this 12-hour rise? It’s my lifeline. Mix it before bed, wake up to perfectly proofed dough that stretches like a dream. The high-protein flour gives it that chewy backbone without the fuss of kneading for hours.
- Oil-Infused Richness: That extra-virgin olive oil isn’t just a drizzle—it’s the secret. The dough develops a subtle depth over 12 hours, with a tender crumb and just enough fat to make every bite feel luxurious. No need for fancy additives; the sugar and yeast work together to create a flavor that’s ridiculously satisfying.
- Weeknight Superhero: Between us, this dough is my go-to for any occasion. Too tired for dinner? Toss it on a sheet pan with marinara and mozzarella—done in 15 minutes. Hosting friends? It’s the same dough, but now it’s a showstopper. The versatility is exactly what you need when life gets chaotic.
- Budget-Friendly Stretch: Honestly, this recipe saves me money in ways I didn’t expect. High-protein flour might sound fancy, but it goes far—one batch feeds four pizzas, and leftovers freeze like a champ. Plus, the yeast and sugar are cheap staples, so I’m not breaking the bank for flavor. That’s a win for my wallet and my taste buds.
Step-by-step instructions for 12-Hour pizza dough recipe
Here’s how to craft the ultimate fermented pizza dough with chewy, airy perfection—every bite will be worth the wait.
Activate the Yeast and Mix the Dough
In a large mixing bowl, combine the 1.25 cups warm water (between 105-110°F—too hot and you’ll kill the yeast) with the 1 tbsp granulated sugar and 0.5 tsp active dry yeast. Let it sit for 5-10 minutes until it becomes frothy. This tells you your yeast is alive and ready to work its magic.
Once bubbly, add the 3.5 cups high-protein bread flour and 1.5 tsp salt. Stir with a wooden spoon until a shaggy dough forms. Then add the 1 tbsp extra-virgin olive oil and mix until fully incorporated. The dough will feel sticky—this is normal, but don’t add extra flour yet. We want to develop that perfect gluten structure for that chewy, airy crust.
Knead Until Silky and Springy
Turn the dough onto a lightly floured surface and knead for 8-10 minutes by hand, or use a stand mixer with a dough hook for 5-6 minutes on medium speed. You’re looking for a smooth, elastic dough that springs back when poked. This kneading step builds the gluten network that gives pizza dough its signature chewiness and structure.
If the dough feels too sticky, wet your hands slightly and keep kneading—adding extra flour now will weaken the gluten. Once it passes the “windowpane test” (stretch a small piece thin enough to see light through), you’re ready for the next step. Shape the dough into a loose ball, place it back in the bowl, and lightly coat the top with olive oil to prevent drying.
Bulk Ferment for Maximum Flavor
Cover the bowl with a damp towel or plastic wrap and let the dough ferment at room temperature for 1 hour. After this initial rise, the dough should have doubled in size and feel puffy. This first fermentation builds flavor and develops the gluten further, setting the stage for the long cold ferment.
After the 1-hour rise, transfer the dough to an airtight container and refrigerate for 11 hours. This slow cold fermentation is what transforms ordinary pizza dough into extraordinary. The cold slows yeast activity, allowing for deeper flavor development and a more open crumb structure. Don’t skip this step—it’s what makes this dough truly special.
Shape and Rest Before Using
Remove the dough from the refrigerator and let it sit at room temperature for 1-2 hours to relax the gluten. This makes it much easier to handle and shape. Divide the dough into 4 equal portions (about 1 pound each) and shape each into a ball. Dust your work surface with 0.5 cup semolina flour to prevent sticking as you work.
To shape each ball, gently press the dough outward from the center, then roll it toward you to form a smooth, taut surface. Finish by tucking the edges under and creating a slight dimple in the center. This helps the dough expand evenly in the oven. Place the shaped dough balls on a floured surface, cover with a damp towel, and let them rest for 30 minutes before stretching. This final rest ensures you get that perfect, airy crust every time.
Stretch and Bake for Perfect Crust
Dust your work surface generously with 0.25 cup cornmeal (this prevents sticking and gives a nice texture on the crust). Stretch one dough ball at a time, starting from the center and working outward. Keep the edges slightly thicker than the center for a crispy, chewy contrast. If the dough resists, let it rest for another 5 minutes—don’t force it.
Transfer your stretched dough to a preheated pizza stone or baking sheet in a 500°F oven. Bake for 10-12 minutes until the crust is golden brown and slightly puffed. That’s your cue to add your favorite toppings and finish baking until they’re bubbly and delicious. The result? A pizza crust with the perfect balance of chewiness, airiness, and flavor—all thanks to that 12-hour fermentation.
Pro Tips For Making 12 Hour Pizza Dough
- Use Lukewarm Water: DESCRIPTION: I learned this the hard way—yeast hates extremes. Mix your yeast with water that’s around 105°F (40°C), not boiling or ice cold. Too hot kills it instantly; too cold makes it sluggish. Stick your finger in: if it feels warm but not hot, you’re golden.
- Knead Less, Stretch More: DESCRIPTION: The 12-hour cold ferment does most of the work, but don’t skip shaping entirely. After bulk fermentation, do 2-3 gentle stretches and folds—just enough to wake up the gluten. Over-kneading now ruins the tender crumb you’re waiting 12 hours for.
- Oil the Bowl First: DESCRIPTION: Coat your mixing bowl with olive oil (about 1 tablespoon) before adding the dough. This prevents sticking and makes turning the dough easier later. I used to skip it, and half my dough would tear when I tried to flip it.
- Divide Before Cold Proof: DESCRIPTION: Split your dough into portions before the final cold proof. Smaller balls (12-16 oz) shape better and crisp faster. Use a kitchen scale—eyeballing leads to uneven sizes, which means uneven baking. (Yes, even if you’re impatient like me.)
Wine and beer pairings for this 12 hour pizza dough
Italian Whites
For your fermented pizza dough, Italian whites like Pinot Grigio or Vermentino are perfect companions. The crisp acidity and citrus notes of these wines cut through the richness of the dough while complementing the tangy tomato sauce.
I love pairing my pizza with a chilled glass of Santa Margherita Pinot Grigio—it’s light enough to let the pizza shine but adds a refreshing contrast. 🍷
Crisp Lagers
If you prefer beer, a crisp Italian lager like Peroni or Moretti is ideal. The subtle malt sweetness and light carbonation balance the savory flavors of the pizza without overpowering it.
For a craft option, try a Belgian witbier like Hoegaarden, which adds a touch of spice and citrus that pairs beautifully with the fermented dough’s depth.
Red Wine Options
If you’re serving a meatier pizza, a light red like Chianti or Sangiovese works wonders. The bright acidity and earthy notes of these wines stand up to rich toppings like pepperoni or sausage.
I recommend a Chianti Classico—its medium body and herbal undertones enhance the pizza’s flavors without dominating. 🍷
Non-Alcoholic Pairings
Don’t drink alcohol? No problem! A sparkling San Pellegrino Aranciata or Fanta Orange> adds a citrusy zing that cleanses the palate between bites. For something more substantial, try a sparkling blood orange soda>—the sweet-tart flavor contrasts beautifully with the savory dough and tangy toppings.
Seasonal Beer Twists
Summer calls for a light Italian pilsner>, while fall pairs well with a dark Belgian dubbel>. In winter, a malty amber ale> adds warmth to complement heartier toppings.
The key is matching the beer’s body and flavor profile to your pizza’s intensity—lighter beers for lighter pizzas, bolder beers for loaded creations.
Nutrition facts
Frequently asked questions
Can I use all-purpose flour instead of high-protein bread flour?
The recipe calls for high-protein bread flour (12-14% protein) to achieve that signature chewy, airy texture. All-purpose flour (10-11% protein) will work, but your crust may be less chewy and more fragile. For best results, stick with bread flour or a bread flour blend. If you must substitute, add 1 extra tablespoon of vital wheat gluten per cup of all-purpose flour to boost protein content.
What if my dough doesn’t rise after the 12-hour fermentation?
If your dough hasn’t visibly expanded after 12 hours, it’s likely due to dead yeast or cold temperatures. First, check your yeast was fresh—old yeast won’t activate. Try placing the dough in a slightly warmer spot (like near the oven with the light on) for 1-2 hours. If it still doesn’t rise, start over with fresh yeast and warm water (105-110°F). The cold fermentation is crucial for flavor, but the dough must show some activity before shaping.
How do I prevent my pizza dough from sticking while stretching?
Generously dust your work surface with semolina flour or cornmeal—these create a non-stick barrier better than all-purpose flour. Use your fingers to gently stretch the dough from the center outward, keeping the edges slightly thicker. If it still sticks, wet your hands slightly and let the dough rest 5 more minutes uncovered. Never force it—patience prevents tearing!
Can I freeze this pizza dough for later use?
Shape the dough into balls, wrap tightly in plastic wrap, then place in a freezer bag. Frozen dough keeps for up to 3 months. To use, thaw overnight in the fridge, then let it sit at room temperature for 1-2 hours before shaping. For best results, bake directly from frozen (add 2-3 extra minutes to baking time). The long fermentation actually improves as it thaws—flavor deepens over time!
Why does my crust turn out dense instead of chewy?
Dense crusts usually mean over-kneading, under-fermenting, or adding too much flour. Check these: 1) Knead only until smooth (no need to overwork), 2) Ensure full 12-hour cold fermentation (flavor and texture develop during this time), and 3) Avoid extra flour—the dough should be sticky but manageable. If you rushed the fermentation, try extending it to 16-24 hours next time for better gluten relaxation.

- 3lb Prime Rib Roast Recipe: Juicy Pink Center Guaranteed in 3 Hours - October 31, 2026
- 5 Spice Cake Recipe: Warmly Spiced Layers With Crunchy Top - October 31, 2026
- 1950’s Macaroni and Cheese Recipe: Nostalgic Creamy Cheese Sauce with Buttery Noodles - October 31, 2026