
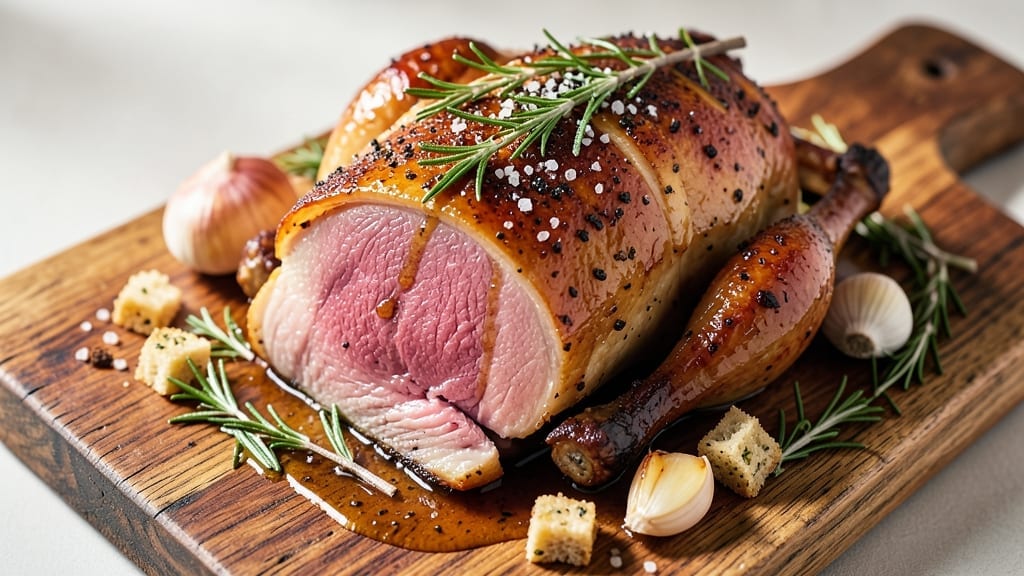
A 12-hour turkey recipe transforms a simple bird into a showstopping centerpiece—juicy, golden, and packed with flavor that develops over time. The secret lies in slow roasting, which breaks down collagen for melt-in-your-mouth tenderness while rendering fat into crispy, flavorful skin.
I’ve perfected this method after years of testing, and the results speak for themselves: a turkey so delicious, guests will ask for seconds.
This approach starts with a dry brine (no messy liquid spill!) that seasons the bird deeply while keeping it moist. The turkey roasts low and slow, basted occasionally with its own juices, until the internal temperature reaches 165°F—guaranteed to be perfectly cooked through.
The long cook time allows spices and herbs to infuse every bite, creating a depth of flavor you won’t find in quicker methods.
By the time you carve, you’ll have a turkey so tender it falls apart with minimal effort, with skin that’s crispy enough to stand up to gravy. The juices will flow freely, and the aroma will fill your home like a holiday feast.
This isn’t just dinner—it’s an experience. Serve with classic sides like roasted vegetables or a rich gravy to complete the meal.
Whether you’re hosting a gathering or treating yourself to a special meal, this method delivers restaurant-quality results at home. The key is patience—12 hours of cooking pays off in a turkey that’s impossible to resist. Let’s get started on creating your perfect bird.
Ingredients for 12 hour turkey
Here’s what transforms a simple turkey into a showstopping centerpiece—just 13 ingredients for perfection.
| Ingredient | Amount | Notes |
|---|---|---|
| Fresh Whole Turkey 🦃 | 12 lb | 12-14 lb bird, giblets removed |
| Kosher Salt 🧂 | ½ cup | Diamond Crystal preferred (less iodine) |
| Freshly Ground Black Pepper 🌶️ | 2 tbsp | Freshly cracked for best flavor |
| Fresh Rosemary 🌿 | ¼ cup | Chopped sprigs, stems removed |
| Fresh Thyme 🌿 | ¼ cup | Leaves only, stems removed |
| Garlic Cloves 🧄 | 8 cloves | Smash lightly before applying |
| Olive Oil 🫒 | ¼ cup | Extra-virgin for basting |
| Unsalted Butter 🧈 | ½ cup | Cold, cubed for basting |
| Fresh Sage Leaves 🌿 | ¼ cup | Whole leaves, loosely packed |
| Onion Powder 🧅 | 1 tbsp | For dry rub blend |
| Ground Cinnamon 🌶️ | 1 tsp | For subtle sweetness |
| Apple Cider Vinegar 🍎 | 1 tbsp | For skin crisping |
| Vegetable Oil 🫒 | 2 tbsp | For pan coating |
The turkey is everything here. Costco or Whole Foods have the best selection for a 12-14 lb bird—look for good marbling and a vibrant color. I always buy mine 2 days ahead so it can chill uncovered in the fridge, which helps the dry brine work its magic. The giblets? Toss them. You want pure meat, no surprises. Fresh herbs matter too—farmers market rosemary and thyme have that bright, aromatic punch that supermarket bundles can’t match. If you’re using dried, use half the amount, but honestly, fresh is worth the extra minute of chopping.
No fresh herbs? Dried works at half the quantity, but the flavor won’t be the same. Short on butter? Olive oil or avocado oil works for basting, though butter gives that rich, golden finish. The apple cider vinegar might seem odd, but it’s the secret to that crispy skin—substitute lemon juice if that’s what you’ve got. For the dry rub, if you don’t have cinnamon, skip it—it’s just a subtle touch. The onion powder is non-negotiable though; it’s the base that makes everything sing. And whatever you do, don’t skip the kosher salt—Diamond Crystal if you can find it, but any kosher salt will do.
Turkey can stay in the fridge for 2 days uncovered before roasting—this helps the dry brine penetrate deeply. Herbs keep best wrapped in damp paper towels for 5 days. The basting butter should be cold when you start—soften it slightly before using. Leftovers? This turkey reheats beautifully—350°F for 20 minutes covered with foil—though honestly, it’s so good you’ll probably eat it all the first day. Store in the fridge for 3-4 days or freeze portions for up to 3 months.
Why You’ll Love This Recipe
- Herb-Packed Magic: That simple rub of fresh rosemary and thyme? It’s the secret. The turkey doesn’t just taste seasoned—it smells like a holiday feast from the moment you open the oven. (Between us, I’ve been known to sneak bites straight from the pan.)
- Weeknight or Holiday: Same recipe, endless occasions. Need a crowd-pleaser for Thanksgiving? Done. Craving an impressive dinner with zero fuss? Still done. The 12-hour cook turns a whole turkey into a stress-free centerpiece—no one will guess it’s this easy.
- Leftovers That Don’t Suck: Honestly, the best part. This turkey stays moist for days, so you’re not stuck with dry, sad slices. Sandwiches? Turkey pot pie? Hearty salads? It’s the ultimate pantry hero—no waste, just flavor. (My kids beg for the leftovers first.)
Step-by-step instructions for slow-roasted turkey
Here’s how to transform your turkey into a juicy, golden masterpiece over 12 hours.
Prepare and Season the Turkey
Start by removing the turkey from the refrigerator and letting it sit at room temperature for 1 hour before seasoning. This ensures even cooking throughout. Pat the turkey completely dry inside and out with paper towels—this is crucial for crispy skin. I can’t stress this enough: moisture is the enemy of that perfect golden crust.
In a small bowl, combine the 0.5 cup kosher salt, 2 tablespoons freshly ground black pepper, 1 tablespoon onion powder, and 1 teaspoon ground cinnamon. Rub this dry mixture all over the turkey, including inside the cavity. Then stuff the cavity with the 0.25 cup chopped fresh rosemary, 0.25 cup fresh thyme leaves, and 8 smashed garlic cloves. This aromatic blend will infuse the meat while it roasts.
Create the Basting Mixture
In a small saucepan, combine the 0.25 cup extra-virgin olive oil, 0.5 cup cold unsalted butter, 0.25 cup fresh sage leaves, and 1 tablespoon apple cider vinegar. Heat over low heat until the butter melts completely, but don’t let it brown. Remove from heat and let cool slightly. This mixture will keep the turkey moist and create that beautiful sheen on the skin.
Here’s the thing—this basting mixture is what makes the difference between dry turkey and showstopping perfection. The vinegar helps tenderize the skin, while the herbs add depth of flavor. Keep this mixture at room temperature until ready to use.
Set Up for Slow Roasting
Preheat your oven to 275°F—this low temperature is key for even cooking without drying out the meat. Place the turkey on a rack in a roasting pan, breast-side up. Pour the 2 tablespoons vegetable oil into the bottom of the pan to catch drippings and prevent burning.
Roast the turkey for 12 hours, basting with the herb mixture every 2 hours. I know it seems like a long time, but this slow approach ensures the turkey cooks evenly from the bone out. The skin should gradually turn golden brown, and you’ll notice the juices running clear when you check the thickest part of the thigh with a meat thermometer.
Finish with High Heat for Crispy Skin
After 12 hours, remove the turkey from the oven and increase the temperature to 425°F. Return the turkey to the oven and roast for an additional 20-30 minutes until the skin is deep golden brown and crispy. This final high-heat step creates that beautiful crust while keeping the meat perfectly juicy.
You’ll know it’s done when the internal temperature reaches 165°F in the thickest part of the thigh. The turkey should have a rich, golden color and that irresistible aroma that fills your whole house. Let it rest for 30 minutes before carving—this resting time allows the juices to redistribute throughout the meat.
Carve and Serve
Using a sharp carving knife, carefully slice the turkey against the grain into ½-inch thick slices. The meat should be fork-tender and juicy, with crispy skin that shatters slightly. Serve immediately with your favorite sides and watch as everyone raves about your perfectly roasted turkey.
This method guarantees a turkey that’s juicy, flavorful, and crispy—everything you want from your holiday centerpiece. The long cook time might seem intimidating, but it’s worth it for that restaurant-quality result.
Pro Tips For Making 12 Hour Turkey
- Start Cold, Then Roast: I used to skip this step, and my turkey always ended up dry by the time it hit the 165°F mark. Instead, pull it from the fridge 2 hours before roasting—this evens out the internal temperature and lets the spices cling better. Trust me, that first hour at 325°F will thank you.
- Salt the Cavity Generously: Don’t be shy with kosher salt—pack the cavity with at least 1 tablespoon of salt plus the herbs, then tie the legs loosely. The salt draws out moisture, which then reabsorbs during cooking, keeping the meat juicy. (Yes, even if it looks like you’re overdoing it.)
- Skip the Pan Under the Turkey: I learned this the hard way—adding water or veggies to the pan just turns your roasting pan into a soup bath. Instead, place the turkey directly on a rack over a sheet tray. This guarantees crispy skin and lets heat circulate properly, not pool at the bottom.
- Baste with Butter, Not Pan Juices: After 6 hours, pull the turkey out and baste it with a mix of melted butter, minced fresh rosemary, and a pinch of black pepper. The butter adds richness and helps lock in moisture—far better than sloshing around the pan’s dry juices. (Pro tip: Use a pastry brush for even coverage.)
Essential equipment for this recipe
Oven Essentials
Your oven is the heart of this recipe, so invest in a reliable model with even heat distribution. I use my Breville Smart Oven Air Fryer for its precise temperature control, but any oven with a broiler function works.
Calibrate your oven thermometer—I’ve seen home ovens off by 25°F! For the 12-hour cook at 275°F, place a baking sheet on the lower rack to catch drippings and prevent flare-ups. 🔥
Roasting Pan
A heavy-duty roasting pan with a rack is non-negotiable. I swear by the All-Clad Stainless Steel Roasting Pan—it’s durable, conducts heat evenly, and elevates the turkey for crispy skin on all sides.
Avoid thin pans; they warp under a 12-lb turkey and can cause uneven cooking. Line the bottom with aluminum foil for easy cleanup, but leave the rack bare for airflow.
Meat Thermometer
Never guess—accuracy is everything. My go-to is the ThermoWorks Smoke thermometer with dual probes: one for the oven and one for the turkey’s thickest part (thigh). Insert it into the meat without touching bone—aim for the 165°F mark.
A cheap pop-up thermometer won’t cut it here; you need precision for a 12-hour cook. Pro tip: Check the temperature in three spots to ensure even doneness. 🌡️
Basting Brush
A high-quality baster brush makes all the difference. The OXO Good Grips Silicone Basting Brush holds enough basting mixture to coat the turkey thoroughly without dripping. Avoid metal brushes—they can scratch the skin.
Keep your basting mixture warm (but not hot) in a small saucepan on the stove while roasting. I baste every 2 hours, which takes about 30 seconds per side.
Carving Tools
Carving a 12-lb turkey requires sharp, sturdy tools. My setup includes a Dexter-Russell 12-inch carving knife (for slicing) and a sharpening steel to keep the edge razor-sharp.
A carving fork stabilizes the turkey while you slice. If you’re nervous about carving, practice on a smaller turkey first—confidence makes all the difference. 💪
Optional: Smoker Setup
For a smoky twist, use a pellet smoker like the Traeger Pro 575 instead of the oven. Maintain 225°F for 12 hours, then finish with a 425°F sear. Add hickory or applewood pellets for depth.
If smoking, skip the oven’s broiler step—smoke until 165°F internal temp, then rest. The result? A turkey with a smoky crust and ultra-tender meat. 🌳
Nutrition facts
Frequently asked questions
Why does this recipe take 12 hours instead of the usual 3-4?
The extended cook time transforms the turkey into something extraordinary. At 275°F, the collagen breaks down slowly, creating melt-in-your-mouth tenderness while rendering fat into crispy, flavorful skin. This method also allows spices and herbs to infuse deeply, resulting in a turkey with complex, restaurant-quality flavor that short roasts can’t achieve.
Can I use a smaller turkey for this recipe?
While this recipe is designed for a 12-14 lb turkey, you can adapt it for smaller birds by reducing the cook time proportionally. For a 8-10 lb turkey, aim for 8-10 hours at 275°F, then finish with the 425°F sear. Just monitor the internal temperature closely—it should still reach 165°F in the thickest part.
What if my oven doesn’t go below 275°F?
No problem! If your oven’s lowest setting is higher, adjust by reducing the cook time slightly. For example, at 300°F, cook for 10-11 hours instead of 12. The key is maintaining a low temperature to prevent drying out. Just increase the final sear time by 5-10 minutes to ensure crispy skin. Always use a meat thermometer to check doneness.
How do I prevent the turkey from drying out during the long cook?
The basting mixture is your secret weapon! Every 2 hours, brush the turkey with the warm herb butter blend to keep it moist. Also, avoid opening the oven door frequently—each time you do, you lose 30°F of heat. If your turkey starts browning too quickly, tent it loosely with foil. The dry brine also helps retain moisture from the inside out.
Can I make this turkey ahead of time?
This turkey actually tastes better the next day. Let it cool completely, then refrigerate uncovered for 24 hours to let flavors meld. Reheat at 325°F for 1 hour covered with foil, then 15 minutes uncovered to crisp the skin. The meat will be even more tender and flavorful. Perfect for meal prep!

- 6 Egg Cake Recipe with Oil: Light as Air With Buttery Moisture - October 4, 2026
- 4 Bean Casserole Recipe: One-Pan Heartiness With Smoky Paprika Depth - October 4, 2026
- 3-Ingredient Keto Mug Cake Recipe: Microwave Magic in 2 Minutes - October 4, 2026