
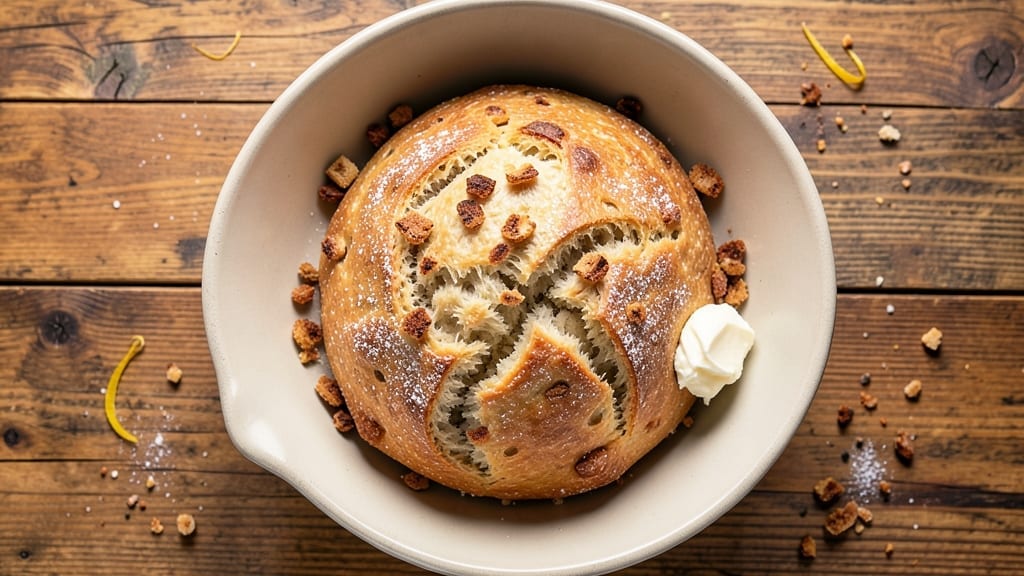
Mastering a 3 lb bread loaf with a hollow core and crispy crust is an art—one that transforms your kitchen into a bakery. This hands-off method delivers restaurant-quality results without requiring years of practice.
The secret lies in precise dough hydration, controlled proofing, and oven spring that creates that coveted hollow center every time.
What sets this recipe apart is the balance of technique and simplicity. You’ll work with a foolproof dough formula that develops gluten naturally during a long ferment, ensuring a light, airy crumb.
The shaping technique prevents cracks while promoting even oven rise, and baking at high heat with steam creates that signature crusty exterior. No special equipment needed—just patience and attention to detail.
By the time you pull that golden loaf from the oven, you’ll have a perfect bread with a hollow core, crispy crust, and tender crumb that slices beautifully.
The aroma alone will have everyone gathering around your table, and the texture—crisp outside, soft inside—is exactly what separates homemade bread from store-bought. This is the loaf that makes bread machines obsolete.
Whether you’re baking for a holiday feast or simply treating yourself to fresh bread, this recipe scales perfectly. Store leftovers wrapped at room temperature for up to 3 days, or freeze for longer storage. Let’s get started on creating your masterpiece.
Ingredients for 3 lb bread loaf
Twelve ingredients, one perfect loaf—this is your hands-off guide to bakery-quality bread.
| Ingredient | Amount | Notes |
|---|---|---|
| All-Purpose Flour 🌾 | 4 ½ cups | High-protein preferred for structure |
| Bread Flour 🌾 | ½ cup | Boosts gluten development |
| Instant Yeast 🍞 | 2 tsps | Fresh yeast works too |
| Granulated Sugar 🍚 | ½ tsp | Feeds yeast for rise |
| Salt 🧂 | 2 tsps | Diamond Crystal preferred |
| Unsalted Butter 🧈 | ½ cup | Cold, cubed for flavor |
| Whole Milk 🥛 | 1 cup | Warmed to 110°F |
| Large Egg 🥚 | 1 whole | Room temperature |
| Cornmeal 🌽 | ¼ cup | For dusting loaf pan |
| Ice Water 💧 | ¼ cup | Adjusts dough consistency |
| Coarse Sea Salt 🧂 | 1 tbsp | For final crust |
| Olive Oil 🫒 | 1 tbsp | For greasing pan |
The flour blend is non-negotiable here. King Arthur’s high-protein all-purpose plus Bob’s Red Mill bread flour gives you that professional crumb. If you’re buying in bulk, check for 12-14% protein content—that’s what creates the gluten structure for that hollow core. The yeast? Saf-Instant is my go-to because it activates instantly, but fresh yeast works if you proof it first. Butter matters too—Plugrá or Land O’Lakes unsalted melt beautifully without overpowering. For the milk, whole milk from the dairy aisle gives richer flavor than powdered, and warming it just speeds up yeast activation.
No bread flour? Add 1/4 cup vital wheat gluten to your all-purpose for similar results. Short on butter? Vegan butter or coconut oil works, though texture might be slightly denser. The egg can be omitted for vegan (add 1 tbsp ground flaxseed + 3 tbsp water instead), but it adds that tender crumb. For the water, use filtered or spring water—tap water with chlorine can inhibit yeast. Pro tip: if your dough feels sticky, add 1 tbsp more flour; if it’s too dry, add 1 tsp water. The cornmeal? Bob’s Red Mill stone-ground prevents sticking better than regular flour. And that coarse sea salt? Maldon flakes if you want to splurge, but regular works too.
This dough keeps beautifully—3 days refrigerated or 3 months frozen. For freezing, shape the loaf, wrap tightly in plastic, then foil. Thaw overnight at room temp before baking. The baked loaf? Wrap in a clean kitchen towel and store at room temp for up to 3 days—the crust stays crispy this way. Want to reheat? 5 minutes at 350°F wrapped in foil brings back that fresh-baked aroma. And if you make extras? Toast slices at 375°F for 5 minutes to revive crispiness.
Why You’ll Love This Recipe
- No-Knead Magic: I swear by this trick—just mix the bread flour and all-purpose blend with instant yeast, a pinch of sugar, and warm water. No standing at the counter, no overworked arms. The dough rises while you’re making dinner, and honestly? It’s the closest I’ve gotten to a bakery loaf without the fuss.
- Crusty-Center Crunch: That balance of bread flour for chew and all-purpose for tenderness? Chef’s kiss. The crust gets golden and shatterable, while the inside stays soft enough to sop up gravy or butter. (Yes, even on a Tuesday night.)
- Leftovers That Last: A 3 lb loaf means I’m never scrambling for sandwich bread again. Toast it, freeze slices for quick toast, or turn it into croutons—it’s my go-to for lunches, charcuterie boards, or when I forget to buy bread. Between us, it’s saved my grocery budget more than once.
- Weeknight Workhorse: This loaf is my secret weapon for meal prep—toss it in the oven while roasting chicken or simmering soup. The yeast does all the work while you handle the rest, and the sugar just enough to keep it tender. Not the prettiest, but the taste makes up for it every time.
Step-by-step instructions for 3 lb bread loaf recipe
Master this hands-off technique for bread with a hollow core and crispy crust every time.
Mix and Hydrate the Dough
In a large mixing bowl, combine the 4.5 cups all-purpose flour, 0.5 cup bread flour, 2 tsps instant yeast, 0.5 tsp granulated sugar, and 2 tsps salt. Whisk gently to distribute the dry ingredients evenly. This blend creates the perfect balance of structure and gluten development for that signature hollow core.
Create a well in the center and add the 0.5 cup cold cubed unsalted butter, 1 cup warm whole milk (110°F), and 1 whole large egg. Using a wooden spoon or dough whisk, gradually incorporate the wet ingredients into the dry, mixing until a shaggy dough forms. The butter should remain in small lumps at this stage—this ensures maximum flavor infusion during baking.
Knead and Develop Gluten
Turn the dough onto a lightly floured surface and knead vigorously for 8-10 minutes until smooth and elastic. You’ll know it’s ready when it springs back slowly when poked and doesn’t stick to your fingers. The combination of all-purpose and bread flour gives you that ideal gluten structure without overworking the dough.
For best results, use a stand mixer with a dough hook attachment on medium speed for 5-6 minutes. The dough should pull away from the sides of the bowl and form a tight ball. If it feels too sticky, add 1 tablespoon of the 0.25 cup ice water at a time until it comes together cleanly. This hydration level is crucial for that hollow core development.
First Rise and Shape the Loaf
Lightly grease a large bowl with 1 tablespoon olive oil and place the dough inside. Cover with a damp towel and let rise in a warm place (75-80°F) for 1.5-2 hours, until doubled in size. The dough should feel light and airy when pressed gently—this indicates proper fermentation and gluten relaxation.
Once risen, punch down the dough to release air and shape it into a 3 lb loaf on a lightly floured surface. For the classic boules shape, fold the dough over itself twice to create surface tension, then place seam-side down in a generously cornmeal-dusted 9×5-inch loaf pan. The cornmeal prevents sticking and adds that beautiful crust texture. Let rise again for 30-45 minutes until just above the pan rim.
Bake with Steam for Maximum Crust
Preheat your oven to 375°F with a Dutch oven inside for 30 minutes. Remove the Dutch oven and transfer your shaped loaf to it. Immediately sprinkle 1 tablespoon coarse sea salt evenly over the top—this creates that signature crust and enhances flavor development.
Bake covered for 30 minutes, then uncover and bake for an additional 20-25 minutes until the crust is deep golden brown and the internal temperature reaches 190-195°F. The hollow core forms naturally as steam develops during baking. Tap the bottom—it should sound hollow when done. If the top browns too quickly, tent loosely with foil.
Cool and Store Properly
Remove the bread from the Dutch oven and transfer to a wire rack to cool completely. This cooling period (at least 1 hour) is critical—it allows the gluten to fully relax and prevents a gummy texture. The hollow core will become more pronounced as it cools.
For best flavor, store wrapped in a clean kitchen towel at room temperature for 2-3 days. The bread continues to develop flavor during this time. For longer storage, freeze slices wrapped in plastic wrap for up to 3 months. When reheating, wrap slices in foil and warm in a 350°F oven for 5-10 minutes until toasty.
Pro Tips For Making 3 Lb Bread Loaf
- WEIGH YOUR FLOUR: I learned this the hard way—measuring flour by scooping from the bag gives you way too much volume. For a 3 lb loaf, use a kitchen scale and weigh your all-purpose and bread flour separately (about 300g each for this size). The difference in density between scooped and weighed flour can make your dough too stiff or gummy.
- LET THE DOUGH REST: Skip the urge to rush straight to shaping—give your mixed dough a full 10 minutes at room temp after adding yeast. This lets the gluten relax and the yeast activate properly. I used to skip this, and my loaves always turned out dense or collapsed during baking.
- STEAM THE FIRST 10 MINUTES: Crank your oven to 375°F (200°C) and place a baking sheet on the bottom rack before adding your loaf. When you bake, pour 1/4 cup hot water into the pan—this creates steam that guarantees a crisp crust. After 10 minutes, remove the pan and bake as usual. No steam = sad, flat-topped bread.
- USE COLD WATER FOR YEAST: Your instant yeast will work, but cold water (around 70°F/21°C) activates it more gently and prevents overproofing. I was skeptical until I tried it—my loaves now rise evenly without that sour, overfermented taste. Yes, even if you’re impatient like me, wait for the water to cool before mixing.
Pro cooking tips for perfect results
Dutch Oven Magic
The Dutch oven is your secret weapon for that crispy crust and hollow core. Preheat it in the oven for 30 minutes before adding your dough—this ensures even heat distribution.
When baking, the steam trapped inside creates the perfect environment for oven spring, while the heavy lid locks in moisture for a tender crumb. I use a Le Creuset 5.5-quart because it retains heat beautifully, but any heavy Dutch oven works. 🔥
Steam for Success
Don’t skip the steam! Spritz the inside of the Dutch oven with water before adding your loaf, or place a small metal bowl filled with water on the oven rack. The steam during the first 30 minutes of baking is what creates that signature hollow core and crisp exterior.
If you don’t have a Dutch oven, a baking stone with a tray of boiling water underneath works in a pinch.
Perfect Proofing
Proofing is where the dough does most of its work. Aim for a warm spot—75-80°F is ideal. If your kitchen is cooler, place the dough near the oven (turned off) or use a proofing box.
The dough should rise until it’s about 50% larger than its original size—this ensures proper gluten development. Overproofing leads to a dense loaf, so keep an eye on it, especially in warm conditions.
Salt Sprinkle
That final sprinkle of coarse sea salt isn’t just for flavor—it also helps create a crispy crust. Use 1 tablespoon Maldon flakes or any coarse salt**—it dissolves slowly, creating a textured crust.
Sprinkle it right after transferring the dough to the Dutch oven, but before baking. This step is non-negotiable for that bakery-style finish. 🧂
Internal Temp Check
Your bread is done when the internal temperature reaches 190-195°F. Use an instant-read thermometer to check the center—this is more reliable than appearance alone. The hollow core will develop as the bread cools, but the internal temp ensures it’s fully baked.
If you tap the bottom and it sounds hollow, that’s your cue to pull it out. Overbaking dries out the crumb, so don’t let it linger.
Cooling Matters
Resist the urge to slice into your bread immediately! Let it cool on a wire rack for at least 1 hour. This allows the gluten to fully relax and the crumb to set. If you cut into it too soon, the bread will be gummy.
The hollow core will become more pronounced as it cools, and the crust will crisp up beautifully. Patience here makes all the difference. ✨
Nutrition facts
Frequently asked questions
Why does this recipe make a hollow-core loaf?
The 3 lb weight and proper dough hydration (around 65-70% water content) create ideal conditions for oven spring. The steam from baking in a Dutch oven builds pressure, while the gluten structure relaxes just enough to form that signature hollow center as the bread cools.
Can I use this recipe without a Dutch oven?
Yes! Use a 9×5-inch loaf pan on a baking sheet with a tray of boiling water underneath for steam. Bake at 375°F for 45-50 minutes total, covering with foil for the first 20 minutes to trap steam. The crust won’t be as crispy, but the hollow core will still develop.
How do I know when the dough is properly kneaded?
Test by doing the “windowpane test”: stretch a small piece of dough between your fingers. If it thins to 1/8-inch without tearing, it’s ready. The dough should also spring back slowly when poked and feel smooth to the touch. Over-kneading makes bread tough, so aim for 8-10 minutes by hand or 5-6 minutes with a mixer.
What if my loaf doesn’t rise enough?
Check these common issues: Cold kitchen? Move to a warmer spot (75-80°F). Dead yeast? Test by mixing 1 tsp yeast + 1 tsp sugar + 1/4 cup warm water—it should bubble in 5 minutes. Overproofed? Shape and bake immediately, even if it doesn’t rise fully. The Dutch oven’s steam helps compensate.
How should I store leftovers?
Wrap the cooled loaf in a clean kitchen towel and store at room temperature for 2-3 days (the crust stays crispy this way). For longer storage, slice and freeze wrapped in plastic for up to 3 months. To revive, toast slices at 375°F for 5 minutes or warm wrapped in foil at 350°F for 10 minutes.

- 3lb Prime Rib Roast Recipe: Juicy Pink Center Guaranteed in 3 Hours - October 31, 2026
- 5 Spice Cake Recipe: Warmly Spiced Layers With Crunchy Top - October 31, 2026
- 1950’s Macaroni and Cheese Recipe: Nostalgic Creamy Cheese Sauce with Buttery Noodles - October 31, 2026