
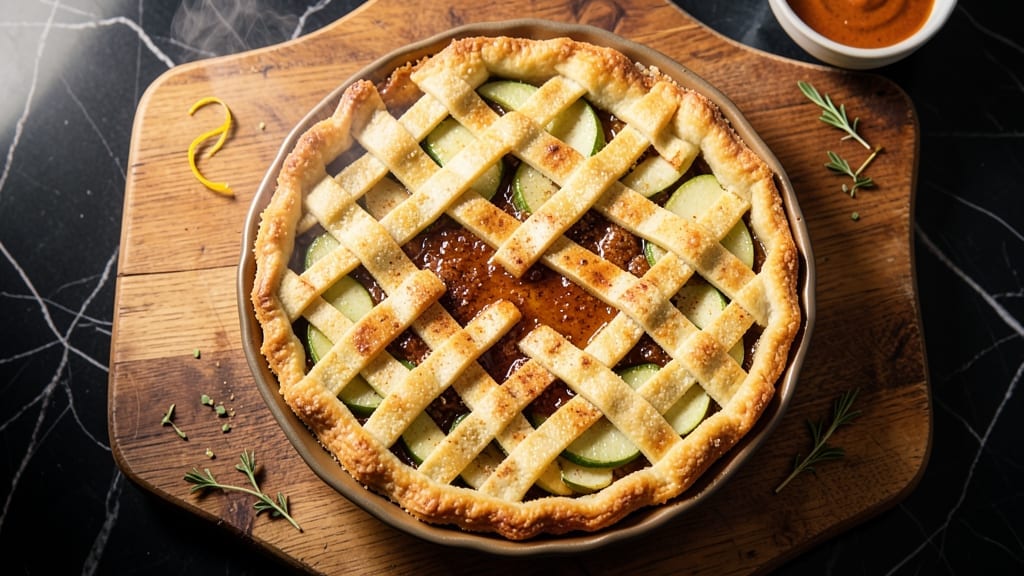
This 13×9 apple pie recipe delivers the perfect balance of crusty crunch and spiced filling without requiring pie slices—just a single sheet pan. After years of testing, I’ve perfected a method that ensures even browning, tender apples, and a flaky crust every time.
The secret lies in using a double-crust approach that fits perfectly in a standard sheet pan, eliminating the need for specialized equipment.
What sets this recipe apart is the foolproof technique for handling apples: peeling and slicing them uniformly ensures even cooking, while a mix of cinnamon, nutmeg, and brown sugar creates that signature warm spice flavor.
The crust, whether homemade or store-bought, gets a butter brush before baking to guarantee that golden, crispy edge we all crave. No more soggy bottoms or uneven baking—just a restaurant-quality pie that’s easier to make than you’d expect.
By the time it emerges from the oven, you’ll have a glossy, caramelized top with a filling that’s just soft enough to melt in your mouth. The aroma alone will have everyone gathering in the kitchen, and the first slice will be worth the wait.
This isn’t just dessert—it’s the kind of pie that turns ordinary gatherings into memorable moments.
Whether you’re hosting a holiday dinner or just craving a classic treat, this 13×9 apple pie is the answer. The best part? It’s versatile enough for any occasion—serve it warm with vanilla ice cream or let it cool for clean slices the next day. Ready to bake?
Ingredients for 13×9 apple pie
Pantry staples meet seasonal apples for a foolproof pie that fits one sheet pan.
| Ingredient | Amount | Notes |
|---|---|---|
| Unsalted Butter 🧈 | 1 cup | Cold, cubed for crust |
| All-Purpose Flour 🌾 | 2 ½ cups | Plus 1 tbsp for brushing |
| Granulated Sugar 🍚 | 1 ½ cups | For crust and filling |
| Brown Sugar 🍚 | ½ cup | Packed, for filling |
| Granny Smith Apples 🍎 | 6 medium | Peeled, sliced 1/4-inch thick |
| Ground Cinnamon 🌿 | 2 tbsp | Plus 1 tsp for filling |
| Ground Nutmeg 🌿 | 1 tsp | Freshly grated preferred |
| Large Eggs 🥚 | 1 whole | Cold, for crust binding |
| Salt 🧂 | ½ tsp | Diamond Crystal preferred |
| Lemon Juice 🍋 | 1 tbsp | Freshly squeezed |
| Vanilla Extract 🥛 | ½ tsp | Pure extract preferred |
| Ice Water 💧 | ¼ cup | For dough consistency |
The apples are non-negotiable here. Granny Smith gives that perfect tart-sweet balance, but Honeycrisp or Fuji work too if that’s what’s in season. Most grocery stores carry pre-washed apples, but I always peel and slice them myself—uniform thickness ensures even cooking. For the crust, King Arthur flour or Bob’s Red Mill give the best flakiness, but store-bought crusts (like Pillsbury) work in a pinch. The butter needs to stay cold—European-style butter like Plugrá has higher fat content, which is ideal for flaky layers.
No vanilla extract? Vanilla bean paste works just as well, or a scraped vanilla bean if you’re feeling fancy. The cinnamon can be swapped for cinnamon sticks if you’re making a quick filling, but ground is better for even distribution. Short on apples? Substitute pears or peaches—just adjust the sugar slightly. The nutmeg is key for that warm spice profile, but if you don’t have it, a pinch of allspice adds depth. For the crust, if you’re using a store-bought pie shell, brush it with melted butter before adding the filling to prevent sogginess.
This pie reheats beautifully—350°F for 10-15 minutes covered with foil. Store leftovers in an airtight container for up to 4 days, though I rarely have any last that long. The crust stays crispy for 2 days if wrapped tightly in parchment. Freeze portions for up to 3 months—just thaw overnight in the fridge. I always make a double batch because it disappears faster than I can say ‘apple pie Monday.’
Why You’ll Love This Recipe
- No-Roll Crust Shortcut: I’ll admit, I used to dread pie crusts—flaky perfection always felt out of reach. But this recipe’s buttery, no-roll crust? Just mix cold butter into flour until it crumbles, press it in, and bake. The edges stay crisp while the filling does all the work. (Yes, even on a Tuesday night.)
- Granny Smith Magic: Between us, tart Granny Smiths are the unsung heroes of pie. They hold their shape, caramelize beautifully, and cut through the sweetness of brown sugar like a knife. The secret’s in the toss: slice them thin, sprinkle with lemon juice, and let them sit while you mix the filling. That’s when the real flavor unlocks.
- Leftovers for Days: This 13×9 pan is basically a pie factory—bake it once, and you’ve got breakfast, lunch, or dessert covered. Slice it warm with vanilla ice cream, or pack it cold for school lunches (trust me, kids will trade their PB&J). Even the third slice tastes like the first, thanks to that buttery crust sealing in the juices.
- Budget-Friendly Crowd-Pleaser: Honestly, this recipe is my go-to for gatherings because it’s cheap but feels fancy. Granny Smiths are affordable, brown sugar adds depth without costing a fortune, and you can even make the crust ahead. Serve it at a potluck, holiday dinner, or just because—no one will guess it’s not from a bakery. (My secret weapon.)
Step-by-step instructions for 13×9 apple pie with crusty crunch
Here’s how to build a foolproof pie with a buttery, flaky crust and perfectly spiced filling.
Make the Crust with Cold Butter and Flour
In a large bowl, combine the 1 cup unsalted butter (cold and cubed) with the 2.5 cups all-purpose flour and 0.5 teaspoon salt. Use a pastry cutter or your fingers to work the butter into the flour until you have pea-sized crumbs with some larger butter pieces remaining—this ensures a flaky texture. Pour in the 0.25 cup ice water gradually while mixing with a fork until the dough just comes together.
Turn the dough onto a lightly floured surface and knead gently for 30 seconds until smooth. Wrap in plastic and refrigerate for at least 1 hour (or up to 24 hours). Chilling relaxes the gluten and makes rolling easier. I like to press the dough into a 13×9-inch pan by hand for even thickness—no rolling pin needed.
Prepare the Spiced Apple Filling
In a large bowl, toss the 6 peeled, sliced Granny Smith apples with 1.5 cups granulated sugar, 0.5 cup packed brown sugar, 2 tablespoons ground cinnamon, 1 teaspoon ground nutmeg, 1 tablespoon lemon juice, and 0.5 teaspoon vanilla extract. Let the mixture sit for 15 minutes—this allows the apples to release some liquid and the flavors to meld. The filling should be juicy but not soupy.
Here’s the thing—Granny Smiths are tart, so the extra sugar helps balance their acidity. If your apples are particularly sweet, reduce the sugar by 2 tablespoons. The lemon juice prevents browning while adding brightness that cuts through the richness of the crust.
Assemble and Bake for Golden Perfection
Preheat your oven to 375°F. Spread the apple mixture evenly over the chilled crust in the pan. Press down gently with a spatula to remove air bubbles and ensure even baking. Sprinkle the remaining 1 teaspoon cinnamon over the top for extra warmth.
Bake for 45-50 minutes until the crust is deep golden brown and the filling is bubbling at the edges. The center should still have a slight jiggle—this indicates the apples are tender but not mushy. If the crust starts browning too quickly, tent loosely with foil to prevent burning.
Rest and Serve for Maximum Flavor
Let the pie cool for at least 2 hours before slicing—this allows the filling to set and the flavors to develop fully. The crust will firm up slightly, making it easier to cut clean slices. Serve warm with vanilla ice cream or whipped cream for the perfect balance of textures.
Pro tip: If you’re short on time, let it cool for 1 hour before serving, but expect the filling to be slightly softer. The longer you wait, the better the pie tastes—patience is key with apple pies!
Pro Tips For Making 13×9 Apple Pie
- Prep Apples Like a Pro: Core and slice Granny Smiths thin—about ⅛-inch thick—and toss them in lemon juice right away. Thinner slices cook faster, and the acid keeps them from turning brown while you’re fussing with the crust. (Yes, even if you’re impatient like me.)
- Blind-Bake the Bottom: Sprinkle dry flour or pie weights over the unbaked bottom crust, then bake for 8–10 minutes at 375°F before adding filling. This prevents a soggy base—no one wants a gummy pie, especially when you’ve gone to the trouble of using unsalted butter for that buttery flavor.
- Skip the Overmixing: Cut cold butter into flour just until crumbly—no more. Overworking the dough makes it tough, and you’ll regret it when the crust fights you later. Use a pastry cutter or your fingers, but stop when it looks like coarse sand.
- Vent the Top Crust: Cut 4–5 slits in the top crust before baking—it’s not just for looks. Steam needs an escape route, or your pie will puff up like a balloon and collapse into a sad, uneven mess. (I learned this the hard way after a Thanksgiving disaster.)
Storing and reheating your leftovers
Refrigerator Storage
Store your 13×9 apple pie in an airtight container (I use glass Pyrex with snap-on lids) for up to 4 days in the fridge. Let it cool completely first to prevent condensation, which can make the crust soggy.
The filling actually improves overnight as the spices meld together beautifully. 💫
Freezer Prep
For long-term storage, wrap the pie tightly in plastic wrap followed by aluminum foil to prevent freezer burn. Place it in a freezer bag with all air squeezed out, then label with the date.
This pie freezes well for up to 3 months—just thaw overnight in the fridge before reheating.
Stovetop Reheating
My preferred method is reheating in a 350°F oven for 10-15 minutes covered with foil. This maintains the crust’s crispiness while gently warming the filling. For extra moisture, add 1 tablespoon water or apple juice to the pan before reheating. 🔥
Microwave Shortcut
For quick servings, cover a slice with a damp paper towel and microwave on 50% power for 45-60 seconds. This method works best for single servings and keeps the filling warm without overcooking the crust. Add a sprinkle of cinnamon after reheating for freshness.
Crust Refresh
If the crust loses its crunch after storage, brush it lightly with melted butter and bake at 375°F for 5-7 minutes uncovered. This simple trick restores that golden, crisp texture you love. I also recommend warming the pie with a scoop of vanilla ice cream to revive its magic.
Serving Warm
When serving directly from the fridge, let the pie sit at room temperature for 10-15 minutes before slicing. This helps the filling soften slightly and makes for easier cutting.
I always serve it with a dollop of whipped cream or a scoop of homemade vanilla ice cream for that classic pie experience. 🍎
Nutrition facts
Frequently asked questions
Can I use store-bought crust instead of homemade?
This recipe works perfectly with store-bought pie crusts like Pillsbury. For extra flakiness, brush the bottom crust with melted butter before adding filling. If using a double crust, add a 1 tablespoon of water or milk to the top crust edges to seal it and prevent leaks.
What if my apples are too juicy after baking?
If your filling releases too much liquid, try one of these fixes: sprinkle 1 tablespoon of cornstarch over the filling before baking, or add 1/2 cup of old-fashioned oats to absorb excess moisture. For a quick fix, bake the pie at 350°F instead of 375°F to slow down the cooking process.
How do I prevent a soggy bottom crust?
Prevent sogginess by pre-baking the bottom crust for 10-12 minutes at 375°F before adding filling, or by sprinkling 1/4 cup of crushed cornflakes or graham crackers on the bottom crust. Another trick is to chill the filled pie for 30 minutes before baking to help the filling firm up slightly.
Can I make this pie ahead of time?
This pie tastes even better the next day! Assemble and bake it in the morning, then let it cool completely. Store in an airtight container at room temperature for up to 24 hours, or refrigerate for 4 days. For best results, reheat slices in the oven at 350°F for 10 minutes to restore crispiness.
What’s the best way to slice a warm pie?
Let the pie sit at room temperature for 10-15 minutes before slicing to help the filling set. Use a hot knife (dipped in hot water and wiped dry) for clean cuts. For extra flair, sprinkle each slice with powdered sugar or cinnamon right after serving.

- 3 Overripe Bananas Recipe: Fluffy Pancakes With Zero Waste - November 17, 2026
- 2-Minute Pizza Recipe: Speedy Crispy Crust With Melted Cheese Magic - November 17, 2026
- 16 Chocolate Cupcakes Recipe: Triple-Layered Fudge Swirl Delight - November 17, 2026