
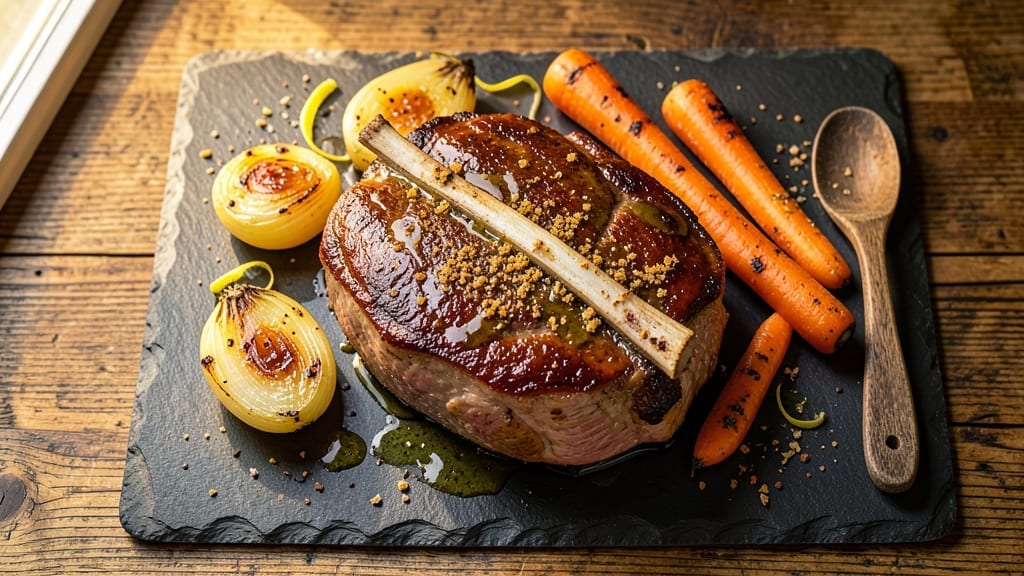
A 3-pound bone-in ribeye roast delivers restaurant-quality flavor with a crisp seared crust and a melt-in-your-mouth pink center—this is the technique I’ve perfected after years of trial and error. The bone adds richness while keeping the meat impossibly tender, and the reverse sear method ensures perfect doneness every time.
What sets this apart is the balance between high-heat searing and low-and-slow roasting, which transforms tough cuts into fall-apart perfection.
This recipe is designed for confidence, whether you’re cooking for a special occasion or a weeknight dinner that deserves attention. You’ll need just four key ingredients—plus time—and the result is a roast so juicy and flavorful, it becomes the star of any meal.
The crust develops a deep caramelized crust thanks to a dry brine and high-heat sear, while the interior remains tender and pink, just as you’d expect from a premium steakhouse cut.
By the time you slice into this roast, you’ll see why it’s worth the effort: a golden-brown crust that shatters with each bite, layers of flavor from the bone, and a juicy interior that practically melts on your tongue.
The technique is straightforward but precise, ensuring you’ll nail it the first time—no guesswork, no overcooking. Pair it with a bold red wine and roasted root vegetables for a meal that feels like a celebration.
This method works equally well for holiday feasts or casual dinners, and leftovers reheat beautifully for sandwiches the next day. The secret lies in patience and temperature control—trust the process, and you’ll have a roast that rivals any steakhouse.
Let’s get started on creating the most impressive centerpiece for your table.
Ingredients for 3 pound bone in ribeye roast
Four core ingredients plus a few pantry staples—this roast is all about the meat and technique.
| Ingredient | Amount | Notes |
|---|---|---|
| Bone-In Ribeye Roast 🥩 | 3 lb | Center-cut, 1-1.5 inches thick |
| Kosher Salt 🧂 | 2 tbsp | Diamond Crystal preferred |
| Freshly Ground Black Pepper 🌶️ | 1 tbsp | Freshly cracked for best flavor |
| Extra-Virgin Olive Oil 🫒 | 2 tbsp | High-quality, fruity variety |
| Yellow Onion 🧅 | 1 whole | Sliced for roasting pan |
| Carrots 🥕 | 4 whole | Baby carrots or cut into sticks |
| Fresh Rosemary 🌿 | 1 sprig | Or 1 tsp dried rosemary |
| Fresh Thyme 🌿 | 2 sprigs | Or 1 tsp dried thyme |
| Garlic Cloves 🧄 | 6 cloves | Smashed, skin-on for roasting |
| Red Wine 🍷 | 1 cup | Bold, dry variety like Cabernet |
| Beef Bone Broth 💧 | 1 cup | Low-sodium preferred |
| Butter 🧈 | 2 tbsp | Unsalted, softened for basting |
The ribeye is non-negotiable here—bone-in, center-cut is key for tenderness and flavor. Costco or Whole Foods usually have the best selection, but any reputable butcher will have it. Look for good marbling and a thick fat cap—this is what keeps the meat juicy. If you can’t find a 3-pound roast, two 1.5-pound roasts work too (just adjust cooking time). The bone adds incredible richness, but if you’re really set on boneless, go for a thick-cut ribeye steak instead—this technique works for that too.
No kosher salt? Diamond Crystal is my go-to, but sea salt works in a pinch (use half the amount). Fresh herbs are ideal, but dried works at one-third the quantity. Running low on red wine? Beef broth with a splash of balsamic gets you close. The butter matters—unsalted, high-fat content is crucial for basting. If you’re making this ahead, prep the veggies and herbs the night before and store them in the fridge. The roast itself can sit at room temp for up to 2 hours before cooking—just take it out of the fridge an hour before you start.
This roast reheats beautifully—low and slow in a 275°F oven for 20-30 minutes brings it back to perfection. For leftovers, wrap tightly in foil and store in the fridge for 3-4 days. Freeze for up to 3 months if you’re planning ahead. I always make extra because the sandwiches the next day are amazing. The crust gets even better after resting, so let it sit for at least 15 minutes before slicing. Trust me, that wait is worth it for clean, juicy slices.
Why You’ll Love This Recipe
- I swear by this: just salt, pepper, and olive oil—no fancy marinades or 10-step processes. That bone-in ribeye? It practically cooks itself while you slice onions and sip wine. Honestly, the hardest part is deciding when to pull it from the oven.
- Two-Ingredient Magic: I swear by this: just salt, pepper, and olive oil—no fancy marinades or 10-step processes. That bone-in ribeye? It practically cooks itself while you slice onions and sip wine. Honestly, the hardest part is deciding when to pull it from the oven.
- Rich, Unmatched Depth: The bone renders into the meat, turning every bite into a flavor explosion—juicy, caramelized crust, and that buttery richness from the olive oil. Between us, this isn’t just a roast; it’s a moment on a plate.
- Game for Any Gathering: Sunday dinner? Check. Weeknight family meal? Done. Even a last-minute dinner party—this roast feeds six with room for seconds. I’ve served it with mashed potatoes, crusty bread, or just as-is, and no one ever complains.
Step-by-step instructions for 3 pound bone-in ribeye roast
Here’s how to transform that beautiful ribeye into a showstopping centerpiece with perfect crust and tender interior.
Prep the Roast for Maximum Flavor
Take the 3 lb bone-in ribeye roast out of the refrigerator and let it sit at room temperature for 1 hour. This ensures even cooking throughout. While it’s coming to temperature, prepare a dry rub by combining the 2 tbsp kosher salt and 1 tbsp freshly ground black pepper in a small bowl.
Pat the roast completely dry with paper towels—this is crucial for that crispy crust. I like to use a clean kitchen towel first to soak up any moisture, then paper towels for the final dry. Rub the salt and pepper mixture all over the roast, including inside any crevices and around the bone. Let it sit uncovered on a wire rack for 30 minutes while you prepare your vegetables.
Build the Roasting Pan and Preheat
Preheat your oven to 450°F—this high initial temperature creates that coveted crust. While the oven heats, slice the 1 whole yellow onion into wedges and cut the 4 whole carrots into 2-inch sticks. Arrange them in a single layer on the bottom of a roasting pan.
Add the 1 sprig fresh rosemary, 2 sprigs fresh thyme, and 6 smashed garlic cloves to the pan. Pour the 1 cup red wine and 1 cup beef bone broth over the vegetables. This creates a flavorful bed that will baste the roast as it cooks. Place the roasting pan on the middle rack of your oven while it preheats.
Sear the Roast for Irresistible Crust
Heat a large oven-safe skillet over high heat until it’s smoking hot. Add the 2 tbsp extra-virgin olive oil and swirl to coat. Carefully place the seasoned roast in the hot skillet, bone-side down. Press down gently on the roast during the first minute—this prevents it from curling and ensures even contact with the pan.
Let it sear undisturbed for 4-5 minutes until you see deep golden-brown color forming. Flip the roast and sear the other side for another 4-5 minutes. The goal is to create that beautiful crust while keeping the interior juicy. Transfer the seared roast to the prepared roasting pan, bone-side up, spooning any pan juices over the top.
Roast to Juicy Perfection
Carefully transfer the roasting pan to the preheated oven. Roast for 20 minutes at 450°F, then reduce the oven temperature to 325°F. Continue roasting for another 1 hour 30 minutes to 2 hours, depending on your preferred doneness.
Here’s the thing—I like my ribeye with a juicy pink center, so I use a meat thermometer. When the internal temperature reaches 125°F for medium-rare (about 1 hour 45 minutes total), it’s ready. If you prefer medium, aim for 135°F. The roast will continue cooking slightly as it rests, so don’t overcook it.
Rest and Baste for Maximum Juiciness
Remove the roast from the oven and transfer it to a cutting board. Let it rest for 15-20 minutes before carving—this resting period allows the juices to redistribute throughout the meat. While it rests, remove the roast from the pan and place it on a platter.
Spoon any accumulated juices from the pan into a small saucepan and place it over medium heat. Add the 2 tbsp softened butter and let it melt into the juices. Simmer for 3-4 minutes until slightly reduced. Pour this delicious pan sauce over the sliced roast before serving.
Pro Tips For Making 3 Pound Bone In Ribeye Roast
- Sear the Fat First: I learned this the hard way—don’t just toss the roast in the oven straight from the fridge. Pat it dry, then sear the fat side down in a screaming-hot pan with olive oil for 3-4 minutes until it’s deep golden. That crust locks in flavor and keeps the meat from drying out later.
- Salt Like a Pro: More salt than you think. Generously coat the roast with kosher salt at least 4 hours ahead (or overnight if you’re patient). Skip the pepper until after cooking—it burns too easily when searing. Trust me, the seasoning will be perfect by then.
- Skip the Onion Hack: That sliced onion in the pan? It’s not just for show. Sear it until caramelized (10-12 minutes) before adding the roast—it adds sweetness and depth. If you’re rushed, use 1 tablespoon of onion powder instead, but it won’t taste the same.
- Rest It Properly: The moment that roast hits the cutting board, tent it with foil and walk away for 15 minutes. I know, it’s hard to wait, but slicing into it too soon means dry, stringy meat. Let the juices redistribute—your future guests will notice the difference.
Dietary considerations for these flavors
Low-Carb Adaptations
This roast naturally fits a low-carb lifestyle since it’s all about the meat and minimal sides. Skip the roasted carrots and onions if tracking macros—just use a wire rack over a baking sheet instead of a roasting pan.
The crust and flavor come entirely from the dry brine and sear, so you won’t miss the veggies. For extra fat, add 1 tbsp ghee to the searing oil for a richer crust. 🥩
Gluten-Free Safety
This recipe is inherently gluten-free since the ingredients are meat, salt, pepper, and basic vegetables. Always double-check your kosher salt and beef bone broth labels for hidden gluten—some brands add wheat-based thickeners.
I use Annie’s Homegrown broth for guaranteed gluten-free results. The wine and butter are also safe, but verify labels if you have celiac disease.
Dairy-Free Options
For a dairy-free version, replace the 2 tbsp butter in the pan sauce with 2 tbsp olive oil or vegan butter (like Miyoko’s). The crust and flavor won’t suffer—olive oil adds a fruity depth that pairs perfectly with the roast.
Just omit the butter entirely if avoiding all dairy, and the dish remains rich and satisfying. The roasted vegetables can stay in the pan for extra flavor.
Allergen-Friendly Swaps
Nut allergies? No issue here—this recipe avoids nuts entirely. For soy-sensitive cooks, ensure your beef bone broth is soy-free (check labels). If you’re avoiding garlic, substitute with 1 tsp onion powder in the roasting pan.
The roast’s natural richness means you don’t need extra umami boosters, so these swaps won’t compromise flavor. Always prioritize fresh, high-quality meat as the star of the dish. 🌟
Protein-Packed Boost
Want to make this even more protein-focused? Add 1 tbsp nutritional yeast to the dry rub for a cheesy, umami kick without dairy. For extra iron, include 1 tsp smoked paprika in the seasoning.
The bone-in cut already delivers 40g protein per serving, but these tweaks bump it closer to 45g per slice. Perfect for meal prep—slice and store portions in glass airtight containers for up to 4 days.
Nutrition facts
Frequently asked questions
Can I use this technique for a smaller or larger roast?
The reverse sear method works beautifully for roasts between 2-5 pounds. For a 2-pound roast, reduce the high-heat sear to 3 minutes per side and the low-and-slow roast time to 50-60 minutes. For a 5-pound roast, increase the sear to 5 minutes per side and extend the roasting time to 2 hours 30 minutes. Always use a meat thermometer to check internal temperature.
What’s the best way to store leftovers?
Slice the roast and store in an airtight container in the fridge for 3-4 days. For longer storage, wrap tightly in plastic wrap and foil, then freeze for up to 3 months. Reheat portions in a 275°F oven for 20-30 minutes or until warmed through. The crust gets even better after reheating!
Why does the roast need to rest before slicing?
The 15-20 minute rest lets the juices redistribute throughout the meat, preventing them from running out when you slice. This is especially important for bone-in cuts—the bone helps conduct heat, so the meat continues cooking slightly after removal. Skipping the rest results in dry slices, no matter how perfect the crust looks.
Can I make this roast ahead of time?
Prep the roast by seasoning it and refrigerating uncovered for 24 hours (this enhances flavor). On cooking day, proceed with the recipe as written. For the sauce, you can make it ahead too—store the pan juices in the fridge and reheat with butter just before serving. The roast reheats beautifully for sandwiches the next day!
What if my oven doesn’t go up to 450°F?
No problem! Use the highest temperature your oven can handle (usually 425°F). For the sear, use a cast-iron skillet on the stovetop over maximum heat until smoking hot. The key is getting that deep golden crust—just increase the sear time by 1-2 minutes per side to compensate for the slightly lower oven temperature.

- 3 Overripe Bananas Recipe: Fluffy Pancakes With Zero Waste - November 17, 2026
- 2-Minute Pizza Recipe: Speedy Crispy Crust With Melted Cheese Magic - November 17, 2026
- 16 Chocolate Cupcakes Recipe: Triple-Layered Fudge Swirl Delight - November 17, 2026