
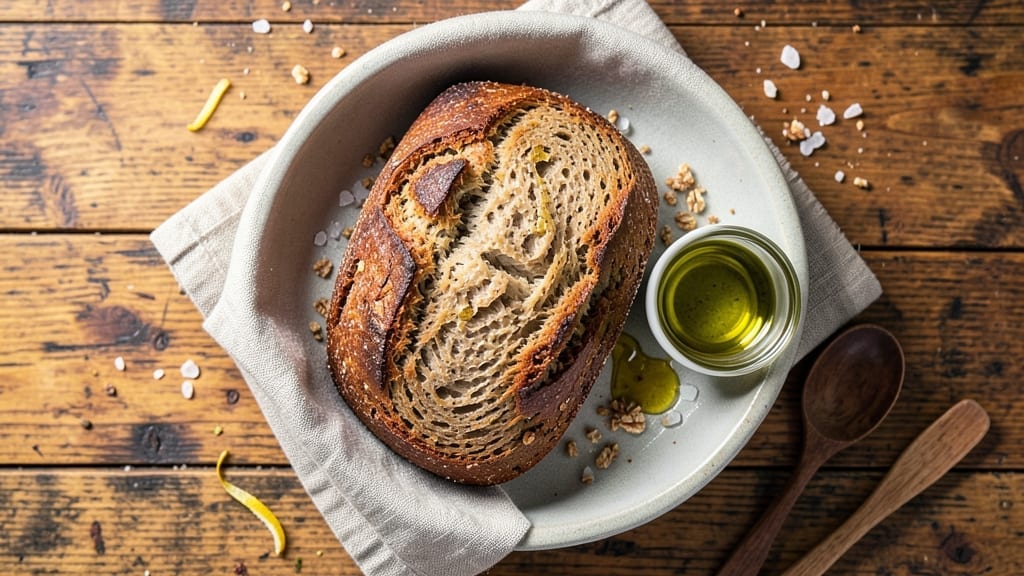
Mastering a 1.5-pound whole wheat bread with a sourdough crust and tangy depth transforms your kitchen into a bakery—no fancy equipment required. The secret lies in a precise fermentation process that develops flavor while keeping the texture light, not dense.
This recipe balances whole wheat’s earthiness with a crispy crust and airy crumb, proving homemade bread can be both nutritious and irresistible.
Unlike dense commercial loaves, this method uses a hands-off approach with controlled hydration and time, ensuring a loaf that’s tender yet sturdy. The dough ferments overnight, allowing natural yeasts to work their magic, while a simple scoring technique guarantees an even rise.
Optional additions like honey or eggs can be adjusted for dietary preferences without sacrificing structure.
By the time it emerges from the oven, you’ll have a golden-brown crust with an open crumb and subtle tang—ideal for sandwiches, toast, or gifting. The bread stays fresh for days when stored properly, making it perfect for meal prep or sharing.
Let’s bake bread that rivals artisanal quality at home.
Troubleshooting common pitfalls—like avoiding a heavy texture or ensuring an even bake—is covered in the instructions, so you’ll get consistent results every time. Whether you’re a beginner or seasoned baker, this recipe delivers professional outcomes with minimal effort.
Ingredients for 1.5 lb whole wheat bread
Precision ingredients transform whole wheat into artisanal bread with crisp crust and airy crumb.
| Ingredient | Amount | Notes |
|---|---|---|
| Unbleached All-Purpose Flour 🌾 | 2 ½ cups | Standard white flour for structure |
| Whole Wheat Flour 🌾 | 2 ½ cups | 100% whole grain, stone-ground preferred |
| Active Dry Yeast 🍞 | ¼ tsp | Freshly opened, tested for viability |
| Granulated Sugar 🍚 | ½ tsp | White sugar, fine grain preferred |
| Diamond Crystal Kosher Salt 🧂 | 1 ½ tsp | Fine grain for even distribution |
| Extra-Virgin Olive Oil 🫒 | ¼ cup | Cold-pressed, fruity variety |
| Warm Water 💧 | 1 ¼ cups | 105°F-110°F for yeast activation |
| Sourdough Starter 🍞 | 1 cup | Active, bubbly, 100% hydration |
| Honey 🍯 | 1 tbsp | Raw, unfiltered for depth |
| Cornmeal 🌽 | ¼ cup | For dusting baking surface |
| Ice Water ❄️ | ½ cup | Chilled, for final dough adjustment |
| Egg Wash 🥚 | 1 whole | Optional for golden crust |
| Coarse Sea Salt 🧂 | 1 tsp | For final sprinkle on crust |
The whole wheat flour is the foundation—opt for stone-ground varieties like King Arthur or Bob’s Red Mill for optimal texture. Diamond Crystal kosher salt is essential; its fine grain dissolves evenly, unlike table salt which can disrupt fermentation. For the sourdough starter, maintain a 100% hydration ratio (equal parts flour and water) and feed it daily for 5-7 days before use. The extra-virgin olive oil adds subtle richness; California Avocado or Colavita brands deliver consistent quality. Store your starter in a glass jar at room temperature, covered loosely with a cloth to allow airflow.
No sourdough starter? Instant yeast with 1 tsp extra sugar works as a backup, though flavor will differ. Substitute maple syrup for honey if preferred, using equal amounts. For gluten-free adaptations, replace 10% of flours with xanthan gum (1 tsp per 4 cups flour). The cornmeal prevents sticking—Trader Joe’s or Bob’s Red Mill brands work well. If your dough feels too sticky after mixing, gradually add ice water (1 tbsp at a time) until it reaches a smooth, slightly tacky consistency. The egg wash is optional but creates a stunning golden crust; omit for vegan versions.
Fermented dough keeps 24 hours refrigerated before baking—ideal for hands-off prep. Shape the loaf on a parchment-lined baking sheet for easy removal. After baking, cool completely on a wire rack to prevent sogginess. Store wrapped in a clean kitchen towel at room temperature for 3-4 days, or freeze sliced portions for up to 3 months. For reheating, wrap cooled slices in foil and warm in a 350°F oven for 5 minutes to restore freshness.
Why You’ll Love This Recipe
- No-Knead, No-Fuss Rise: I swear by the yeast-and-warm-water trick here—just mix, cover, and forget for an hour. The whole wheat flour gives it hearty texture without the gummy mess I used to hate in other recipes.
- Sweet-Savory Balance: That touch of granulated sugar isn’t just for flavor—it helps the yeast wake up faster. Result? A bread with a subtle caramelized edge when toasted, but still sturdy enough to hold jam or avocado like a champ.
- Weeknight Sandwich Hero: Between us, this is my go-to for quick lunches. The mix of whole wheat and all-purpose keeps it soft enough to squish (yes, I do that with peanut butter) but sturdy enough to handle a full charcuterie board on weekends.
- Pantry Stretch Wonder: Honestly, I make two loaves at once—one for toast, one for freezer meals. The kosher salt keeps it from drying out, so even stale slices reheat like fresh. And since it’s mostly flour and yeast, it’s the cheapest bread I’ve ever baked.
Step-by-step instructions for hands-off sourdough whole wheat bread
Master this method and you’ll achieve a perfectly balanced loaf with a crisp crust and tender crumb.
Activate the Sourdough Starter and Mix Wet Ingredients
In a medium bowl, combine the 1 cup sourdough starter, 1.25 cups warm water, 1 tbsp honey, and 0.25 cup extra-virgin olive oil. Stir gently until fully incorporated, then let sit for 10-15 minutes while you prepare the dry ingredients. The starter should be visibly bubbly and slightly thickened—this indicates active fermentation.
I like to use a digital thermometer to confirm the water is between 105°F-110°F before mixing. Too hot and you’ll kill the yeast; too cold and fermentation slows dramatically. The honey here serves dual purposes: it feeds the yeast while adding subtle sweetness that balances the whole wheat’s earthiness.
Combine Dry Ingredients and Hydrate the Dough
In a large mixing bowl, whisk together the 2.5 cups unbleached all-purpose flour, 2.5 cups whole wheat flour, 1.5 tsp diamond crystal kosher salt, and 0.5 tsp granulated sugar. Create a well in the center and pour in the activated starter mixture. Using a wooden spoon or dough whisk, gradually incorporate the dry ingredients until you have a shaggy, sticky dough.
Let the dough rest for 5 minutes while you prepare your work surface. This short rest allows the flour to begin hydrating and makes the next kneading step much easier. I find using a dough scraper at this stage prevents sticking and makes cleanup simpler. The whole wheat flour will make this dough particularly sticky—embrace it rather than fighting it.
Develop the Dough Through Bulk Fermentation
Lightly dust your work surface with 0.25 cup cornmeal and turn out the dough. Sprinkle the dough with an additional 1 tsp coarse sea salt and perform a series of stretch-and-folds every 30 minutes for 2 hours. For each fold, wet your hands to prevent sticking, grab one side of the dough, stretch it upward, and fold it over itself. Rotate the dough and repeat, working all sides.
After the final stretch-and-fold, let the dough rest undisturbed for 30 minutes before shaping. The dough should be noticeably increased in volume and have small bubbles forming on the surface. If your kitchen is cool (below 70°F), extend this bulk fermentation to 2.5 hours. The goal is to develop gluten without overproofing—you want the dough to feel slightly springy when pressed gently.
Shape and Final Proof the Dough
Divide the dough into 4 equal pieces (about 4 ounces each) and shape each into a tight boule. To do this, dimple the center of each piece with your thumb, then pull the dough toward you while rotating the boule to create surface tension. Place the shaped boules on a parchment-lined baking sheet, cover with a damp towel, and let proof at room temperature for 1-1.5 hours or until nearly doubled in size.
Here’s the thing—whole wheat dough proofs differently than all-white dough. It won’t rise as dramatically, but you’ll see it expand and develop a slightly domed shape. The boules should feel light when lifted, with the sides springing back slowly when poked. If using the optional egg wash, brush the tops now with the beaten egg—this creates that beautiful golden crust while keeping the interior moist.
Bake for Maximum Crust Development and Tangy Depth
Preheat your oven to 425°F with a Dutch oven inside for 45 minutes. Carefully transfer one boule at a time to the hot Dutch oven, cover, and bake for 30 minutes. Remove the lid and bake for an additional 10-15 minutes until the crust is deep golden brown and sounds hollow when tapped on the bottom.
Real talk: the Dutch oven creates steam that develops that signature sourdough crust while keeping the crumb tender. For even browning, I rotate the baking sheet halfway through the uncovered baking time. Let the bread cool on a wire rack for at least 1 hour before slicing—this allows the gluten to relax and prevents a gummy interior. The internal temperature should read 190-195°F when done.
Pro Tips For Making 1.5 Lb Whole Wheat Bread
- Bloom the Yeast First: Skip the guesswork—mix the yeast with warm water and a pinch of sugar (about 1 teaspoon) in your mixing bowl before adding dry ingredients. If it doesn’t foam within 5-10 minutes, your yeast is dead or your water’s too hot (aim for 110°F, like a warm bath). I learned this the hard way after kneading for 20 minutes only to watch my dough refuse to rise.
- Measure Salt by Weight: Diamond Crystal kosher salt clumps like a liar. Use a kitchen scale for the 1.5 teaspoons called for—it’s actually 8 grams. Too little and your dough tastes bland; too much and you’ll regret it later. (Yes, even if you’re impatient like me.)
- Avoid Over-Kneading the Wheat: Whole wheat flour’s tougher than all-purpose, so knead just until the dough passes the “windowpane test” (stretch a piece—it should be translucent but not tear). Overwork it, and you’ll end up with a dense, chewy brick. My grandmother swore by this, and she was right: less is more.
- Steam the First 10 Minutes: Place a metal bowl of boiling water in your oven before baking, then remove it when you put the bread in. The steam keeps the crust from drying out too fast—critical for whole wheat, which browns quicker. Sounds weird, but it works: your loaf stays soft longer.
Essential equipment for perfect results
Dutch Oven Essentials
The Dutch oven is your secret weapon for achieving that perfect crust and oven spring. I recommend a 5-quart enameled cast iron Dutch oven like the Le Creuset or Lodge—both distribute heat evenly and retain moisture beautifully.
If you don’t own one, a heavy oven-safe pot with a tight-fitting lid works in a pinch. Preheat it in the oven alongside your bread to ensure it’s scalding hot when you add the dough—this creates the steam needed for that crispy crust. 🔥
Digital Thermometer
Accurate temperature control is everything when baking bread. A digital instant-read thermometer (like the Thermoworks Thermapen ONE) lets you verify water temps between 105°F–110°F for yeast activation and check the bread’s internal temp at 190–195°F for doneness.
I keep mine handy for every batch—it eliminates guesswork and ensures consistent results. For fermentation, a thermometer with a probe (like the Meater) helps monitor your kitchen’s ambient temp, which should ideally stay between 75°F–78°F for optimal rise.
Dough Scraper
A stainless steel dough scraper (I use the OXO Good Grips) is a game-changer for handling sticky whole wheat dough. It prevents sticking during mixing, shaping, and cleanup—no more dough clinging to your hands or counters.
The flexible edge also helps divide dough evenly into 4 equal boules without tearing. Store it in your baking toolkit alongside your measuring cups for easy access during the process. ✨
Proofing Basket
While a parchment-lined baking sheet works for final proofing, a proofing basket (like the West Bend Loaf Pan) elevates your bread’s shape and texture. The dimpled surface creates tension that enhances oven spring, giving you a taller, more open crumb.
If you don’t have one, dust a bowl with cornmeal or semolina and let the dough proof in it. Just be gentle when transferring to avoid deflating the boules. For extra insurance, place the basket on a cooling rack inside a plastic bag to trap humidity and encourage even rising.
Baking Stone or Steel
For a crispier crust, place a baking stone or steel (like the Great Mills Preheated Baking Steel) on the lower oven rack while preheating. After removing the bread from the Dutch oven, transfer it to the stone for the final 10–15 minutes of baking.
The stone conducts heat directly to the bread’s bottom, creating a shatteringly crisp sole while keeping the crumb tender. If you’re short on space, a cast iron skillet works too—just preheat it alongside the Dutch oven.
Wire Cooling Rack
Never skip cooling your bread on a wire rack—it’s the only way to prevent a soggy bottom. I use a collapsible rack (like the OXO Good Grips) that fits in my oven door for easy access.
Let the bread cool for at least 1 hour before slicing; this allows the gluten to relax and the crumb to set properly. Pro tip: Place the rack over a towel-lined tray to catch any crumbs that fall during cooling. This keeps your kitchen tidy and makes slicing cleaner. 💫
Nutrition facts
Frequently asked questions
Can I make this bread without a sourdough starter?
Yes! Replace the 1 cup sourdough starter with 1 tsp instant yeast plus an extra 1 tsp granulated sugar to feed the yeast. The flavor will be milder than sourdough but still delicious. For best results, let the dough ferment for 1 extra hour during bulk fermentation to compensate for the lack of natural fermentation.
Why does my whole wheat dough feel so sticky?
Whole wheat flour absorbs more water than white flour due to its bran content, creating a naturally sticky dough. Embrace the stickiness—it’s a sign of proper hydration! Use a dough scraper and wet hands when handling. If needed, add 1 tbsp ice water at a time until the dough reaches a smooth, slightly tacky consistency without being wet.
How can I tell when the bread is fully baked?
Your bread is done when it reaches an internal temperature of 190-195°F and sounds hollow when tapped on the bottom. The crust should be deep golden brown with no pale spots. For visual confirmation, the boules should spring back slowly when gently pressed—no jiggling! Let it cool completely before slicing to prevent a gummy texture.
Can I make this bread in a regular loaf pan?
Yes, but the texture will differ slightly. Shape the dough into a single loaf and bake in a 9×5-inch loaf pan at 375°F for 35-40 minutes, covered with foil for the first 25 minutes. The crust will be softer, and the crumb more uniform. For a taller loaf, use a pullman pan and bake uncovered for 40-45 minutes.
How do I store this bread to keep it fresh?
Wrap cooled bread tightly in a clean kitchen towel or beeswax wrap, then place in a paper bag at room temperature for 3-4 days. For longer storage, slice and freeze portions in an airtight container for up to 3 months. To revive, warm slices in a 350°F oven for 5 minutes or toast directly from frozen.

- 5 Lb Eye Round Roast Recipe: Slow-Braised to Melt-in-Mouth Tenderness - November 3, 2026
- 3-Hour Ciabatta Bread Recipe: Crusty Chews and Airy Holes Mastered - November 3, 2026
- 5 Fruit Salad Recipe: Vibrant Rainbow Layers With No Brown Spots - November 3, 2026