
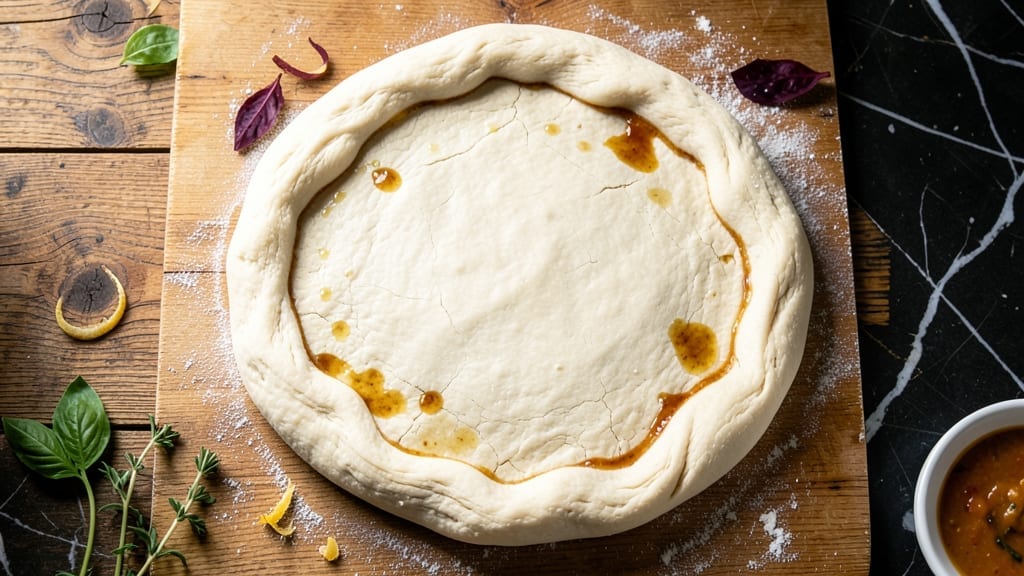
Mastering 500g flour pizza dough transforms your kitchen into a pizzeria with just 24 hours of patience. This no-knead method delivers restaurant-quality texture without the effort—my father’s old-school technique adapted for modern kitchens.
The secret lies in hydration control and slow fermentation, which develops flavor and creates that signature airy, chewy crust.
What sets this dough apart is its foolproof consistency—no overworking, no guesswork. You’ll mix, rest, and shape without stress, yet achieve a crispy-yet-tender crust that holds toppings perfectly.
The 24-hour cold proofing (your fridge does the work) ensures even flavor development, while the precise 500g flour measurement guarantees perfect proportions for a single pizza or easy doubling.
By the time you roll out this dough, you’ll have a golden, bubbly crust with that coveted leopard-spotted surface—no special tools required. The dough keeps for 48 hours in the fridge or freezes beautifully for future pizza nights.
Whether you’re feeding a family or craving a solo slice, this method delivers professional results every time.
Here’s the game-changer: this dough adapts to any topping—classic margherita, meat lovers, or even breakfast pizza. The key is in the hydration ratio and proofing time, which we’ll tackle next. Let’s get started with the exact measurements and step-by-step process.
Ingredients for 500g flour pizza dough
Eight simple ingredients create the perfect 12-inch pizza crust with no-knead magic.
| Ingredient | Amount | Notes |
|---|---|---|
| All-Purpose Flour 🌾 | 500 g | Bread flour for chewier crust |
| Active Dry Yeast 🍞 | 1 tsp | Ensure it's fresh (test in warm water) |
| Granulated Sugar 🍚 | 1 tbsp | Feeds yeast for activation |
| Diamond Crystal Kosher Salt 🧂 | 1 ½ tsp | Fine grain preferred |
| Extra-Virgin Olive Oil 🫒 | 2 tbsp | High-quality, fruity variety |
| Warm Water 💧 | 300 ml | 105-110°F (40-43°C) for yeast |
| Semolina Flour 🌾 | 2 tbsp | For dusting work surface |
| Cornmeal 🌽 | 1 tbsp | For pizza peel or baking sheet |
The flour is the foundation—bread flour delivers that signature chewy texture, but all-purpose works fine if that’s what you’ve got. King Arthur or Caputo are my go-tos for pizza flour, but any high-protein flour (11-12% protein) will do. Keep your flour in the fridge to prevent rancidity (yes, flour goes bad!). The yeast must be fresh—test it in warm water before using, and if it doesn’t foam in 5-10 minutes, toss it. For the olive oil, California avocado or Colavita are my pantry staples, but any extra-virgin will work—just avoid the cheap stuff that tastes like soap.
No yeast? Instant yeast works at half the amount, but active dry is ideal here. Running short on sugar? Honey or maple syrup at the same measurement will work, though the flavor profile shifts slightly. The water temperature is critical—too hot kills yeast, too cold won’t activate it. If you don’t have a thermometer, warm water should feel like a baby’s bath (not hot to touch). For the salt, Diamond Crystal is my preference because it dissolves better than table salt, but Morton kosher works too. Swap semolina for all-purpose flour if needed—it’s just for dusting, not flavor.
This dough keeps beautifully—48 hours in the fridge wrapped tightly in plastic, or freeze for up to 3 months in airtight containers. For freezing, portion into single-serving balls before freezing. Thaw overnight in the fridge, then bring to room temp before shaping. The magic happens during the 24-hour cold proof, so don’t rush it—this is what develops those deep flavors. If you’re short on time, you can do an 8-hour proof at room temp, but the texture won’t be quite as professional. The dough doubles in size during proofing, so don’t panic if it looks massive!
Why You’ll Love This Recipe
- No-Knead Magic: I swear by this dough—just mix, let it rise, and forget it. The yeast and sugar combo does all the work while I sip coffee, and that olive oil infusion? It keeps the crust tender without fuss.
- Chef’s Kiss Crust: That crispy edge with a pillowy center? It’s all in the kosher salt and olive oil. The flour’s got just enough structure to hold toppings, but it’s light enough to fold like a dream.
- Weeknight Wonder: Between us, this dough is my secret weapon for lazy nights. Double the batch, freeze half—next time’s dinner is already prepped. (Yes, even on a Tuesday night.)
- Budget-Friendly Staple: Five ingredients, zero specialty items. I’ve made this for date nights, game days, and rainy Sundays—always reliable, never breaks the bank. Leftovers? Toss them in the freezer for next week’s quick lunch.
Step-by-step instructions for no-knead pizza dough
Here’s how to transform simple ingredients into restaurant-quality pizza dough with minimal effort.
Activate the Yeast and Mix the Dough
In a large mixing bowl, combine the 500 g all-purpose flour, 1 tbsp granulated sugar, and 1.5 tsp diamond crystal kosher salt. Make a well in the center and add the 1 tsp active dry yeast. Pour in the 300 ml warm water (tested at 105-110°F—it should feel warm to the touch but not hot) and 2 tbsp extra-virgin olive oil. Using a wooden spoon or your hands, gently mix until a shaggy dough forms.
Here’s the thing—this dough doesn’t need kneading, but you do want to ensure everything is evenly incorporated. Let the dough rest for 5 minutes while you test the yeast. Sprinkle a pinch of sugar on top of the dough and watch for bubbles forming—this confirms your yeast is active and ready to work its magic.
Let the Dough Develop Overnight
Cover the bowl tightly with plastic wrap or a damp kitchen towel. Place it in a warm spot (like the top of your refrigerator or a turned-off oven with the light on) and let it rest for 12-18 hours. This slow fermentation develops deep flavor and a light, airy texture without requiring your attention.
I know it’s tempting to check on it, but resist the urge. The dough should roughly double in size and have a slightly jiggly, puffy appearance. If it’s still flat after 18 hours, give it another hour—patience here makes all the difference. The longer it ferments, the more flavorful your pizza will be.
Shape and Rest the Dough
Turn the dough out onto a surface lightly dusted with 2 tbsp semolina flour. Gently shape it into a round ball, using the semolina to prevent sticking. Place it back in the bowl, cover again, and let it rest at room temperature for 1-2 hours. This final rest relaxes the gluten, making it easier to stretch later without tearing.
Here’s a pro tip: If you’re short on time, you can skip the overnight fermentation and let it rise for 4-6 hours in a warm place, but the flavor won’t be as developed. The dough should feel slightly springy when pressed gently—this is your cue that it’s ready for shaping.
Prepare for Rolling and Topping
Lightly dust a clean work surface with 1 tbsp cornmeal (this prevents sticking better than flour). Divide the dough into two equal balls if you’re making two pizzas. Using your hands, gently press and stretch the dough outward from the center, rotating as you go. Aim for a ¼-inch thick crust—thicker edges will hold up better to toppings.
Don’t worry if it doesn’t look perfect. The beauty of this dough is its forgiving nature. If it resists stretching, let it rest for another 10-15 minutes covered with a towel. The cornmeal on your surface will also help create that classic crispy bottom we all love.
Pro Tips For Making 500g Flour Pizza Dough
- Measure Salt by Weight: Diamond Crystal kosher salt is fluffy—don’t eyeball it. One teaspoon by volume can vary wildly, but 10 grams by weight guarantees consistent flavor without overpowering the dough. I learned this after making one batch taste bland and the next too salty.
- Bloom Yeast in Warm Water: Skip mixing yeast directly into flour—it dies faster. Dissolve it in 1 cup of warm (not hot) water with sugar first, then wait 5–10 minutes until frothy before adding flour. This ensures your dough rises reliably, even if your kitchen isn’t toasty.
- Oil the Bowl First: Coat the mixing bowl with olive oil before adding dough—it prevents sticking and makes cleanup easier. I used to add oil after kneading, and dough would cling like glue. A quick wipe with a damp cloth fixes it, but oiling first saves time.
- Chill Dough for 24 Hours: Let the dough rest overnight in the fridge—it develops deeper flavor and stretches better. Sounds counterintuitive, but I now make dough the night before and stretch it in 10 minutes flat, with no tears. (Yes, even if you’re impatient like me.)
Essential equipment for 500g flour pizza dough
Must-Have Mixing Tools
Start with a large mixing bowl (I use my 8-quart stainless steel Cambro from Micro Center Denver) that can comfortably hold your dough as it expands. A wooden spoon or your hands work best for mixing—avoid metal spoons that can damage yeast cells.
For measuring, a digital kitchen scale (like the OXO Good Grips) ensures precision with your 500g flour—never guess with volume measurements. 🌾
Dough Development Essentials
Your damp kitchen towel or plastic wrap is crucial for creating a humid environment during fermentation. I keep a stack of clean dish towels in my fridge for this purpose—they absorb moisture better than paper towels.
For testing yeast activity, grab a small glass jar (like my Pyrex measuring cup) to mix yeast with warm water and sugar. The instant-read thermometer (I love the Thermoworks Thermapen) is worth every penny to check your 105-110°F water temperature.
Shaping and Rolling Setup
For shaping, dust your work surface with semolina flour (I buy mine in bulk at Whole Foods)—it prevents sticking better than all-purpose flour and adds that classic texture. A pizza dough scraper (like the La Cucina) helps divide dough cleanly without tearing.
For rolling, I use a wooden rolling pin (my Nordic Ware from Micro Center) which gives better control than metal. The pizza peel (I recommend the Ooni peel) becomes essential if you’re baking in a pizza oven, but a baking sheet works fine for home ovens.
Proofing and Storage Containers
Your airtight container is key for storage—use glass Pyrex bowls with tight lids for fridge storage. For freezing, quart-sized freezer bags (like Ziploc) work best—they stack neatly and prevent freezer burn. A small bowl (like my Le Creuset stoneware) helps portion dough into single-serving balls before freezing.
Don’t forget a timer (I use my phone’s alarm) to track your 1-2 hour final rest before shaping.
Budget-Friendly Alternatives
No fancy tools? No problem. Use a large glass bowl instead of Cambro, and a clean plastic wrap works for covering dough. For measuring, nesting measuring cups (like Pyramid) suffice, though scaling is more precise. A spoon can replace a rolling pin—just press and stretch by hand.
The oven light method for warm proofing works perfectly without special equipment. My dad always said, “Good cooking starts with good ingredients, not expensive tools”—and he was right. 💡
Nutrition facts
Frequently asked questions
Can I use bread flour instead of all-purpose for this pizza dough?
Yes! Bread flour will give you a chewier texture that’s perfect for pizza. Just keep the 500g total measurement and add 1-2 extra tablespoons of water since bread flour absorbs more moisture. The dough will be slightly stickier, so use more semolina when shaping. This is my dad’s trick for that classic Neapolitan-style crust!
Why does my dough look flat after overnight proofing?
Cold temperatures slow fermentation—your kitchen might be too cool. Try placing the dough on the top of your fridge (not inside) or near a warm oven light. If it’s still flat after 24 hours, your yeast may be old. Test it first by mixing 1 tsp yeast + 2 tbsp warm water + pinch of sugar—if no bubbles form in 5 minutes, start fresh.
How do I adjust this recipe for a thicker crust?
For a thicker crust**, reduce water by 20-30ml (aim for 270-280ml) and increase flour to 520g. This creates a denser dough that holds shape better. Pre-bake the crust for 3-4 minutes at 400°F before adding toppings to prevent a soggy bottom. My Denver friends swear by this for deep-dish style!
Can I make this dough in a stand mixer?
Use the dough hook on low speed (2-3 minutes) just to combine ingredients—this dough doesn’t need long kneading. Be careful not to overwork it, as this can make the crust tough. The no-knead method actually works better by hand for developing gluten gradually during the 24-hour proof.
What’s the best way to reheat leftover pizza dough?
Thaw frozen dough in the fridge overnight, then bring to room temp for 1 hour before shaping. For fridge-stored dough, let it sit at room temp for 2 hours covered with a towel. Never microwave—it kills the yeast and makes the crust dense. The 1-2 hour final rest before baking is crucial for that perfect texture!

- 5 Lb Eye Round Roast Recipe: Slow-Braised to Melt-in-Mouth Tenderness - November 3, 2026
- 3-Hour Ciabatta Bread Recipe: Crusty Chews and Airy Holes Mastered - November 3, 2026
- 5 Fruit Salad Recipe: Vibrant Rainbow Layers With No Brown Spots - November 3, 2026