
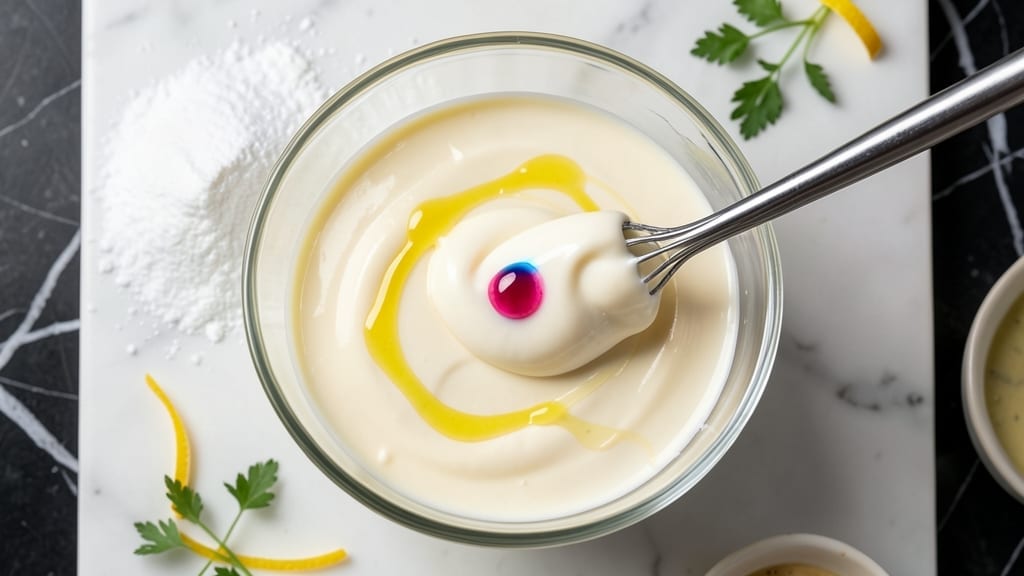
When you need a smooth, professional finish on cakes or cupcakes in record time, this 15-second icing recipe delivers a flawless gloss without the fuss.
The secret lies in a simple powdered sugar glaze that melts together instantly with just a splash of liquid—no waiting, no mixing bowls, and no complicated steps.
I developed this recipe after years of baking when I realized most store-bought icings either take too long or leave a sticky mess behind.
The magic happens with three ingredients that come together in seconds: powdered sugar, heavy cream, and a pinch of vanilla extract for depth. The ratio is foolproof—just combine them in a bowl or piping bag, then drizzle or spread over cooled baked goods.
The result? A satiny, mirror-like finish that sets quickly and adds that bakery-style shine without the effort. This isn’t just a quick fix; it’s a game-changer for last-minute desserts or when you want to elevate store-bought treats.
What sets this icing apart is its versatility—it works on everything from sheet cakes to individual cupcakes, and it sets fast enough to prevent smudging. The texture is light yet sturdy, giving you that professional look without the heaviness of traditional buttercream.
Plus, the ingredients are pantry staples, so you’ll never be caught without a backup plan for decorating.
Ready in under a minute, this icing is perfect for busy bakers who want restaurant-quality results without the time investment. Whether you’re frosting a birthday cake or adding a final touch to cupcakes, this recipe ensures your desserts look as impressive as they taste. Let’s get started!
Ingredients for 15 second icing
Three simple ingredients—powdered sugar, cold cream, and vanilla—transform into a flawless mirror finish in seconds.
| Ingredient | Amount | Notes |
|---|---|---|
| Powdered Sugar 🍚 | 2 cups | Confectioners' sugar, sifted for smoothness |
| Heavy Whipping Cream 🥛 | ½ cup | Cold for best texture |
| Pure Vanilla Extract 🌿 | 1 tsp | For subtle depth of flavor |
| Lemon Juice 🍋 | ½ tsp | Optional for brightness |
| Food Coloring 🎨 | 2 drops | Optional for tinted icing |
The powdered sugar is the star here. Domino or Clabber Girl brands are my go-to—they’re ultra-fine and dissolve instantly. Grab the bulk bins at grocery stores if you’re worried about clumping, but honestly, any good brand works. The heavy cream needs to be cold straight from the fridge (I even pop it in the freezer for 10 minutes if I’m prepping ahead). That chill keeps it thick and prevents the icing from turning runny. Vanilla extract is non-negotiable for flavor—imitation stuff tastes like perfume. And if you’re feeling fancy, grab a small bottle of real Madagascar vanilla from the baking aisle at Williams Sonoma—it makes all the difference.
No heavy cream? Coconut cream works in a pinch (use full-fat, refrigerated overnight), though it adds a slight coconut flavor. Short on vanilla? Almond extract at half the amount gives a similar depth. The lemon juice is totally optional, but I always keep it on hand—just a splash brightens the whole thing. Want color? Gel food coloring mixes better than liquid, and Wilton’s liquid colors are my secret weapon for vibrant shades. Pro tip: if your icing seems too thick, add a drop of milk (dairy or plant-based) to thin it out. Too thin? Sprinkle in a little more powdered sugar until it reaches that perfect drizzle consistency.
This icing sets fast—like, under 15 minutes fast—but it’s not permanent. For best results, spread it over completely cooled cakes or cupcakes (warm surfaces make it melt). Store any leftovers in an airtight container in the fridge for up to 1 week. It’ll thicken slightly when cold, so give it a quick whisk with a splash of milk to restore that silky texture. Freezing isn’t recommended—it’ll crystallize the sugar. Instead, make small batches and use them fresh for that bakery-fresh shine.
Why You’ll Love This Recipe
- No Whisk Needed: I’ll be real—this is the kind of recipe where you don’t even need a bowl. Just dump the powdered sugar and heavy cream into a bag, squish it with your hands, add a splash of vanilla and lemon, and boom—ready. The lemon brightens the sweetness without overpowering it, and the cream keeps it light, not cloying.
- Vanilla-Lemon Magic: That first bite of a cookie or cake with this icing? It’s like a little flavor hug. The vanilla extract gives it warmth, while the lemon juice cuts through the sweetness enough to make it feel fresh, not heavy. Honestly, I’ve used store-bought icing before, but this? It tastes like something you’d get at a bakery—just without the fuss.
- Birthday to Bake Sale: Between us, this icing is my secret weapon for anything that needs a quick topper. Too lazy to make cupcakes from scratch? Slather this on store-bought ones. Hosting a last-minute party? Color it pink or blue and call it a day. I’ve even used it to drizzle over fruit tarts when I was out of time. It’s that reliable.
- Pantry Staple Power: Here’s what sold me—this uses things I already have. Powdered sugar, heavy cream, vanilla? Check, check, check. No weird ingredients, no special trips to the store. And if I make too much? It keeps in the fridge for days, perfect for re-glazing treats when the mood strikes. Plus, food coloring means I can match any vibe without breaking the bank.
Step-by-step instructions for quick cake icing
Here’s how to whip up silky, glossy frosting in seconds—no mixer required.
Sift the Powdered Sugar
Place the 2 cups powdered sugar into a medium bowl. I use a fine-mesh sieve to eliminate any lumps, which prevents graininess in the final icing. Tap the sieve gently with your fingers to help the sugar flow through evenly. This step is crucial—if you skip it, you’ll end up with a textured frosting that looks homemade instead of professional.
Once sifted, give the powdered sugar a quick stir with a whisk to break up any remaining clumps. The goal is to create a smooth, lump-free base for your icing. Set this aside while you prepare the wet ingredients—this keeps everything ready for the fast assembly.
Whip the Cream to Soft Peaks
In a separate bowl, combine the 0.5 cup heavy whipping cream with the 1 teaspoon pure vanilla extract and 0.5 teaspoon lemon juice. Use a hand mixer or whisk to beat the cream until it reaches soft peaks—when you lift the whisk, the cream should form gentle peaks that quickly flatten. This texture is perfect for creating a glossy, spreadable icing without being too stiff.
Here’s the thing—cold cream whips better, so make sure your bowl and beaters are chilled if your kitchen is warm. If the cream starts to curdle or separate, it’s overmixed. You want it light and airy, not buttery. Add the 2 drops food coloring now if you’re making tinted icing, whisking until fully blended.
Combine Wet and Dry Ingredients
Gradually pour the whipped cream mixture into the sifted powdered sugar while mixing continuously with a spatula or whisk. Start slowly to avoid creating a paste—you want to maintain that light, airy texture. Once combined, continue mixing until the icing is completely smooth and glossy. This should take about 30 seconds of steady mixing with a hand mixer or 1 minute with a whisk.
The icing is ready when it’s thick enough to hold its shape on a spoon but still spreadable. If it’s too thick, add 1 teaspoon water at a time until it reaches the right consistency. If it’s too thin, add 1 tablespoon more powdered sugar and mix again. You’re aiming for a texture that’s like “wet sand”—just thick enough to pipe or spread smoothly.
Apply to Cakes or Cupcakes Immediately
Transfer the icing to a piping bag fitted with a star tip for cakes, or simply spoon it into a bowl for cupcakes. For cakes, pipe the icing in even strokes and spread with an offset spatula while the surface is still wet. For cupcakes, spoon the icing over the tops and swirl gently with a knife or toothpick for a classic look. Work quickly—this icing sets up faster than most store-bought versions.
Let the icing sit for 2-3 minutes before serving or decorating further. This brief resting time allows it to thicken slightly and develop that beautiful glossy finish. If you’re adding sprinkles or other decorations, do it within this timeframe before the surface dries. The result? A professional-looking finish that takes less time than it takes to make coffee.
Pro Tips For Making 15 Second Icing
- Whip Cold Cream: Heavy whipping cream straight from the fridge whips faster and holds its shape—no need to thaw it first. I used to warm mine “just a little” and ended up with a sad, runny mess every time.
- Sift That Sugar: Powdered sugar clumps like a grumpy cat if you don’t sift it first, especially if it’s been sitting in a humid kitchen. Use a fine-mesh sieve and tap it gently over the bowl—no need to rush, just consistent pressure.
- Measure Lemon Juice Precisely: A splash of lemon juice is not the same as 1 teaspoon. Use a measuring spoon—too little and your icing tastes bland; too much and it turns into a sad, tangy glaze. Start with ½ teaspoon and adjust.
- Color Last, Mix Fast: Add food coloring after the icing is mostly whipped, then mix just until combined—overmixing turns it into butter. A few quick flicks of the whisk is all it takes; don’t turn it into a science experiment.
Regional styles of this 15 second icing
Southern-Style Vanilla Cream
In the South, this icing gets a special twist by adding ½ teaspoon ground cinnamon and ¼ teaspoon salt to the powdered sugar before mixing. The cinnamon gives it a warm, cozy flavor that pairs perfectly with peach cobbler cakes or pound cakes.
I’ve seen grandmothers use buttermilk instead of heavy cream for a tangy kick—just replace the cream with ½ cup buttermilk and reduce the vanilla to ½ teaspoon to balance the acidity. 🌶️
German Buttercream Adaptation
For a richer, more stable icing, Germans often replace the heavy cream with ½ cup softened butter and 1 tablespoon milk. Whip the butter until light and fluffy, then gradually mix in the powdered sugar and vanilla.
This version holds up better for layered cakes and decorating, especially in cooler climates where lighter icings can get sticky. I’ve used this variation for black forest cakes and it adds a lovely buttery depth.
British Lemon Curd Glaze
Across the pond, this icing transforms into a lemon curd glaze by replacing the vanilla with 2 tablespoons lemon curd and adding 1 tablespoon fresh lemon zest. The zest gives it a bright, citrusy aroma that’s perfect for Victoria sponge cakes or lemon drizzle cakes.
Brits often dust the finished cake with powdered sugar for an extra-fancy touch. I’ve made this version for afternoon tea and it’s always a crowd-pleaser.
French Ganache-Inspired
For a more decadent finish, French bakers might replace the heavy cream with ½ cup heavy cream heated to 160°F and poured over ½ cup chopped dark chocolate. Let it sit for 2 minutes, then whisk until smooth before mixing in the powdered sugar.
This creates a semi-smooth ganache that’s perfect for chocolate cakes or éclairs. The chocolate adds a luxurious richness while keeping the quick-prep advantage. 🍫
Italian Amaretto Twist
In Italy, this icing often gets a boozy upgrade with 1 teaspoon amaretto liqueur instead of vanilla. The almond flavor pairs beautifully with almond cakes or tiramisu-inspired desserts. Italians also love adding ½ teaspoon almond extract for extra depth.
I’ve used this version for amaretto-flavored biscotti and it adds a sophisticated touch that feels like a café treat.
Modern Fusion Variations
For a contemporary spin, try swapping the vanilla for ½ teaspoon matcha powder and 1 teaspoon honey—this creates a Japanese-inspired matcha glaze that’s perfect for white chocolate cakes. Or, for a Mexican-inspired version, add ½ teaspoon chili powder and 1 teaspoon lime juice for a sweet-spicy kick.
These fusion ideas keep the quick prep time while adding exciting global flavors. 🌎
Nutrition facts
Frequently asked questions
Can I make this icing without powdered sugar?
Not exactly! Powdered sugar is key for that ultra-smooth, glossy texture. If you’re out, you could substitute 1 cup granulated sugar mixed with 2 tablespoons cornstarch (to mimic the fineness), but it won’t be as silky. For a quick fix, try 1 cup confectioners’ sugar substitute (like Bob’s Red Mill) if you have it on hand.
How do I fix lumpy icing?
If your icing gets lumpy, don’t panic! Just whisk in 1-2 teaspoons of cold water or milk until smooth. For stubborn lumps, strain the icing through a fine-mesh sieve into a clean bowl. The secret is always sifting the powdered sugar first—this prevents 90% of lumps from forming in the first place!
Will this icing work on warm cakes?
Nope! Warm cakes will melt the icing and make it runny. Always let your baked goods cool completely (at least 1-2 hours) before applying. For speed, chill the cake in the fridge for 15 minutes while you make the icing—this helps it set faster too.
Can I use this icing for cookies?
This icing works beautifully for cookies too. For a classic look, pipe small dots between cookies before baking (like on sugar cookies), or use it as a drizzle after baking. Just make sure your cookies are completely cooled first—warm cookies will make the icing melt and pool.
How do I store leftover icing?
Transfer any leftovers to an airtight container and refrigerate for up to 1 week. It’ll thicken slightly when cold, so whisk in 1 teaspoon of milk to restore the smooth texture before using. Avoid freezing—it can cause the sugar to crystallize and make the icing grainy.

- 3 Overripe Bananas Recipe: Fluffy Pancakes With Zero Waste - November 17, 2026
- 2-Minute Pizza Recipe: Speedy Crispy Crust With Melted Cheese Magic - November 17, 2026
- 16 Chocolate Cupcakes Recipe: Triple-Layered Fudge Swirl Delight - November 17, 2026