
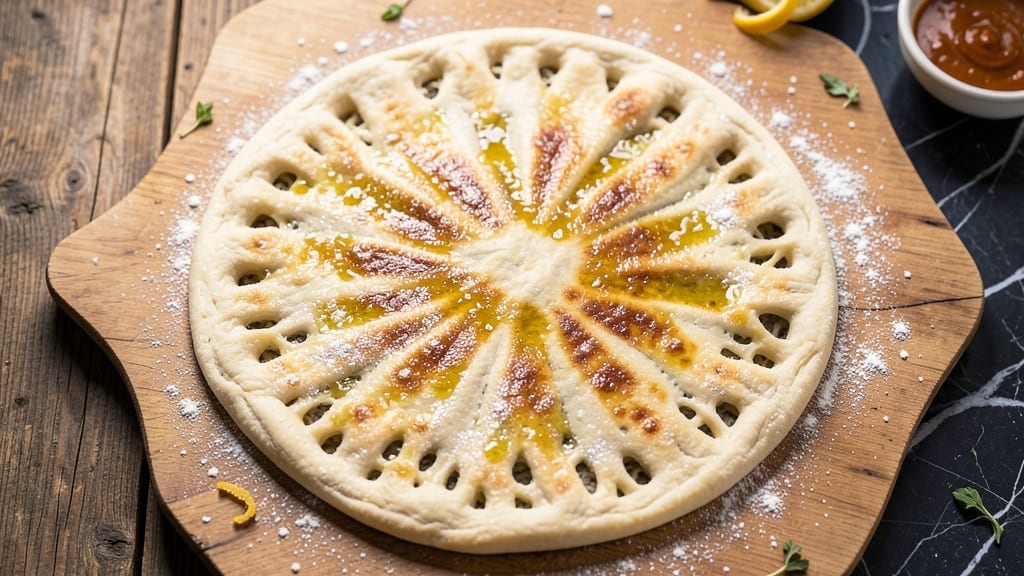
This 16-inch pizza dough recipe delivers a no-knead giant crust that’s crispy on the edges and perfectly chewy inside—all in just 2 hours from start to finish. The secret lies in a slow fermentation process that develops deep flavor while keeping the dough manageable, even for first-time pizza makers.
No stand mixer? No problem. This method relies on time and patience, not brute force, ensuring a professional-quality crust every time.
What makes this dough special is its foolproof technique: combine simple ingredients—flour, yeast, water, and salt—then let the dough rest at room temperature for 1 hour, followed by a 1-hour cold proof in the fridge.
This resting period allows the gluten to relax, preventing cracks and creating that signature airy texture. The result? A dough that stretches effortlessly and bakes up with a golden, blistered crust that holds toppings perfectly.
By the time you slide it into a 475°F oven, you’ll have a dough that’s ready to transform into your dream pizza—whether it’s a classic Margherita, a loaded deep-dish, or a thin-crust masterpiece.
The beauty of this recipe is its flexibility: adjust the thickness by stretching it thinner for a Neapolitan-style crust or thicker for a Chicago deep-dish. The only limit is your imagination.
Ready to master the art of homemade pizza? This dough is your foundation—crispy, flavorful, and impossible to mess up—so you can focus on the fun part: choosing your toppings. Let’s get started.
Ingredients for 16 in pizza dough
Four cups flour, one tablespoon oil—this dough transforms simple pantry staples into a restaurant-quality 16-inch crust.
| Ingredient | Amount | Notes |
|---|---|---|
| All-Purpose Flour 🌾 | 4 cups | High-protein preferred for chewiness |
| Active Dry Yeast 🍞 | ¼ tsp | Fresh yeast at half amount |
| Warm Water 💧 | 1 ½ cups | 110°F (43°C) for best activation |
| Extra-Virgin Olive Oil 🫒 | 1 tbsp | For dough elasticity |
| Granulated Sugar 🍬 | 1 tsp | Feeds yeast for fermentation |
| Diamond Crystal Kosher Salt 🧂 | 1 tsp | Adjusts flavor balance |
| Semolina Flour 🌾 | ½ cup | For dusting and crispy crust |
| Cornmeal 🌽 | ¼ cup | Prevents sticking to surface |
Flour is everything here. King Arthur or Caputo Tipo 00 give the best texture, but Bob’s Red Mill all-purpose works in a pinch. The yeast needs to be fresh—if your packet’s past its expiration, double the amount. Warm water is key: too hot kills the yeast, too cold slows fermentation. Test it by dipping your pinky finger—should feel like bathwater. For the olive oil, California Gold or Bertolli add subtle fruitiness that enhances the dough’s flavor during baking. Salt matters too: Diamond Crystal dissolves better than table salt, so don’t substitute.
No yeast? Instant yeast works 1:1, but active dry needs 5 minutes to proof first. Short on olive oil? Avocado oil or melted coconut oil keep the same neutral profile. The sugar can be swapped for honey or maple syrup, but it’ll ferment faster. For a lower-carb version, replace 1 cup flour with almond flour—texture changes slightly, but it works. Semolina is non-negotiable for that authentic crispy crust, but fine cornmeal works if you’re out. The cornmeal just prevents sticking during shaping—no need to bake it in unless you want extra crunch.
This dough keeps 3 days in the fridge, wrapped tightly in plastic. For longer storage, freeze shaped dough balls for up to 3 months—thaw overnight in the fridge before using. The cold proof is crucial: never skip it. It relaxes the gluten, preventing cracks when stretching. If you’re prepping ahead, make the dough up to 24 hours early, then let it come to room temp before final proof. The flavor develops more over time, so patience pays off—trust the process.
Why You’ll Love This Recipe
- No-Fuss Dough: I swear by this recipe because it’s the kind of dough I can mix while watching a show—just flour, yeast, water, and a splash of olive oil. No stand mixer, no waiting around for hours; the yeast does its magic in under an hour, and I’m left with something that’s actually better than store-bought.
- Golden Crust Promise: That little spoonful of sugar isn’t just for the yeast—it helps create a crust with a subtle sweetness and a satisfying crunch. The olive oil keeps it tender inside, so you get that perfect balance: crispy edges, pillowy middle, every time.
- Pizza for Any Mood: Between us, this dough works for everything. Weeknight dinners? Check. Game day snacks? Done. Even breakfast (yes, really—add an egg and cheese). I’ve made 16 personal pizzas for a party, frozen half for lazy Mondays, and still had leftovers for lunch the next day.
- Budget-Friendly Staple: Honestly, the ingredients cost next to nothing, and they last. A bag of flour and a jar of yeast stretch across months of dough-making, which means more pizza nights without breaking the bank. Plus, the olive oil adds richness without needing fancy shortcuts.
Step-by-step instructions for 16-Inch no-knead pizza dough
Here’s how to create a perfectly elastic, no-fuss dough that handles a giant 16-inch pizza with ease.
Activate the Yeast for Maximum Rise
In a small bowl, combine the 1.5 cups warm water (test temperature with your finger—it should feel warm but not hot) with the 1 tsp granulated sugar and 0.25 tsp active dry yeast. Let this sit for 5-10 minutes until you see frothy bubbles forming on the surface. This confirms your yeast is alive and ready to work.
I always give yeast this little head start because it ensures a strong fermentation later. If no bubbles appear after 10 minutes, your yeast might be dead—start fresh with a new packet. Once bubbly, proceed immediately to avoid overproofing.
Mix the Dough to Perfect Consistency
In the bowl of a stand mixer fitted with the dough hook attachment, combine the 4 cups all-purpose flour and 1 tsp diamond crystal kosher salt. Mix on low speed for 30 seconds to distribute the flour evenly. Add the yeast mixture and 1 tbsp extra-virgin olive oil, then mix on low speed for 2 minutes until a shaggy dough forms.
The dough should look wet and sticky at this stage—this is normal. If it seems too dry, add 1 tablespoon warm water at a time until it reaches the perfect consistency. I press my finger into the dough; if it springs back slowly but leaves a slight indentation, you’re golden. This texture gives you that perfect chewy yet airy crust.
Let the Dough Rest for Optimal Development
Transfer the dough to a lightly oiled large bowl, cover it tightly with plastic wrap, and let it rest at room temperature for 1 hour. This initial rest allows the gluten to relax and the yeast to begin fermenting gently. After 1 hour, you’ll notice the dough has puffed up slightly and looks less dense.
I like to give the dough a gentle stretch and fold at this stage to strengthen the gluten further. Wet your hands slightly and press down on the dough, then fold it over itself like a letter. Repeat this process 2-3 times—this builds structure without requiring traditional kneading. Let it rest another 30 minutes before shaping.
Shape and Prepare for Final Rise
Lightly dust a clean work surface with 0.5 cup semolina flour. Turn out the dough and gently press it into a rough rectangle. Starting from the center, stretch the dough outward in all directions until it reaches about 16 inches in diameter. If the dough resists, let it rest for 5 minutes and try again—rushing this step leads to uneven thickness.
Transfer the shaped dough to a parchment-lined baking sheet or pizza peel dusted with 0.25 cup cornmeal. Cover loosely with plastic wrap and let it rise at room temperature for 30-60 minutes, until it’s puffy and springs back slowly when pressed gently with your finger. This final rise ensures a light, airy crust that’s ready for your favorite toppings.
Preheat and Use Immediately
Preheat your oven to 500°F (or as high as it goes) with a pizza stone or steel inside for at least 60 minutes. This intense heat is crucial for achieving that perfect crispy yet chewy texture. While the oven heats, keep your dough covered to prevent it from drying out.
When ready to bake, slide the dough (with parchment) directly onto the preheated stone or steel. Bake for 10-12 minutes until the crust is golden brown and slightly blistered. The edges should be crisp, but the center should still feel soft to the touch. This dough handles toppings beautifully—just add sauce and cheese immediately after baking for the best results.
Pro Tips For Making 16 In Pizza Dough
- Test Yeast First: Skip the guesswork—mix 1 teaspoon yeast with ¼ cup warm water and ½ teaspoon sugar, then wait 5–10 minutes. If it doesn’t foam, your yeast is dead, and you’ll need to start over. (I learned this the hard way after baking a flat, sad dough.)
- Weigh Your Flour: Ditch the scoop—use a kitchen scale for the 500g flour. Spooning adds air, which throws off hydration and makes the dough tougher. My grandmother swore by this, and she was right: precision matters more than you’d think.
- Knead Until Silky: Stop when the dough springs back slowly when poked and looks smooth, not sticky. Over-kneading makes gluten tight and chewy—under-kneaded dough won’t hold toppings. (Yes, even if you’re impatient like me.)
- Oil Your Hands: Coat your fingers with olive oil before shaping—it keeps the dough from sticking and makes stretching easier. No more frustrated tugging or dough tearing. (Does it look weird? Yes. Does it work? Every single time.)
Creative variations of this 16 in pizza dough
Neapolitan-Style Thin Crust
For a classic Neapolitan crust, stretch your dough to a 16-inch diameter but keep it thin—about ⅛-inch thick at the edges. Use 00 flour (like Caputo) for that signature chew and fold the dough over itself 3-4 times during the 1-hour room temp rest to build strength.
Bake at 500°F for just 9-10 minutes—the high heat creates those prized charred spots. Finish with San Marzano tomato sauce and fresh mozzarella for authenticity. 🌟
Chicago Deep-Dish Twist
Transform this dough into a deep-dish masterpiece by pressing it into a 9-inch round cake pan (greased with butter). Pile on layers of mozzarella, sausage, and marinara sauce before baking at 375°F for 30-35 minutes.
The secret? Use 1 extra cup of flour in the dough to handle the extra thickness. Top with a sprinkle of Parmesan before serving. 🍕
Gluten-Free Adaptation
Swap 1 cup all-purpose flour for a 1:1 gluten-free blend (like King Arthur’s). Add 1 tbsp xanthan gum to mimic gluten’s structure, and let the dough rest 30 minutes longer between stages.
Shape carefully—gluten-free dough tears easily, so work gently. Bake at 475°F with a thinner crust (¼-inch thick) to prevent burning. 💪
Herb-Infused Dough
Boost flavor by mixing 1 tbsp chopped fresh rosemary or basil into the dough during the 2-minute mixer stage. For a garlic twist, infuse 1 tbsp olive oil with 3 minced garlic cloves before adding it to the dough.
These herbs develop beautifully during the 1-hour room temp rest, creating a fragrant, aromatic crust. Perfect for Mediterranean-style pizzas! 🌿
Breakfast Pizza Hack
Roll the dough into a 12-inch round and bake at 425°F for 8 minutes until golden. Top with scrambled eggs, crispy bacon, and shredded cheddar, then finish under the broiler for 2-3 minutes to melt the cheese. The dough’s chewiness balances the richness of breakfast toppings beautifully. 🍳
No-Yeast Sourdough Version
Replace yeast with ½ cup active sourdough starter (fed and bubbly). Reduce water to 1 cup and let the dough ferment at room temp for 4 hours** (or overnight in the fridge).
The tangy flavor develops over time, and the crust gets extra crispy. Shape and bake as usual—this version is perfect for sourdough lovers who want pizza night! 🥖
Nutrition facts
Frequently asked questions
Why does this dough need two different rising times?
The 1-hour room temperature rest develops gluten structure while the 1-hour cold proof relaxes it for easier stretching. Cold proofing also enhances flavor and prevents cracks when shaping. Think of it as giving your dough a spa day—first it builds muscle, then it rests to become pliable!
Can I make this dough without a stand mixer?
Just mix the dough by hand in a large bowl using a wooden spoon or your hands. Work it for 5-7 minutes until it pulls away from the sides. The dough should still be sticky but cohesive. For best results, do the stretch-and-fold technique by hand—wet your fingers and press down gently before folding.
What if my dough cracks when stretching?
Cracks usually mean the gluten isn’t relaxed enough. Let the dough rest 10-15 minutes longer before stretching, or do more stretch-and-folds during the 1-hour room temp rest. If it still cracks, try this trick: gently press your fingers into the dough to create small air pockets before stretching—this gives the gluten room to expand without tearing.
How do I know when my pizza stone is properly preheated?
Your stone is ready when a drop of water sizzles and evaporates instantly upon contact. For extra assurance, place a 1-inch piece of dough on the stone—if it browns in 30 seconds, it’s hot enough. Pro tip: Preheat your stone 60 minutes before baking for maximum heat transfer. Never place cold dough on a hot stone—it’ll shock and crack!
Can I make this dough ahead of time?
Yes! Shape the dough and store it in the fridge for up to 3 days, wrapped tightly in plastic. For longer storage, freeze shaped dough balls for 3 months. Thaw overnight in the fridge before final proofing. The longer it rests, the more flavor develops—just let it come to room temp before shaping.

- 3lb Prime Rib Roast Recipe: Juicy Pink Center Guaranteed in 3 Hours - October 31, 2026
- 5 Spice Cake Recipe: Warmly Spiced Layers With Crunchy Top - October 31, 2026
- 1950’s Macaroni and Cheese Recipe: Nostalgic Creamy Cheese Sauce with Buttery Noodles - October 31, 2026