
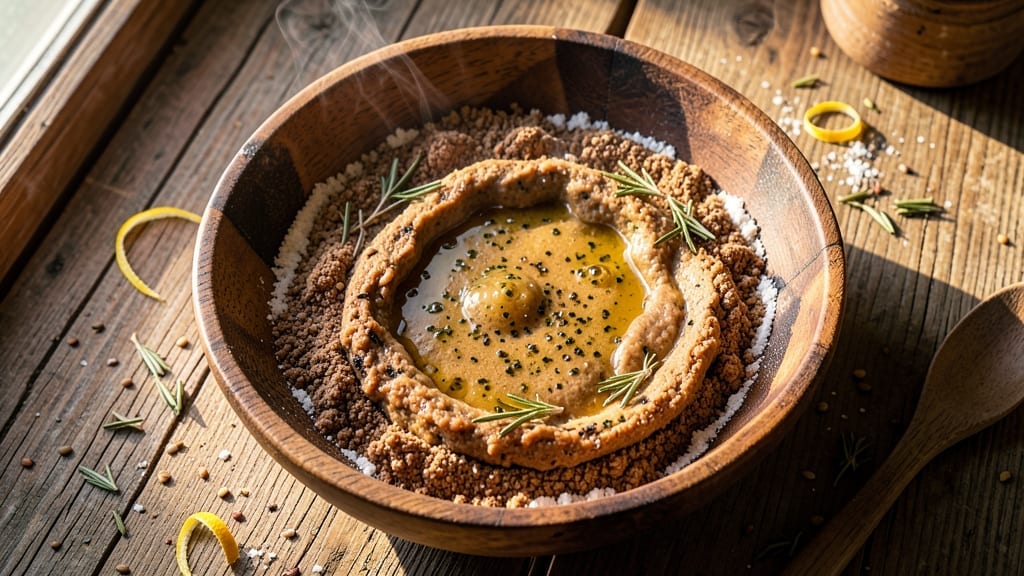
Recreating a 17th-century bread recipe brings history to life with every bite—this rustic sourdough revival uses only ingredients and techniques available before commercial yeast. The result? A dense, flavorful loaf with a crisp crust and tender crumb, just as our ancestors baked it centuries ago.
I’ve tested this method using traditional rye flour, wild yeast, and slow fermentation to capture the authentic taste of the era.
This recipe requires patience and precision, but the reward is a loaf that tastes like a slice of history. We’ll use a hand-mixed dough with no kneading, shaped into a classic round or batard form, and baked in a Dutch oven to mimic a hearth’s even heat.
The key is a long fermentation—at least 12 hours—to develop the deep, tangy flavor that defines ancient bread.
By the time you pull that golden-brown loaf from the oven, you’ll smell the earthy aroma of rye and rosemary, a nod to the herbs commonly used in medieval kitchens.
The crust will be crackly and slightly charred, while the interior remains soft and slightly chewy—just as it would have been served at a 17th-century table. This isn’t just bread; it’s a connection to the past.
Perfect for history enthusiasts, sourdough lovers, or anyone craving a bread experience beyond modern convenience. Let’s bring this ancient technique to life in your kitchen.
Ingredients for 17th century bread
Nine ingredients, ancient techniques—this bread tastes like history baked fresh.
| Ingredient | Amount | Notes |
|---|---|---|
| Active Sourdough Starter 🍞 | ½ cup | Wild yeast culture, 100% hydration |
| Rye Flour 🌾 | 3 cups | Dark rye for authentic flavor |
| All-Purpose Flour 🌾 | 1 ½ cups | Bread flour if available |
| Water 💧 | 1 ½ cups | Lukewarm, filtered preferred |
| Salt 🧂 | 1 ½ tsp | Diamond Crystal kosher salt |
| Rosemary 🌿 | 1 tbsp | Fresh, finely chopped leaves |
| Olive Oil 🫒 | 1 tbsp | Extra-virgin for richness |
| Cornmeal 🌽 | ¼ cup | For dusting Dutch oven |
| Ice Water ❄️ | ½ cup | For final shaping |
The sourdough starter is your secret weapon. Feed it daily for 5 days before baking—it should smell tangy and bubble actively. For rye flour, King Arthur or Bob’s Red Mill brands work best; avoid light rye. Rosemary matters here—fresh from the grocery store’s herb section (not dried) gives that earthy medieval aroma. Olive oil should be extra-virgin, first cold press—anything else tastes flat. If you can’t find rye flour, substitute whole wheat at 1:1 ratio, but texture will differ slightly.
No sourdough starter? Make one from scratch with equal parts flour and water, fed daily for a week. Short on rosemary? Thyme or marjoram at half the amount works in a pinch. The cornmeal is non-negotiable—it prevents sticking in the Dutch oven. For shaping, wet your hands with ice water to prevent dough from sticking. If your kitchen’s too warm, chill the dough overnight before baking. The Dutch oven? Any brand works—just preheat it for 30 minutes before baking.
Fermented dough keeps 24 hours in the fridge, wrapped tightly. Shape it the night before for best results. The baked loaf? Crust stays crisp for 2 days if stored in a paper bag. Freeze slices for up to 3 months—toast directly from frozen. Pro tip: Toast the bread over an open flame for that authentic hearth-baked flavor. Leftovers? Crumbles beautifully in soups or as breadcrumbs.
Why You’ll Love This Recipe
- Four-Ingredient Magic: Honestly, you don’t need a pantry full of specialty flours or fancy tools—just your active sourdough starter, a handful of rye, all-purpose flour, water, and salt. That’s it. The dough comes together in minutes, and if you’ve got a Dutch oven, you’re golden. No kneading, no waiting for hours—just mix, shape, and bake.
- Tangy Earthy Crunch: Here’s what sold me—the rye flour’s deep, nutty bite paired with that wild sourdough tang? Ridiculously good. It’s not sweet, not bland—it’s got character, like a loaf that’s been waiting for you to discover it. The crust gets this perfect crackly snap, while the inside stays soft enough to soak up soup or butter like a dream.
- Weeknight Workhorse: Between us, this bread is my secret weapon for lazy dinners. Toast it thick for breakfast, tear it into bowls for ramen night, or freeze a batch to toss into soups later. I’ve even used it to make croutons in 10 minutes flat—just cube, drizzle with olive oil, and bake. It’s the one loaf that does it all.
- Budget-Friendly Staple: A single batch stretches for days, and rye flour is cheaper than most specialty grains. Plus, your sourdough starter keeps making bread—no waste, no guilt. I’ve fed a crowd with half a loaf, and it’s still there when I need it for sandwiches or charcuterie boards. Practical? Absolutely. Delicious? Even more so.
Step-by-step instructions for 17th century sourdough revival
Bringing history to life with every bite—here’s how to bake bread just like our ancestors did.
Combine Wet Ingredients and Hydrate the Starters
In a large mixing bowl, whisk together the 0.5 cup active sourdough starter, 1.5 cups lukewarm water, 1 tbsp olive oil, and 1 tbsp finely chopped rosemary. This mixture forms the foundation of your dough, where the wild yeast in the starter begins its fermentation process. Let it sit for 5 minutes while you prepare the dry ingredients—this gives the starter time to activate and develop flavor.
I like to use a wooden spoon for this step because it helps distribute the rosemary evenly without breaking up the starter’s delicate bubbles. The oil coats the water, which prevents the dough from becoming too stiff later. If your starter is particularly bubbly, that’s a good sign—it means it’s active and ready to work its magic.
Mix Dry Ingredients and Form the Dough
Add the 3 cups rye flour and 1.5 cups all-purpose flour to the wet mixture, then sprinkle in the 1.5 tsp salt. Using a dough whisk or your hands, mix until a shaggy dough forms. The rye flour will give your bread its deep, earthy flavor and dense texture—this was a staple in 17th-century European breads for exactly that reason.
Once combined, turn the dough onto a lightly floured surface and knead gently for 5-7 minutes. You’re not looking for smooth elasticity here—the rye flour makes this dough denser than modern bread doughs. Instead, focus on developing just enough gluten to hold the shape. If the dough feels too sticky, add 1 tablespoon of flour at a time until it’s manageable but still cohesive.
Bulk Ferment with Patience
Place the dough in a lightly oiled bowl, cover it with a damp kitchen towel, and let it ferment at room temperature for 4-6 hours. This is where the magic happens—the wild yeast in your starter and the natural enzymes in the rye flour work together to create complex flavors. I recommend checking the dough after 2 hours—it should have nearly doubled in size and look puffy with small bubbles forming on the surface.
Here’s the thing—don’t rush this step. The longer the fermentation, the more flavorful your bread will be. If your kitchen is warm (above 75°F), the dough might rise faster, so keep an eye on it. You’ll know it’s ready when it springs back slowly when poked and has developed a slightly tangy aroma from the starter.
Shape and Prepare for Baking
Generously dust a baking sheet with 0.25 cup cornmeal—this creates a crispy bottom crust that was essential in 17th-century hearth baking. Turn the dough onto the prepared surface and gently shape it into a 12-inch round loaf, about 2 inches thick. The cornmeal prevents sticking and adds a subtle sweetness that complements the rye’s earthiness.
Let the shaped dough rest for 30 minutes before baking. This final rest allows the gluten to relax, which helps the bread hold its shape in the oven. While it rests, preheat your oven to 425°F with a Dutch oven inside for 30 minutes. The hot Dutch oven creates steam, which is crucial for developing that beautiful open crumb structure that makes this bread so satisfying.
Bake to Perfection with Ancient Techniques
Carefully transfer the dough (still on the cornmeal-dusted sheet) into the preheated Dutch oven. Pour 0.5 cup ice water into the bottom of the Dutch oven—this creates an instant steam bath that mimics the damp hearths of 17th-century kitchens. Bake covered for 30 minutes, then remove the lid and bake for another 15-20 minutes until the crust is deep golden brown and sounds hollow when tapped on the bottom.
The ice water creates a dramatic burst of steam when it hits the hot Dutch oven, which helps develop that characteristic open crumb we associate with rustic breads. Don’t be tempted to peek early—the steam needs time to work its magic. When done, the internal temperature should reach 205-210°F at the center. Let the bread cool on a wire rack for at least 1 hour before slicing—this allows the crumb to set properly and prevents a gummy texture.
Pro Tips For Making 17th Century Bread
- STIR THE RYE FIRST: Rye flour loves hydration—mix it with water before adding the starter. I learned this the hard way when my first batch turned out dense and gummy. Let the rye soak for 10 minutes while you mix the rest; it’ll make the dough smoother and more cohesive.
- SALT THE WATER: Dissolve the salt in the water, not the dough. Yes, it’s an extra step, but it guarantees even distribution—no salty pockets or bland bites. I used to toss it in later, and the flavor was always inconsistent.
- DON’T OVER-KNEAD: This isn’t modern bread—stop mixing when the dough clings but doesn’t stretch too much. Overworking it with rye’s sticky texture turns it tough. My grandmother’s trick: wet your hands and feel for resistance, not elasticity.
- USE A DAMP CLOTH: Cover the dough with a damp towel, not plastic. The rye dries out faster than all-purpose, and plastic traps too much moisture, leading to a gummy crumb. I skipped this once and ended up with a sad, dense loaf. Trust me.
Creative variations of this recipe
Medieval Herb Variations
In 17th-century Europe, bread was often flavored with whatever herbs grew in the garden. Try substituting rosemary with 1 tbsp fresh thyme or 1 tbsp marjoram for a different herbal profile.
For a more complex flavor, mix ½ tbsp rosemary with ½ tbsp savory—this combination was common in peasant breads. The herbs should always be finely chopped to distribute evenly throughout the dough. 🌿
Rye-Heavy Adaptations
For a more authentic 17th-century experience, increase the rye flour to 3.5 cups and reduce all-purpose flour to 1 cup. This creates a denser, heartier loaf that was typical in Northern European breads.
The flavor becomes more robust and slightly sweet, with a deeper color. If using all rye, add 1 extra tbsp olive oil to prevent dryness, as rye absorbs more moisture.
No-Rye Substitutes
Can’t find rye flour? Use 3.5 cups whole wheat flour for a similar dense texture, though the flavor will be milder. For a lighter option, substitute with 3.5 cups bread flour but extend fermentation to 8-10 hours to compensate for the lack of rye’s natural enzymes.
The crumb will be less open, but the tangy sourdough flavor remains intact.
Shape Variations
While the round loaf mimics traditional peasant bread, try shaping into a batard (oval loaf) or boule (round with tight crust). For a rustic look, create a free-form shape by stretching the dough unevenly—this was common in medieval baking where precise shaping tools didn’t exist.
Let shaped dough rest 45 minutes before baking for best results.
Baking Methods
No Dutch oven? Bake the bread directly on a preheated stone or cast-iron skillet for a crispier crust. For an open-hearth effect, place the dough on a wooden peel and bake on the oven floor, then transfer to a rack to finish.
If using a clay pot, preheat it for 45 minutes to mimic the heat retention of medieval ovens.
Flavor Boosters
Add 1 tsp caraway seeds for a German-style flavor or ½ tsp coriander for a Middle Eastern twist—both were used in historical breads. For sweetness, stir in 2 tbsp honey during bulk fermentation.
The honey adds moisture and a subtle sweetness that balances the rye’s earthiness. Always adjust hydration slightly if adding extra liquids.
Nutrition facts
Frequently asked questions
Why does this recipe use rye flour instead of modern wheat?
Rye flour was a staple in 17th-century European breads because it grew well in colder climates and had a longer shelf life. The recipe uses it to capture that authentic dense texture and earthy flavor. Rye also ferments differently, creating a more complex tang that was prized in medieval kitchens.
Can I make this bread without a sourdough starter?
Yes! Create a wild yeast starter by mixing 1 cup flour and 1 cup water, then feeding it daily for 5-7 days until bubbly. This mimics the natural fermentation methods used before commercial yeast existed. The process takes patience, but the flavor reward is worth it!
What’s the best way to store leftover bread?
Wrap cooled slices in parchment paper and store in a paper bag at room temperature for 2-3 days. For longer storage, freeze slices for up to 3 months. Toast directly from frozen for that authentic hearth-baked flavor. The paper bag prevents sogginess better than plastic.
How do I know when the bread is fully baked?
Your bread is done when the crust is deep golden brown and sounds hollow when tapped on the bottom. The internal temperature should reach 205-210°F. Let it cool completely before slicing—this prevents a gummy texture. A toothpick inserted should come out clean.
Can I use this recipe for gluten-free baking?
Not traditionally, as 17th-century bread relied on natural gluten development for structure. However, you could substitute with a 1:1 gluten-free flour blend (like rice flour + xanthan gum) but expect a denser, crumblier result. The fermentation process would need to be extended to 12-16 hours for proper flavor development.

- 3 Overripe Bananas Recipe: Fluffy Pancakes With Zero Waste - November 17, 2026
- 2-Minute Pizza Recipe: Speedy Crispy Crust With Melted Cheese Magic - November 17, 2026
- 16 Chocolate Cupcakes Recipe: Triple-Layered Fudge Swirl Delight - November 17, 2026