
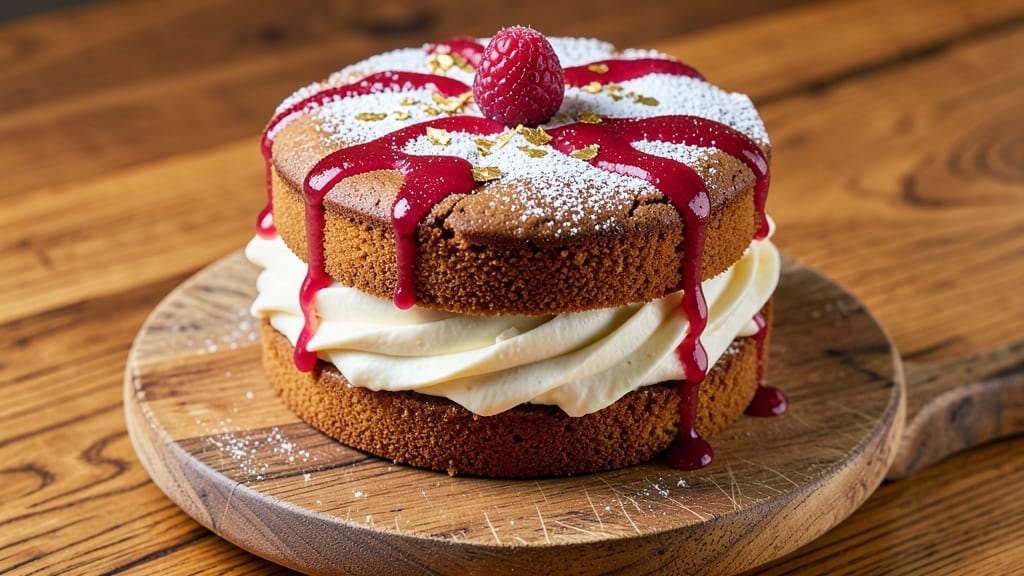
An 18-cup pound cake delivers that legendary buttery, moist crumb and golden crust that makes every slice worth waiting for. This recipe builds on classic techniques—precise measuring, gentle folding, and proper layering—to create a cake that stays tender for days.
The secret lies in the balance of butter, flour, and sugar, combined with a slow bake that develops deep flavor without drying out.
What sets this version apart is the attention to detail: using room-temperature ingredients ensures even mixing, while a light hand when folding preserves air pockets for that signature tender crumb.
The cake’s layers develop a subtle vanilla aroma as it bakes, and the crust achieves that perfect golden sheen without burning. This isn’t just a cake—it’s a foundation for frosting, filling, or serving plain with tea.
By following this method, you’ll achieve a cake that’s moist for days, with clean layers and a buttery richness that rivals bakery versions. The recipe includes optional frosting suggestions, but many prefer it plain—just as the original pound cakes were made.
Whether you’re baking for a celebration or a simple afternoon treat, this cake delivers professional results with home-kitchen simplicity.
Prep time is minimal, but the baking process requires patience—3 hours at 325°F ensures even cooking and maximum moisture retention. The cooling phase is just as important, allowing the cake to set properly before slicing.
For best results, bake in a lightly greased pan and use a thermometer to confirm doneness. This is the pound cake recipe that builds confidence with every batch.
Ingredients for 18 cup pound cake
Classic pound cake staples with precise measurements for that legendary buttery, moist crumb.
| Ingredient | Amount | Notes |
|---|---|---|
| Unsalted Butter 🧈 | 1 ½ lb | Room temperature for creaming |
| All-Purpose Flour 🌾 | 4 ½ cups | Sifted for even texture |
| Granulated Sugar 🍚 | 3 ½ cups | Superfine preferred for smoothness |
| Pure Vanilla Extract 🌿 | 2 tbsp | High-quality Madagascar bourbon |
| Large Eggs 🥚 | 6 whole | Room temperature for blending |
| Baking Powder 🍞 | 1 ½ tsp | Aluminum-free preferred |
| Salt 🧂 | 1 ½ tsp | Diamond Crystal kosher |
| Milk 🥛 | 1 ½ cups | Room temperature for mixing |
| Vegetable Oil 🫒 | ½ cup | Light neutral flavor |
| Lemon Zest 🍋 | 1 tbsp | Freshly grated for brightness |
| White Cake Flour 🌾 | 1 ½ cups | Alternative for finer crumb |
| Powdered Sugar 🍚 | ½ cup | For optional dusting |
The butter is non-negotiable—European-style unsalted butter has higher fat content, which creates that signature tender crumb. King Arthur or Plugrá brands are my go-to for reliability, but any good-quality butter works. Room temperature is critical: press the butter gently with your finger—it should leave a slight indentation but not flatten completely. The flour should be sifted before measuring to prevent dense layers. Bob’s Red Mill all-purpose flour is my standard, but any sifted flour will do. For the sugar, superfine dissolves more evenly, though regular granulated works in a pinch if pulsed in a food processor first.
No vanilla extract? Vanilla bean paste at half the amount gives you those little specks of magic. Short on milk? Heavy cream or buttermilk both work, though the flavor will shift slightly. The lemon zest adds brightness—skip it if you prefer pure vanilla flavor, but trust me, it makes a difference. For the flour, if you don’t have white cake flour, substitute all-purpose with 1 tbsp cornstarch per cup. The baking powder must be fresh: if it’s over a year old, toss it and start fresh. The salt is crucial—Diamond Crystal kosher measures differently than table salt, so don’t swap unless you adjust the amount.
Butter and eggs should be at room temperature before mixing—30 minutes out of the fridge is ideal. The batter will thicken as it sits, so don’t overmix. For storage, wrap the cake tightly in plastic wrap and then foil to keep it moist. Keeps at room temperature for 3 days or up to 1 week refrigerated. Freezes beautifully for up to 3 months—wrap each layer individually in plastic before freezing. The cake improves with age, so if you can wait, let it sit overnight before slicing for maximum tenderness.
Why You’ll Love This Recipe
- No Mixer Needed: I swear by this recipe when my mixer’s on vacation—just creaming butter and sugar by hand gives that classic pound cake texture. The eggs and vanilla come together in minutes, no fuss.
- Butter-Sugar Magic: That rich, creamed butter and sugar combo? It’s the secret weapon. The cake stays moist for days, and the vanilla? Pure, unadulterated happiness in every slice.
- Party or Picnic: Slice it for a crowd or pack it for a hike—this cake travels well. Honestly, I’ve fed a dozen people with one pan, and it’s just as good cold as it is warm.
- Budget-Friendly Giant: Eighteen cups of cake for pennies? Yes, please. The ingredients are simple, and the leftovers? They last longer than my willpower to resist them. (Yes, even on a Tuesday night.)
Step-by-step instructions for layered vanilla pound cake
This classic 18-cup pound cake delivers rich vanilla flavor and tender layers every time.
Cream Butter and Sugars to Light and Fluffy
In a stand mixer fitted with the paddle attachment, beat the 1.5 lb unsalted butter and 3.5 cups granulated sugar on medium speed for 5-7 minutes. The mixture should become pale, thick, and nearly triple in volume. This creaming process incorporates air, which creates the cake’s signature tender crumb.
I press down on the butter mixture occasionally to ensure it’s fully emulsified. You’ll know it’s ready when it leaves a ribbon trail when the beaters are lifted. If using superfine sugar, the process will be slightly faster—about 3-5 minutes. Stop mixing as soon as the sugar dissolves completely to prevent overworking.
Add Eggs and Dry Ingredients Alternately
Add the 6 whole large eggs, one at a time, mixing on low speed after each addition until fully incorporated. Then add the 2 tbsp pure vanilla extract and mix for 10 seconds. This prevents the eggs from scrambling and ensures even distribution of the vanilla flavor.
In a separate bowl, whisk together the 4.5 cups all-purpose flour, 1.5 tsp baking powder, 1.5 tsp salt, and 1.5 cups white cake flour. With the mixer on low speed, add about one-third of the flour mixture and mix until just combined. Then add ½ of the 1.5 cups milk and mix again. Repeat this process, alternating between dry and wet ingredients, ending with the remaining flour mixture. This gradual incorporation prevents gluten development and creates a tender crumb.
Incorporate Oil, Zest, and Final Mixing
Add the 0.5 cup vegetable oil and 1 tbsp lemon zest to the batter and mix on low speed for 30 seconds until fully combined. The oil adds moisture and richness, while the lemon zest brightens the vanilla flavor. Scrape down the sides of the bowl with a spatula to ensure even mixing.
For the final touch, add the remaining ½ of the 1.5 cups milk and mix on low speed for 15 seconds until just combined. The batter should be smooth and thick, with a consistency similar to heavy cream. Avoid overmixing—this is crucial for achieving the perfect texture. If the batter looks too thick, add 1-2 tablespoons of milk to reach the ideal consistency.
Bake in Layers for Even Cooking
Preheat your oven to 350°F. Grease and flour three 9-inch round cake pans or line them with parchment paper circles. Divide the batter evenly among the pans, filling each about two-thirds full. Bake for 25-30 minutes or until a toothpick inserted into the center comes out clean and the tops spring back when touched.
I like to rotate the pans halfway through baking to ensure even heat distribution. The cakes should be golden brown on top and have pulled away slightly from the sides of the pans. If the tops brown too quickly, tent the pans with foil after 15 minutes to prevent overbrowning. Let the cakes cool in the pans for 10 minutes, then transfer to a wire rack to cool completely.
Assemble and Dust with Powdered Sugar
Once the cakes are completely cool, level the tops if necessary using a serrated knife. Place one layer on a serving plate and spread a thin layer of 0.25 cup powdered sugar (about 1 tablespoon) mixed with 1 teaspoon vanilla extract over the top. Repeat with the remaining layers, stacking them carefully to avoid crumbs.
For the final touch, dust the entire cake with the remaining 0.25 cup powdered sugar using a fine-mesh sieve. This creates a beautiful, snowy finish and adds a subtle sweetness. Serve the cake at room temperature for the best texture and flavor. The layers should be moist but not soggy, with a perfect balance of vanilla and lemon zest.
Pro Tips For Making 18 Cup Pound Cake
- Cream Butter Slowly: I learned this the hard way—dumping softened butter into sugar at room temp just makes a greasy mess. Use cold butter (firm but not rock-hard) and mix it into the sugar with the paddle attachment on low speed for 2-3 minutes first. This ensures proper emulsification before adding eggs, so your cake doesn’t turn out dense or greasy.
- Sift Flour Twice: Skimping on sifting here is a mistake. Weigh your flour first (yes, even if your recipe uses cups), then sift it directly into the bowl before adding it to the butter-sugar mix. Sift it again right before folding it in—this prevents lumps and guarantees a lighter texture. (Trust me, your cake will rise better.)
- Don’t Overmix Eggs: After adding the eggs one at a time, mix just until combined—not until you can’t see the yolks. Overmixing incorporates too much air, which can cause the cake to collapse as it bakes. Stop when the batter looks smooth but still has a marbled effect from the butter.
- Use a Toothpick Test: The oven’s temp probe might lie, but a toothpick won’t. Insert it into the center of the cake at the thickest part—when it comes out with one or two moist crumbs (not wet batter), pull it out. If you wait for “clean,” you’ll dry out the cake. (Yes, even if it looks underbaked.)
Essential equipment for this dish
Stand Mixer Essentials
Your stand mixer is the workhorse of pound cake baking—I use my KitchenAid Artisan Series with the paddle attachment for creaming butter and sugar. The paddle’s flat surface ensures even mixing without overwhipping. If you don’t have a mixer, a hand mixer works, but be prepared for more elbow grease.
For the whisk attachment, I switch to it when combining dry ingredients to prevent lumps. 💡
Precision Measuring Tools
Accurate measurements are non-negotiable for pound cake texture. I swear by a digital kitchen scale for butter and sugar, but if you’re measuring by volume, use a clear glass measuring cup for liquids and a stainless steel measuring cup for dry ingredients.
For the 1.5 lb butter, I weigh it in grams (about 680g) for consistency. A fine-mesh sieve is essential for sifting flour to prevent dense layers. 🌾
Baking Pans and Prep
Three 9-inch round cake pans are ideal for this recipe—I use Wilton Perfect Results Non-Stick pans for easy release. Grease them with shortening (not butter) and dust with flour or line with parchment circles.
A parchment round ensures even baking and prevents sticking. For layering, I stack them on top of each other in the oven to save space. 🔥
Thermometer for Perfect Doneness
An instant-read thermometer is my secret weapon for checking doneness. The internal temperature should reach 205-210°F at the center. Without one, rely on the toothpick test: insert it into the center—it should come out clean with a few moist crumbs.
A wire cooling rack is essential for even cooling after baking. ⏰
Optional Tools for Elevation
For dusting powdered sugar, a fine-mesh sieve creates that professional snowy finish. A serrated knife helps level uneven cake tops. If you’re making frosting, a piping bag with a star tip makes decorating easier. For storage, clear plastic wrap and aluminum foil keep the cake moist for days. 💫
Nutrition facts
Frequently asked questions
Why does this pound cake recipe use 18 cups of flour?
The “18-cup” refers to the total amount of flour used across all three layers, not per layer. Each 9-inch round pan gets about 6 cups of batter total, with 1.5 cups white cake flour and 4.5 cups all-purpose flour combined. This creates the signature tender crumb while maintaining structure. The name comes from traditional pound cake recipes that used a pound of butter and a pound of flour.
Can I bake this in a different pan size?
Yes, but adjust the baking time accordingly. For 8-inch pans, bake 30-35 minutes (they’ll be thicker). For 10-inch pans, bake 20-25 minutes (they’ll be thinner). The key is to fill pans only two-thirds full and check doneness with a thermometer at 205-210°F. Never overfill—this prevents proper rising and creates dense layers.
What’s the secret to keeping pound cake moist?
The butter-to-flour ratio and slow baking are critical. Using 1.5 lb butter for 6 cups total flour creates fat pockets that retain moisture. Baking at 350°F for 25-30 minutes develops flavor without drying out. For extra moisture, brush warm layers with simple syrup (equal parts sugar and water) before stacking. Store in an airtight container at room temperature for up to 5 days.
Can I substitute butter with oil?
Not recommended for traditional pound cake texture, but you can try a modified approach. Replace ½ lb butter with ½ cup vegetable oil (keeping total fat equal). The cake will be slightly less rich but still tender. For best results, use European-style butter with higher fat content (82-86%). Oil substitution works better in moist cakes like carrot cake, not classic pound cake.
How do I fix a sunken middle?
Sunken centers usually mean overbaking or under-mixed batter. For future cakes: bake until internal temp reaches 205-210°F (toothpick test), not just color. If it happens, slice off the top ½ inch, spread with 1 tbsp apricot jam, replace the top, and press gently. For a quick fix, brush the sunken area with simple syrup and dust with powdered sugar. The cake will still taste great—just less dramatic!

- 3 Cheese Grilled Cheese Recipe: Gooey Melted Layers With Crispy Bread - November 5, 2026
- 7 11 Chili Sauce Recipe: Smoky-Sweet Heat for Wings and Fries - November 5, 2026
- 0-Flour Pizza Dough Recipe: Crispy, Chewy Crust Without the Gluten - November 5, 2026