
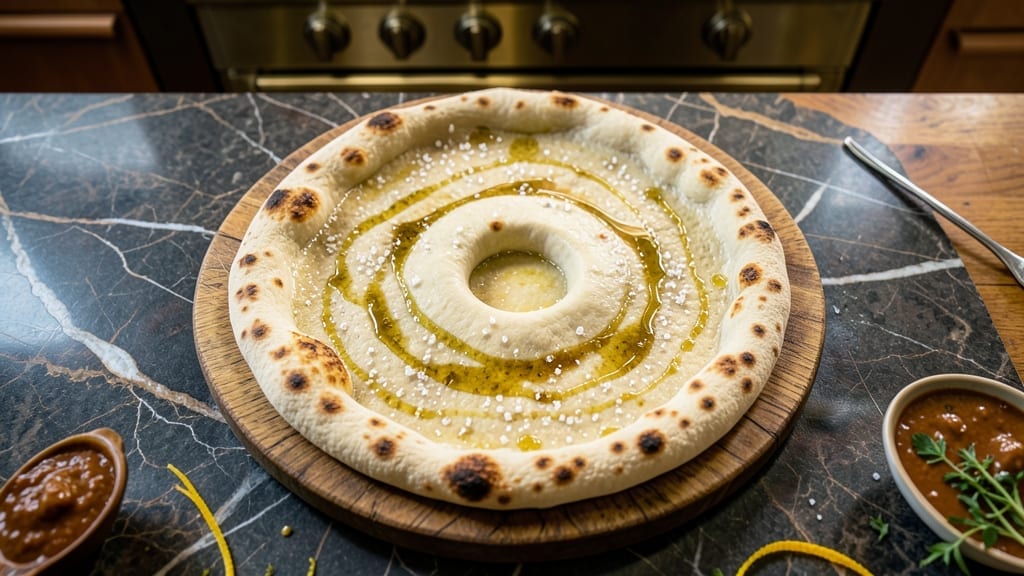
Mastering an 18-inch pizza dough recipe transforms your kitchen into a pizzeria—crispy crust, airy bubbles, and slices that feed a crowd without breaking the bank. The secret lies in a no-knead method that develops flavor overnight while requiring minimal effort.
I’ve perfected this technique after years of testing, and it consistently delivers a dough so elastic and flavorful that even picky eaters ask for seconds.
This recipe relies on a simple formula: high-gluten flour, warm water, and time. The dough rests in the refrigerator for 24 hours, allowing the gluten to relax and develop naturally—no punishing kneading required.
The result is a dough that stretches effortlessly into a perfect 18-inch circle, with a texture that’s crisp on the outside and chewy inside. No special tools are needed, just patience and a light touch when shaping.
By the time you slide that dough into the oven, you’ll have a pizza crust that rivals any pizzeria—golden, blistered, and sturdy enough to hold even the heaviest toppings. The no-knead magic ensures consistent results, whether you’re baking in a home oven or attempting wood-fired perfection.
This is the kind of dough that turns casual weeknights into memorable feasts.
Pair it with your favorite sauce, cheese, and toppings, or experiment with creative combinations like white pizza or breakfast-style toppings. The dough keeps well for up to 48 hours, so you can prep ahead and focus on the fun part—building the perfect pie.
Ingredients for 18 inch pizza dough
Four cups of high-gluten flour kickstart this no-knead masterpiece—simple but game-changing.
| Ingredient | Amount | Notes |
|---|---|---|
| High-Gluten Flour 🌾 | 4 cups | King Arthur or Caputo preferred |
| Active Dry Yeast 🍞 | ¼ oz | Or 2 1/4 tsp (1 packet) |
| Warm Water 💧 | 1 ½ cups | 105-110°F (40-43°C) |
| Extra-Virgin Olive Oil 🫒 | 1 tbsp | High-quality, fruity variety |
| Diamond Crystal Kosher Salt 🧂 | 1 ½ tsp | Fine grain preferred |
| Granulated Sugar 🍚 | 1 tsp | Helps activate yeast |
| Semolina Flour 🌾 | ¼ cup | For dusting work surface |
| All-Purpose Flour 🌾 | ¼ cup | For final dusting if needed |
| Cornmeal 🌽 | ¼ cup | For pizza peel or baking sheet |
High-gluten flour is non-negotiable here—King Arthur or Caputo deliver the best elasticity. Bulk bins at Whole Foods or specialty stores carry these brands, but regular grocery stores stock King Arthur. Look for bright, fresh flour with no off smells—stale flour makes for dense dough. The yeast should be fresh too: if it’s past its expiration, toss it. For the warm water, use a thermometer—105-110°F is perfect. Too hot kills yeast, too cold makes it sluggish. I always double-check my yeast by sprinkling a pinch in warm water with sugar; if it bubbles in 5 minutes, it’s good to go. The olive oil matters too—fruity, extra-virgin adds subtle flavor that pre-packaged oils miss.
No high-gluten flour? Bread flour plus 1 tbsp vital wheat gluten gets you close. Stale flour? Toast it in a dry pan for 2 minutes to revive it. Running low on semolina? All-purpose flour works in a pinch, though it won’t give that signature crisp. The sugar is optional but helps yeast activate faster—skip it if you’re watching carbs. For the salt, Diamond Crystal dissolves better than Morton, but any kosher salt works. Pro tip: if your kitchen feels too cold, warm the yeast with the water for 5 minutes before adding flour—helps activate it faster during the long rest. And if you’re making this ahead, add the yeast last right before shaping to keep it potent.
This dough is designed for patience—24 hours in the fridge transforms it from bland to extraordinary. Store it in a sealed container or wrapped tightly in plastic. It keeps for up to 48 hours, so you can prep days ahead. For shaping, let it sit at room temp for 30 minutes first—makes it much easier to handle. The semolina and cornmeal are your friends: dust the peel or baking sheet generously to prevent sticking. Any leftover flour? Store in an airtight container for 6 months. And if you’re feeling ambitious, freeze portions of dough for up to 3 months—thaw overnight in the fridge before shaping.
Why You’ll Love This Recipe
- No-Knead Nightmare Solved: Mixing this dough takes less than 5 minutes—just toss the high-gluten flour, yeast, and water, then let it rest while you eat dinner. No standing at the counter, no overworking your arms, just hands-off magic.
- Crispy-Chewy Magic: That high-gluten flour gives you the perfect balance: a shatteringly crisp edge and a pillowy center that holds sauce like a dream. Honestly, it’s the kind of texture that makes you close your eyes and sigh.
- Party in a Pan: An 18-inch dough stretches to feed a crowd, but it’s just as good for a lazy Sunday lunch. Between us, I’ve used it for breakfast pizzas, garlic knots, and even a quick flatbread—this dough’s got backup plans.
- Budget-Friendly Stretch: A single batch costs pennies and keeps for days in the fridge. Freeze half for when you’re too tired to bake, and you’ll always have a blank canvas for whatever’s in your fridge—no takeout guilt, just pure satisfaction.
Step-by-step instructions for 18-Inch pizza dough
Here’s how to create a no-knead dough that yields crispy edges and chewy centers every time.
Mix the Dough with Precision
In a large mixing bowl, combine the 4 cups high-gluten flour, 1.5 teaspoons diamond crystal kosher salt, and 1 teaspoon granulated sugar. This high-protein flour develops gluten beautifully for that perfect pizza texture. Create a well in the center and add the 0.25 ounces active dry yeast to the bottom of the well.
Next, pour in the 1.5 cups warm water (between 105-110°F) and the 1 tablespoon extra-virgin olive oil. The water temperature is crucial—too hot and you’ll kill the yeast; too cold and it won’t activate properly. Use a wooden spoon to gently mix everything together until you form a shaggy dough that clings to the sides of the bowl.
Develop the Dough Through Resting
Cover the bowl tightly with plastic wrap or a damp kitchen towel. Let the dough rest at room temperature for 1 hour. This initial rest allows the yeast to activate and begin developing gluten strands. You’ll notice the dough will look puffy and slightly bubbly after this time—this is your signal that fermentation is working.
Here’s the thing—don’t be tempted to peek or stir during this resting period. The yeast needs stable conditions to do its job. If your kitchen is particularly cold, you might want to place the bowl on top of your oven with the light on (just enough to provide gentle warmth) to maintain that 105-110°F range.
Shape and Rest for Final Development
After the initial rest, turn the dough out onto a surface lightly dusted with 0.25 cup semolina flour. This creates a barrier that prevents sticking and gives your pizza that beautiful rustic texture. Using your hands, gently shape the dough into a loose ball—don’t worry about getting it perfect at this stage.
Place the shaped dough back in the bowl, cover it again, and let it rest for another 1-2 hours at room temperature. This second rest is where the magic happens—the gluten relaxes and the dough becomes more pliable. You’ll know it’s ready when the dough has nearly doubled in size and has a few small bubbles on the surface. This is called bulk fermentation, and it’s what gives your pizza that professional-quality texture.
Prepare for Stretching
Once the dough has properly risen, turn it out onto a surface dusted with 0.25 cup all-purpose flour. This lighter flour creates a smoother surface for stretching. Gently press down on the dough with your fingertips to release any large air bubbles. Then, using your fingertips, work from the center outward to create a rough 18-inch circle. Don’t press too hard—you’re just creating a template.
Let the shaped dough rest for 15-20 minutes uncovered at room temperature. This final rest is crucial—it allows the gluten to relax just enough so you can stretch it without tearing. The dough should feel slightly tacky but not sticky. If it’s too sticky, dust with a little more all-purpose flour, but don’t overdo it or you’ll lose that perfect texture.
Stretch and Prepare for Baking
Place your 0.25 cup cornmeal on your pizza peel or baking sheet. This creates a textured base that prevents sticking and adds that classic wood-fired look. Now comes the fun part—stretching your dough. Using your fingertips, gently press down on the center of the dough and work your way outward, rotating the peel occasionally to maintain even thickness.
As you stretch, keep the edges slightly thicker than the center—this helps prevent shrinking during baking. Aim for about ¼-inch thickness in the center. Once stretched, your 18-inch pizza dough should be ready for toppings. If you’re not baking immediately, cover it loosely with a clean kitchen towel to prevent drying.
Pro Tips For Making 18 Inch Pizza Dough
- Weigh Your Flour: High-gluten flour is dense—don’t eyeball it. Use a kitchen scale for the 500g (or 4 cups) called for, or your dough will be too stiff or too slack. I learned this the hard way when my first 18-inch attempt turned into a brick.
- Proof at Room Temp: Skip the fridge for bulk fermentation—just leave it on the counter in a warm spot (75–80°F) for 1.5–2 hours. The yeast in this dough works best when it’s cozy, not cold. (Yes, even if you’re impatient like me.)
- Stretch, Don’t Pull: When shaping, use your knuckles to press and stretch the dough outward from the center, not your fingertips. Pulling creates tears; pressing keeps the gluten aligned for a smooth 18-inch base. I was skeptical until I tried it—now it’s non-negotiable.
- Oil the Bowl Twice: Coat the mixing bowl with olive oil before adding the dough, then toss the dough in a little extra oil after the first rise. This prevents sticking and makes stretching easier. (Your future self will thank you.)
Pro cooking tips for this dish
Dough Temperature Control
Your kitchen’s temperature dramatically affects dough development. Ideal room temp should be between 68-72°F—any colder and fermentation slows, any hotter and it speeds up too fast. I always check my kitchen with a thermometer before starting.
If it’s chilly, place the dough bowl on top of your oven with the light on (just enough warmth) to maintain 75°F. Too hot? Move it to a cooler spot like a basement or counter away from appliances. 🌡️
Stretching Without Tears
Stretching 18-inch dough requires patience and technique. First, use your fingertips to gently press the center outward while rotating the peel—never pull from the edges as this causes tearing. Keep the dough slightly tacky; if it sticks, dust with all-purpose flour but don’t overdo it.
I find using a pizza peel with a long handle helps maintain control. For stubborn spots, let the dough rest for 5 more minutes before continuing. The goal is even ¼-inch thickness throughout.
Proofing in the Fridge
Cold proofing overnight enhances flavor and texture. After your initial rest, transfer the shaped dough to an airtight container and refrigerate for 24 hours. This slow fermentation develops deeper flavors and makes stretching easier.
I always let the dough sit at room temp for 30 minutes before shaping to avoid shocking the yeast. For best results, use the dough within 48 hours of cold proofing—beyond that, flavor starts to diminish.
Wood-Fired vs. Home Oven
For wood-fired style at home, preheat your oven to 550°F with a pizza stone or steel inside for 60 minutes. Add a baking tray of water below the stone to create steam. For home ovens, 500°F works well with a pizza stone.
I like to bake for 10-12 minutes until the crust is golden and edges are slightly charred. Never fear the dark spots—they’re signs of proper cooking! 🔥
Handling Large Dough
An 18-inch dough requires teamwork. If you’re alone, use a pizza peel with a long handle to stretch and transfer. For groups, have one person stretch while another supports the center. I recommend working over a lightly floured surface to prevent sticking.
If the dough resists stretching, let it rest for 10 more minutes—it’s better to wait than force it. Remember, the dough will shrink slightly in the oven, so aim for 19 inches when stretching.
Topping Distribution
Evenly distribute toppings within 1 inch of the crust’s edge to prevent soggy spots. Heavy toppings like pepperoni or sausage should go on first, followed by cheese and lighter veggies. I like to use mozzarella shredded at home (blocks melt better than pre-shredded).
For extra crispiness, sprinkle cornmeal on the crust before adding sauce. Never overload—too many toppings make the crust soggy and unevenly cooked.
Nutrition facts
Frequently asked questions
Can I make this dough without a stand mixer?
This recipe requires no kneading—just gentle mixing by hand. Use a large bowl and a wooden spoon to combine ingredients until you get a shaggy dough. The magic happens during the 24-hour rest, where the gluten develops naturally without any effort from you. The no-knead method is perfect for busy cooks who want restaurant-quality results with minimal elbow grease.
Why does the dough need 24 hours to rest?
The long rest is what creates that perfect texture and flavor. During this time, the gluten relaxes and develops slowly, creating a more elastic dough that stretches beautifully. The cold proofing also enhances the flavor by allowing enzymes to break down starches. Think of it like aging wine—patience pays off with a richer, more complex dough that’s far superior to quick-rise methods.
What if my dough sticks when stretching?
This happens when the dough is too dry or you’re using too much flour. Keep your work surface lightly dusted with semolina or all-purpose flour—just enough to prevent sticking. If the dough resists stretching, let it rest for 5-10 more minutes uncovered. The key is to work quickly but gently, rotating the peel as you stretch to maintain even thickness. A slightly tacky dough stretches better than one that’s dry and crumbly.
Can I freeze this dough for later use?
Yes! Shape the dough into a ball, wrap tightly in plastic wrap, then place in a freezer bag. It keeps for up to 3 months. When ready to use, thaw overnight in the fridge and let it sit at room temperature for 30 minutes before shaping. The texture will be slightly drier after freezing, so you may need to add a little water when stretching. This is great for meal prep—make a batch on Sunday and have perfect pizza dough ready all week!
How do I prevent the crust from getting soggy?
Keep toppings within 1 inch of the crust edge and avoid watery ingredients like fresh tomatoes. For extra protection, sprinkle a thin layer of cornmeal on the crust before adding sauce. Bake on a preheated pizza stone or steel at 500°F for 10-12 minutes—the high heat creates a crispy crust while keeping the interior chewy. Never skip preheating your oven or stone, as this is what gives you that perfect texture.

- 3 Overripe Bananas Recipe: Fluffy Pancakes With Zero Waste - November 17, 2026
- 2-Minute Pizza Recipe: Speedy Crispy Crust With Melted Cheese Magic - November 17, 2026
- 16 Chocolate Cupcakes Recipe: Triple-Layered Fudge Swirl Delight - November 17, 2026