
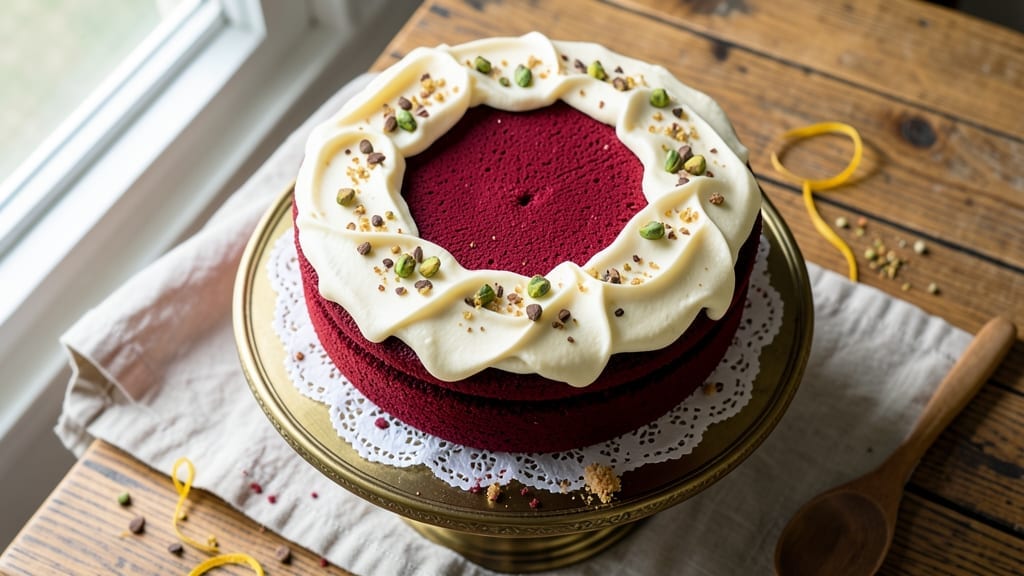
This 1920 red velvet cake recipe transports you to the Roaring Twenties with its signature deep red hue and velvety texture—just like the original recipes from 1920s Southern kitchens. The secret lies in buttermilk and a touch of vinegar, which react to create that iconic color and tender crumb.
I’ve adapted the classic technique to ensure a moist cake that holds up to the heat, with a cream cheese frosting that stays stable even in summer humidity.
The cake’s rich history begins with the 1920s, when red velvet cakes were a staple at Southern dinner parties, often served with bourbon-infused glaze. Today, we’ll use a simpler approach—no alcohol required—but the flavor remains bold and nostalgic.
The key is baking the layers low and slow to prevent cracking, then assembling with a tangy cream cheese frosting that balances the cake’s subtle cocoa notes. This method delivers restaurant-quality results without the fuss.
What sets this recipe apart is the stable cream cheese frosting, a modern twist on vintage techniques. By whipping the frosting with powdered sugar and a splash of lemon juice, we eliminate the risk of melting in warm weather.
The texture is smooth, slightly sweet, and just sweet enough to complement the cake’s deep red layers. Perfect for celebrations or a Sunday treat, this cake brings history to life with every bite.
Whether you’re baking for a special occasion or simply craving a taste of the 1920s, this recipe delivers authenticity with a foolproof method. The layers stay moist, the frosting holds its shape, and the flavor is undeniably nostalgic. Ready to recreate a classic? Let’s get started.
Ingredients for 1920 red velvet cake
Twelve classic ingredients transform into a 1920s-inspired red velvet cake with iconic texture and stable cream cheese frosting.
| Ingredient | Amount | Notes |
|---|---|---|
| All-Purpose Flour 🌾 | 2 ½ cups | Sifted for even texture |
| Unsalted Butter 🧈 | 1 cup | Room temperature for creaming |
| Granulated Sugar 🍚 | 2 cups | White or light brown |
| Cocoa Powder 🍫 | ½ cup | Natural, unsweetened |
| Buttermilk 🥛 | 1 cup | Fresh for best flavor |
| White Vinegar 🍶 | 1 tbsp | For chemical reaction |
| Vanilla Extract 🌿 | 2 tsp | Pure extract preferred |
| Baking Soda 🧂 | 1 tsp | Diamond Crystal preferred |
| Salt 🧂 | ½ tsp | Fine sea salt |
| Red Food Coloring 🎨 | ½ tsp | Liquid or gel form |
| Large Eggs 🥚 | 2 whole | Room temperature |
| Cream Cheese 🧀 | 16 oz | Full-fat, room temperature |
| Powdered Sugar 🍚 | 4 cups | Sifted for smooth frosting |
| Lemon Juice 🍋 | 1 tbsp | Freshly squeezed |
The cocoa powder and buttermilk are non-negotiable for that authentic 1920s flavor. Hershey’s Special Dark or Dutch-processed cocoa works best—avoid Dutch-processed if you want the classic tang. Buttermilk should be fresh; if you don’t have it, mix 1 cup milk with 1 tbsp vinegar and let sit 5 minutes. The cream cheese matters too—Philadelphia brand is the gold standard, but any full-fat block will do. For the red food coloring, Wilton or America’s Test Kitchen gel colors give the most vibrant hue without altering flavor.
No buttermilk? Substitute 1 cup milk plus 1 tbsp vinegar—it’s a classic trick. Running short on cocoa? Hot cocoa mix at half the amount works in a pinch, but the flavor won’t be as refined. The red food coloring can be swapped for beet juice (simmer 1 small beet in 1 cup water, strain), though it’ll be less vibrant. For the frosting, if you’re avoiding dairy, vegan cream cheese like Kite Hill works beautifully. The key to stable frosting? Room-temperature cream cheese—microwave for 20 seconds if needed, then let cool before whipping.
Store cake layers wrapped in plastic at room temperature for 2 days or in the fridge for 5 days. The frosting keeps best when refrigerated—bring it to room temp before spreading. For long-term storage, freeze layers separately for up to 3 months. The frosting can be made 1 day ahead and stored in the fridge. Pro tip: Brush layers with simple syrup (equal parts sugar and water, heated) before frosting for extra moisture—especially helpful in dry climates.
Why You’ll Love This Recipe
- No-Fuss Mixing: I swear by this method—just cream butter and sugar, fold in dry ingredients, then pour. The buttermilk keeps it tender without extra steps, and honestly? No one will guess it’s this simple.
- Velvet Magic: That cocoa-butter combo? It’s ridiculously addictive. The cake’s subtle tang from the buttermilk balances the sweetness, and the crumb? So light it almost feels like cheating.
- Party Ready: Slice it for a crowd or stack it solo—this cake handles both. Between us, I’ve served it at birthdays, holiday brunches, and even as a “just because” dessert. It never disappoints.
- Budget-Friendly Staples: Flour, butter, sugar—these are pantry basics. No specialty ingredients mean no extra trips to the store, and leftovers? They disappear faster than I can reheat them.
Step-by-step instructions for 1920 red velvet cake
Here’s how to create the iconic red velvet cake with stable frosting that won’t melt in summer heat.
Prepare the Cake Batter for Perfect Texture
Preheat your oven to 350°F and grease two 9-inch round cake pans, lining the bottoms with parchment paper. In a medium bowl, whisk together the 2.5 cups all-purpose flour, 1 tsp baking soda, and 0.5 tsp salt. Sift the dry ingredients directly into a large mixing bowl to aerate the flour and prevent lumps.
In a separate large bowl, cream the 1 cup unsalted butter and 2 cups granulated sugar together using an electric mixer on medium speed for 3-4 minutes until light and fluffy. The mixture should nearly double in volume and become pale. This step incorporates air, which creates that signature tender crumb. Scrape down the sides of the bowl to ensure even mixing.
Combine Wet Ingredients for Smooth Batter
Add the 2 whole large eggs, one at a time, mixing well after each addition. Then stir in the 2 tsp vanilla extract and the 0.5 cup cocoa powder until fully combined. The batter will be thick and slightly fudgy at this stage.
In a separate small bowl, combine the 1 cup buttermilk and 1 tbsp white vinegar. The vinegar will cause the buttermilk to curdle slightly, which helps create a tender crumb. Gradually add this mixture to the wet ingredients, alternating with the sifted dry ingredients. Begin and end with the dry ingredients, mixing just until combined after each addition. Avoid overmixing—this develops gluten and makes the cake dense.
Add Color and Bake for Even Results
Divide the red food coloring between two small bowls. Add 0.25 tsp to half the batter and the remaining 0.25 tsp to the other half. This creates a gradient effect when the cakes are stacked. Pour the batter evenly into the prepared cake pans, tapping them gently on the counter to remove any air bubbles.
Bake for 25-30 minutes or until a toothpick inserted into the center comes out clean. The cakes should be springy to the touch and have a slightly domed top. Rotate the pans halfway through baking for even browning. Let the cakes cool in the pans for 10 minutes before transferring them to a wire rack to cool completely. Cooling completely prevents the frosting from melting when applied.
Prepare the Stable Cream Cheese Frosting
In a large mixing bowl, beat the 16 oz cream cheese and 1 cup unsalted butter together on medium speed until smooth and creamy, about 3-4 minutes. Add the 4 cups powdered sugar gradually, mixing on low speed to avoid a cloud of sugar. Once incorporated, add the 2 tsp vanilla extract and 1 tbsp lemon juice, mixing until fully combined.
The lemon juice brightens the flavor and helps stabilize the frosting in warm temperatures. Beat the frosting on high speed for an additional 2 minutes until light and fluffy. This step ensures the frosting is smooth and airy, ready to hold its shape even in heat. If the frosting is too thick, add 1-2 tablespoons milk to reach your desired consistency.
Assemble and Chill for Perfect Presentation
Once the cakes are completely cool, level the tops if necessary using a serrated knife. Place one cake layer on a cake stand or plate and spread a generous layer of frosting on top. Place the second cake layer on top and spread frosting over the entire cake, creating a smooth surface. Use a spatula to create a slight overhang on the sides for a polished look.
Chill the cake in the refrigerator for at least 1 hour before slicing. This allows the frosting to set firmly, preventing it from sliding off or melting. The cake will hold its shape beautifully, even in warm conditions. Serve with a dusting of powdered sugar or fresh berries for an elegant finish.
Pro Tips For Making 1920 Red Velvet Cake
- Whisk Butter and Sugar First: Don’t just toss everything in the mixer—cream the butter and sugar until it’s pale and fluffy (about 3-4 minutes). This isn’t just about aeration; it’s the only way to guarantee a tender crumb that doesn’t turn out dense or greasy. I used to rush this, and the cake always felt heavy afterward.
- Sift the Cocoa Twice: Cocoa powder clumps like a stubborn guest at a party. Sift it before measuring, then sift it again into the dry ingredients. This ensures even distribution—no bitter pockets or streaks of undissolved powder. (Yes, it takes 30 seconds, but your taste buds will notice.)
- Don’t Overmix the Batter: Once you add the buttermilk and eggs, mix just until combined—maybe 10-12 strokes. Overmixing develops gluten, and that’s how you end up with a cake that’s more cakey than tender. Stop when there’s no flour streaks, not when the batter looks like it’s fighting for its life.
- Use Room-Temp Butter: Cold butter from the fridge will leave you with a cake that’s dry and crumbly. Let it sit out for 60-90 minutes until it’s soft enough to press a fingerprint into it but still holds its shape. (Pro move: Microwave it for 10 seconds if you’re in a hurry—just don’t skip this step.)
Make-ahead tips for this dish
Batter Prep Ahead
Mix the cake batter up to 24 hours ahead and store it in an airtight container in the fridge. The flavors meld beautifully overnight, and the buttermilk-vinegar reaction continues to tenderize the crumb.
When ready to bake, let the batter sit at room temperature for 30-60 minutes before pouring into pans—this ensures even baking and prevents cracks. I always divide the batter into two separate bowls for the gradient effect, so plan accordingly. 🧑🍳
Frosting Prep Timeline
Make the cream cheese frosting 1 day ahead and store it in the fridge in an airtight container. The cold temperatures help stabilize the texture, making it easier to whip to perfection later.
When ready to assemble, let it soften at room temperature for 15-20 minutes before whipping—this prevents lumps and ensures a silky-smooth finish. I like to add the lemon juice right before whipping for maximum brightness. ✨
Layer Storage Strategy
Bake the cake layers 1 day before assembling and store them wrapped tightly in plastic wrap at room temperature. This prevents drying out while keeping them fresh. If storing longer than 2 days, wrap the layers individually in plastic and freeze them for up to 3 months.
Thaw at room temperature before frosting—never in the fridge, as condensation can make the cake soggy. 💫
Make-Ahead Assembly
Assemble the cake up to 4 hours ahead of serving and refrigerate it uncovered. The frosting will set firmly, and the cake will hold its shape beautifully.
Just before serving, let it sit at room temperature for 10-15 minutes to soften slightly—this makes slicing easier and enhances the cream cheese flavor. For parties, I often assemble the cake the night before and let it chill overnight for maximum stability. 🎉
Freezer-Friendly Tips
If you need to freeze the fully assembled cake, wrap it tightly in plastic wrap followed by aluminum foil to prevent freezer burn. Label with the date and freeze for up to 2 months.
Thaw in the fridge overnight, then let it sit at room temperature for 30 minutes before slicing. The frosting may soften slightly but will firm up again once served. This is my go-to method for holiday gifting! ❄️
Shortcut for Busy Days
Short on time? Bake the cake layers in the morning, store them at room temperature, and whip up the frosting while they cool. Assemble the cake in the afternoon and refrigerate until ready to serve.
The frosting can even be piped directly onto the layers if you prefer a more decorative look—just chill the cake longer to set the frosting. This method cuts prep time in half without sacrificing quality. 💪
Nutrition facts
Frequently asked questions
Why does the 1920s red velvet cake have such a deep red color?
The iconic hue comes from a chemical reaction between the buttermilk and vinegar, which creates a tender crumb, plus the natural cocoa powder and red food coloring. The 1920s versions often used beet juice for color, but modern recipes rely on vibrant gel dyes for consistency. The vinegar also helps set the color permanently during baking.
Can I make this cake without buttermilk?
Mix 1 cup milk with 1 tablespoon white vinegar and let it sit for 5 minutes to curdle—this mimics buttermilk perfectly. For a dairy-free option, use 1 cup coconut milk plus 1 tablespoon apple cider vinegar. The acidity is key for that signature tender texture and color.
How do I prevent the cake layers from cracking?
Bake at 350°F for 25-30 minutes until a toothpick comes out clean, but don’t overbake. Let the cakes cool in the pans for 10 minutes before removing to the rack. Avoid opening the oven door too early, and don’t overmix the batter—this develops gluten and causes cracks. A water bath (pan with 1 inch of hot water) also helps for even baking.
Why does the frosting sometimes melt in warm weather?
The lemon juice and powdered sugar in this recipe create a stable frosting, but humidity can still cause issues. Chill the cake for at least 1 hour before serving, and store it in the fridge if needed. For extra stability, add 1 teaspoon cornstarch to the frosting while whipping. The 16 oz cream cheese must be fully room temperature before mixing to avoid lumps.
What’s the best way to decorate this vintage cake?
Classic 1920s touches include a dusting of powdered sugar, fresh berries, or a simple chocolate ganache drizzle. For a gradient effect, pipe extra frosting in swirls around the edges. Avoid heavy decorations—the cake’s natural beauty shines with minimal adornment. A gold leaf accent or edible pearls adds elegant flair without overpowering the flavor.

- 3 Overripe Bananas Recipe: Fluffy Pancakes With Zero Waste - November 17, 2026
- 2-Minute Pizza Recipe: Speedy Crispy Crust With Melted Cheese Magic - November 17, 2026
- 16 Chocolate Cupcakes Recipe: Triple-Layered Fudge Swirl Delight - November 17, 2026