
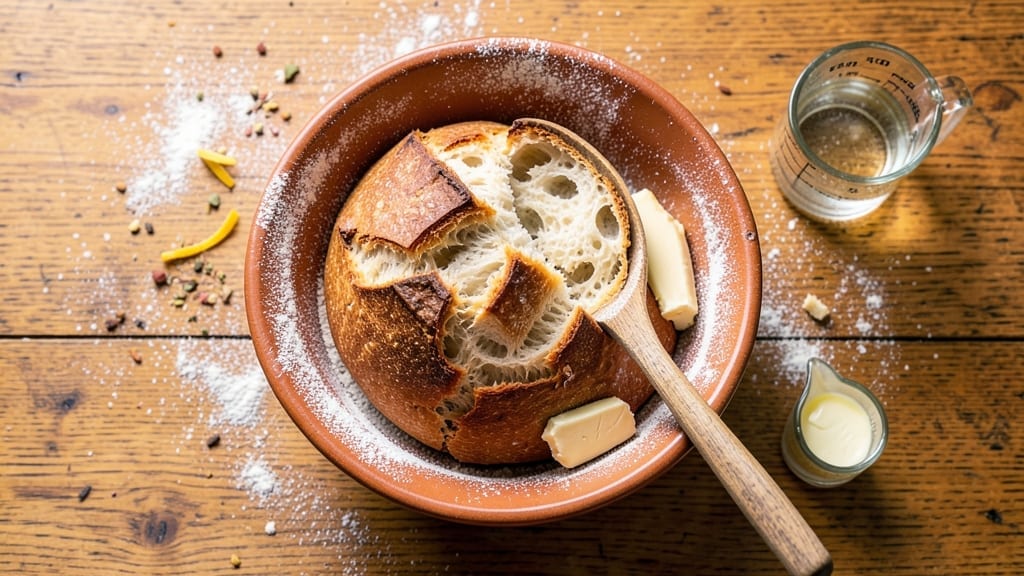
This 1940s bread recipe brings back the hearty, no-fuss loaves that fed families through wartime rationing—now with a crispy crust and tender crumb that modern bakers will love. The beauty of this method lies in its simplicity: no kneading, no fancy equipment, just flour, water, and time.
I first tried it after reading about how housewives stretched every ounce of flour during the 1940s, and the results were surprisingly satisfying. The slow fermentation develops deep flavor, while the high-heat baking creates that iconic crusty exterior.
The recipe uses just five ingredients—flour, yeast, salt, sugar, and water—plus a touch of butter for richness, all mixed in a bowl and left to rise overnight. This approach mirrors the resourcefulness of 1940s home cooks who made every ingredient count.
The dough develops naturally as it rests, creating a texture that’s both sturdy and tender, perfect for sandwiches or toast. What’s remarkable is how this method produces a loaf that’s far more flavorful than store-bought bread, despite its simplicity.
By morning, you’ll have a golden-brown loaf with a crackly crust that snaps satisfyingly and a soft interior that’s ideal for soaking up gravy or butter. The aroma alone—warm, yeasty, and just slightly sweet—will transport you to a mid-century kitchen.
This bread is versatile enough for everyday meals but special enough to serve at a dinner party. The best part? It requires no special skills, just patience and a warm oven.
For those interested in the historical context, this recipe reflects the no-waste, no-frills approach of 1940s baking, where every loaf was a triumph of ingenuity. The technique also works beautifully in modern kitchens, where time is often limited.
Whether you’re recreating history or simply craving a rustic loaf, this bread delivers on both tradition and taste. Let’s get baking!
Ingredients for 1940s bread
Five core ingredients and a touch of butter create this iconic wartime loaf with golden crust and tender crumb.
| Ingredient | Amount | Notes |
|---|---|---|
| All-Purpose Flour 🌾 | 4 cups | Unbleached, high-protein preferred |
| Active Dry Yeast 🍞 | ¼ oz | Freshly opened, tested for viability |
| Granulated Sugar 🍚 | 1 tbsp | White or light brown |
| Salt 🧂 | 1 ½ tsp | Diamond Crystal preferred |
| Unsalted Butter 🧈 | 2 tbsp | Cold, cubed for even melting |
| Warm Water 💧 | 1 ½ cups | 105-110°F, not hot |
| Olive Oil 🫒 | 1 tbsp | Extra-virgin for crust development |
| Cornmeal 🌽 | 2 tbsp | For dusting baking surface |
The flour is the foundation—opt for King Arthur or Gold Medal for best gluten development. Bulk bins at Whole Foods often carry high-protein varieties perfect for this recipe. Yeast is non-negotiable here; always test a pinch in warm water with sugar to confirm it’s active before mixing. The butter adds richness but must be cold when added to prevent overdevelopment. For authenticity, use salted butter if available, though unsalted works fine with the recipe’s salt adjustment. Water temperature matters most: too hot kills yeast, too cold prevents activation.
No active dry yeast? Instant yeast works at half the amount—just mix directly with flour. Substitute sugar with honey or maple syrup (reduce by 1 tsp) for subtle flavor variations. Butter shortages? Vegetable oil or lard (rendered) maintains texture. For a gluten-free version, swap flour for a 1:1 blend of rice flour and xanthan gum—though texture will differ. The cornmeal isn’t optional: it creates the signature crust. If unavailable, semolina or crushed graham crackers work in a pinch. Always measure flour by weight (1 cup = 4.5 oz) for consistency.
Store-bought yeast loses potency quickly—keep in freezer for up to 6 months. The dough doubles in volume overnight; cover with a damp towel to prevent drying. For best results, bake immediately after shaping, but dough can be refrigerated for up to 24 hours before baking. The loaf stays fresh 3 days at room temperature wrapped in a clean towel, or 1 week refrigerated in an airtight bag. Freeze slices for 3 months by wrapping individually in parchment. Reheat in a 350°F oven for 5 minutes to restore crispness.
Why You’ll Love This Recipe
- Pantry Staples Only: I swear by this recipe because it uses what I already have—no fancy ingredients, just flour, yeast, sugar, and butter. The yeast activates in warm water while I mix the dough, and honestly? That’s where the magic happens without extra fuss.
- Buttery, Golden Crust: The butter in the dough gives it that rich, tender crumb, while the sugar just barely caramelizes on top for a crisp, golden crust. It’s not sweet—just enough to make every bite feel special, like a little treat you didn’t even plan for.
- Weeknight Hero: I make a double batch on Sundays and freeze half. When I’m too tired to cook, I pull out a loaf, toast it up, and slap on some jam or butter. It’s the ultimate lazy-day lifesaver—no stress, just satisfaction.
- Budget-Friendly Staple: A single batch costs me pennies, and it stretches across breakfasts, sandwiches, or even a quick French toast. Between us, this is the kind of bread that makes grocery bills feel a little lighter while keeping my family happy.
Step-by-step instructions for rustic no-knead bread
This 1940s-inspired method delivers a loaf with crispy crust and tender crumb—no kneading required.
Activate the Yeast for Maximum Rise
In a small bowl, combine the 1.5 cups warm water (between 105-110°F) with the 1 tbsp granulated sugar and 0.25 oz active dry yeast. Let it sit for 5-10 minutes until foamy. The yeast should create bubbles and double in volume—this confirms it’s active. If it doesn’t foam after 10 minutes, your yeast may be dead, and you’ll need to start over.
I always test yeast viability first because cold water kills it instantly. The sugar jumpstarts fermentation, which is why we don’t skip this step. Once properly activated, the yeast will create the airy texture characteristic of this bread. Keep this mixture at room temperature while you prepare the rest of the dough.
Mix Dough and Let It Rest Overnight
In a large bowl, whisk together the 4 cups all-purpose flour and 1.5 tsp salt. Add the yeast mixture, 1 tbsp olive oil, and 2 tbsp cold unsalted butter (cut into small cubes). Mix with a wooden spoon until just combined—you’ll still see dry spots, and that’s intentional. Overmixing develops gluten, which we want to minimize in this rustic loaf.
Cover the bowl with plastic wrap and let it rest at room temperature for 12-18 hours. This long fermentation develops deep flavor and creates that signature open crumb structure. I place my dough in a slightly warm spot (like on top of the fridge) to encourage even fermentation. The dough will be sticky but shouldn’t spread dramatically during this time. If it does, your kitchen is too warm.
Shape and Score the Dough
Lightly flour a clean surface and transfer the dough. Gently shape it into a loose round by folding the edges toward the center. Don’t worry about perfect symmetry—this is rustic bread, after all. Place the dough seam-side up in a floured bowl, cover with a damp towel, and let it rest for 1 hour at room temperature. This final rise should nearly double the dough’s size.
Preheat your oven to 450°F and place a baking sheet inside to heat. Line a baking stone or invert a baking sheet with a piece of parchment paper. When the dough has risen, carefully transfer it to the prepared surface. Using a sharp knife or razor, score the top with two diagonal slashes about ½ inch deep. This prevents excessive expansion in the oven and gives the bread its classic look.
Bake for Crispy Crust and Even Bake
Carefully transfer the scored dough to the preheated baking sheet (use a peel if available) and bake for 25-30 minutes until the crust is deep golden brown and sounds hollow when tapped on the bottom. The internal temperature should reach 190-200°F. I rotate the pan halfway through baking to ensure even heat distribution—this is especially important in home ovens where heat varies.
During the last 5 minutes of baking, you’ll notice steam rising from the bread. This is normal and indicates the crust is developing properly. If the top browns too quickly, tent loosely with aluminum foil. The bread is done when it pulls away from the sides of the pan with a satisfying crack and has a rich, caramelized aroma. Let it cool on a wire rack for at least 30 minutes before slicing—this allows the crumb to set properly.
Create the Perfect Serving Surface
While the bread cools, prepare your serving surface by dusting it with 2 tbsp cornmeal. This creates a beautiful contrast with the dark crust and prevents sticking when you slice. The cornmeal also adds a subtle nutty flavor that complements the bread’s rustic character. I like to serve this bread warm with butter, allowing the crust to crisp up again as it cools.
For maximum freshness, store any leftovers in an airtight container at room temperature for up to 3 days. To revive, wrap the cooled loaf in a damp towel and heat in a 350°F oven for 5-10 minutes until warmed through. This bread freezes beautifully too—slice before freezing and toast directly from frozen for that just-baked quality.
Pro Tips For Making 1940s Bread
- Warm the Butter First: Skip the cold butter straight from the fridge—soften it to room temperature before mixing it into the dough. I learned this the hard way when my first batch turned out dense and greasy; warm butter blends smoother and creates those classic 1940s bread pockets without fighting for texture.
- Proof at 75°F (Not Warmer): Yeast loves warmth, but not too much—75°F is the sweet spot for this recipe. If your kitchen’s hotter, proof the dough in a turned-off oven with the light on (yes, it’s old-school, but it works). Overproofing turns that tender crumb into a sad, flat pancake.
- Salt the Butter, Not Just the Dough: Most recipes call for salt in the dough, but I double-check by sprinkling a pinch into the softened butter too. The butter’s salt dissolves better into the flour mix, giving every bite that balanced flavor without over-salting later.
- Use a Bench Scraper for Shaping: This isn’t the prettiest method, but it’s the tastiest—fold the dough over a bench scraper to stretch and shape it without tearing. It takes 30 seconds but guarantees those signature 1940s bread layers instead of a collapsed loaf. (Your future self will thank you.)
Creative variations of this 1940s bread
WWII Rationing Twist
During World War II, housewives stretched every ounce of flour by adding 1-2 tablespoons of potato flour (mashed and dried) to this recipe. The starch creates a slightly denser crumb that mimics modern bread while using up starchy vegetables.
For authenticity, replace ½ cup of the all-purpose flour with potato flour—it adds a subtle sweetness that was common in wartime loaves. 🌱
Herb-Infused Variations
Add 1 tablespoon of dried rosemary or thyme directly to the flour mixture for a Provençal-inspired twist that was popular in 1940s French cuisine. Fresh herbs like dill or parsley (finely chopped) work too—just reduce the water by 1 tablespoon to account for moisture.
I like adding herbs to half the dough and mixing them in after the overnight rise for concentrated flavor pockets.
Sweet Onion Loaf
For a savory-sweet variation, caramelize ½ cup finely chopped yellow onion in 1 tablespoon butter until golden, then mix it into the dough after the overnight rise. The onions add depth that pairs perfectly with cold cuts or cheese.
This method was common in 1940s American diners where bread often doubled as a side dish. 🧅
Whole Wheat Adaptation
Replace 1 cup of all-purpose flour with whole wheat flour for a heartier loaf that was more common in rural 1940s households. The bran content requires 1 extra tablespoon of water to prevent dryness.
For best results, let the dough ferment for 24 hours—the longer rise helps break down the bran’s tough fibers. This version has a nuttier flavor and slightly denser crumb.
Seeded Rustic Loaf
Add 1 tablespoon of poppy seeds or sesame seeds to the dough for texture and visual appeal. These were inexpensive pantry staples in the 1940s and added nutritional value.
For extra crunch, sprinkle 1 teaspoon of seeds on the dough before scoring. I recommend using black sesame seeds for their rich flavor and striking appearance on the crust.
Molasses-Enhanced Version
Swap the granulated sugar for 1 tablespoon of molasses (reduced by 1 teaspoon) for a deeper, slightly bitter note reminiscent of Southern 1940s baking. The molasses caramelizes beautifully during baking, creating a darker crust. This variation pairs exceptionally well with ham or corned beef—classic wartime comfort foods. 🍯
Nutrition facts
Frequently asked questions
Why does this 1940s bread recipe use no-knead method?
This method was born from wartime necessity during the 1940s when flour was rationed and time was precious. The long fermentation (12-18 hours) develops deep flavor while requiring minimal effort—perfect for housewives balancing multiple priorities. The dough’s natural gluten development creates that signature open crumb without overworking the flour.
Can I make this bread without butter?
Replace the 2 tbsp butter with 2 tbsp vegetable oil or lard for a similar texture. During WWII, many families substituted lard when butter was scarce—it adds richness while keeping the loaf tender. Just ensure your oil is neutral in flavor to avoid overpowering the bread.
What if my dough doesn’t rise overnight?
Check three things: yeast viability (test fresh yeast in warm water with sugar), room temperature (ideal is 70-75°F), and dough consistency (should be sticky but not runny). If cold, move to a warmer spot (like near the oven with light off). If still flat, your yeast may be dead—start fresh with new yeast.
How do I get a crispier crust like vintage recipes?
For maximum crust development, use a baking stone or Dutch oven** and bake at 475°F for the first 10 minutes. The steam created in a Dutch oven mimics old wood-fired ovens. Brush the baked loaf with melted butter immediately after baking for extra shine and crunch. Cornmeal on the surface also enhances crispiness.
Is this bread suitable for sandwiches?
Yes! The open crumb structure holds fillings beautifully while the crispy crust adds texture. For sandwiches, slice the bread slightly thicker (½-inch) to prevent sogginess. Toast lightly before serving to revive the crust. This bread was designed for wartime sandwiches—perfect for cold cuts, cheese, or even peanut butter.

- 3lb Prime Rib Roast Recipe: Juicy Pink Center Guaranteed in 3 Hours - October 31, 2026
- 5 Spice Cake Recipe: Warmly Spiced Layers With Crunchy Top - October 31, 2026
- 1950’s Macaroni and Cheese Recipe: Nostalgic Creamy Cheese Sauce with Buttery Noodles - October 31, 2026