
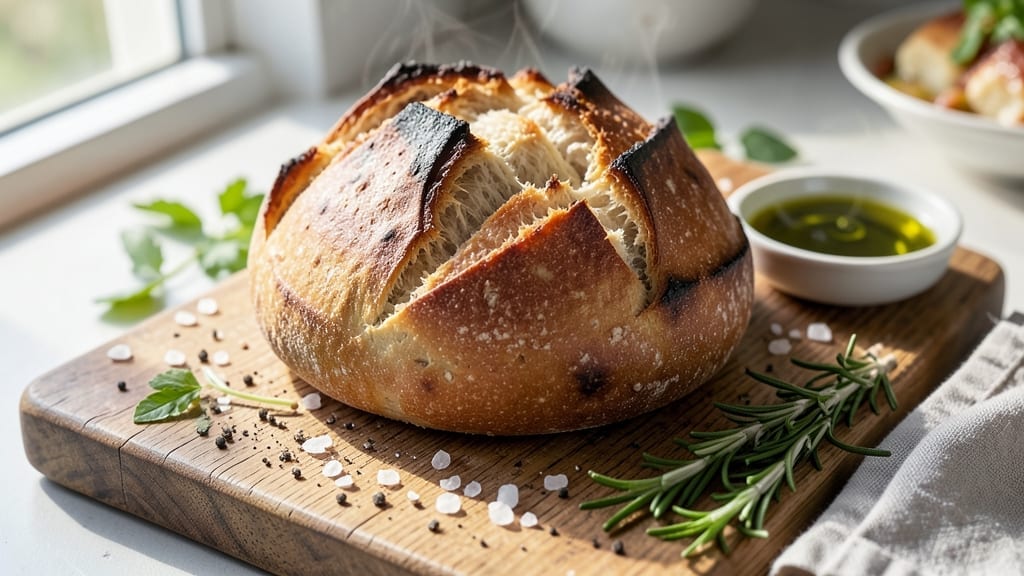
This 1-hour bread recipe delivers restaurant-quality crusty loaves without the hours of kneading or waiting—just pantry staples and a few simple steps. 💛 The secret lies in a high-hydration dough that develops flavor while you proof, then bakes into a loaf with a crispy crust and airy crumb.
I perfected this method after years of experimenting with quick breads, and it never fails to impress, even with beginners.
What makes this recipe work is the combination of warm water (not hot) and a long proof at room temperature, which allows the gluten to relax and develop naturally. There’s no need for special equipment—just a mixing bowl, a warm spot for proofing, and a Dutch oven for baking.
The result? A loaf with golden, crackly crust and a tender interior that’s perfect for sandwiches or toast.
By the time you pull it from the oven, you’ll have a loaf that smells like a bakery and tastes even better.
The dough comes together in 10 minutes, proofs while you prep dinner, and bakes in 30 minutes—all while delivering the depth of flavor you’d expect from a slow-rise loaf. This is the kind of bread that makes homemade baking feel effortless.
For variations, swap out half the flour for whole wheat or add a spoonful of honey to the dough for subtle sweetness. The possibilities are endless, but the base recipe remains foolproof. Let’s get started—your crusty loaf awaits.
Ingredients for 1hr bread
Pantry staples transform into golden crusty bread in under an hour—no kneading required.
| Ingredient | Amount | Notes |
|---|---|---|
| All-Purpose Flour 🌾 | 3 ½ cups | Spooned and leveled, not scooped |
| Instant Yeast 🍞 | ¼ tsp | Freshly opened, not expired |
| Granulated Sugar 🍚 | ½ tsp | White or brown, no difference |
| Salt 🧂 | 1 tsp | Kosher or sea salt preferred |
| Warm Water 💧 | 1 ½ cups | 110°F, not hot or cold |
| Extra-Virgin Olive Oil 🫒 | 1 tbsp | For dough and Dutch oven |
| Cornmeal 🌽 | ¼ cup | For dusting Dutch oven |
Flour is the foundation here. King Arthur or Bob’s Red Mill work best for that perfect airy crumb, but any all-purpose flour will do. The yeast needs to be freshly opened—if it’s been sitting in your pantry for months, toss it. Warm water is key: too hot kills the yeast, too cold slows it down. 110°F is ideal, so if your tap water runs hot, let it cool for 10 minutes. For the olive oil, Trader Joe’s or Whole Foods brands have great flavor without breaking the bank.
No instant yeast? Active dry yeast needs 5 minutes to activate in warm water first. Short on sugar? Honey or maple syrup at half the amount works too. Using whole wheat? Reduce by 1 cup and add 1 cup extra water—it absorbs more moisture. The cornmeal is optional but creates that perfect crust. If you don’t have it, semolina or all-purpose flour works in a pinch (just add a little extra oil).
The dough keeps for 24 hours in the fridge if you want to prep ahead—just let it sit at room temp for 30 minutes before baking. For extra flavor, brush the baked loaf with melted butter and sprinkle with flaky salt. Stored in a paper bag at room temperature, it stays fresh for 3-4 days. Freeze slices for up to 3 months—toast straight from frozen for crispy results.
Why You’ll Love This Recipe
- Pantry Staples Only: I swear by this recipe because it uses what’s already in my cupboard—no specialty flours or fancy additives. Just flour, yeast, sugar, salt, and water. That’s it. No last-minute grocery runs, no stress.
- Golden Crust Magic: The sugar in the dough caramelizes just right when baked, giving you that perfect crispy exterior with a soft, airy center. Honestly, it’s the kind of bread that makes you pause mid-slice to appreciate how good something simple can taste.
- Weeknight Wonder: Between us, this is my go-to when I need bread fast—whether it’s for toast in the morning, sandwiches at lunch, or dinner rolls. It bakes in under an hour, so I’m never stuck scrambling when hunger hits.
- Budget-Friendly Loaves: A single batch costs pennies and stretches for days. I’ll make two loaves on Sunday, freeze one, and still have fresh bread for the week. Plus, the ingredients last forever, so I’m not wasting money on bread I’ll toss.
Step-by-step instructions for no-knead crusty loaf
Here’s how to transform simple pantry staples into a golden, crispy loaf in just an hour.
👨🍳 Step 1: Mix the Dough (No Kneading Required!)
In a large bowl, whisk together the 3.5 cups all-purpose flour, 0.25 tsp instant yeast, 0.5 tsp granulated sugar, and 1 tsp salt. I like to use a whisk first to distribute the yeast evenly through the flour—this prevents those weird dry spots that can happen with instant yeast.
Make a well in the center and pour in the 1.5 cups warm water (about 110°F) and 1 tbsp extra-virgin olive oil. Let it sit for 1 minute before stirring with a wooden spoon. The dough will be shaggy at first, but that’s perfect—this method relies on hydration and time, not kneading.
🥘 Step 2: Rest and Shape the Dough
Cover the bowl with a damp kitchen towel and let the dough rest at room temperature for 30 minutes. You’ll notice it thickens and pulls away from the sides—this is the yeast doing its magic. After resting, lightly oil your hands and gently shape the dough into a loose ball.
Here’s the thing—don’t stress about perfect shaping. Just gather the edges toward the center and tuck them under. The dough will continue to rise and develop structure during baking. Place the shaped dough seam-side up in a bowl, cover again, and let it rise for another 30 minutes.
🔥 Step 3: Prep the Dutch Oven for Maximum Crust
Preheat your oven to 450°F with the Dutch oven inside for 30 minutes. While it heats, dust the inside of the Dutch oven with 0.25 cup cornmeal, tapping out any excess. The cornmeal creates that beautiful crunchy bottom crust we all love.
After preheating, carefully remove the hot Dutch oven using oven mitts. Transfer the risen dough to the center of the Dutch oven, seam-side up. The dough should be about 2 inches thick—if it’s too tall, it won’t bake evenly. You’ll know it’s ready when it springs back slowly when poked.
⏰ Step 4: Bake to Golden Perfection
Bake uncovered for 25 minutes, then carefully remove the lid and bake for another 10 minutes until the bread is deep golden brown. You’ll see steam rising when you remove the lid—that’s your signal the bread is developing that perfect crust.
For the ultimate test, tap the bottom of the loaf—it should sound hollow. The internal temperature should reach 190-200°F at the center. Let the bread cool on a wire rack for at least 1 hour before slicing. This resting time prevents a gummy crumb and lets the flavors develop fully.
🍞 Step 5: Serve Warm with Butter
Once cooled, slice into thick pieces and serve warm with extra extra-virgin olive oil or softened butter. The crust should be crispy enough to stand up to a knife, with a satisfying crack when broken. Inside, you’ll find a tender, airy crumb with just the right chewiness.
Real talk: the first slice is always the best—warm, crusty, and packed with that homemade flavor. Store leftovers wrapped in a clean kitchen towel at room temperature for up to 2 days, or freeze slices for quick toast later.
Pro Tips For Making 1hr Bread
- Mix the Yeast Last: Don’t toss the yeast in with the dry ingredients—it’ll activate too early and make your dough gummy. Wait until the water’s warm (105-110°F, like bathwater) and stir in the yeast just before combining with the flour. If it fizzes within 5 minutes, you’re good; if not, your yeast might be dead (or your water’s too hot).
- Weigh Your Flour: Scooping flour from the bag packs in air, which means your dough will be too dry. Use a kitchen scale for accuracy—this recipe needs 350g of flour, no more, no less. I learned this the hard way when my loaves turned out dense and chewy instead of light.
- Skip the Over-Kneading: This isn’t sourdough—you don’t need to knead like you’re punching a bag of sand. Mix the dough until it just comes together, then let the yeast do the work during the 30-minute rise. Over-kneading develops gluten too much, making the bread tough and dense.
- Shape It Fast: Once the dough’s ready, work quickly to shape it into a ball—don’t linger. A tight, smooth seal traps gas and helps the bread rise evenly. If your hands are sticky, wet them slightly, but don’t add extra water to the dough. (Yes, even if you’re impatient like me.)
Wine and beer pairings for this dish
Light White Wine
This crusty bread pairs beautifully with a crisp, dry white wine like Sauvignon Blanc from New Zealand or Pinot Grigio from Italy. The bright acidity and citrus notes cut through the bread’s richness, cleansing your palate between bites.
I always reach for a Cloudy Bay Sauvignon Blanc—its herbal and grapefruit flavors complement the bread’s nutty crust perfectly. 🍷
Crisp Lager Beer
For beer lovers, a German Pilsner or Belgian Witbier works wonders. The Stella Artois or Leffe Blonde provide a light, refreshing contrast that balances the bread’s hearty texture. The subtle sweetness from the beer enhances the bread’s caramelized crust without overpowering its natural flavor. Serve chilled for the best experience.
Red Wine for Heartier Spreads
If you’re serving this bread with rich toppings like garlic butter or smoked salmon, a light-bodied red wine like Chianti or Beaujolais elevates the meal. The Chianti Classico from Tuscany brings earthy notes that pair well with the bread’s crusty exterior.
Avoid heavy reds like Cabernet Sauvignon—they can overpower the delicate flavors.
Craft Beer Experimentation
Want to get creative? Try a slightly sour wheat beer like Allagash White or a hoppy IPA for a bold contrast. The citrusy hop notes in an IPA mirror the bread’s crust, while the sourness in a wheat beer adds a refreshing twist.
I love pairing this bread with a local craft IPA—it’s a match made in flavor heaven. 🍺
Non-Alcoholic Options
Don’t drink alcohol? No problem! A sparkling apple cider or ginger beer makes a fantastic non-alcoholic pairing. The effervescence and slight tartness enhance the bread’s crust, while the natural sweetness balances its savory notes. Martinelli’s Sparkling Apple Cider is my go-to for a refreshing match.
Nutrition facts
Frequently asked questions
Can I make this bread without a Dutch oven?
Yes! If you don’t have a Dutch oven, use a heavy oven-safe pot with a lid or a baking stone. For best results, bake the bread on a parchment-lined tray and cover it with foil during the first 20 minutes to trap steam. The crust won’t be as crispy, but the bread will still be delicious. A pizza stone or cast-iron skillet also works well—just preheat it in the oven first.
Why did my bread turn out dense instead of crusty?
Dense bread usually means the dough didn’t proof enough or the oven wasn’t hot enough. Make sure your water is 110°F (not hotter) and let the dough rest fully for both 30-minute stages. Also, preheat the oven with the Dutch oven inside for 30 minutes—this ensures even heat. If your kitchen is cold, try proofing near a warm spot, like the oven with the light on.
How can I add flavor to this basic recipe?
Try these easy upgrades: Swap 1 cup of flour for whole wheat for nuttiness, or mix in 1 tsp dried rosemary or garlic powder. For sweetness, add 1 tbsp honey or 1/4 tsp cinnamon to the dough. After baking, brush with melted butter and sprinkle with flaky salt or everything bagel seasoning. The possibilities are endless—just keep the yeast and water ratios the same!
Can I make this bread in a smaller loaf pan?
For a smaller loaf, shape the dough into a 6×3-inch log and bake it in a greased loaf pan. Reduce baking time to 20-25 minutes covered, then 10 minutes uncovered. The texture will be similar, but the crust may be slightly less crispy. For extra crunch, bake on a tray instead of in the pan and broil for 1-2 minutes at the end.
What’s the best way to reheat stale bread?
Wrap slices in foil and warm in a 350°F oven for 5-7 minutes until crispy again. For a quicker fix, toast slices in a dry skillet over medium-low heat for 1-2 minutes per side. Avoid the microwave—it makes bread gummy. Pro tip: Store bread in a paper bag at room temperature to keep it fresh longer.

- 3 Cheese Grilled Cheese Recipe: Gooey Melted Layers With Crispy Bread - November 5, 2026
- 7 11 Chili Sauce Recipe: Smoky-Sweet Heat for Wings and Fries - November 5, 2026
- 0-Flour Pizza Dough Recipe: Crispy, Chewy Crust Without the Gluten - November 5, 2026