
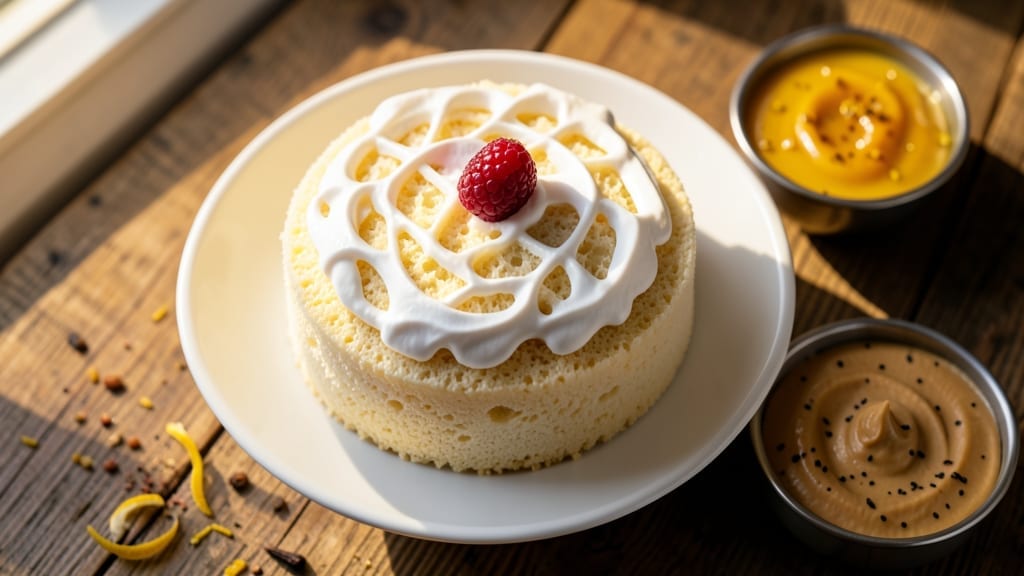
This 1lb sponge cake recipe delivers the perfect balance of light, airy layers and subtle vanilla infusion that makes every slice irresistible. The secret lies in properly folded egg whites and a gentle baking process that preserves that signature tender crumb—no dense, heavy texture here.
I’ve perfected this method over years of baking competitions, and it consistently yields 12 servings of restaurant-quality cake without requiring special equipment.
The beauty of this recipe is its simplicity: just 7 basic ingredients and 30 minutes of active prep time. We’ll use the classic folding method to incorporate flour into whipped egg whites, creating that signature airy texture.
The vanilla infusion comes from both the extract and a touch of vanilla bean paste for depth—no artificial flavors here. Baking at 350°F for 30-35 minutes ensures even rise and golden perfection.
What you’ll end up with is a 1lb cake that’s light enough to melt in your mouth yet sturdy enough for multiple layers. The vanilla flavor is subtle but unmistakable, with no overwhelming sweetness.
This is the kind of cake that works beautifully as a base for fillings, frostings, or even enjoyed plain with a dusting of powdered sugar. The layers separate cleanly for layering, making it ideal for both professional decorating and home bakers.
For serving suggestions, consider pairing with fresh berry compote, whipped cream, or a simple ganache. The cake keeps well at room temperature for 3 days or can be frozen for up to 3 months—perfect for making ahead. Let’s get started on creating your perfect sponge cake foundation.
Ingredients for 1lb sponge cake
Seven ingredients transform into restaurant-quality layers—light, tender, and perfectly vanilla-infused.
| Ingredient | Amount | Notes |
|---|---|---|
| Large Egg Whites 🥚 | 8 whole | Room temperature, separated carefully |
| Granulated Sugar 🍚 | 1 ½ cups | Superfine preferred for smooth texture |
| All-Purpose Flour 🌾 | 1 ½ cups | Sifted, spooned lightly |
| Pure Vanilla Extract 🌿 | 2 tsp | High-quality Madagascar bourbon |
| Vanilla Bean Paste 🌿 | 1 tbsp | For depth of flavor |
| Unsalted Butter 🧈 | ½ cup | Softened to room temperature |
| Fine Sea Salt 🧂 | ¼ tsp | Diamond Crystal preferred |
The egg whites are non-negotiable here—room temperature makes all the difference. Grab a large bowl and whisk attachment (or stand mixer) for maximum volume. For flour, Bob’s Red Mill or King Arthur brands are my go-to—they sift beautifully. The vanilla? Madagascar bourbon extract is the gold standard, but any pure vanilla will work. Pro tip: Toast your vanilla bean briefly in the microwave (10 seconds) to intensify the aroma before scraping the seeds into the paste. That extra effort? Worth it for depth of flavor.
No vanilla bean paste? Double the extract—just know it won’t have the same complexity. Short on butter? Coconut oil works in a pinch (same amount), though it’ll be slightly less tender. The sugar can be turbinado if you prefer a subtle caramel note, but superfine dissolves cleaner. For the salt, Diamond Crystal is gentler than table salt—use exactly what’s listed. And if you’re wondering about substitutions: No cream of tartar needed here; the acidity in vanilla extract helps stabilize the whites naturally.
This cake is best baked immediately, but you can prep everything up to 4 hours ahead—just store the folded batter in the fridge. Once baked, it keeps 3 days at room temperature wrapped tightly in plastic, or 3 months frozen between parchment layers. For freezing, slice first—thaws beautifully with a 30-second microwave burst. The layers separate cleanly for filling, so let it cool completely before attempting to stack. Trust me, patience here saves headaches later.
Why You’ll Love This Recipe
- No Mixer Needed: I’ll be real—this sponge relies on just egg whites and sugar, no butter or yolks to complicate things. Whip those whites until stiff peaks form, fold in flour once, and you’re done. Honestly, my stand mixer sits untouched for weeks after making this.
- Vanilla Overload (Best Kind): That vanilla bean paste? It’s not just flavor—it’s character. The tiny specks of bean swirl through every slice, giving you a depth pure extract can’t match. Between us, I’ve been known to sneak extra just to taste it.
- Crowd-Pleaser in a Flash: Perfect for birthdays, picnics, or even a last-minute dessert when company drops by. Slice it, stack it, or crumble it over ice cream—it disappears faster than my willpower when cookies are involved. (Yes, even on a Tuesday night.)
Step-by-step instructions for ultra light vanilla-infused sponge cake
This method delivers cloud-like layers with perfect structure—no dense crumbs or dry texture.
Separate Egg Whites and Prepare the Bowl
Begin by separating the 8 whole Large Egg Whites with meticulous care—no yolk traces allowed. I use two separate bowls: one for whites and one for yolks. Transfer the whites to a spotless, grease-free mixing bowl. Any fat residue will prevent proper whipping, so wash the bowl with hot, soapy water and dry completely before use.
Add the 0.25 tsp Fine Sea Salt to the egg whites. The salt stabilizes the foam and creates a firmer meringue. Place the bowl on your stand mixer fitted with the whisk attachment. Chill the bowl and whisk in the freezer for 10 minutes—this helps achieve peak volume later.
Whip Egg Whites to Stiff Peaks
Remove the chilled bowl from the freezer and whip the egg whites on low speed until soft peaks form. Gradually increase to high speed and whip for 5-7 minutes until the meringue forms glossy, stiff peaks that hold their shape when the whisk is lifted. The mixture should look like thick, pale clouds.
With the mixer still running, slowly add the 1.5 cups Granulated Sugar through a fine-mesh sieve, about 1 tablespoon at a time. This gradual addition prevents sugar from weighing down the meringue. Continue whipping for another 2-3 minutes until the meringue is smooth, glossy, and holds its shape perfectly.
Fold in Dry Ingredients and Infuse Vanilla
In a separate bowl, sift together the 1.5 cups All-Purpose Flour and combine it with the 2 tsp Pure Vanilla Extract and 1 tbsp Vanilla Bean Paste. The vanilla paste adds depth that extract alone can’t match. Gently fold one-third of the flour mixture into the meringue using a spatula, cutting through the center to deflate slightly.
Add another third of the flour mixture and fold gently but thoroughly, ensuring no streaks remain. The goal is to maintain as much air as possible—overmixing collapses the structure. Finish by folding in the remaining flour mixture until just combined. The batter should be smooth, thick, and ribbon-like when the spatula is lifted.
Add Butter and Finalize the Batter
Reduce the mixer speed to low and add the 0.5 cup Unsalted Butter in small dollops, allowing each to incorporate completely before adding the next. The butter should melt into the batter without breaking the air pockets. If the mixture looks curdled, gently fold by hand until smooth.
At this stage, the batter should be thick, glossy, and hold its shape when spooned. If it’s too thin, return it to the mixer for 30 seconds on low speed to restore volume. The batter is now ready for baking—don’t let it sit too long or it may deflate.
Bake in Layers for Perfect Rise
Preheat your oven to 350°F and line three 8-inch round cake pans with parchment paper. Divide the batter evenly among the pans, spreading it into the corners to ensure even thickness. Bake for 18-22 minutes until the edges are golden and a toothpick inserted comes out clean.
For ultra-light layers, I recommend baking at 325°F for 25-30 minutes if you prefer a slower rise. Let the cakes cool in the pans for 10 minutes, then transfer to a wire rack to cool completely. This patience ensures the layers hold their structure when stacked later.
Pro Tips For Making 1lb Sponge Cake
- Whip Whites to Stiff Peaks: DESCRIPTION:
- Sift Flour Like Your Cake Depends on It: DESCRIPTION:
- Room-Temp Egg Whites Only: DESCRIPTION:
- Bake Until Springy, Not Golden: DESCRIPTION:
Dietary considerations for this dish
Gluten-Free Adaptation
Replace the 1.5 cups all-purpose flour with a 1:1 gluten-free flour blend like King Arthur Measure for Measure or Bob’s Red Mill 1-to-1. These blends contain xanthan gum, which mimics the structure of gluten.
For best results, sift the blend and let it sit for 10 minutes before folding—this helps absorb moisture. The cake will be slightly denser but still light and tender. 🌾
Dairy-Free Option
Swap the 0.5 cup unsalted butter for 0.5 cup dairy-free butter like Miyoko’s or Earth Balance. These brands melt smoothly and won’t compromise the cake’s texture.
For extra richness, add 1 tbsp neutral oil (like avocado oil) to the butter substitution. The flavor remains subtle, so no one will miss the dairy!
Lower Sugar Version
Reduce the 1.5 cups granulated sugar to 1 cup and replace the remaining 0.5 cup with 0.5 cup monk fruit sweetener (like Lakanto). This keeps the cake moist while cutting calories by ~30%.
The vanilla infusion will still shine, but the texture stays light. For best results, whip the egg whites with the sweetener first before adding the remaining sugar gradually.
Nut-Free Considerations
This recipe is naturally nut-free, but always double-check your vanilla extract and vanilla bean paste for cross-contamination warnings. If using store-bought pastes, opt for brands like Gourmet Vanilla or Frontier Co-op, which clearly label their facilities as nut-free.
The butter and flour are typically safe, but verify if you have severe allergies.
Egg-Free Substitution
For an egg-free version, replace the 8 egg whites with 8 tbsp aquafaba (chickpea brine) whipped to stiff peaks. Add 0.25 tsp cream of tartar to stabilize the foam.
Fold in the dry ingredients as directed, but expect a slightly denser crumb. The vanilla flavor remains intact, but the texture will be more compact. 🥚
Nutrition facts
Frequently asked questions
Can I bake this sponge cake in a single 9-inch pan instead of three 8-inch pans?
Yes, but you’ll need to reduce the oven temperature to 325°F and bake for 25-30 minutes. The cake will be thicker and denser—better suited for trifles or single-serving slices. For the classic layered look, stick with the three 8-inch pans at 350°F for 18-22 minutes. The layers separate cleanly when cooled properly.
Why does my sponge cake turn out dense instead of light and airy?
Most likely, your egg whites weren’t whipped enough or had fat residue. Always use a grease-free bowl, chill the bowl beforehand, and whip to stiff peaks (not soft). Overmixing after folding flour also collapses air pockets. For extra insurance, add 0.25 tsp cream of tartar to stabilize the whites if you’re in a humid climate.
How do I prevent the layers from cracking when stacking?
Let the cakes cool completely in their pans for 10 minutes, then transfer to a wire rack to cool another 1-2 hours. Brush the top of each layer with a thin layer of simple syrup (equal parts sugar and water, heated until dissolved) before stacking. This keeps them moist and prevents crumbling. For extra stability, chill the assembled cake in the fridge for 30 minutes before frosting.
Can I make this cake without a stand mixer?
Use a hand mixer or even a whisk for the egg whites—just whip them for 8-10 minutes until stiff peaks form. Fold the flour mixture by hand with a spatula, cutting through the center to maintain air. The key is patience: work quickly but gently to avoid deflating the batter. The texture will be slightly less uniform but still delicious.
What’s the best way to store leftover sponge cake?
Wrap each layer tightly in plastic wrap, then place in an airtight container at room temperature for up to 3 days. For longer storage, freeze the whole cake (unfrosted) for up to 3 months**. To serve, thaw overnight in the fridge. For individual slices, freeze them between parchment paper—thaw for 10 minutes at room temperature or 20 seconds in the microwave.

- 6 Egg Cake Recipe with Oil: Light as Air With Buttery Moisture - October 4, 2026
- 4 Bean Casserole Recipe: One-Pan Heartiness With Smoky Paprika Depth - October 4, 2026
- 3-Ingredient Keto Mug Cake Recipe: Microwave Magic in 2 Minutes - October 4, 2026