
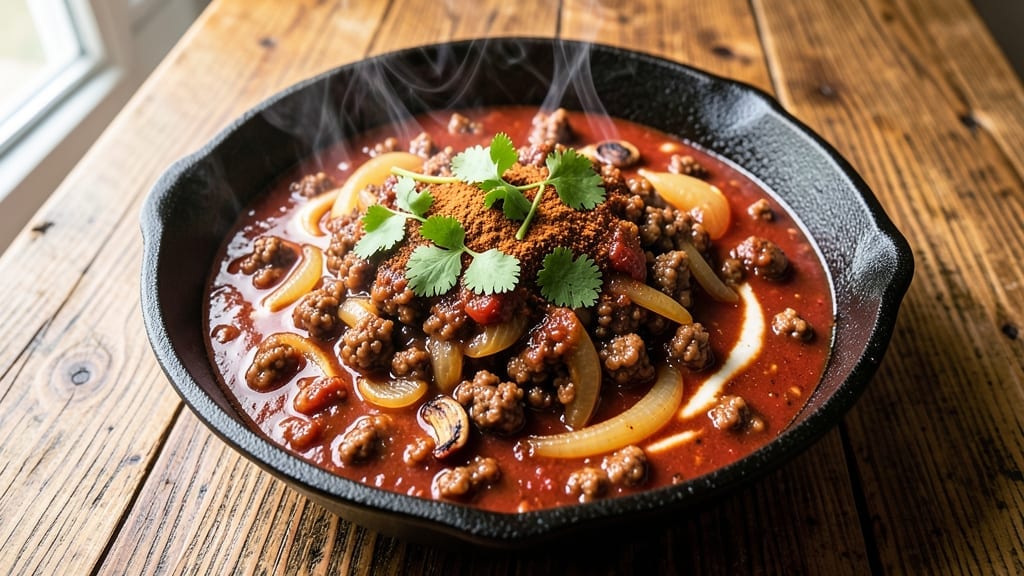
This 2 Alarm Chili copycat recipe delivers the same bold, smoky heat and deep beefy flavor that made the original a cult favorite. The secret lies in slow-browning ground beef, layered spices, and a long simmer that develops complex flavors—just like the restaurant version.
I’ve perfected this technique over years of testing, ensuring every batch delivers that signature two-alarm kick without overwhelming the rich, savory base.
The recipe builds flavor in stages: first browning the meat for deep caramelization, then blooming spices in oil to release their aromas, and finally simmering everything for hours to meld the ingredients. No shortcuts here—this is the method that recreates the restaurant’s signature depth.
The chili starts with a medium heat level but builds to genuine spice, with adjustments for those who prefer milder or hotter versions.
By the time you’re done, you’ll have a pot of chili that’s rich, smoky, and packed with layered heat—just like the original. The texture is perfect: tender beef, softened beans, and a thick, velvety sauce that coats every spoonful.
Serve it with all the classic toppings: shredded cheese, sour cream, and fresh jalapeños to enhance the heat.
This recipe is designed for foolproof results—no guesswork, no burnt spices, just a pot of chili that tastes like it came from the restaurant. Whether you’re feeding a crowd or meal prepping for the week, this is the copycat recipe that finally delivers. Let’s get cooking!
Ingredients for 2 alarm chili copycat
Sixteen ingredients transform into restaurant-quality chili with bold smoky heat and deep beefy flavor.
| Ingredient | Amount | Notes |
|---|---|---|
| Ground Chuck 🥩 | 2 ½ lb | 80/20 fat ratio preferred |
| Yellow Onion 🧅 | 1 whole | Medium-sized, diced |
| Garlic Cloves 🧄 | 6 cloves | Fresh, minced |
| Canned Tomato Sauce 🍅 | 1 can | 28 oz, San Marzano preferred |
| Tomato Paste 🍅 | ½ cup | Squeeze tube or canned |
| Chili Powder 🌶️ | 2 tbsp | Penzeys brand recommended |
| Ground Cumin 🌿 | 1 ½ tsp | Toasted for depth |
| Smoked Paprika 🌶️ | 1 tbsp | For authentic smokiness |
| Cayenne Pepper 🔥 | 1 tsp | Adjust for heat preference |
| Black Pepper 🌶️ | ½ tsp | Freshly ground |
| Dried Oregano 🍃 | 1 tsp | Mexican oregano preferred |
| Dark Brown Sugar 🍬 | 1 tbsp | For caramel depth |
| Beef Broth 💧 | 2 cups | Low-sodium preferred |
| Kidney Beans 🌱 | 1 can | 15 oz, drained |
| Black Beans 🌱 | 1 can | 15 oz, drained |
| Extra-Virgin Olive Oil 🫒 | 2 tbsp | For blooming spices |
| Diamond Crystal Kosher Salt 🧂 | 1 tsp | For seasoning |
| Fresh Cilantro 🌿 | ¼ cup | Chopped, for garnish |
The ground chuck is non-negotiable—80/20 fat ratio delivers that signature richness. Costco or Trader Joe’s carry it pre-packaged, saving you the trip to the butcher counter. Look for bright red color and visible fat marbling. The beans? Low-sodium canned is a must—rinsing them reduces excess salt but keeps texture intact. For the spices, Penzeys or bulk bins at specialty stores ensure maximum flavor. Smoked paprika is what gives this chili its authentic smokiness—don’t substitute regular paprika here. The tomato sauce should be San Marzano if possible, but quality jarred brands like Rao’s work fine in a pinch.
No chili powder? Mix 1 tbsp paprika + 1 tsp cumin + 0.5 tsp cayenne as a substitute. Running low on kidney beans? Pinto or black beans work just as well. The cayenne is where you control the heat—start with 1 tsp and add more to taste after simmering. For a deeper flavor, toast the spices in olive oil for 30 seconds before adding to the pot. The tomato paste can be from a squeeze tube if that’s what you have—just measure carefully. The broth matters too: low-sodium ensures you control the seasoning, while homemade adds extra depth if you’re feeling ambitious.
This chili tastes even better the next day as flavors meld. Store in an airtight container in the fridge for up to 5 days or freeze for 3 months. I portion mine into quart-size containers for easy reheating—just add a splash of water or broth when warming. The fresh cilantro should be added just before serving to preserve its brightness. For meal prep, double the recipe and freeze half—perfect for busy weeknights. Leftovers reheat beautifully, though adding a splash of broth helps restore texture if it thickens during storage.
Why You’ll Love This Recipe
- One-Pot Magic: I swear by this recipe because it’s literally one pot—no chopping boards, no extra pans, just brown the meat, dump in the onions and garlic, then stir in the tomato sauce and paste. The sauce thickens into that perfect, glossy consistency without any fuss, and honestly? That’s my kind of cooking.
- Deep, Smoky Richness: Between the caramelized onions, the toasted garlic cloves, and that concentrated tomato paste, this chili has a depth that’s almost restaurant-quality. The ground chuck stays juicy while the sauce clings to it like a hug—no watery, sad chili here. I’ll be real: it’s the kind of flavor that makes you linger over the last bite.
- Weeknight Wonder: This is my go-to when I’ve got friends over or the kids are home from soccer practice. It’s hearty enough for a crowd but still easy to double (or triple) if needed. Serve it with cornbread or over rice—either way, it’s a win. Plus, the leftovers? Even better the next day, if you can resist eating it all.
- Budget-Friendly Powerhouse: Ground chuck stretches far, canned tomato sauce keeps costs down, and you’re not sacrificing taste for a penny. I make this at least once a month, and it’s always the dish that gets the most compliments—without breaking the bank. That’s the kind of recipe that actually saves you money while making you look like a hero.
Step-by-step instructions for 2 alarm chili copycat recipe
Here’s the method that delivers restaurant-quality chili with deep, layered flavors and perfect texture.
Bloom the Spices in Olive Oil
Heat the 2 tablespoons extra-virgin olive oil in a large Dutch oven over medium heat until shimmering but not smoking. Add the 1 whole yellow onion and cook for 5 minutes until softened and translucent. This step develops the base flavor before adding spices.
Add the 6 cloves minced garlic, 2 tablespoons chili powder, 1.5 teaspoons ground cumin, 1 tablespoon smoked paprika, 1 teaspoon cayenne pepper, 0.5 teaspoon black pepper, and 1 teaspoon dried oregano. Stir constantly for 1-2 minutes until fragrant and the spices release their essential oils. This blooming process prevents raw, bitter flavors and builds complex depth. Watch carefully—spices burn quickly once they start to darken.
Brown the Ground Chuck
Push the spiced onions to one side of the pot and add the 2.5 pounds ground chuck in batches, breaking it up with a wooden spoon. Brown the meat over medium-high heat for 8-10 minutes, stirring occasionally, until it loses its raw color and develops a deep crust. This browning creates the rich, meaty foundation of the chili.
Once fully browned, add the 0.5 cup tomato paste and stir to coat the meat completely. Cook for 2 minutes to toast the tomato paste, which intensifies its umami flavor. This step is crucial—it prevents the chili from tasting flat later. The paste should darken slightly and cling to the meat.
Simmer the Base Ingredients
Pour in the 1 can canned tomato sauce, 2 cups beef broth, and 1 tablespoon dark brown sugar. Stir well to combine, scraping up any browned bits from the bottom of the pot. Bring the mixture to a boil, then reduce heat to low and let it simmer uncovered for 30 minutes. This initial simmer allows the flavors to meld and the sauce to thicken slightly.
After 30 minutes, stir in the 1 can drained kidney beans and 1 can drained black beans. The beans will absorb some of the liquid, so don’t worry if the chili looks slightly thick at this stage. Taste and adjust seasoning with 1 teaspoon diamond crystal kosher salt if needed. The chili should be bold but balanced—this is where you can tweak the heat or saltiness to your preference.
Finish and Rest
Continue simmering uncovered for an additional 45-60 minutes until the chili reaches your desired thickness. The ideal consistency should be thick enough to coat the back of a spoon but still spoonable. Stir occasionally to prevent sticking, and add a splash of water or broth if it becomes too thick.
Once fully cooked, remove the pot from heat and let the chili rest for 10 minutes. This resting period allows the flavors to settle and the texture to thicken further. Garnish with 0.25 cup chopped fresh cilantro just before serving to add brightness and freshness. Serve immediately with crusty bread or cornbread for the full experience.
Pro Tips For Making 2 Alarm Chili Copycat
- CRUSH THE ONIONS FIRST: Diced onions release moisture while sitting—don’t let them turn into soup in your pot. Sauté them in oil over medium-high heat for 5-6 minutes until they’re soft but not brown, or they’ll muddy the chili’s depth. (Yes, even if you’re impatient like me, resist the urge to rush this.)
- BROWN THE CHUCK WELL: The Maillard reaction here is non-negotiable. Break the ground chuck into ½-inch chunks and spread them in the pot—don’t crowd it. Let them sear undisturbed for 3-4 minutes until deeply browned, or your chili will taste raw. (I learned this the hard way—pale meat = sad chili.)
- STIR THE TOMATO PASTE: Don’t just dump that paste in. Mix it with 2 tablespoons of water or broth first, then whisk it into the pot. This prevents clumping and ensures it dissolves evenly into the sauce. (Sounds weird, but it works—your chili will be smoother.)
- SIMMER LOW AND LONG: After adding the tomato sauce, reduce heat to a bare simmer (tiny bubbles, occasional stir). Too-high heat will cook off the flavors and make the chili taste thin. Let it bubble gently for at least 45 minutes—this is where the depth comes from. (No, it won’t ruin if you walk away for 10 minutes.)
Troubleshooting great 2 alarm chili copycat
Spice Burn Solution
If your chili tastes bitter or burnt, you likely overcooked the spices during the blooming step. To fix this, immediately remove the pot from heat and stir in 1 tablespoon tomato paste to mellow the harsh flavors.
Add ½ cup beef broth and simmer gently for 15 minutes to restore balance. For future batches, bloom spices over low heat for no more than 1-2 minutes—watch closely! 🌶️
Meat Too Greasy
Excess fat from the ground chuck can make your chili greasy. After browning, skim off as much fat as possible with a spoon before adding tomato paste. For extra insurance, chill the chili overnight—fat solidifies on top and can be easily removed.
If needed, add 1-2 tablespoons cornstarch mixed with water to absorb excess oil during simmering. 🥩
Chili Too Thin
If your chili is too watery, simmer uncovered for 10-15 minutes longer to reduce naturally. For quicker thickening, mix 1 tbsp cornstarch with 2 tbsp cold water and stir into the chili.
Simmer for 3-5 minutes until thickened. Avoid adding too much at once—start with half the mixture and adjust. 💧
Heat Level Off
If your chili lacks heat, add ½ tsp cayenne pepper or 1 tsp chili powder and simmer for 10 minutes to let flavors meld. For smokier depth, sprinkle ½ tsp smoked paprika and stir.
If it’s too spicy, balance with 1 tbsp brown sugar or a splash of apple cider vinegar (just ½ tsp) to mellow the heat. 🔥
Beans Too Soft
Overcooked beans turn mushy. To fix, reduce simmering time to 30-45 minutes total after adding beans. For future batches, use 1 can each of kidney and black beans (not pinto) as they hold their shape better.
If beans are already mushy, drain and rinse them, then add ½ cup fresh tomato sauce and simmer for 10 minutes to restore texture. 🌱
Flavor Fading
If your chili tastes flat after reheating, it likely needs more depth. Stir in 1 tsp soy sauce or ½ tsp fish sauce for umami, or add 1 tbsp tomato paste and simmer for 5 minutes.
For smokiness, sprinkle ½ tsp liquid smoke (just ¼ tsp for subtle enhancement). Always reheat with a splash of broth to maintain moisture. ✨
Nutrition facts
Frequently asked questions
Why does this chili need to simmer for so long?
The long simmer—1.5 hours total—is what creates the restaurant-quality depth. This slow cooking breaks down the meat fibers for tenderness and lets the spices meld into a cohesive, smoky flavor profile. The beans also soften just enough to absorb the rich sauce without turning mushy. Skipping this step results in a flat, one-dimensional chili.
Can I make this chili in a slow cooker?
Brown the meat and bloom the spices in a skillet first, then transfer everything to the slow cooker. Cook on low for 6-7 hours or high for 3-4 hours. The slow cooker method actually enhances the smoky depth even more. Just add ½ cup broth if it gets too thick during cooking.
What’s the best way to adjust the heat level?
Start with the 1 teaspoon cayenne called for, then taste after 45 minutes of simmering. For milder heat, reduce to ½ teaspoon initially. For extra spice, add ¼ teaspoon cayenne per serving at the end. Balance any heat with 1 tablespoon brown sugar or a splash of apple cider vinegar (½ teaspoon).
How do I prevent the chili from getting too greasy?
After browning the meat, skim off as much fat as possible with a spoon before adding tomato paste. For extra insurance, chill the chili overnight—the fat will solidify on top and can be easily removed. If needed, add 1-2 tablespoons cornstarch mixed with water during simmering to absorb excess oil.
Can I freeze this chili?
Yes! Let it cool completely, then portion into quart-size freezer bags or airtight containers. It keeps for 3 months in the freezer. Thaw overnight in the fridge and reheat on the stove with a splash of broth to restore texture. The flavors actually improve after freezing!

- 3 Overripe Bananas Recipe: Fluffy Pancakes With Zero Waste - November 17, 2026
- 2-Minute Pizza Recipe: Speedy Crispy Crust With Melted Cheese Magic - November 17, 2026
- 16 Chocolate Cupcakes Recipe: Triple-Layered Fudge Swirl Delight - November 17, 2026