
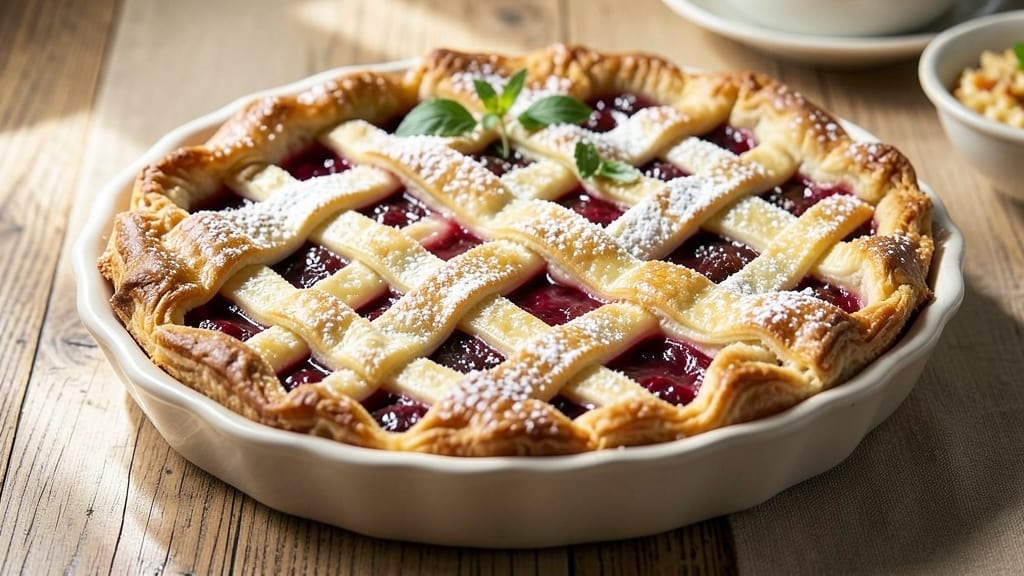
This 2 crust pie recipe with shortening delivers restaurant-quality flakiness without the stress of rolling dough twice—just one perfect crust that gets folded into itself for effortless double-crust magic. 💛 The secret lies in chilled shortening and precise folding, which creates those signature delicate layers while keeping the filling from leaking.
After perfecting this technique through countless test batches (and a few too many burnt edges), I’ve finally cracked the code for consistent, foolproof results every time.
The beauty of this method is its simplicity: no rolling out two separate crusts, no tricky lattice patterns, and no guesswork about thickness.
Shortening’s high fat content creates steam pockets that separate the layers, while the folded design ensures a sturdy structure that holds up to both sweet and savory fillings.
Whether you’re making classic apple pie, rich chocolate cream, or seasonal pumpkin, this technique guarantees a golden, flaky crust that rivals bakery quality.
What you’ll achieve is a pie with a perfectly flaky top and bottom, tender yet sturdy enough to hold its shape when sliced. The crust maintains its crispness even after baking, with delicate, paper-thin layers that melt in your mouth.
No more soggy bottoms or tough tops—just consistent, professional results that impress even skeptical pie lovers.
This recipe works equally well for both sweet and savory pies, making it incredibly versatile. The folded crust technique also allows for creative variations like adding herbs to savory fillings or extra sugar to sweet ones. Let’s get started on creating your perfect pie crust from scratch!
Ingredients for 2 crust pie recipe with shortening
Restaurant-quality flakiness starts with these precise ingredients—chilled shortening and sifted flour are non-negotiable.
| Ingredient | Amount | Notes |
|---|---|---|
| All-Purpose Flour 🌾 | 4 cups | Sifted for even texture |
| Shortening 🧈 | 1 cup | Chilled for flakiness (Crisco preferred) |
| Granulated Sugar 🍚 | ¼ cup | Plus 1 tbsp for brushing |
| Salt 🧂 | 1 tsp | Diamond Crystal kosher salt |
| Ice Water 💧 | ½ cup | Chilled for precise mixing |
| Large Egg Yolk 🥚 | 1 whole | For binding (optional) |
| Vanilla Extract 🌸 | ½ tsp | Pure, high-quality extract |
| Unsalted Butter 🧈 | 2 tbsp | Melted for brushing |
| Coarse Sugar 🍚 | 2 tbsp | For sprinkling |
| Pie Filling 🍎 | 6 cups | Sweet or savory (prepared separately) |
| Egg Wash 🥚 | 1 tbsp | 1 egg + 1 tbsp water |
The shortening is the game-changer here—Crisco or Smart Balance work best for that signature flakiness. Buy it in bulk from Costco or King Arthur Flour’s online store if you bake often; it stays stable for 12 months unopened. Keep it refrigerated once opened. The flour must be sifted—King Arthur or Gold Medal brands are ideal for their consistency. If your kitchen lacks a sifter, fold it into the dry mix using a whisk to aerate. The granulated sugar isn’t just for sweetness; it helps create steam pockets during baking, so don’t skip it even for savory pies.
No shortening? Vegan butter or lard (for savory pies) can substitute at 1:1 ratio, but texture won’t be identical. The egg yolk is optional but adds tenderness—omit for egg-free versions. Vanilla extract is a must for sweet pies, but dried rosemary or thyme (1 tsp) works beautifully for savory. The pie filling can be anything—store-bought or homemade—but pre-cook it thoroughly to prevent a soggy crust. For the egg wash, beat the egg first to emulsify, then thin with water for even brushing. Diamond Crystal kosher salt dissolves cleaner than table salt, so use that if possible.
Store dough scraps wrapped in plastic between parchment paper for 2 days in the fridge. For longer storage, freeze shaped dough (unbaked) for 3 months—thaw overnight before baking. The shortening hardens when cold, so let it sit 10 minutes at room temp before mixing if it feels rock-hard. Preheat your oven to 375°F before assembling; this ensures even baking. Brush the melted butter on the crust twice—once before baking and once after—for maximum golden color. Coarse sugar on top adds crunch, but crushed nuts or sprinkles work too.
Why You’ll Love This Recipe
- No-Fuss Dough: I swear, this crust comes together with just flour, shortening, and ice water—no butter fighting with your hands or last-minute egg chases. The cold water keeps it from getting gummy, and the shortening gives that melt-in-your-mouth flakiness without the fuss of rolling it out perfectly.
- Golden Crust Magic: That crispy, caramelized edge with a tender interior? The sugar in the dough does all the work—just brush the top with a little egg wash before baking. It’s the kind of crust that makes people ask for the recipe, and honestly, it’s just four ingredients doing their thing.
- Double the Pie: Make two crusts at once and freeze one for later—no extra effort, just double the dough. Perfect for when you’re craving pie but don’t want to bake it all in one go. I’ve used the extra for pot pies, hand pies, or even a quick quiche when I’m lazy.
- Budget-Friendly Staples: Flour, shortening, sugar—these are pantry basics that won’t break the bank. No need for fancy ingredients or last-minute grocery runs. Plus, the dough keeps well, so you’re always ready for a homemade pie without the stress.
Step-by-step instructions for perfect 2-Crust pie with shortening
Master this foolproof method for restaurant-quality crusts without rolling or stress.
👨🍳 Step 1: Mix Dough for Maximum Flakiness
In a large bowl, combine the 4 cups sifted all-purpose flour, 1 cup chilled shortening, 0.25 cup granulated sugar, and 1 tsp salt. Use a pastry cutter or your fingers to work the shortening into the flour until you achieve pea-sized crumbs with some flour still visible. This texture is crucial—overworking develops gluten and ruins flakiness.
Add the 1 whole large egg yolk and 0.5 tsp vanilla extract, then gradually mix in the 0.5 cup ice water until the dough just comes together. The dough should hold when pressed but still feel slightly dry. If it’s too crumbly, add 1 teaspoon more ice water; if too sticky, add 1 tablespoon more flour. Divide the dough into two equal portions and flatten each into a disk.
🥘 Step 2: Chill and Shape Crusts
Wrap each dough disk tightly in plastic wrap and refrigerate for at least 1 hour (up to 24 hours). Chilling relaxes the gluten and prevents shrinking during baking. When ready, roll out the first disk on a lightly floured surface to fit a 9-inch pie dish, about 1/8-inch thick. The key here is even thickness—thinner edges crisp faster than thicker centers.
Transfer the rolled crust to the pie dish, pressing gently to conform to the shape. Trim excess dough, leaving a 1/2-inch overhang. Fold the overhang under itself to create a neat edge. Repeat with the second crust disk—this will be your top crust. Keep both crusts refrigerated until ready to use. If the dough warms up, return it to the fridge for 15 minutes before rolling.
🔥 Step 3: Blind-Bake Bottom Crust
Preheat your oven to 375°F. Line the bottom crust with parchment paper, then fill it completely with dry pie weights or pie pans. Bake for 15 minutes until the edges begin to golden brown. Remove the weights and parchment, then prick the bottom all over with a fork to prevent puffing. Return to the oven and bake for 5-7 minutes more until the crust is light golden brown and completely set.
Here’s the thing—don’t skip the blind-baking. This step prevents a soggy bottom crust when you add the filling. The crust should support itself when lifted gently from the dish. If any spots remain pale, bake 2-3 minutes longer. While the bottom crust bakes, prepare the 6 cups pie filling according to your recipe—it should be at room temperature when you assemble the pie.
🥘 Step 4: Assemble and Bake the Pie
Spread the prepared pie filling evenly into the baked bottom crust. Brush the edges of the bottom crust with melted unsalted butter, then place the second crust on top. Trim to match the bottom crust’s diameter, then seal the edges by pressing them together firmly. Create a slit in the center of the top crust for steam to escape. Brush the entire top crust with egg wash, then sprinkle with 2 tablespoons coarse sugar for a decorative finish.
Bake at 375°F for 35-45 minutes until the top crust is deep golden brown and the filling is bubbling through the vent. The edges should be bubbly and set, not raw. If the crust browns too quickly, tent loosely with foil. For extra shine, brush the top crust with egg wash again after 20 minutes of baking. Let the pie cool completely before slicing—this allows the filling to set properly.
⏰ Step 5: Rest and Serve
Transfer the pie to a wire rack and let it cool completely at room temperature for at least 2 hours. This resting period is critical—it allows the filling to firm up and the crust to crisp further. The contrast between the flaky, golden crust and the warm filling will be perfect when served.
Slice with a hot knife (dip in hot water and wipe dry between cuts) for clean edges. Serve warm or at room temperature. The bottom crust should be crisp and buttery, the top crust light and flaky, and the filling rich and perfectly set. Store leftovers in the refrigerator for up to 3 days or freeze for up to 3 months.
Pro Tips For Making 2 Crust Pie Recipe With Shortening
- CHILL THE DOUGH: After mixing flour, shortening, sugar, and salt, add ice water one tablespoon at a time—you’ll need about 4-5 tablespoons total. The dough should just hold together when pressed; if it’s sticky, add more flour (1 tbsp at a time). I learned this the hard way: overworking the dough or adding too much water turns it gummy. Let the dough rest 30 minutes before rolling—yes, even if you’re eager to bake.
- CUT SHORTENING COLD: Grate or cube your shortening and freeze it for 10 minutes before mixing. Cold fat creates flaky layers, while room-temperature shortening makes the crust tough. I was skeptical until I tried it—now I swear by it, especially for double-crust pies where texture matters most.
- WEIGH DON’T SCOOP FLOUR: Use a kitchen scale for flour (1 cup = 120g). Scooping from the bag packs it too tightly, throwing off your ratio. A light hand with flour keeps the crust tender and prevents a dense, heavy texture. Trust me, your pie will thank you—this is the thing that matters most for a light, airy crust.
- PRESS NOT ROLL THE CRUST: Instead of rolling the dough out, press it gently into the pie dish with your fingers, then use a rolling pin only to smooth the edges. This prevents air gaps and shrinking. I skip this when I’m lazy, but the difference in a crisp, even crust is noticeable—especially for a double-crust pie where both layers count.
Dietary considerations for this 2 crust pie recipe with shortening
Gluten-Free Adaptations
For a gluten-free version, replace the 4 cups all-purpose flour with a 1:1 gluten-free flour blend like Bob’s Red Mill or King Arthur. Add 1/4 cup xanthan gum to mimic gluten’s binding properties—this prevents crumbling.
Chill the dough 2 hours extra since gluten-free dough is more fragile. Use a pie dish with a removable bottom for easier transfer after baking. 💫
Dairy-Free Options
Skip the unsalted butter and egg wash for a dairy-free crust. Brush with melted coconut oil instead—it adds richness without dairy. For the egg wash, use 1 tbsp water + 1 tbsp aquafaba (chickpea brine) mixed until frothy.
The crust will still brown beautifully, though slightly less golden. Store-bought vegan shortening works too for extra flakiness.
Lower Sugar Versions
Reduce the 0.25 cup granulated sugar to 2 tbsp for a lighter crust. Boost flavor with 1 tsp cinnamon or 1/2 tsp vanilla bean paste instead. For fillings, use fruit with natural sweetness like berries or apples.
Sprinkle the top crust with crushed nuts or seeds for crunch and texture without extra sugar. The crust will still hold its shape—just with a subtler sweetness.
Nut-Free Considerations
If nut allergies are a concern, avoid topping with chopped nuts or nut-based fillings. Use sunflower seeds or pumpkin seeds instead—they add crunch without nuts. For fillings, opt for dairy-based custards or fruit compotes.
Always check labels on store-bought fillings for hidden nut traces. Cross-contamination is key—use separate utensils and surfaces if multiple allergens are present in your kitchen.
Savory vs. Sweet
This crust works equally well for savory pies! For quiche or pot pie, reduce the sugar to 1 tbsp and add 1 tsp dried herbs (thyme, rosemary) to the dough. Brush with olive oil instead of butter for a Mediterranean touch.
The folded crust technique prevents sogginess even with wet fillings like spinach or chicken. Pre-bake the bottom crust longer (20 minutes) to handle moisture-heavy fillings.
Nutrition facts
Frequently asked questions
Why does this recipe use shortening instead of butter?
Shortening creates more steam pockets during baking, resulting in that signature flaky, layered texture that butter can’t match. It also has a higher melting point, so the crust stays crisp longer. Plus, it’s more forgiving—less likely to shrink or puff up while baking. For extra richness, you can even mix ½ cup shortening with ½ cup butter.
Can I make this pie ahead of time?
Assemble the pie (unbaked) and refrigerate for up to 24 hours before baking. For a fully baked pie, let it cool completely, then wrap tightly in plastic wrap and store in the fridge for 3-4 days. To reheat, bake at 350°F for 10-15 minutes to refresh the crust.
What if my crust gets soggy?
Soggy crusts usually happen when the filling is too wet or the crust isn’t pre-baked enough. Always blind-bake the bottom crust for 15-20 minutes before adding filling. For extra insurance, sprinkle a thin layer of crushed cornflakes or breadcrumbs between the crust and filling to absorb moisture.
How do I prevent the top crust from burning?
Tent the pie loosely with foil after 20 minutes of baking if the top browns too quickly. Brush the crust with egg wash again halfway through baking for even color. Lower the oven temperature to 350°F for the last 10 minutes if needed. The filling should bubble through the vent before the crust is fully browned.
Can I make this crust without a pie dish?
Yes! For a free-form galette, roll out one crust to 1/8-inch thickness, pile the filling in the center, then fold the edges toward the center to create a rustic shape. Brush with egg wash and bake at 375°F for 30-35 minutes until golden. No blind-baking needed—just let it bake until the crust is crisp.

- 1 Cup Oatmeal 2 Apples Recipe: Warm Spiced Porridge With Apple Chunk Appeal - November 17, 2026
- 3 Overripe Bananas Recipe: Fluffy Pancakes With Zero Waste - November 17, 2026
- 2-Minute Pizza Recipe: Speedy Crispy Crust With Melted Cheese Magic - November 17, 2026