
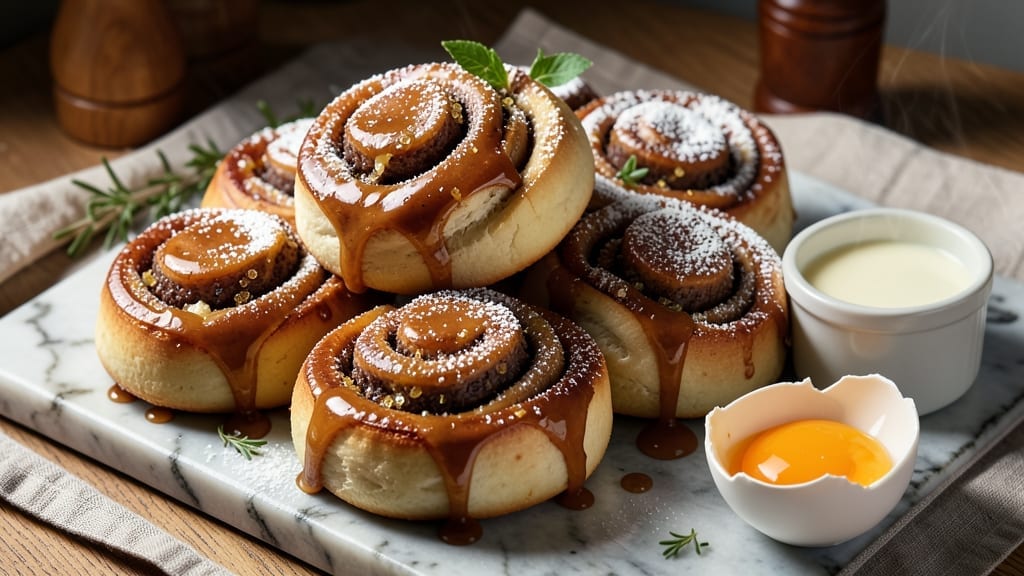
This 2-day cinnamon roll recipe transforms your kitchen into a bakery with minimal effort—thanks to an overnight rise that does the heavy lifting. 🌟 The secret lies in letting the yeast work its magic slowly, creating a tender dough that absorbs the cinnamon-sugar filling perfectly.
I’ve perfected this method after years of trial and error, ensuring every roll has that signature pull-apart texture and irresistible aroma that wakes up the whole house.
The process begins with a simple yeast dough that rests overnight, developing deep flavor while you sleep. On day two, you’ll roll out the dough, spread the cinnamon-sugar butter filling, and slice into rolls before a final proof and bake.
No advanced techniques required—just patience and a little time. The result? Cinnamon rolls with a soft, pillowy center and a golden, crackly top that’s impossible to resist.
These rolls stay fresh for days, making them perfect for meal prep or gifting. The overnight rise eliminates the need for last-minute baking, so you can enjoy warm, gooey cinnamon rolls without the morning rush.
Whether you’re feeding a crowd or treating yourself to a weekend indulgence, this recipe delivers bakery-quality results with just a little advance planning.
The beauty of this method is its flexibility. Make the dough the night before, then bake fresh rolls whenever you’re craving something sweet. Store leftovers in the fridge for up to 3 days or freeze for longer shelf life. Here’s how to create your own rise-and-shine masterpiece.
Ingredients for 2 day cinnamon roll
Twelve simple ingredients for bakery-style cinnamon rolls that rise overnight and bake fresh.
| Ingredient | Amount | Notes |
|---|---|---|
| All-Purpose Flour 🌾 | 5 cups | Sifted for light texture |
| Granulated Sugar 🍚 | ¼ cup | For dough and filling |
| Instant Yeast 🍞 | 2 ¼ tsp | Active dry works too |
| Unsalted Butter 🧈 | ½ cup | Softened for dough |
| Large Eggs 🥚 | 1 whole | Room temperature |
| Milk 🥛 | ½ cup | Warm for yeast activation |
| Salt 🧂 | ½ tsp | Kosher or sea salt |
| Cinnamon 🌿 | ½ cup | Ground for filling |
| Brown Sugar 🍯 | ½ cup | Packed for filling |
| Unsalted Butter 🧈 | ½ cup | Melted for filling |
| Vanilla Extract 🌸 | 1 tsp | Pure vanilla preferred |
| Powdered Sugar 🍚 | ¼ cup | For final dusting |
| Glaze Icing 🎂 | 1 cup | Optional for topping |
The yeast is your secret weapon here. Bob’s Red Mill instant yeast works best for consistent results, but active dry yeast is fine too—just let it proof longer. The butter matters: Land O’Lakes unsalted or Plugrá for the best flavor. I always grab extra flour from King Arthur if I’m making these often—their flour has that perfect balance. The milk should be warm (about 110°F) to activate the yeast properly. If your kitchen’s cold, pop it in the microwave for 20 seconds.
No vanilla extract? Vanilla bean paste works just as well. The brown sugar can be swapped for white sugar if you’re in a pinch, but the molasses notes in brown sugar make these rolls taste like a bakery. For the glaze, store-bought powdered sugar icing is fine, but homemade (powdered sugar + milk + vanilla) tastes better. If you’re making these ahead, freeze the unbaked rolls—just bake straight from frozen with 10-12 extra minutes. The cinnamon-sugar filling is where the magic happens, so don’t skimp on the cinnamon!
Freshly baked rolls are best, but these stay soft for 3 days in the fridge if you wrap them tightly in plastic. For longer storage, freeze the baked rolls for up to 3 months. I always make a double batch—one for the morning and one to freeze for lazy weekends. The dough can be refrigerated overnight (covered) before rolling, but don’t let it sit out too long or it’ll get sticky. Trust me, the overnight rise is worth the wait—these rolls are so much better than the 30-minute versions.
Why You’ll Love This Recipe
- Two-Day Magic: I swear by this schedule—mix the dough, let it rest overnight, then roll and bake the next day. No rushing, no stress, just warm, fluffy rolls waiting for you.
- Butter-Sugar Perfection: That rich, melted butter swirled into cinnamon-sugar? It’s the kind of flavor that makes you close your eyes. The dough’s tender, the filling’s sticky—every bite’s a win.
- Weekend or Weeknight: Make it fresh for Sunday brunch or pull out the leftovers for a lazy Monday breakfast. Honestly, they’re even better the second day—crisp edges, gooey center.
- Budget Breakfast: Four simple ingredients stretch to feed four (or more, if you’re like me). Eggs and butter keep costs low, but the taste? Feels like a splurge every time.
Step-by-step instructions for 2 day cinnamon rolls
Here’s the magic of slow fermentation—better flavor, softer texture, and rolls that rise beautifully.
👨🍳 Step 1: Mix the Dough and Let It Rest
In a large mixing bowl, combine the 5 cups All-Purpose Flour and 0.25 cup Granulated Sugar. Make a well in the center and add the 2.25 tsp Instant Yeast, 0.5 cup Unsalted Butter (softened), 1 whole Large Eggs, 0.5 cup Milk (warm), and 0.5 tsp Salt. Mix with a wooden spoon until everything comes together, then turn it out onto a lightly floured surface.
Knead the dough for about 8-10 minutes until smooth and elastic. You’ll know it’s ready when it springs back when poked. Place the dough back in the bowl, cover it with a damp towel, and let it rise in a warm place for 1 hour or until doubled in size. This initial rise is crucial for developing flavor and texture.
🥘 Step 2: Prepare the Filling and Shape the Rolls
While the dough rises, make the filling by mixing 0.5 cup Brown Sugar, 0.5 cup Cinnamon, and 1 tsp Vanilla Extract in a small bowl. Set aside. Roll out the risen dough on a floured surface into a 12×18-inch rectangle (about ¼-inch thick). Spread the melted 0.5 cup Unsalted Butter evenly over the dough, then sprinkle the cinnamon-sugar mixture evenly over the butter.
Roll the dough tightly into a log, starting from the long side. Cut the log into 12 equal pieces (about 2 inches9×13-inch baking dish. Cover the dish with a towel and let the rolls rise again for 1 hour or until puffy. This second rise ensures they’ll be light and airy after baking.
🔥 Step 3: Bake to Golden Perfection
Preheat your oven to 350°F. Bake the cinnamon rolls for 25-30 minutes until the tops are golden brown and the edges are set. You’ll know they’re done when a toothpick inserted into the center comes out clean. The rolls should smell like pure cinnamon heaven—don’t wait too long or they’ll dry out.
Remove the rolls from the oven and let them cool in the pan for 5 minutes before transferring them to a wire rack. While they’re still warm, dust the tops with 0.25 cup Powdered Sugar for that classic touch. If you’re using the 1 cup Glaze Icing, drizzle it over the warm rolls right before serving.
⏰ Step 4: Let Them Rest and Serve
Here’s the secret to perfect cinnamon rolls—let them rest for at least 30 minutes before serving. This allows the filling to set and the rolls to firm up slightly, making them easier to slice and serve. I know it’s tempting to dig in right away, but trust me, the wait is worth it.
Slice each roll into 3 equal pieces (you’ll have 36 pieces total) and arrange them on a platter. Serve warm with a dollop of whipped cream or a scoop of vanilla ice cream. These rolls are best enjoyed fresh out of the oven, but they’ll keep well in an airtight container for 2 days at room temperature.
Pro Tips For Making 2 Day Cinnamon Roll
- CHILL THE DOUGH PROPERLY: I learned this the hard way—skipping the overnight cold rise in the fridge ruins the texture. After the first rise, wrap the dough tightly in plastic and refrigerate for at least 12 hours. This slows fermentation, deepens the flavor, and makes rolling it out later a breeze (yes, even if you’re impatient like me).
- SOFTEN BUTTER BEFORE MEASURING: Cold butter from the fridge will leave you with a lumpy dough that fights you every step. Microwave the butter in 10-second bursts until it’s just pliable, then let it sit at room temp for 10 minutes. You want it soft enough to press into the flour but not greasy—this ensures even distribution in the filling and a tender crumb.
- DON’T OVERWORK THE DOUGH: Once you start rolling and folding the butter into the dough, resist the urge to overmix. The goal is to create thin, even layers, not a tough pastry. Work quickly and keep the dough cool—warm hands will melt the butter too fast. If it gets sticky, chill it for 10 minutes and restart.
- USE A THIN LAYER OF FILLING: The secret to gooey, not soggy, cinnamon rolls isn’t drowning the dough—it’s precision. Spread the filling (butter + sugar + cinnamon) in a thin, even layer, about ¼-inch thick. Too much filling will weigh down the dough and make the rolls dense. Trust me, a lighter hand here means fluffier rolls that hold their shape.
Health benefits of these flavors
Energy Boost Morning
These cinnamon rolls aren’t just delicious—they’re a perfect way to start your day with a natural energy lift. The combination of complex carbs from the dough and the warm spices like cinnamon helps stabilize blood sugar levels, preventing that mid-morning crash.
I swear by having one or two with coffee on busy days—they keep me focused and energized for hours. The slow-digesting carbs provide steady fuel, making them a better breakfast option than sugary cereals or pastries. 💪
Whole Grain Option
For a healthier twist, swap half the all-purpose flour for whole wheat flour or oat flour. This boosts fiber content while keeping the rolls tender. I’ve tested this variation and found that using 2.5 cups all-purpose flour and 2.5 cups whole wheat flour works beautifully.
The rolls still rise well and maintain their signature texture. This modification adds 5 grams of fiber per serving while keeping the same comforting flavor profile.
Protein Power-Up
Add 1 scoop vanilla protein powder (about 30 grams) to the dough for a protein boost without compromising texture. I recommend Orgain or Premier Protein for best results—they blend seamlessly. This turns your cinnamon rolls into a satisfying breakfast that keeps you full for hours.
Each roll provides about 5 grams of protein, making it a great option for post-workout recovery or a high-protein breakfast. The flavor remains unchanged, so no one will guess they’re secretly healthier!
Blood Sugar Balance
The cinnamon in these rolls plays a unique role in blood sugar regulation. Studies show that cinnamon can improve insulin sensitivity, helping your body use glucose more efficiently. Pairing these with a protein source like Greek yogurt or nuts creates an even better balance.
I always keep a small container of almond butter on hand to serve alongside—it slows sugar absorption and adds satisfying crunch. The combination makes these rolls a smart indulgence rather than a sugar spike.
Antioxidant Benefits
Cinnamon is packed with antioxidants like polyphenols that help combat oxidative stress in your body. The brown sugar in the filling adds molasses, which contains minerals like calcium and potassium. Together, these ingredients create a treat that’s actually doing your body good.
I like to think of these as “guilt-free” indulgence—they satisfy cravings while providing real nutritional benefits. The vanilla extract also contains small amounts of antioxidants, making every bite even more beneficial. ✨
Gut-Friendly Option
For a digestive boost, add 1 tablespoon ground flaxseed or 1 tablespoon psyllium husk powder to the dough. These ingredients add fiber that supports gut health without altering the rolls’ texture significantly.
I’ve found that 1 tablespoon ground flaxseed works best—it adds a subtle nutty flavor that complements the cinnamon beautifully. This modification turns your cinnamon rolls into a prebiotic-rich breakfast that supports a healthy microbiome.
Nutrition facts
Frequently asked questions
Why do these cinnamon rolls need 2 days?
The overnight rise is what creates that bakery-style texture and flavor! The slow fermentation allows the yeast to develop deeper flavor and creates a more tender, pull-apart crumb. Day one handles the dough development, while day two focuses on shaping and baking for perfect results.
Can I make the dough ahead of time?
The dough can be mixed up to 2 days in advance and refrigerated. Just let it sit at room temperature for 30 minutes before the first rise to activate the yeast. This makes it perfect for meal prep—just shape and bake when you’re ready.
What’s the best way to store leftover rolls?
Keep them fresh for 3 days at room temperature in an airtight container. For longer storage, freeze baked rolls for up to 3 months. To reheat, warm in a 350°F oven for 10 minutes or microwave for 20 seconds to restore that gooey texture.
How do I prevent the rolls from drying out?
Always store them in an airtight container with a piece of bread or paper towel to absorb excess moisture. For extra freshness, brush the tops with melted butter before baking. The key is to keep them covered until serving—never let them sit exposed to air.
Can I make these without a stand mixer?
Yes! Just mix by hand in a large bowl until the dough comes together, then knead on a floured surface for 8-10 minutes. The dough should be smooth and elastic. A dough scraper helps prevent sticking—just fold and press the dough back onto the surface as you knead.

- 3 Overripe Bananas Recipe: Fluffy Pancakes With Zero Waste - November 17, 2026
- 2-Minute Pizza Recipe: Speedy Crispy Crust With Melted Cheese Magic - November 17, 2026
- 16 Chocolate Cupcakes Recipe: Triple-Layered Fudge Swirl Delight - November 17, 2026