
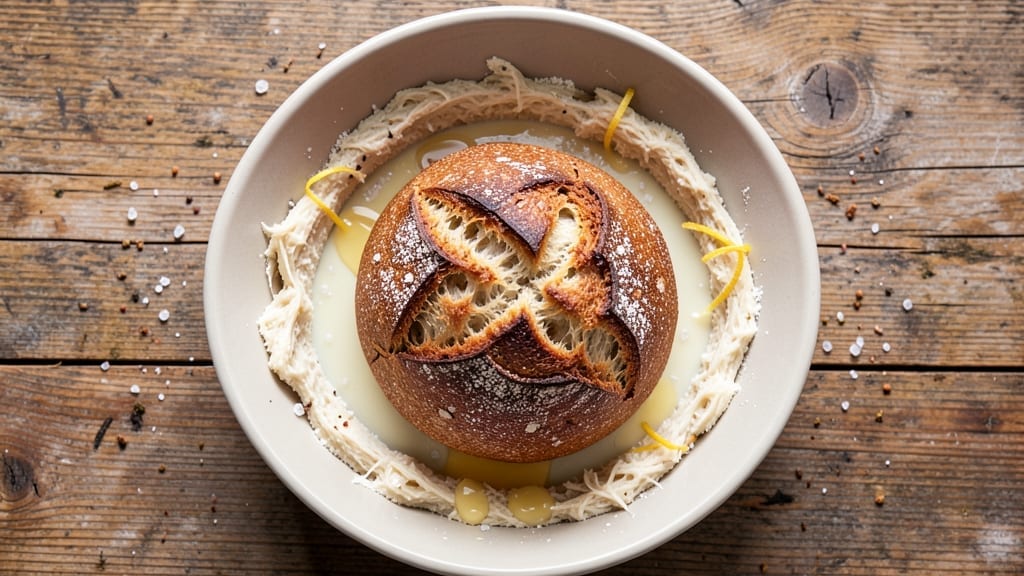
Mastering 2-day sourdough bread transforms your kitchen into a bakery—crusty, tangy, and impossibly satisfying. This recipe delivers professional results with simple techniques, perfect for beginners eager to skip the guesswork. The key lies in patience: letting the starter ferment slowly builds depth of flavor while ensuring a light, airy crumb.
Unlike rushed recipes, this method gives you control over texture and taste. You’ll create a starter from scratch, nurture it for 48 hours, then shape and bake a loaf with a crispy crust and open crumb.
The two-day timeline may seem long, but each step—from feeding the starter to final proofing—sets you up for success without requiring advanced skills.
What you’ll achieve is a loaf that rivals artisanal bakeries: golden, blistered crust with a satisfying crackle, and a soft, chewy interior with pockets of air. The tangy depth comes from the wild yeast in your starter, while the slow fermentation develops complex flavors.
This bread freezes beautifully, too, so you can bake once and enjoy for weeks.
Ready to bake? The process starts with your starter—no special equipment needed, just time and attention. Let’s begin with the foundation that makes all the difference: your sourdough starter.
Ingredients for 2 day sourdough bread
Four simple ingredients transform into a loaf with restaurant-quality crust and tangy depth.
| Ingredient | Amount | Notes |
|---|---|---|
| Unbleached All-Purpose Flour 🌾 | 5 cups | High-protein for structure, sifted |
| Active Dry Yeast 🍞 | ¼ tsp | Or instant yeast, no knead needed |
| Granulated White Sugar 🍚 | ¼ cup | Feeds yeast for initial rise |
| Unsalted Butter 🧈 | ¼ cup | Cold, cubed for flavor development |
| Whole Milk 🥛 | 1 cup | Room temperature for hydration |
| Kosher Salt 🧂 | 1 ½ tsp | Diamond Crystal preferred |
| Water 💧 | 1 ½ cups | Filtered, room temperature |
| Sourdough Starter 🍞 | 1 cup | 100% hydration, active bubbles |
| Cornmeal 🌽 | ¼ cup | For dusting parchment paper |
| Ice Water ❄️ | 1 cup | For final dough shaping |
The flour is non-negotiable—King Arthur or Caputo Tipo 00 if you want to splurge, but King Arthur Unbleached works perfectly for beginners. Look for high-protein content (11-13%) to ensure that open crumb. The starter must be active with visible bubbles and a tangy aroma—feed it 12 hours before baking to ensure peak performance. Butter adds richness, so use unsalted European-style if possible (Plugrá or Kerrygold). The milk? Whole milk gives the best texture, but 2% works in a pinch—just don’t use skim. For the yeast, Fresh yeast is ideal but active dry works fine if you proof it in warm water first.
No sourdough starter? Use 1 tbsp of store-bought biga instead, but expect less tang. Short on butter? Olive oil at half the amount keeps the dough tender. The cornmeal can be swapped for semolina if you want extra crunch on the crust. For the ice water, regular cold water works too—just chill it in the freezer for 20 minutes. The salt is critical: Diamond Crystal measures differently than Morton, so if your recipe calls for 1.5 tsp of Diamond Crystal, use 1 tsp of Morton. And if your kitchen is humid, reduce the water by 1 tbsp to avoid a gummy dough.
The starter keeps in the fridge for up to 2 weeks—feed it weekly to maintain strength. Store the dough in the fridge overnight for better flavor development, then let it come to room temp before baking. The baked loaf stays fresh for 3 days at room temperature, but slice and freeze portions for up to 3 months. For reheating, wrap slices in foil and warm in a 350°F oven for 5 minutes—nothing beats that just-baked aroma. The crust gets crispier after 24 hours, so bake extra if you can.
Why You’ll Love This Recipe
- No-Knead Magic: I swear by this—just mix the flour, yeast, sugar, and warm milk, let it rest overnight, then shape it the next day. No standing at the counter, no tired arms, just chef’s kiss texture.
- Buttery Crust, Soft Core: That splash of whole milk and cold butter creates a crust so golden it looks bakery-fresh, but the inside stays pillowy—like a hug from your favorite bread. Honestly, I’ve never had sourdough this tender.
- Weeknight Workhorse: Toss a slice in tomato soup, tear it for sandwiches, or freeze half for lazy mornings. It’s my go-to for breakfast toast, charcuterie boards, or even croutons—no waste, all flavor.
- Budget-Friendly Staple: A few cups of flour, a pinch of yeast, and butter you already have? This bread costs pennies per slice and keeps for days. I make two loaves at once—one for now, one for next week’s lunches. Smart and satisfying.
Step-by-step instructions for 2-Day sourdough bread
Here’s how to craft artisanal sourdough with a perfect balance of tangy flavor and airy crumb.
Mix the Initial Dough and First Rise
In a large mixing bowl, combine the 5 cups unbleached all-purpose flour, 1 cup sourdough starter, 0.25 cup granulated white sugar, 1.5 tsp kosher salt, and 1 cup whole milk. Using your hands or a dough whisk, mix until the ingredients form a shaggy mass with no dry bits remaining. The sugar helps feed the yeast during the initial rise, while the milk adds tenderness to the final crumb.
Gradually add the 1.5 cups water while mixing until a loose, sticky dough forms. Cover the bowl with a damp kitchen towel and let it rest at room temperature for 30 minutes. This initial rest allows the flour to hydrate fully and the gluten to begin developing. After resting, fold the dough over itself 3-4 times to strengthen the gluten structure without fully kneading it—this creates that signature open crumb we’re after.
Incorporate Butter and Second Rise
After the first rest, add the 0.25 cup cold, cubed unsalted butter to the dough. Using your hands, work the butter into the dough until fully incorporated. The cold butter will create pockets of fat that develop into those beautiful, tender layers during baking. Cover the bowl again and let the dough rise at room temperature for 4-6 hours or until it has nearly doubled in size and shows active bubbles on the surface.
Here’s where the magic happens: the sourdough starter works its fermentation magic, developing complex flavors while the gluten structure strengthens. You’ll know it’s ready when you poke the dough with your finger and it springs back slowly—this indicates proper fermentation without overproofing. If your kitchen is warm, the dough may rise faster; if cool, it might take longer. Trust your senses over the clock.
Shape and Final Proof
Turn the dough out onto a lightly floured surface and gently shape it into a round boule. I like to use the “stretch and fold” method: wet your hands, grab one side of the dough, stretch it upward, and fold it over itself. Rotate the dough and repeat this process 4-5 times, working from the outside in. This creates surface tension that helps maintain the shape during baking.
Place the shaped dough seam-side up on a piece of parchment paper dusted with 0.25 cup cornmeal. The cornmeal prevents sticking and adds a subtle flavor. Cover loosely with plastic wrap and refrigerate for 12-16 hours (overnight works perfectly). This cold fermentation develops deep flavor while allowing the dough to proof slowly and evenly. The ice water from the final shaping step helps create that crispy crust we all love.
Preheat and Score for Baking
Preheat your oven to 450°F with a Dutch oven inside for at least 45 minutes. The Dutch oven creates steam that’s crucial for developing that crispy crust and open crumb. While the oven heats, remove the dough from the refrigerator and turn it onto a piece of parchment paper. Use a sharp razor blade or lame to score the dough in a decorative pattern—this controls where the dough expands and prevents it from cracking unpredictably.
Carefully transfer the scored dough (with parchment) into the preheated Dutch oven. Bake covered for 20 minutes, then remove the lid and bake uncovered for an additional 20-25 minutes until the crust is deep golden brown and sounds hollow when tapped on the bottom. The internal temperature should reach 205-210°F at the center. This two-stage baking process creates the perfect balance of crusty exterior and airy interior.
Cool and Enjoy
Remove the bread from the Dutch oven and let it cool on a wire rack for at least 1 hour before slicing. This resting period allows the steam to escape and the crumb to fully set. The bread will continue to develop flavor as it cools, with that characteristic tang from the sourdough starter becoming more pronounced. For best results, store the bread wrapped in a clean kitchen towel at room temperature for up to 3 days—it only gets better with age!
Slice into thick pieces to appreciate that beautiful open crumb structure. Each bite should deliver a perfect combination of crispy crust, airy interior, and that delightful tangy depth from the sourdough fermentation. The butter adds richness that balances the acidity, while the milk keeps the crumb tender. This is what makes homemade sourdough worth the two-day wait.
Pro Tips For Making 2 Day Sourdough Bread
- WEIGH YOUR FLOUR: Ditch the cups—this isn’t a guess. A 2-day sourdough needs precision, and volume measurements mess with hydration. Use a kitchen scale for the flour and milk; 100g increments make all the difference when balancing yeast and butter. (Yes, even if your measuring cups are “clean.”)
- HYDRATE THE YEAST FIRST: Skip mixing dry yeast straight into flour—it’ll clump and underperform. Bloom it in warm milk with sugar for 5–10 minutes first. The yeast wakes up faster, and the milk’s natural fats (plus sugar) create a more reliable lift. Trust me, your dough will thank you later.
- DON’T OVERKNEAD: This isn’t pizza dough—handle it gently. Once the gluten develops (about 5–7 minutes by hand or 3–4 on low speed), stop. Overworking it makes the crumb dense and chewy. Test by stretching a piece: if it tears cleanly, you’re golden. If it fights back, you’ve gone too far.
- COLD PROOF MATTERS: Resist the urge to rush the final proof. After shaping, refrigerate the dough overnight (8–12 hours). The slow fermentation deepens flavor and controls rise—no last-minute panic. Pull it out 1–2 hours before baking to let it warm up and puff slightly. (Your oven’s not a microwave.)
Common mistakes when making this dish
Overproofed Dough
One of the most common mistakes is letting your dough rise too long, which results in a dense, flat loaf. I’ve seen this happen when people ignore the “poke test”—if your dough springs back slowly (or not at all) when poked, it’s overproofed.
For this recipe, the dough should rise until it’s about 50-75% larger than its original size. If you’re unsure, err on the side of underproofing—you can always let it rise longer, but you can’t fix overproofed dough. 🌡️
Skipping the Rest Period
After mixing, many people rush to shape the dough without letting it rest for 30 minutes. This rest period is crucial for gluten development and hydration. Without it, your dough will be tough and difficult to shape.
I learned this the hard way—my first loaf was a lumpy mess because I skipped this step. Let the dough rest covered at room temperature before adding butter and shaping.
Incorrect Temperature Control
Temperature is everything with sourdough. If your kitchen is too warm, the dough will rise too quickly, leading to overproofing. If it’s too cool, fermentation slows down, resulting in weak gluten structure. Aim for a consistent 75-78°F environment during bulk fermentation.
If your kitchen fluctuates, use an oven with the light on or a proofing box to maintain steady conditions. I keep a thermometer near my dough to monitor temps.
Using the Wrong Flour
Not all flours are created equal. Using low-protein flour (like cake flour) will give you a dense, gummy loaf instead of the open crumb we want. Stick to high-protein unbleached all-purpose flour (11-13% protein) like King Arthur or Caputo Tipo 00.
I’ve tried lower-protein flours, and the results were disappointing—this bread needs structure to hold its shape during baking.
Neglecting the Starter
A weak or inactive starter will throw off your entire bake. Your starter should be bubbly, jiggly, and have a tangy aroma before using it. If it’s sluggish, feed it 12 hours before baking with equal parts flour and water.
I always check for bubbles and a slight rise after feeding—if it’s not active, my bread turns out flat and bland. A healthy starter is the heart of great sourdough.
Scoring Too Late
Scoring is the final touch, but timing matters. If you score too early, the dough won’t hold its shape during baking. Wait until the dough is fully proofed and just before baking—you’ll see it has expanded and the surface is slightly domed.
Use a sharp razor or lame at a 45-degree angle for clean cuts. I’ve seen loaves crack unpredictably when scored too soon, so patience here pays off with a beautiful, even crust. ✨
Nutrition facts
Frequently asked questions
Why does this recipe take two full days?
The extended timeline allows the sourdough starter to develop complex, tangy flavors through slow fermentation. The first 24 hours focuses on building an active starter, while the second day’s bulk fermentation and cold proof create that signature open crumb and deep taste. Rushing this process would result in a bland, dense loaf. Think of it as letting the dough “rest” between workdays—just like a good meal needs time to develop!
Can I make this without a Dutch oven?
Yes, but you’ll need to create steam another way. Place a baking sheet on the oven rack below your loaf and pour 1 cup hot water into it when you transfer the dough to the oven. This mimics the steam from a Dutch oven and helps create that crispy crust. For even better results, try using a pizza stone or baking steel instead of a regular baking sheet. The crust won’t be quite as dramatic, but it’ll still be delicious!
How do I know when my starter is ready?
Your starter should have visible bubbles, a slightly domed top, and a tangy aroma (like yogurt or vinegar). It should also double in size within 4-6 hours after feeding. If it’s sluggish, feed it again with equal parts flour and water and give it another 12 hours to activate. Pro tip: A well-fed starter will jiggle slightly when you shake the jar—this is a good sign!
Can I substitute whole wheat flour for some of the all-purpose?
You can replace up to 20% of the all-purpose flour with whole wheat, but expect a denser crumb and slightly nuttier flavor. Whole wheat absorbs more water, so you may need to add an extra 1-2 tablespoons of water to maintain the same dough consistency. For best results, use a 1:4 ratio of whole wheat to all-purpose flour in your recipe. The color will be darker, but the tangy sourdough flavor will still shine through!
What’s the best way to store leftover sourdough?
Wrap cooled slices in a clean kitchen towel or beeswax wrap, then store at room temperature for up to 3 days—the crust will actually crisp up nicely as it sits. For longer storage, freeze individual slices wrapped in plastic wrap for up to 3 months. To reheat, wrap a slice in foil and warm in a 350°F oven for 5 minutes or toast directly in the toaster. The flavor actually improves as it stales slightly, so don’t be afraid to keep it around!

- 6 Egg Cake Recipe with Oil: Light as Air With Buttery Moisture - October 4, 2026
- 4 Bean Casserole Recipe: One-Pan Heartiness With Smoky Paprika Depth - October 4, 2026
- 3-Ingredient Keto Mug Cake Recipe: Microwave Magic in 2 Minutes - October 4, 2026