
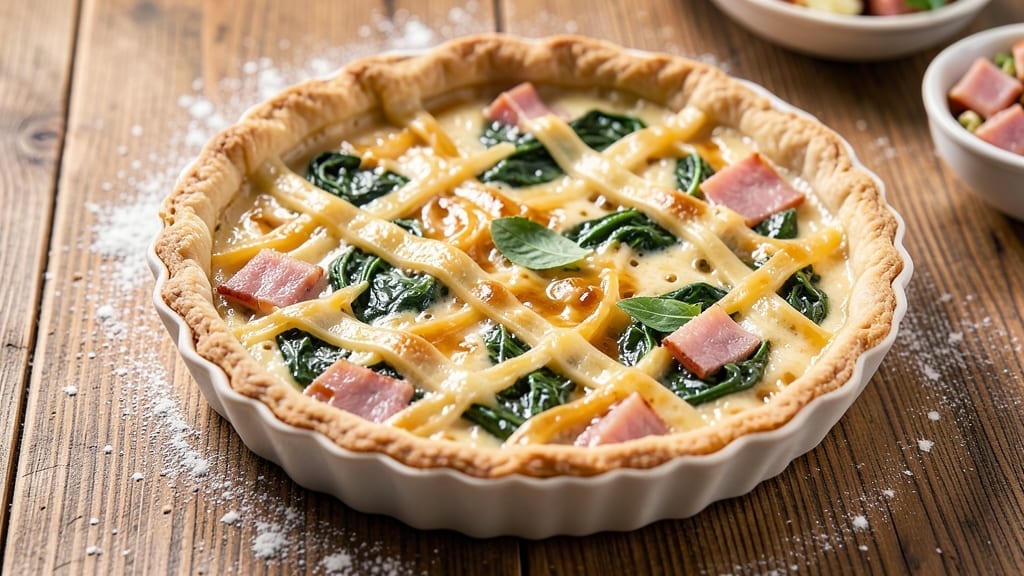
A 2-egg quiche delivers restaurant-quality flavor with a crispy crust and silky eggs—perfect for breakfast or brunch. The secret lies in pre-baking the crust just enough to prevent sogginess while keeping the filling rich and tender.
This recipe cuts prep time to 20 minutes without sacrificing texture or taste, making it ideal for weekdays or lazy weekends.
What sets this quiche apart is the balance of techniques: a crispy crust achieved through proper blind-baking, a velvety egg mixture that never curdles, and fillings that stay moist without making the crust soggy.
Whether you prefer classic ham and cheese or modern twists like sweet potato and walnut, the method remains the same—simple yet foolproof.
By the time it emerges from the oven, you’ll have a golden, flaky crust cradling a silky egg custard with perfectly incorporated fillings. The aroma alone will have everyone gathering around the table, and the first bite delivers that satisfying contrast of crispy crust and creamy filling.
Serve with a fresh salad or crusty bread to round out the meal. The beauty of this recipe is its versatility—swap fillings based on what you have on hand, and you’ll never need a takeout quiche again. Let’s get started!
Ingredients for 2 egg quiche
Eight simple ingredients for a quiche that tastes like a fancy brunch spot.
| Ingredient | Amount | Notes |
|---|---|---|
| Large Eggs 🥚 | 2 whole | Room temperature for best mixing |
| Heavy Cream 🥛 | ½ cup | Full-fat for richness |
| Whole Milk 🥛 | ¼ cup | Warmed slightly for smooth custard |
| Shredded Sharp Cheddar Cheese 🧀 | 1 cup | Freshly grated preferred |
| Cooked Diced Ham 🥓 | ½ cup | Low-sodium preferred |
| Fresh Spinach 🍃 | 1 cup | Chopped, thawed if frozen |
| Unsalted Butter 🧈 | ¼ cup | Cold, cubed for crust |
| All-Purpose Flour 🌾 | 1 cup | Plus 1 tbsp for dusting |
| Ice Water 💧 | ¼ cup | For dough consistency |
| Salt 🧂 | ½ tsp | Kosher or sea salt |
| Ground Black Pepper 🌶️ | ¼ tsp | Freshly ground preferred |
| Nutmeg 🌿 | ⅛ tsp | Freshly grated for warmth |
The crust is where this quiche shines—cold butter gives you that flaky magic. Grab Plugra unsalted butter from the store (it’s my go-to) or use whatever’s in your fridge. The flour? King Arthur all-purpose if you’re fancy, but any brand works. Keep everything cold until mixing—warm butter makes for a tough crust. The secret? Cut the butter into tiny pieces and work fast. If your dough feels too sticky, add a splash more ice water (one tbsp at a time).
No sharp cheddar? Gruyère or pepper jack work great—just adjust the heat level. Ham too salty? Rinse it first or use low-sodium. Spinach wilting? Squeeze out excess water before adding to the crust. The eggs should be at room temp (pop them in warm water for 5 minutes if they’re straight from the fridge). For a veggie twist, swap ham for sautéed mushrooms or roasted bell peppers. The nutmeg is optional but adds that restaurant-quality depth—Penzeys sells pre-grated if you hate grating.
Prep the crust first—it needs 15 minutes of blind-baking while you make the filling. Store leftover crust dough wrapped in plastic for 2 days or freeze for 3 months. The filling keeps 3 days in the fridge if you make it ahead (just assemble and bake when ready). For reheating, cover with foil and warm at 300°F for 15 minutes—keeps the crust crispy. Double the recipe and freeze one crust—perfect for spontaneous brunches.
Why You’ll Love This Recipe
- Two-Egg Magic: I swear by this—just two eggs, a splash of cream, and suddenly you’ve got a meal that feels fancy. No fussing with a dozen eggs or waiting for a wobbly center; this sets in 20 minutes flat.
- Cheese Pulls Hard: That sharp cheddar? It’s the star. When it melts into the creamy custard, you get these little golden pockets—crispy edges, gooey middle—every bite’s a win. The ham adds just enough salty bite to keep it interesting.
- Lunchbox Hero: Between us, this is my go-to for work lunches. Slice it up, pack it with a side salad, and you’ve got a protein-packed meal that won’t get soggy. Honestly, it’s saved me from sad desk lunches more times than I can count.
- Budget Breakfast: Two eggs, a little milk, and whatever cheese you’ve got? This recipe stretches ingredients without skimping on flavor. Leftovers reheat like a dream—perfect for when you’re too tired to cook but still need something solid.
Step-by-step instructions for 2 egg quiche
Here’s how to make a restaurant-worthy quiche with a golden crust and silky eggs—no fancy skills needed.
Make the Perfect Crust
In a food processor, pulse the 1 cup all-purpose flour, 0.5 teaspoon salt, and 0.125 teaspoon nutmeg until combined. Add the 0.25 cup unsalted butter, cold and cubed, and pulse until the mixture resembles coarse crumbs with pea-sized butter pieces. Gradually add the 0.25 cup ice water, 1 tablespoon at a time, until the dough just comes together when pressed. Avoid overmixing—just combine until it holds.
Turn the dough onto a lightly floured surface and gently press it into a 10-inch pie crust shape. I like to roll it out between two sheets of parchment paper to prevent sticking. Transfer it to a 10-inch pie dish, pressing it into the bottom and up the sides. Crimp the edges with your fingers or a fork for a classic look. Chill the crust in the refrigerator while you prep the filling—this keeps it from shrinking when you bake.
Prep the Filling
In a large bowl, whisk together the 2 whole large eggs, 0.5 cup heavy cream, and 0.25 cup whole milk until just combined. Add the 1 cup shredded sharp cheddar cheese, 0.5 cup cooked diced ham, 1 cup fresh spinach, 0.25 teaspoon ground black pepper, and mix gently—just until everything is evenly distributed. The spinach should be slightly wilted but still vibrant. Here’s the thing—don’t overmix or you’ll end up with a dense quiche instead of that light, custardy texture you want.
Preheat your oven to 375°F. Place the chilled crust on a baking sheet lined with parchment paper to catch any drips. Pour the filling into the crust and smooth the top with a spatula. The filling should be about ½ inch deep—not too thick or it won’t cook through properly.
Blind-Bake the Crust
Before adding the filling, blind-bake the crust for 10 minutes at 375°F. Line the crust with parchment paper, fill it with pie weights or dried beans, and bake until the edges are lightly golden. This step is crucial—it prevents a soggy bottom. Remove the weights and bake for another 2 minutes to crisp the edges. The crust should be golden brown but not dark brown—you’re aiming for that perfect crispy texture without burning.
Real talk: If your crust starts browning too quickly, cover it loosely with foil. The goal is a crispy, flaky base that holds up to the custard filling. Once it’s ready, carefully transfer the quiche back to the oven with the filling.
Bake to Golden Perfection
Return the quiche to the oven and bake for 18-20 minutes until the filling is set and the edges are golden brown. You’ll know it’s done when the center is just slightly jiggly—it’ll firm up as it cools. The top should be golden, not pale, and the crust should be crispy all the way through. If the top browns too quickly, tent it with foil to prevent over-browning while the center finishes cooking.
Let the quiche cool for 10 minutes before slicing. This resting time allows the custard to set properly and makes it easier to serve. The result should be a crispy, flaky crust with a silky, creamy egg filling that’s just set—not rubbery. Serve warm with a simple green salad or crusty bread to soak up any extra custard.
Pro Tips For Making 2 Egg Quiche
- Preheat crust with pie weights: Skip the oven and save time by placing your pre-baked crust on a rack over a baking sheet, then fill it with dried beans or pie weights. Microwave for 30 seconds—this relaxes the crust so it doesn’t puff up when you add the custard. (Yes, I’ve seen quiches explode from skipping this.)
- Whip cream, not whisk: Heavy cream separates when you whisk it into eggs too aggressively. Instead, gently fold it in with a rubber spatula while the mixture is still cold—this keeps the custard silky smooth. I learned this the hard way after making a quiche with the texture of oatmeal.
- Press cheese, don’t sprinkle: Sharp cheddar melts unevenly if you just dump it on top. Press shredded cheese directly into the custard with the back of a spoon—this ensures it melts into a creamy blanket, not clumps. (Your future self will thank you when you don’t have to fish out unmelted cheese.)
- Bake low and slow: Crank the oven to 375°F (200°C) for 10 minutes, then drop to 325°F (160°C) until set. This prevents the top from browning too fast while the center stays undercooked. I used to rush it, and the result was always a sad, rubbery middle.
Pro cooking tips for 2 egg quiche
Crust Perfection
Pre-bake your crust for 10 minutes at 375°F with pie weights or dried beans to prevent sogginess. I use King Arthur flour and Plugra butter for that signature flakiness. Line the crust with parchment paper before adding weights—it makes cleanup a breeze. 🧈
For extra crispiness, brush the bottom with 1 tablespoon melted butter after blind-baking. Chill the crust for 15 minutes before adding filling to maintain shape. If your crust shrinks during baking, press it gently back into the dish with a fork.
Egg Mixture Secrets
Warm your milk and cream to 70°F before mixing with eggs for a silky texture. I use a hand mixer on low speed for just 10 seconds—overmixing creates tough quiche. Room-temperature eggs blend smoother, so pop them in warm water for 5 minutes if straight from the fridge. 🥚
Season the filling last—this prevents salt from curdling the eggs. Add ½ teaspoon salt and ¼ teaspoon pepper right before pouring into the crust. For extra richness, stir in 1 tablespoon sour cream with the eggs.
Filling Balance
Keep your filling ½ inch deep—any thicker and the center won’t cook properly. I distribute fillings evenly by spooning them in concentric circles. For veggie quiches, pre-cook ingredients to avoid excess moisture (squeeze spinach dry with a towel). 🥗
Protein-heavy fillings (like ham) need 2-3 minutes less baking time than veggie-only versions. Test doneness by inserting a knife—it should come out clean with just a slight wobble in the center.
Baking Like a Pro
Bake at 375°F for 18-20 minutes—the crust should be golden, not browned. If the top browns too fast, tent with foil. The quiche is done when the edges pull away slightly from the pan and the center jiggles like Jell-O. 🔥
Let it rest 10 minutes before slicing—this prevents a runny center. For make-ahead meals, assemble the quiche (unbaked) in a glass pie dish, cover, and refrigerate for up to 24 hours before baking.
Nutrition facts
Frequently asked questions
Can I make this quiche without a homemade crust?
Use a 9-inch pre-made pie crust (like Pillsbury) for convenience. Press it into your dish, prick the bottom with a fork, and blind-bake for 8 minutes at 375°F with pie weights. The key is still pre-baking to prevent sogginess—just reduce time slightly since store-bought crusts are thinner.
Why did my quiche turn out rubbery instead of creamy?
Overmixing the egg filling is the #1 culprit—whisk just until combined to avoid tough texture. Also check your baking time: 18-20 minutes at 375°F should give you that silky custard. If it’s still rubbery, it likely didn’t cook long enough. For next time, warm your dairy to 70°F before mixing with eggs.
Can I use this recipe for a sweet quiche?
Yes! Swap the savory filling for 1 cup diced apples, ½ cup brown sugar, and 1 teaspoon cinnamon. Reduce the ham/spinach to ¼ cup total and add 2 tablespoons maple syrup to the egg mixture. Bake as directed—sweet quiches need slightly less time (15-18 minutes) since fruit cooks faster.
How do I reheat leftovers without drying out the crust?
Cover the quiche with foil and warm at 300°F for 15 minutes—this keeps the crust crispy while gently reheating the filling. For microwave reheating, cut into slices and heat for 30 seconds on 50% power, then finish with 10 seconds to avoid rubbery texture. Never microwave uncovered!
What’s the best way to make this quiche ahead of time?
Assemble the quiche (unbaked) in a glass pie dish, cover tightly with plastic wrap, and refrigerate for up to 24 hours. When ready to bake, remove from fridge 30 minutes before baking at 375°F for 25-30 minutes (extra time accounts for cold start). For freezing, bake first, then cool completely and wrap tightly—it keeps 3 months in the freezer.

- 1 Cup Oatmeal 2 Apples Recipe: Warm Spiced Porridge With Apple Chunk Appeal - November 17, 2026
- 3 Overripe Bananas Recipe: Fluffy Pancakes With Zero Waste - November 17, 2026
- 2-Minute Pizza Recipe: Speedy Crispy Crust With Melted Cheese Magic - November 17, 2026