
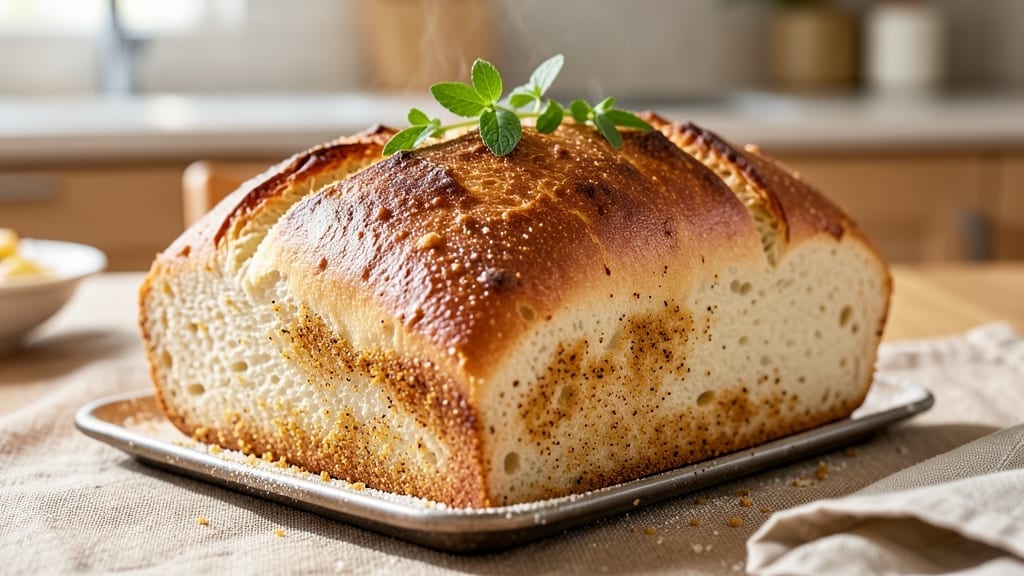
Mastering a 1.5-pound white bread machine recipe transforms your kitchen into a bakery—no yeast calculations or kneading required. This no-knead method delivers a loaf with a crispy crust and airy crumb, perfect for sandwiches or toast.
The secret lies in precise ingredient ratios and machine settings that work across most brands, from basic models to high-end machines.
With just five simple ingredients—flour, yeast, water, sugar, and salt—you’ll create a loaf that rivals artisanal bakeries. The bread machine handles the kneading and proofing, while you focus on setting the right cycle (basic white bread) and ensuring proper flour weight. This recipe eliminates guesswork, guaranteeing consistent results every time.
What you’ll achieve is a golden-brown loaf with a satisfying crunch and tender interior, ready in under two hours. The aroma alone will have everyone gathering around the table. Whether you’re a beginner or a seasoned baker, this method simplifies the process without sacrificing quality.
Use this loaf for classic sandwiches, garlic bread, or French toast—its versatility makes it a staple. The recipe includes troubleshooting tips for common issues like dense texture or uneven baking, ensuring success on the first try. Let’s get started on your perfect loaf.
Ingredients for 1.5 lb white bread machine
Five core ingredients plus two finishing touches—this is all you need for bakery-quality bread machine perfection.
| Ingredient | Amount | Notes |
|---|---|---|
| All-Purpose Flour 🌾 | 5 cups | Plus 1 tbsp for dusting pan |
| Active Dry Yeast 🍞 | 2 ¼ tsp | Ensure yeast is fresh and active |
| Granulated Sugar 🍚 | 1 ½ tbsp | White sugar preferred for balanced sweetness |
| Salt 🧂 | 1 ½ tsp | Diamond Crystal preferred for accuracy |
| Warm Water 💧 | 1 ¼ cups | 110°F (43°C) for optimal yeast activation |
| Unsalted Butter 🧈 | 1 tbsp | Softened for even distribution |
| Cornmeal 🌽 | 1 tbsp | For dusting bread machine pan |
| Coarse Sea Salt 🧂 | 1 tsp | For sprinkling on crust after baking |
The flour is non-negotiable here—King Arthur or Gold Medal all-purpose deliver the best balance of protein and texture. Bulk bins at specialty stores often offer fresher flour than grocery bags, and you can weigh it precisely for consistency. For yeast, check the expiration date—old yeast won’t activate properly. Store your flour in the freezer for long-term freshness if you bake frequently. The butter adds richness, but Earth Balance vegan butter works equally well for dietary preferences.
No Diamond Crystal salt? Morton kosher salt works at the same measurement, though it’s slightly coarser. The warm water must be 110°F (43°C)—too hot kills yeast, too cold slows activation. Use a candy thermometer for accuracy. Running short on cornmeal? Semolina or crushed graham crackers serve as perfect substitutes. The finishing sea salt should be coarse—fine salt won’t adhere properly to the crust. For a sweeter loaf, increase sugar to 2 tbsp, but reduce yeast slightly to 2 tsp to balance fermentation.
Store flour in an airtight container away from heat sources for up to 6 months. Yeast keeps in the fridge for 3 months and freezes for 6 months—test freshness by dissolving in warm water with sugar. The bread machine pan should be lightly greased before each use for easy removal. Bake immediately after mixing for best texture, but dough can rest in the fridge for up to 12 hours if covered tightly. Leftovers? Toast within 2 days for peak freshness.
Why You’ll Love This Recipe
- Five-Ingredient Magic: I swear by this—just flour, yeast, sugar, salt, and water. That’s it. No fancy mix-ins, no stress. The bread machine does all the heavy lifting while I sip coffee and scroll through my phone. Honestly, it’s the kind of recipe that makes me feel like a baking genius without any effort.
- Crusty-Creamy Balance: Between us, this loaf has layers. The outside gets that perfect golden crust—crisp enough to hold a sandwich together, but not so hard it needs a knife—while the inside stays soft and pillowy. That little touch of sugar in the dough? It’s what makes it taste like the bread from my childhood bakery, not just a sad grocery store loaf.
- Weeknight Sandwich Hero: I make this every Friday because it always works. Toast it for grilled cheese, slice it for PB&J, or just eat it plain with butter—it’s the ultimate blank canvas. My kids ask for it more than any other bread, and I’ve even used it for homemade French toast on lazy mornings. Versatile? Absolutely.
- Budget Loaf Wins: A 1.5 lb loaf feeds my family for days, and the ingredients cost pennies. I can make two batches for under $3, and they keep well in the freezer for months. No wasted dough, no sad half-loaves—just pure, reliable bread that never disappoints. Plus, it’s the kind of recipe that lets me splurge on good cheese or jam without guilt.
Step-by-step instructions for perfect bread machine white bread
This no-knead method delivers a crusty exterior and tender crumb with minimal effort.
Prepare the Bread Machine Pan and Ingredients
Lightly grease the inside of your bread machine pan with a thin layer of vegetable oil or nonstick spray. This prevents sticking without making the bread greasy. Sprinkle the bottom of the pan with 1 tablespoon of cornmeal, shaking it gently to create an even layer. The cornmeal creates a crisp barrier that prevents the bread from adhering to the pan during baking.
In a small bowl, combine the 5 cups all-purpose flour, 2.25 teaspoons active dry yeast, 1.5 teaspoons salt, and 1.5 tablespoons granulated sugar. Use a whisk to break up any yeast clumps—this ensures even distribution and consistent rising. The yeast should be fresh; if it’s more than 3-4 months old, test it in warm water first to confirm it’s still active.
Mix and Hydrate the Dough in the Machine
Add the 1.25 cups warm water (between 110-115°F) to the bread machine pan. The water should be warm enough to activate the yeast but not so hot that it kills it. If you’re unsure, test the temperature with your finger—it should feel pleasantly warm, like a comfortable bath.
Pour the dry ingredients into the pan and add the 1 tablespoon softened unsalted butter. Select the “Basic White Bread” setting on your machine and close the lid. The machine will automatically mix the ingredients for about 5-10 minutes until a shaggy dough forms. Resist the urge to peek—consistent mixing is key to developing gluten properly. You’ll see the dough transform from a rough mass into a smooth, elastic ball as the machine works its magic.
Let the Dough Rise and Knead Automatically
The bread machine will handle the rising and kneading for you, typically taking 1.5 to 2 hours. During this time, the dough will double in size and develop a smooth, elastic texture. The machine’s internal sensors monitor the dough’s progress, ensuring it reaches the perfect consistency without overworking the gluten. You’ll hear the machine beep when the rising phase is complete—this is your cue that the dough is ready for shaping.
If your machine has a “Dough” setting, you can stop it after the first rise to check the dough. It should feel soft but slightly firm to the touch, with a slight springiness when pressed. If it’s too sticky, add 1 tablespoon of flour at a time until it’s manageable. The automatic kneading phase ensures even gluten development, which translates to a lighter, more open crumb structure in your final loaf.
Shape and Second Rise in the Pan
Once the machine signals the kneading is complete, remove the dough and place it on a lightly floured surface. Gently shape it into a smooth, oval loaf, tucking the edges underneath to create surface tension. This step is crucial for achieving an even rise and a well-defined crust. Place the shaped dough back into the greased pan, seam-side up, and let it rise for an additional 10-15 minutes at room temperature. You’ll see the dough expand slightly and develop a few small bubbles on the surface—this indicates it’s ready for baking.
While the dough rises, preheat the bread machine to 375°F if your model allows it. If not, simply start the baking cycle. The machine will automatically bake the bread for 45-55 minutes, depending on your specific model. The crust will turn a deep golden brown, and the bread will develop a hollow sound when tapped on the bottom—this is the classic “knock test” for doneness.
Finish with Coarse Salt and Cool Properly
Remove the bread from the machine and immediately sprinkle the top with 1 teaspoon coarse sea salt. The salt enhances the crust’s texture and flavor, creating a satisfying contrast to the soft interior. Let the bread cool on a wire rack for at least 30 minutes before slicing. This cooling period allows the moisture to redistribute, preventing a gummy texture. If you can’t resist, take a small slice to test—you’ll notice the crust is crisp and the crumb is tender with an open, even structure.
The bread will continue to firm up as it cools, making it easier to slice without squishing the loaf. Store any leftovers in an airtight container or wrap tightly in plastic wrap to maintain freshness for up to 5 days. For extra crunch, reheat slices in a 350°F oven for 5-10 minutes before serving.
Pro Tips For Making 1.5 Lb White Bread Machine
- WEIGH YOUR FLOUR: I learned this the hard way—measuring flour by scooping from the bag leaves too much air, and your bread turns out dense. Use a kitchen scale for the 1.5 lb recipe: 500 grams of all-purpose flour gives you consistent, light results every time.
- Dissolve Sugar First: Mixing the sugar directly into the flour creates clumps that won’t dissolve properly in the water. Instead, whisk the sugar into the warm water first—this ensures even yeast activation and a smoother dough. (Yes, even if you’re impatient like me.)
- Skip the Overmixing: The bread machine does the kneading, but if you pre-mix the dough by hand, stop as soon as it pulls away from the bowl. Overworking the gluten makes the bread tough—just combine the ingredients, let the machine handle it, and walk away.
- Use a Thermometer: That “warm water” in the recipe isn’t just “feels warm”—it should be 105–110°F. Too hot and you kill the yeast; too cool and it won’t activate. A cheap thermometer takes the guesswork out of it, and your bread will rise reliably. (Your future self will thank you.)
Flavor customization for this recipe
Sweet Variations
Add ½ cup raisins or dried cranberries to the dough for a sweet twist—toss them in 1 tbsp flour first to prevent sinking. For cinnamon swirl bread, mix 2 tbsp brown sugar and 1 tbsp cinnamon into the dough, then roll in a ¼ cup softened butter before baking. 🍯
Herb & Cheese Boosts
Fold in ¼ cup grated Parmesan and 1 tbsp dried rosemary for a savory Italian-style loaf. For garlic bread, add 2 minced garlic cloves and 1 tbsp olive oil to the dough. Fresh herbs like thyme or basil work beautifully too—just add them with the butter during mixing.
Whole Grain Mix-Ins
Replace 1 cup all-purpose flour with whole wheat flour for a nuttier flavor and extra fiber. For texture, stir in ¼ cup chopped walnuts or sunflower seeds during the final kneading phase.
These additions work best with a slightly longer rise time—let the dough rest for 10 minutes extra before baking.
Savory Garlic & Herb
Create a rustic boulesque loaf by adding 2 tbsp minced garlic, 1 tbsp dried oregano, and 1 tbsp olive oil to the dough. For extra richness, replace 1 tbsp water with 1 tbsp milk—this enhances browning and adds subtle sweetness.
Brush the baked loaf with garlic-infused olive oil after cooling for maximum flavor.
Seeded & Nutty Crunch
Add 2 tbsp poppy seeds, 2 tbsp sesame seeds, and 1 tbsp flaxseeds to the dough for a crunchy topping. For a Middle Eastern touch, mix in 1 tbsp za’atar seasoning with the salt.
Sprinkle seeds generously on top before baking—they’ll toast beautifully and add texture contrast to every slice. ✨
Sweet & Spiced Twist
Transform your loaf into a dessert base by adding 1 tsp cinnamon, ½ tsp nutmeg, and ¼ cup chopped dates to the dough. After baking, drizzle with melted butter and a sprinkle of coarse sugar for a quick bread pudding.
This variation works especially well when sliced thick and toasted with cream cheese.
Nutrition facts
Frequently asked questions
Why does my bread machine white bread turn out dense?
Dense bread usually means over-kneading or under-proofing. First, check your yeast freshness—old yeast won’t activate properly. Also, ensure your machine’s pan isn’t overfilled (this recipe’s 1.5 lb loaf should fit comfortably). If using whole wheat flour, increase water by 1-2 tablespoons to compensate for its dryness.
Can I use whole wheat flour in this recipe?
Yes, but with adjustments! Replace 1 cup all-purpose flour with whole wheat and add 1 extra tablespoon water since whole wheat absorbs more moisture. For best results, let the dough rise 10 minutes longer before baking. The texture will be denser but nuttier—perfect for toast or sandwiches!
What if my bread machine doesn’t have a “Basic White Bread” setting?
No problem! Use the “White Bread” or “Rapid” setting if available. For older models without presets, select the longest kneading cycle (usually 2-3 hours). The key is letting the dough rise fully—listen for the machine’s beep before baking begins.
How do I know when the bread is fully baked?
Look for three signs: the crust should be deep golden brown, the bread will pull away slightly from the pan edges, and it should sound hollow when tapped on the bottom (like knocking on wood). If unsure, check the internal temperature—it should reach 190-200°F when done.
Can I make this recipe without butter?
Replace the 1 tbsp butter with 1 tbsp olive oil or 1 tbsp melted coconut oil for the same moisture and richness. For a lighter texture, add ½ tsp xanthan gum (optional) if you’re using a butter substitute. The flavor will be slightly different but still delicious!

- 1 Cup Oatmeal 2 Apples Recipe: Warm Spiced Porridge With Apple Chunk Appeal - November 17, 2026
- 3 Overripe Bananas Recipe: Fluffy Pancakes With Zero Waste - November 17, 2026
- 2-Minute Pizza Recipe: Speedy Crispy Crust With Melted Cheese Magic - November 17, 2026