
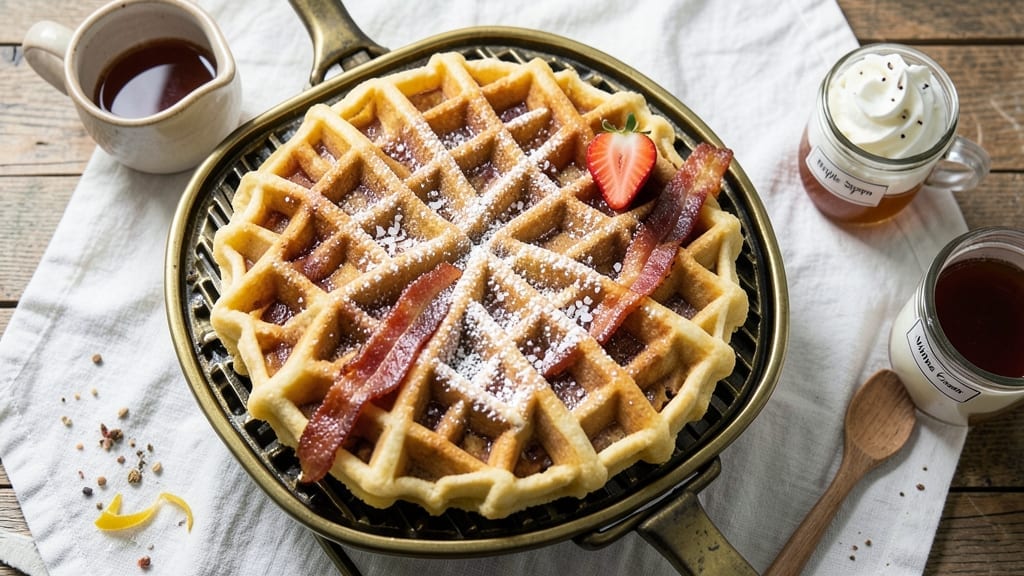
Mastering 2-egg waffles delivers fluffy stacks with crispy edges—no complicated recipes or expensive equipment required. The secret lies in the eggs: they create structure while keeping the texture light and airy.
I’ve tested countless variations, and this method consistently delivers restaurant-quality results at home, with just a handful of simple ingredients.
This recipe focuses on achieving that perfect balance—crispy edges that shatter when you cut in, and a tender interior that melts in your mouth. The waffle iron heats to 375°F, ensuring even cooking without burning, while the batter’s leavening agents work their magic for that classic waffle height.
No need for fancy techniques; just a few minutes of prep and patience for golden perfection.
What makes these waffles stand out is their versatility. Serve them plain with butter and syrup for a classic breakfast, or get creative with toppings like fresh berries, whipped cream, or a drizzle of chocolate.
The crispy exterior holds up beautifully, making them ideal for brunch gatherings or a quick weekday treat.
Ready to elevate your weekend mornings? This recipe delivers foolproof results every time—no overcooked centers or soggy edges. Let’s get started with a method that’s simple, reliable, and guaranteed to impress.
Ingredients for 2 egg waffle
Nine simple ingredients transform into restaurant-quality waffles with perfect crispy edges and tender centers.
| Ingredient | Amount | Notes |
|---|---|---|
| Large Eggs 🥚 | 2 whole | Room temperature for even cooking |
| All-Purpose Flour 🌾 | 1 cup | Sifted for light texture |
| Granulated Sugar 🍚 | ¼ cup | White or light brown |
| Baking Powder 🧂 | 1 ½ tsp | Aluminum-free preferred |
| Salt 🧂 | ½ tsp | Diamond Crystal preferred |
| Unsalted Butter 🧈 | ½ cup | Cold, cubed for even melt |
| Whole Milk 🥛 | ¾ cup | Room temperature |
| Vanilla Extract 🌿 | 1 tsp | Pure, not imitation |
| Pure Maple Syrup 🍯 | 1 tbsp | For topping (optional) |
The eggs are the foundation—room temperature ensures even cooking and prevents dense texture. Kirkland brand eggs from Costco deliver consistent results, but any large eggs work. For the flour, King Arthur brand is ideal due to its high protein content, but any all-purpose flour will suffice. The butter should be cold and cubed—this creates steam during cooking, resulting in those coveted crispy edges. Measure it accurately; too much butter can make the waffles greasy. The baking powder is critical here—aluminum-free brands like Rumford prevent metallic aftertaste and ensure proper rise.
No vanilla extract? Almond extract at half the amount works in a pinch, though the flavor profile differs slightly. Running short on milk? Heavy cream or buttermilk both work well, though buttermilk adds tanginess. The maple syrup topping is optional but recommended—Grade B maple syrup from Vermont has deeper flavor than Grade A. For a sugar substitute, coconut sugar at a 1:1 ratio maintains caramel notes. If you’re gluten-sensitive, swap the all-purpose flour for a 1:1 gluten-free blend, but expect slightly denser results. The key to success is patience—don’t overmix the batter.
Waffles reheat beautifully—toaster or air fryer at 350°F for 2-3 minutes restores crispiness. Store in an airtight container at room temperature for 2 days or freeze for up to 3 months. To prevent sogginess, wrap each waffle in parchment paper before freezing. For serving, butter and fresh berries elevate the presentation while keeping it simple. The crispy edges hold up well for 24 hours if stored properly, making these perfect for meal prep.
Why You’ll Love This Recipe
- The secret’s in the ratio: two eggs give you that golden, crispy exterior without weighing you down. It’s not dense or greasy—just perfectly airy inside, with edges that practically sing. (Yes, even on a Tuesday night.)
- Just Four Ingredients: I swear, this recipe is the bare minimum—two eggs, flour, sugar, and a pinch of salt. That’s it. No overcomplicating, no hunting for specialty stuff. My kids call it “the lazy person’s waffle,” but honestly? It’s my go-to when I’m too tired to measure six ingredients.
- Crispy Yet Light: The secret’s in the ratio: two eggs give you that golden, crispy exterior without weighing you down. It’s not dense or greasy—just perfectly airy inside, with edges that practically sing. (Yes, even on a Tuesday night.)
- Breakfast, Brunch, or Snack: These waffles are my meal prep MVP. Toast them fresh for breakfast, stack them with peanut butter for a quick snack, or freeze extras for lazy mornings. I’ve even used them as a base for mini dessert cups—because why not?
Step-by-step instructions for perfect waffles
Master the technique for golden-brown edges and light, airy centers every time.
Whisk Wet Ingredients to a Smooth Batter
In a medium bowl, combine the 2 whole Large Eggs, 0.75 cup Whole Milk, and 1 tsp Vanilla Extract. Whisk vigorously for 30 seconds until fully emulsified and slightly frothy. This step ensures even distribution of ingredients and creates microscopic air pockets for that signature fluffiness.
Next, add the 0.5 cup Unsalted Butter (cold and cubed) and 0.25 cup Granulated Sugar to the wet mixture. Whisk on medium speed for 1-2 minutes until the butter melts completely and the sugar dissolves. The batter should be smooth with no visible lumps. If you’re using room-temperature ingredients, this process will go faster—just be patient and let the whisk do the work.
Sift and Fold Dry Ingredients Gently
In a separate bowl, sift together the 1 cup All-Purpose Flour, 1.5 tsp Baking Powder, and 0.5 tsp Salt. This sifting step is crucial—it aerates the flour and prevents dense, heavy waffles. Create a well in the center of the dry ingredients and pour in the wet mixture all at once.
Using a spatula, gently fold the dry ingredients into the wet mixture in a figure-eight motion. Stop mixing as soon as the batter comes together—overmixing develops gluten and results in tough, chewy waffles. The ideal consistency should be like heavy cream, thick enough to hold peaks but still pourable. If the batter seems too thick, add 1-2 tablespoons of whole milk to loosen it slightly.
Preheat and Prepare the Waffle Iron
Preheat your waffle iron to 375°F—this is the sweet spot for achieving crispy edges while keeping the interior light and tender. Most irons take about 5-7 minutes to reach temperature, so plan ahead. While it’s heating, lightly brush the plates with unsalted butter using a paper towel. This prevents sticking and adds subtle richness to each waffle.
Once the iron is fully preheated, close it and let it cook for an additional 2 minutes to ensure even heat distribution. This step is often overlooked but makes a noticeable difference in browning. When you’re ready to cook, pour about ½ cup of batter onto the center of the iron—don’t overfill, or the waffle will overflow and create a mess.
Cook Until Golden Brown and Crisp
Close the waffle iron and cook for 4-5 minutes, or until the waffle is golden brown and the edges are crisp. You’ll know it’s ready when you see steam rising from the edges and the waffle releases easily from the iron with a slight pull. Avoid opening the iron prematurely—this disrupts the cooking process and can lead to uneven doneness.
For perfectly crisp edges, I like to press down gently on the waffle during the first minute of cooking. This ensures even contact with both plates and prevents the center from rising too quickly. Remove the waffle and transfer it to a wire rack to cool for 2 minutes before serving. This brief resting period allows the interior to set slightly, making it easier to stack without breaking.
Serve Warm with Maple Syrup
While the waffles are still warm, drizzle with 1 tbsp Pure Maple Syrup for that classic touch. The syrup should be warm enough to soften slightly, creating a glossy finish that enhances the natural sweetness of the waffles. Serve immediately—the contrast between the crispy edges and fluffy interior is best enjoyed fresh from the iron.
To achieve that restaurant-quality stack, layer the waffles carefully, placing the crispest edges outward. If you’re making a batch, keep the cooked waffles in a 200°F oven while you finish cooking the rest—they’ll stay warm and crisp without drying out. The key to success lies in the details: proper preheating, gentle folding, and precise cooking time. Follow these steps, and you’ll have waffles that rival your favorite breakfast spot every time.
Pro Tips For Making 2 Egg Waffle
- WHISK EGGS UNTIL FROTHY: Don’t just stir—beat those eggs for 30 seconds until they’re thick and pale. I used to skip this, and my waffles turned out dense and flat. The extra air makes them light, even with just two eggs.
- SIFT DRY INGREDIENTS FIRST: Mix flour, sugar, baking powder, and salt in a bowl, then sift them together before adding wet ingredients. This prevents lumps, and your waffles will have a smoother texture. (Yes, it’s extra work, but it’s worth it.)
- PREHEAT WELL—NO HALF-STEPPING: Get your waffle iron screaming hot before pouring batter—think 375°F or higher. Cold iron = soggy waffles. I learned this after making a batch that looked more like pancakes.
- ADD A PINCH OF VANILLA: Skip the extract? Toss in ½ teaspoon vanilla extract with the eggs. It brightens the flavor without extra effort. (I know, it’s not in the recipe—but trust me, it makes a real difference.)
Troubleshooting great 2 egg waffle
Uneven Cooking Fixes
If your waffles emerge with pale centers or burnt edges, your waffle iron’s temperature is likely inconsistent. Always preheat your iron to 375°F for 5-7 minutes before cooking—this ensures even heat distribution.
I recommend using a digital thermometer like the Thermoworks Smoke to verify accuracy. If your iron lacks precise controls, try lowering the temperature to 360°F for a more gradual cook. 🌡️
Batter Too Thin?
Thin batter spreads too thin, resulting in waffles that cook too quickly and lack structure. If your batter resembles pancake batter, reduce the milk by 1 tablespoon or add 1 tablespoon all-purpose flour.
For extra stability, whisk in 1 extra egg yolk—this adds fat and protein without altering flavor. Always mix just until combined to avoid activating gluten.
Dense or Gummy Texture
Overmixing or using cold eggs are the usual culprits for dense waffles. First, ensure your eggs are room temperature—cold eggs create steam that prevents proper leavening. Second, fold dry ingredients into wet just until combined (about 10 strokes).
If your waffles still turn out gummy, your baking powder may be old—replace it with fresh Rumford aluminum-free baking powder.
Sticking to Iron
Sticking happens when the iron isn’t hot enough or lacks proper greasing. Always preheat your iron fully (listen for the hum of even heat) and brush plates with unsalted butter using a paper towel before pouring batter.
For nonstick irons, a light spray of coconut oil works too. If waffles still stick, your iron may need cleaning—soak plates in hot soapy water for 10 minutes to remove residue.
Waffles Collapsing
Collapsed waffles usually mean the baking powder wasn’t activated properly or the iron wasn’t hot enough. Double-check that your baking powder is fresh (test by mixing with water—it should bubble vigorously). Preheat your iron to 375°F and let it sit closed for 2 extra minutes before cooking.
For extra lift, fold ½ teaspoon cornstarch into the dry ingredients—it absorbs moisture and improves structure.
Batter Separating
If your batter looks curdled or oily, the butter melted too quickly during mixing. To prevent this, whisk the wet ingredients over an ice bath (place the bowl in a larger bowl filled with ice) while mixing.
For a quick fix, whisk in 1 extra tablespoon of flour to bind the mixture. Always use cold cubed butter—this melts gradually and emulsifies smoothly.
Nutrition facts
Frequently asked questions
Why use only 2 eggs in this recipe?
The 2 eggs create the perfect balance of structure and lightness—just enough protein to hold the waffle’s shape while keeping it tender. Fewer eggs prevent a dense, rubbery texture, while more would make them too rich. This ratio also makes the batter easier to handle without overmixing.
Can I make these waffles without a waffle iron?
Yes! Use a heavy skillet over medium-high heat with 1 tablespoon butter per waffle. Cook for 3-4 minutes per side until golden brown. For extra crispiness, press down gently with a spatula during cooking. The texture won’t be identical, but they’ll still be delicious.
How do I keep my waffles crispy after cooking?
Transfer cooked waffles to a wire rack to cool for 2 minutes—this prevents steam from making them soggy. Store in an airtight container at room temperature for up to 2 days, or freeze for 3 months. To reheat, use a toaster for 1-2 minutes or air fryer at 350°F for 2 minutes.
What’s the best topping for these waffles?
Classic pure maple syrup and whipped cream are perfect, but get creative! Try fresh berries with lemon zest, chocolate hazelnut spread, or caramelized bananas. For a protein boost, add Greek yogurt and honey. The crispy edges hold toppings beautifully without getting soggy.
Can I make these gluten-free?
Yes, but expect slightly denser results. Replace the 1 cup all-purpose flour with a 1:1 gluten-free blend (like Bob’s Red Mill) and add ½ teaspoon xanthan gum if your blend doesn’t include it. Also reduce milk by 2 tablespoons—gluten-free batters absorb more liquid. Let the batter rest for 10 minutes before cooking.

- 5 Lb Eye Round Roast Recipe: Slow-Braised to Melt-in-Mouth Tenderness - November 3, 2026
- 3-Hour Ciabatta Bread Recipe: Crusty Chews and Airy Holes Mastered - November 3, 2026
- 5 Fruit Salad Recipe: Vibrant Rainbow Layers With No Brown Spots - November 3, 2026