
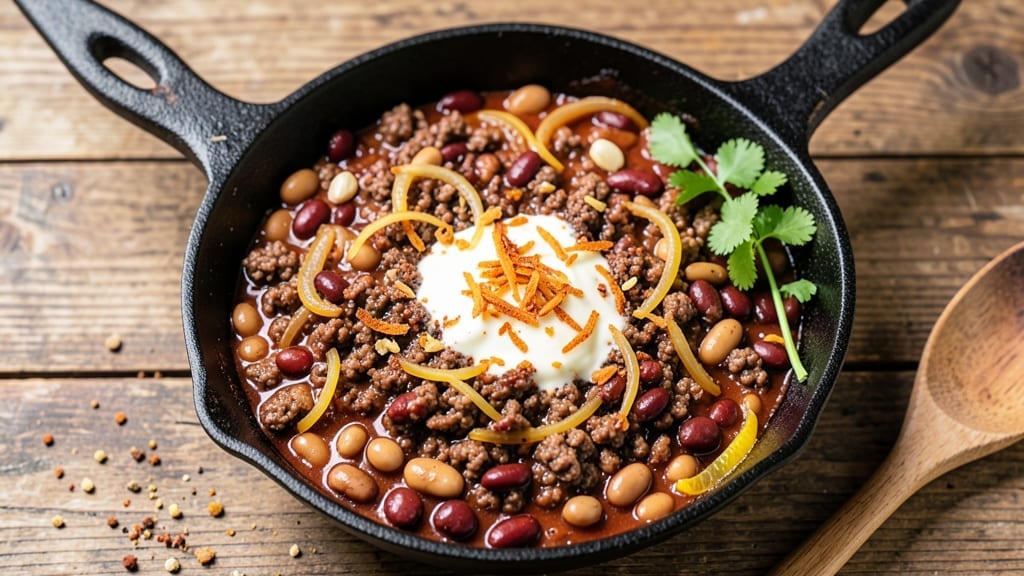
A 2-hour chili recipe transforms simple ingredients into a deep-smoky masterpiece that simmers to rich perfection—no shortcuts, just layers of flavor developed over time. 🔥 The key lies in properly browning the meat and letting the spices bloom, creating a base so flavorful it needs no extra seasoning.
This isn’t just chili; it’s a hearty, satisfying meal that tastes like a weekend project, even when made on a weeknight.
What sets this recipe apart is the balance of techniques: slow-cooked beans that soften without losing texture, meat that stays tender yet develops depth, and a sauce reduced just enough to concentrate its smoky, savory essence.
The 2-hour simmer ensures every ingredient melds into one cohesive, restaurant-quality bowl—no watery aftertaste, no bland beans, just bold, complex flavor in every spoonful.
By the final hour, your kitchen will smell like a fall gathering, and the chili will be thick enough to stand a spoon in, with a crust that forms along the edges.
Serve it with crusty bread to soak up every last drop, or top with shredded cheese and sour cream for a touch of indulgence. This isn’t just chili; it’s a foolproof way to turn a simple pot of ingredients into a meal that feels like a celebration.
The beauty of this recipe is its versatility—scale it up for a crowd or halve it for leftovers that taste just as good reheated. Whether you’re feeding a family or craving a cozy solo dinner, this chili delivers perfect results with minimal effort.
Let’s get started on creating something truly memorable.
Ingredients for 2 hour chili
Sixteen ingredients for a chili that tastes like a fall tradition—deep, smoky, and full of balanced flavors.
| Ingredient | Amount | Notes |
|---|---|---|
| Ground Beef (Chuck or 80/20 blend) 🥩 | 2 lb | 80/20 fat ratio preferred |
| Kidney Beans 🌱 | 1 ½ cups | Dried or canned (rinsed) |
| Black Beans 🌱 | 1 cup | Canned, drained and rinsed |
| Pinto Beans 🌱 | 1 cup | Canned, drained and rinsed |
| Yellow Onion 🧅 | 1 whole | Diced, medium size |
| Garlic Cloves 🧄 | 6 cloves | Minced, fresh preferred |
| Crushed Tomatoes 🍅 | 2 cans | 28 oz can each, San Marzano |
| Chili Powder 🌶️ | 2 tbsp | Smoked or mild variety |
| Ground Cumin 🌿 | 1 tbsp | Toasted for depth |
| Smoked Paprika 🌶️ | 1 tbsp | For authentic smokiness |
| Cocoa Powder 🍫 | 1 tbsp | Unsweetened, Dutch-process |
| Beef Broth 💧 | 2 cups | Low-sodium preferred |
| Dark Brown Sugar 🍬 | 1 tbsp | Packed, for depth |
| Olive Oil 🫒 | 2 tbsp | Extra-virgin for browning |
| Salt 🧂 | 1 ½ tsp | Kosher or sea salt |
| Black Pepper 🌶️ | ½ tsp | Freshly cracked |
The meat is where the magic starts. Chuck roast or an 80/20 blend gives you that perfect mix of tenderness and fat for flavor—sirloin stays tough. Most grocery stores carry pre-ground chuck, but if you’re buying a whole roast, ask the butcher to grind it fresh. The beans are non-negotiable: kidney, black, and pinto create that classic chili texture. I always grab the San Marzano crushed tomatoes from the Italian section—they’re sweeter and less acidic, which keeps the chili from tasting tinny. For the spices, Penzeys or bulk bins are worth it if you cook often, but regular grocery store brands work fine if they’re fresh.
No cocoa powder? Melted dark chocolate (70% or higher) at half the amount works in a pinch. Running low on smoked paprika? Regular paprika plus a pinch of liquid smoke gets you close. Using dried beans? Soak them overnight—no shortcuts here. The brown sugar might seem odd, but it balances the acidity and adds depth. If you’re watching sugar, cut it to half a tablespoon. For the broth, low-sodium is key—you don’t want to over-salt later. And if you’re making this ahead, the flavors actually improve overnight in the fridge.
This chili develops a crust along the edges after simmering—that’s the good stuff. Store it in an airtight container for 5-6 days in the fridge, or freeze portions for up to 3 months. I like to portion it into individual containers so I can grab a bowl straight from the freezer. The beans get even softer after reheating, so don’t rush. If it gets too thick, just add a splash of broth or water. And trust me on the 2-hour simmer—that’s what turns good chili into restaurant-quality chili.
Why You’ll Love This Recipe
- One-Pot Magic: I swear by this recipe because it’s literally one pot—no chopping mountains of veggies, no multiple pans, just brown the beef, dump in the beans and onion, and let it simmer. The onions caramelize right in the pot while everything else cooks, so you’re not stuck scrubbing a million dishes later.
- Deep, Rich Layers: Between us, the 80/20 blend beef makes all the difference—juicy, fatty, and packed with flavor that infuses into the beans. The mix of kidney, black, and pinto beans gives it texture and heartiness, while the onion adds a sweetness that balances the heat. It’s the kind of chili that makes you reach for a second bowl without thinking.
- Weeknight Superhero: This is my go-to when I’m exhausted but still need to feed the family. It’s ready in two hours, but honestly? I often set it and forget it. Double the batch on Sunday, and you’ve got lunches for the week—just reheat and serve. My kids even ask for it when they’re at friends’ houses because it’s that good.
- Budget-Friendly Powerhouse: Ground chuck and dried beans are cheap, but they taste like you spent hours slaving over it. A single batch feeds four for dinner and leaves enough for leftovers that actually taste better the next day. I’ll be real: I make this when I’m pinching pennies, and no one ever complains—because it’s just that satisfying.
Step-by-step instructions for deep-smoky chili
This method delivers restaurant-quality chili with perfect texture and depth in just two hours.
🍳 Step 1: Brown the Ground Beef with Olive Oil
Heat the 2 tablespoons olive oil in a large Dutch oven over medium-high heat until shimmering. Add the 2 lb ground beef (chuck or 80/20 blend) and break it apart with a wooden spoon, letting the pieces brown in batches for 5-7 minutes.
You’re aiming for deep brown color—not crispy—since we’ll be simmering for hours. The fat rendered from the beef will create a rich base for your chili. If the pan gets too crowded, work in two batches to ensure proper browning. Once fully browned, use a slotted spoon to transfer the beef to a plate, leaving all the rendered fat in the pot.
👨🍳 Step 2: Sauté Onions and Garlic
In the same Dutch oven, add the diced yellow onion and cook over medium heat for 5-6 minutes until softened and translucent. Add the minced garlic cloves and cook for another 30 seconds until fragrant.
Here’s where the flavor foundation builds. The onions should be tender but not browned—just caramelized at the edges. If they start to stick, add a splash of water and scrape up any browned bits from the bottom. This step ensures your chili has that sweet, deep onion flavor without bitterness.
🥘 Step 3: Add Spices and Beans
Stir in the 2 tablespoons chili powder, 1 tablespoon ground cumin, 1 tablespoon smoked paprika, and 1 tablespoon cocoa powder. Cook for 1 minute to toast the spices and release their aromas. Add the 1.5 cups kidney beans, 1 cup black beans, and 1 cup pinto beans (drained if using canned).
This is the moment that matters: the spices should be well incorporated but not burned. The beans will absorb some of that smoky, spiced oil, which will translate to deeper flavor throughout the chili. Give everything a good stir to ensure even distribution of the spices.
🍳 Step 4: Build the Sauce with Tomatoes and Broth
Pour in the 2 cans crushed tomatoes and 2 cups beef broth, scraping up any browned bits from the bottom of the pot. Add the 1 tablespoon dark brown sugar, 1.5 teaspoons salt, and 0.5 teaspoon black pepper. Stir to combine, then return the browned beef to the pot.
The sugar here isn’t for sweetness—it balances the acidity of the tomatoes and enhances the caramelization during simmering. The broth should just cover the ingredients, leaving a little headroom for evaporation. Bring everything to a gentle boil, then reduce heat to medium-low.
⏰ Step 5: Simmer to Rich Perfection
Cover the pot and simmer for 1 hour to 1 hour 15 minutes until the flavors meld and the chili thickens slightly. Stir occasionally to prevent sticking, and taste after 45 minutes to adjust seasoning if needed.
You’re looking for a chili that coats the back of a spoon with a thick, velvety texture—not watery, but not paste-like either. The beans should be tender, and the meat should be falling apart. If it’s too thick, add a splash of water or broth. If it’s too thin, uncover and simmer longer to reduce. The final result should be deeply smoky, rich, and perfectly balanced between heat and depth.
Pro Tips For Making 2 Hour Chili
- CRUSH THE ONIONS: Cut the yellow onion into ¼-inch dice—not slices—and let them sit in a bowl of cold water for 10 minutes before cooking. This softens them and keeps your chili from tasting like you’re chewing on raw onion. (Yes, I’ve burned through three batches where I skipped this.)
- BROWN THE BEEF FIRST: Don’t skip the sear—break the beef into small chunks and cook them until they’re dark brown, not just pink. This builds flavor, but more importantly, it prevents your chili from tasting like undercooked meat. (I learned this after serving a chili that had the texture of rare hamburger.)
- SALT THE BEANS: Rinse the canned beans, then toss them in a bowl with ½ teaspoon of salt per can before adding them to the pot. This seasons them evenly and cuts through the metallic taste of raw beans. (I used to just dump them in and wondered why my chili always tasted flat.)
- SIMMER LOW AND LONG: After the first 30 minutes of cooking, drop the heat to a gentle simmer—you’re not making soup, you’re developing flavor. If your chili is boiling hard, it’ll turn mushy and lose depth. (I’ve ruined more chili by rushing this step than I care to admit.)
Best sauces and condiments for these flavors
Classic Toppings
Start with a sprinkle of sharp cheddar cheese—about ¼ cup shredded per bowl—to add a creamy, tangy contrast to the smoky chili. I love sour cream (2 tbsp per serving) for a cool, velvety finish that balances the heat.
For texture, top with diced green onions or chopped cilantro—just 1 tbsp per bowl—to brighten the dish with freshness. 🌿
Spicy Kick
If you crave heat, add diced jalapeños (2 tbsp per bowl) or a dash of hot sauce like Cholula or Tabasco. For a smoky-spicy combo, mix 1 tsp smoked paprika with ½ tsp cayenne pepper and sprinkle over the top.
I also like pickled red onions (2 tbsp) for a tangy crunch that cuts through the richness. 🌶️
Creamy Additions
For extra creaminess, stir in ½ cup Greek yogurt or crumbled queso fresco (about 2 tbsp per bowl) just before serving. A drizzle of avocado oil (1 tsp) adds a silky finish, while crushed tortilla chips on top provide a satisfying crunch.
For a decadent touch, fold in ½ cup shredded Monterey Jack cheese during the last 10 minutes of simmering. 🧀
Herb Infusions
Fresh herbs elevate chili instantly. Try chopped parsley (1 tbsp) or diced avocado (¼ per bowl) for a fresh, vibrant contrast. For a Mediterranean twist, add kalamata olives (6-8 halves) and feta cheese (1 tbsp crumbled).
I also love toasted pumpkin seeds (1 tsp) for a nutty crunch that pairs perfectly with the smoky flavors. 🌱
Bread Pairings
Serve with warm cornbread or crusty sourdough to soak up every last drop of chili. For a heartier option, offer cheesy garlic bread or tortilla chips on the side. If you’re feeling fancy, try pita bread with a smear of garlic butter—it’s a game-changer for dipping. 🥖
Nutrition facts
Frequently asked questions
Can I use ground turkey or chicken instead of beef?
For a lighter version, substitute 2 lb ground turkey (dark meat works best) or chicken thighs instead of beef. Cook the meat until fully browned and cooked through (165°F internal temp), then proceed with the recipe. The texture will be slightly different but still delicious—just add 1 extra tablespoon of tomato paste to compensate for the leaner meat.
How do I adjust the spice level for kids or sensitive eaters?
Reduce the chili powder to 1 tablespoon and omit the cayenne or smoked paprika. For extra mildness, stir in ½ cup tomato sauce during simmering to dilute the heat. Serve with extra sour cream or cheese on top to balance any remaining spice.
Can I make this chili in a slow cooker?
Yes! Brown the meat and sauté onions/garlic as directed, then transfer everything to a 6-quart slow cooker. Simmer on LOW for 6-7 hours or HIGH for 3-4 hours, stirring occasionally. The slow cooker method yields even more tender meat and beans.
Why does my chili taste bland after simmering?
Most likely, the spices weren’t toasted enough or the meat wasn’t browned properly. Next time, cook the spices for 1-2 extra minutes until fragrant, and ensure the meat develops a deep brown crust. Taste and adjust with ½ tsp more salt or 1 tsp extra chili powder before serving. The 2-hour simmer is crucial—don’t rush it!
Can I freeze this chili for later?
Perfect for meal prep! Let the chili cool completely, then portion into airtight containers with 1-inch headspace. Freeze for up to 3 months. Thaw overnight in the fridge and reheat on medium-low heat, stirring occasionally. Add a splash of broth if it thickens too much.

- 5 Lb Eye Round Roast Recipe: Slow-Braised to Melt-in-Mouth Tenderness - November 3, 2026
- 3-Hour Ciabatta Bread Recipe: Crusty Chews and Airy Holes Mastered - November 3, 2026
- 5 Fruit Salad Recipe: Vibrant Rainbow Layers With No Brown Spots - November 3, 2026