
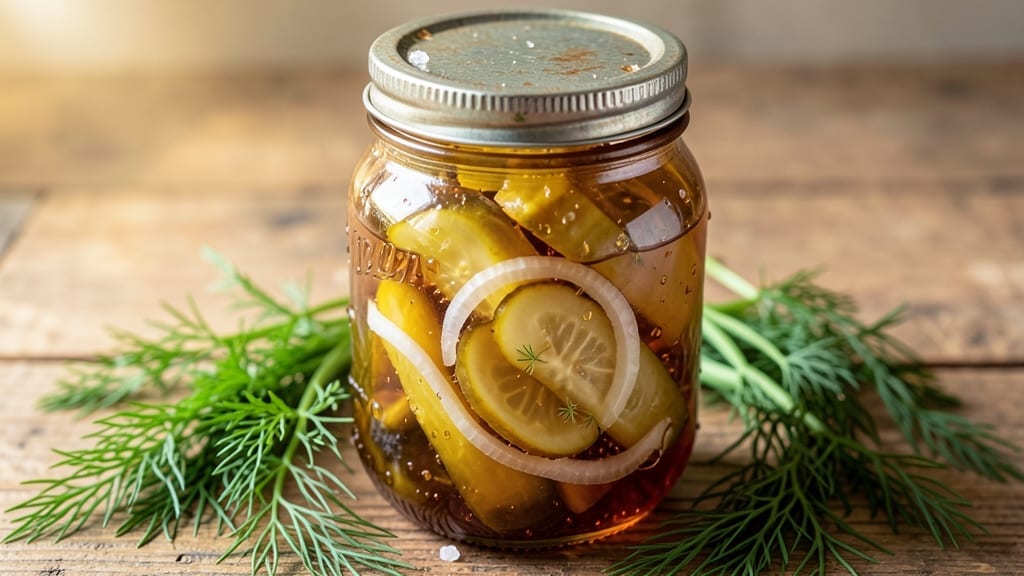
Transforming simple cucumbers into 12-day sweet pickles unlocks a world of briny-sweet complexity that store-bought versions can’t match. This recipe isn’t just about sweetness—it’s about patience, as each day of fermentation builds layers of flavor that turn ordinary pickles into a dessert-like delicacy.
The process requires minimal effort but rewards you with jars of golden, syrupy pickles that taste like a homemade treat, not a quick preserve.
The magic happens in the brining phase, where cucumbers soak in a carefully balanced solution of salt, sugar, and spices over 12 days. This extended time allows the flavors to meld perfectly, creating a syrup that’s both sweet and tangy.
Unlike quick-pickle recipes, this method develops depth—think of it as fermenting fruit for jam, but with cucumbers. The result? Pickles that stay crisp yet absorb enough syrup to be irresistibly sweet.
By the final day, your pickles will be glossy, tender, and packed with flavor, ready to be jarred and stored for weeks. The syrup thickens slightly, clinging to each slice for that perfect balance of crunch and sweetness.
These aren’t just pickles—they’re a textural and flavorful experience, perfect for gifting, holiday tables, or sneaking into desserts like ice cream toppings or cheese boards.
What makes this recipe stand out is its foolproof simplicity—no special equipment needed, just time and a few pantry staples. The key is consistency: check the brine daily, adjust sweetness to taste, and let the process work its magic.
Once you try these, you’ll never settle for anything less than homemade again.
Ingredients for 12 day sweet pickles
Pantry staples plus cucumbers and patience transform into golden, syrupy sweet pickles.
| Ingredient | Amount | Notes |
|---|---|---|
| Fresh Cucumbers 🥒 | 2 lb | Medium-sized, firm, unblemished |
| Granulated Sugar 🍚 | 2 cups | White or raw cane sugar |
| Mason Jars 🥫 | 2 quart-sized | Pint or quart size, sterilized |
| Kosher Salt 🧂 | 1 cup | Non-iodized, fine grain |
| White Vinegar 🍶 | 1 cup | Distilled, 5% acidity |
| Fresh Dill 🌿 | ¼ cup | Chopped, stems removed |
| Garlic Cloves 🧄 | 4 cloves | Smashed, peeled |
| Red Pepper Flakes 🌶️ | 1 tsp | Adjust for spice preference |
| Mustard Seeds 🌱 | 1 tsp | Whole, yellow or brown |
| Lemon Juice 🍋 | ½ cup | Freshly squeezed |
| Lemon Slices 🍋 | 4 thick | For garnish, optional |
| Ice Cubes ❄️ | 1 cup | For initial chilling |
The cucumbers are the foundation—look for firm, medium-sized ones with no soft spots. Local farmers markets often have the freshest, crunchiest cucumbers, but the grocery store works too. If you can’t find dill, dried dill at one-third the amount is fine, though fresh has better flavor. The mustard seeds add a subtle kick, so toast them lightly in a dry pan first to deepen their aroma. For the jars, quart-sized mason jars are ideal—they give enough room for the cucumbers to develop that signature glossy syrup.
No vinegar? Apple cider vinegar works too, but distilled is more neutral. Short on dill? Tarragon or even more basil can stand in. The sugar is non-negotiable here—it’s what creates that irresistible sweetness, so don’t skimp. If you’re worried about the pickles getting too soft, add an extra cup of ice cubes to the initial brine to keep them crisp longer. The garlic cloves can be peeled and smashed with the side of a knife for maximum flavor infusion.
Once your pickles are brined, keep them in a cool, dark place—a pantry or cellar works best. Check the brine daily and add more ice cubes if the cucumbers aren’t submerged. These pickles stay fresh for up to 3 months in the fridge, and the syrup gets even better with time. Portion into smaller jars for gifting—everyone will ask for seconds
Why You’ll Love This Recipe
- No-Fuss Jars: I swear by this recipe because it’s literally dump-and-wait. Slice the cucumbers, toss them in jars with sugar and salt, then pour the vinegar—no peeling, no fancy tools, just 12 days of hands-off magic.
- Sweet-Tart Magic: That perfect balance of sugar and vinegar? It’s like a party in your mouth—crunchy, tangy, and just sweet enough to make you reach for seconds. The vinegar cuts through the sugar so it never feels cloying.
- Party Snack Star: Honestly, these are my go-to for potlucks, BBQs, or even lazy Sunday afternoons. The jars make them portable, and everyone always asks for the recipe. (I bring extras just in case.)
- Pantry Goldmine: Between us, this is the ultimate budget hack. Cucumbers are cheap, sugar lasts forever, and you’ll have jars of sweet pickles ready for months. No waste, no stress—just delicious leftovers waiting to be eaten.
Step-by-step instructions for 12-Day sweet pickles
Here’s how to transform simple cucumbers into melt-in-your-mouth sweet pickles through careful layering and time.
Prepare and Sterilize Your Mason Jars
Start by washing the 2 quart-sized Mason jars and their lids in hot, soapy water. Place them in a large pot and cover with water, then bring to a boil for 10 minutes to sterilize completely. This step ensures your pickles stay fresh throughout the 12-day process by preventing contamination.
While the jars sterilize, prepare a large bowl of ice water and add the 1 cup ice cubes. This chilled brine will help preserve the cucumbers’ crisp texture during the initial stages. Keep the jars hot until you’re ready to fill them—this prevents temperature shock that could cause cracking.
Create the Brine Solution
In a separate large bowl, combine the 1 cup kosher salt with 4 cups cold water (yes, we’re using less than the jar capacity—this will be our initial brine). Stir until the salt fully dissolves. The solution should taste intensely salty, like the ocean. This high-salt brine draws moisture out of the cucumbers while preserving their structure.
Add the 1 cup white vinegar and 0.5 cup lemon juice to the saltwater mixture. The acidity from both ingredients works together to create the perfect balance of tangy sweetness. Stir gently to combine, then let the solution sit for 5 minutes to allow flavors to meld before proceeding.
Prepare and Layer the Cucumbers
Rinse the 2 lb fresh cucumbers thoroughly under cold water and pat them completely dry with paper towels. You want them bone-dry—any moisture left on the skin will dilute your brine and affect texture. Using a sharp knife, slice each cucumber into ½-inch thick rounds, keeping them whole rather than chopping.
Begin layering the cucumber rounds in each jar, leaving about 1 inch of space at the top. Between each layer, sprinkle ¼ cup chopped fresh dill, 1 smashed garlic clove, ½ teaspoon red pepper flakes, and ½ teaspoon mustard seeds. These aromatics will infuse the cucumbers with complex flavors as they develop over time. The dill should be distributed evenly—you want every bite to taste like summer.
Pour the Brine and Initial Chilling
Carefully pour the prepared brine over the cucumber layers until each jar is completely filled, leaving just ½ inch of headspace at the top. This space allows for the natural expansion of the cucumbers as they absorb the brine. Tap each jar gently on the counter to remove any air bubbles trapped between the layers.
Place the jars in the ice water bath for 30 minutes. This initial chilling helps the cucumbers absorb the brine quickly and evenly, setting the stage for their transformation. After chilling, remove the jars from the ice water and add the 4 thick lemon slices on top of each cucumber layer. The lemon will add a bright citrus note that complements the developing sweetness.
Seal and Age the Pickles
Using clean tongs, place the sterilized lids on each jar and screw on the rings until they’re fingertip-tight. Don’t overtighten—the jars need room to expand slightly as the cucumbers release moisture. Store the jars at room temperature for the first 24 hours, then move them to the refrigerator.
The magic happens over the next 12 days. Each day, the cucumbers will gradually absorb more of the sweet brine, developing that perfect balance of sweetness and tang. After 5 days, you can taste-test one—you’ll notice the flavors intensifying. By day 12, your pickles will be tender yet crisp, with a deep sweetness that’s hard to resist. The longer they age, the more complex their flavor profile becomes.
Pro Tips For Making 12 Day Sweet Pickles
- USE SLICED CUCUMBERS, NOT CHUNKS: Thin, even slices (¼-inch thick) soak up the sugar-vinegar brine faster than thick chunks—no soggy centers after 12 days. I used to cut them haphazardly, and half the jar stayed underripe by day 7.
- WEIGH THE SUGAR, DON’T EYEBALL: A 12-day pickle relies on precise sugar-to-vinegar balance. Use a scale for 1 cup sugar per pint of liquid—eyeballing means some jars turn cloyingly sweet while others stay bland. I learned this after tossing a jar that tasted like syrup.
- PACK JARS TIGHT, THEN REST: Shove cucumber slices in jars until they’re packed like dominoes, then let them sit for 10 minutes before adding brine. This prevents floating and ensures even flavor distribution—no half-pickles left floating in syrup.
- STORE COOL AND DARK: Refrigerate the jars immediately after sealing, even if the recipe says room temp is fine. Heat speeds up fermentation, turning your sweet pickles into vinegary mush by day 5. I skipped this once—regretful.
Wine and beer pairings for this 12 day sweet pickles
Sweet White Wine
Sweet white wines like Moscato d’Asti or Riesling are my go-to pairings for these pickles. The Moscato d’Asti from Italy has delicate floral notes and a touch of sweetness that mirrors the syrup’s flavor, while a German Riesling (off-dry style) adds a citrusy brightness that cuts through the richness.
Serve both chilled at 45-50°F—the cool temperature enhances the pickles’ refreshing quality. 🍷
Crisp Lager Beer
A crisp, light lager like Peroni or Heineken works surprisingly well with sweet pickles. The beer’s clean, slightly malty profile balances the pickles’ sweetness without overpowering their briny depth. For a craft option, try a Belgian witbier—its coriander and citrus notes complement the lemon and dill flavors beautifully.
Serve at 40-45°F to keep the beer refreshing alongside the pickles.
Dry Rosé Pairing
If you prefer something drier, a Provençal rosé like Whispering Angel or Miraval bridges the gap between sweet and savory. The wine’s subtle fruitiness and crisp acidity enhance the pickles’ complexity without clashing.
Opt for a dry or semi-dry rosé (around 10-12% alcohol) to avoid overwhelming the dish. Serve slightly chilled at 50°F for the best balance.
Sparkling Wine
For a festive touch, Prosecco or Cava adds effervescence that cleanses the palate between bites. The bubbles and light sweetness of Prosecco (like La Marca) mirror the pickles’ texture and flavor profile.
A dry Cava also works well if you prefer a drier option. Serve at 40-45°F to maintain the wine’s liveliness and highlight the pickles’ sweet-tangy notes.
Non-Alcoholic Options
For those avoiding alcohol, a sparkling apple cider (like Martinelli’s) or ginger beer (like Feather’s) offers a refreshing contrast. The ginger beer’s spice adds a nice kick, while the cider’s fruitiness complements the pickles’ sweetness. Serve both chilled at 40°F for the best experience. 🍹
Nutrition facts
Frequently asked questions
Why do these pickles need 12 days to develop?
The extended 12-day process allows the cucumbers to gradually absorb the sweet brine, creating a perfect balance of texture and flavor. Unlike quick-pickle recipes, this method develops deep sweetness and complex aromatics from the dill, garlic, and spices. Each day builds layers of flavor—think of it like aging wine, but for cucumbers!
Can I adjust the sweetness level?
Start with the full 2 cups sugar for classic sweetness, but reduce to 1 cup for a milder taste. For extra sweetness, add ½ cup more sugar on day 5. Taste-test after 5 days—you can always adjust the syrup later by adding more sugar dissolved in water.
What if my cucumbers float instead of staying submerged?
This happens when they release air bubbles. Simply place a small weight (like a sterilized stone or metal spoon) on top of the cucumbers to keep them submerged. Never use glass weights—they could break. If the brine level drops, add more sterilized water or simple syrup to maintain coverage.
How do I know when the pickles are ready?
After 12 days, your pickles should be tender yet still slightly crisp, with a glossy syrup clinging to them. Taste one around day 5—if they’re too salty, rinse briefly in cold water. The longer they sit (up to 3 months in the fridge), the more complex their flavor becomes!
Can I make these pickles without vinegar?
Vinegar is crucial for both preservation and tanginess, but you can use lemon juice or apple cider vinegar as substitutes. For fermentation safety, ensure the acidity level remains high (pH 4.6). If skipping vinegar entirely, increase the lemon juice to 1 cup and monitor closely for any off smells.

- 5 Lb Eye Round Roast Recipe: Slow-Braised to Melt-in-Mouth Tenderness - November 3, 2026
- 3-Hour Ciabatta Bread Recipe: Crusty Chews and Airy Holes Mastered - November 3, 2026
- 5 Fruit Salad Recipe: Vibrant Rainbow Layers With No Brown Spots - November 3, 2026