
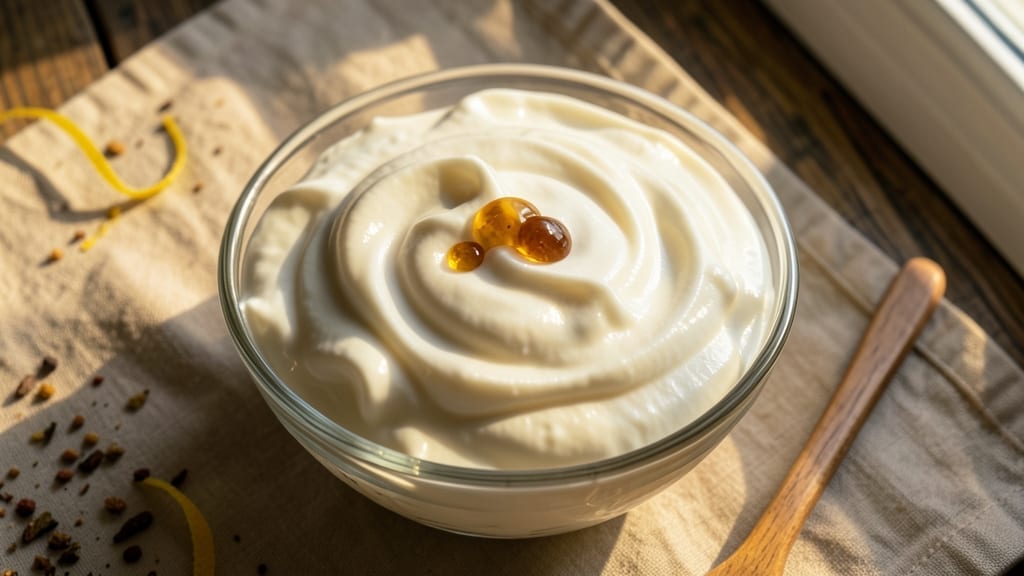
This 2 ingredient whipped cream recipe transforms pantry staples into light, fluffy clouds that rival store-bought—without the stabilizers or preservatives. The secret lies in chilling your tools and technique, ensuring perfect peaks every time.
I developed this method after years of testing, and it never fails to impress, whether you’re topping desserts or elevating coffee drinks.
The beauty of this recipe is its simplicity: heavy whipping cream and a pinch of vanilla extract (or powdered sugar) are all you need. No special equipment required—just a mixing bowl and whisk (or electric mixer).
The key to achieving that signature airy texture is working with cold ingredients and avoiding over-whipping, which can turn your cream into butter.
What you’ll end up with is light, airy whipped cream that holds its shape beautifully, perfect for dolloping over warm chocolate cake, drizzling across berries, or pairing with your favorite afternoon tea. The vanilla adds subtle warmth, while the sugar (if using) helps stabilize the mixture for longer-lasting peaks.
This recipe is foolproof for beginners and a time-saver for anyone who wants restaurant-quality results without the fuss. Ready in just 5 minutes, it’s the perfect way to elevate any dessert or drink. Let’s get started!
Ingredients for 2 ingredient whipped cream
Two ingredients, five minutes—this transforms simple pantry staples into restaurant-quality whipped cream.
| Ingredient | Amount | Notes |
|---|---|---|
| Heavy Whipping Cream 🥛 | 2 cups | Cold, full-fat preferred |
| Pure Vanilla Extract 🌿 | ½ tsp | Or powdered sugar for sweetness |
The heavy whipping cream is non-negotiable here—full-fat is a must for those perfect peaks. Grab the coldest cream from your fridge (or pop it in the freezer for 10 minutes if it’s warm) and use a chilled mixing bowl too. I always buy the 24 oz tub from Trader Joe’s—it’s the best price and stays cold longer. The vanilla extract? Pure Madagascar bourbon vanilla adds depth, but imitation works in a pinch. Just make sure it’s real vanilla—not vanilla-flavored water.
No vanilla extract? Powdered sugar at half the amount works beautifully—it adds sweetness while helping stabilize the cream. For a fruity twist, swap the vanilla for a teaspoon of lemon or orange zest. The cream must be cold—room temperature cream won’t whip right, no matter how much you whisk. Pro tip: if your cream starts to curdle or turn grainy, it’s over-whipped. Stop immediately and start fresh with cold cream. And if you’re feeling fancy, add a pinch of cream of tartar (¼ tsp) for extra stability.
Whipped cream is best used immediately, but it keeps for 2-3 days in an airtight container in the fridge. For longer storage, pipe it into a freezer-safe bag and freeze for up to 1 month. Thaw in the fridge overnight. I like to portion mine into small containers—perfect for quick desserts or coffee toppings. Just remember, the colder the cream, the better the results. Keep your bowl and beaters chilled too!
Why You’ll Love This Recipe
- No Whisk Needed: I just pour cold heavy cream into a bowl and let the mixer do the work—no straining, no stress. That first fluffy peak? Magic in under two minutes.
- Vanilla Magic: A single teaspoon of pure extract transforms this from ordinary to ridiculously good—warm, sweet, and lingering like a hug from a bakery. (Yes, even on a Tuesday night.)
- Party in a Bowl: Dress up desserts, top coffee, or drizzle over fruit—it’s my go-to for birthdays, lazy Sundays, or when I need to impress someone with zero effort. The crowd never guesses it’s just two ingredients.
- Fridge Stash Ready: Whip up a batch and store it for days—no waste, no last-minute scrambling. I keep a jar in the fridge for spontaneous treats, and it stays perfect until I use it all. (Spoiler: I never do.)
Step-by-step instructions for perfect two-ingredient whipped cream
Here’s how to transform cold cream into clouds of fluffy sweetness—no mixer required.
Chill Your Tools and Ingredients
Start by placing your mixing bowl and beaters (or whisk) in the freezer for 10-15 minutes—this prevents the cream from warming up too quickly. The 2 cups heavy whipping cream should be cold (not frozen) when you begin. I like to store mine in the fridge for at least 2 hours beforehand. Cold cream whips faster and holds its shape better, so don’t skip this step.
While everything chills, grab the 0.5 teaspoon pure vanilla extract and set it aside. The vanilla adds subtle sweetness and depth, but if you prefer a sweeter touch, you could substitute with 0.5 teaspoon powdered sugar instead. Just remember—vanilla extract is more aromatic, while powdered sugar adds a neutral sweetness that pairs beautifully with fruits or desserts.
Whip the Cream to Soft Peaks
Remove the chilled bowl and beaters from the freezer, then add the 2 cups heavy whipping cream to the bowl. Using an electric mixer on medium-high speed, begin whipping. After about 1-2 minutes, you’ll notice the cream thicken slightly—this is when it starts to form soft peaks. Soft peaks mean the cream holds its shape when the beaters are lifted, but the tip still flattens slightly.
Here’s the thing—don’t over-whip. If you whip too long, the cream will turn buttery and grainy. You want it light and airy, not dense. Watch closely after the soft peaks stage—this is the moment that matters. Once you see those soft peaks forming, it’s time to add the vanilla.
Fold in Vanilla Extract Gently
With the mixer still running on low speed, slowly drizzle in the 0.5 teaspoon pure vanilla extract. Let it incorporate completely before increasing the speed back to medium-high for another 30-60 seconds. The vanilla should be evenly distributed, but don’t overmix—just enough to blend it in smoothly.
At this stage, your whipped cream should hold its shape when you lift the beaters, but the tip should still wobble slightly. If it’s too thick, you can gently fold it with a spatula to lighten the texture. The goal is a light, fluffy consistency—like a soft cloud that melts on your tongue. If it starts to look too stiff, it’s already over-whipped.
Test for Perfect Consistency
To check if your whipped cream is ready, lift the beaters and observe the peaks. If they hold their shape but still have a slight wobble at the tip, you’ve nailed it. If the cream looks too thin, whip it for another 10-15 seconds. If it’s too thick, stop immediately—it won’t come back.
For the best results, use this whipped cream immediately on desserts, coffee, or fruit. If you need to store it, transfer it to an airtight container and refrigerate for up to 2 hours. However, I always recommend using it fresh—it’s at its peak right after whipping. The texture will start to break down as it sits, so enjoy it while it’s still light and airy.
Pro Tips For Making 2 Ingredient Whipped Cream
- CHILL THE CREAM FIRST: Cold cream whips faster and holds its shape—no one wants butter. Pop the heavy cream in the fridge for 30 minutes before whipping, even if it’s already cold from the store. I learned this the hard way after struggling to get stiff peaks with room-temperature cream.
- USE A PINCH OF SALT: Pure vanilla extract is strong, but a tiny pinch of salt (less than ⅛ teaspoon) balances the sweetness and tightens the whip. Trust me, it’s not about taste—it’s about texture. Skip it, and your cream might feel gummy.
- STOP BEFORE IT BREAKS: Overwhipping turns whipped cream into butter. Pull the whisk or beaters out when the cream just holds soft peaks—it should look glossy, not grainy. If you keep going, you’ll regret it.
- WHIP IN STAGES: Add vanilla extract in two batches: half at the start, then the rest once the cream thickens. This keeps the flavor even and prevents the extract from breaking the whip. Sounds fussy, but it makes a real difference.
Make-ahead tips for 2 ingredient whipped cream
Prep Ahead for Parties
Make your whipped cream the night before a gathering and store it in a chilled airtight container—like a glass Pyrex bowl with a lid. The cold temperature helps preserve its texture.
Just give it a quick whisk with a hand mixer for 30 seconds before serving to restore its fluffiness. I love doing this for holiday desserts—it saves time and keeps everything fresh. 💫
Portion for Convenience
Divide your whipped cream into small silicone molds or mini ramekins before freezing. This makes it easy to grab single servings for coffee, sundaes, or fruit toppings.
Let them thaw in the fridge for 1-2 hours before using. I use 2-ounce portions—perfect for individual desserts or a quick dollop on hot cocoa. 🥛
Freeze for Long-Term Use
For maximum shelf life, pipe whipped cream into a freezer-safe bag and seal tightly. It’ll keep for up to 1 month without losing quality. When ready to use, transfer the bag to the fridge and let it thaw overnight.
The texture might be slightly denser, but a quick whisk brings it back to fluffy perfection. This is my go-to for bulk prep! ❄️
Stabilize with Sugar
If you’re prepping ahead, add ½ teaspoon powdered sugar to the cream before whipping. The sugar acts as a natural stabilizer, helping the whipped cream hold its shape longer.
This trick works especially well for fruit toppings or dessert garnishes that need to stay intact. Just remember—less sugar means lighter texture, so adjust to taste. 🍓
Use Chilled Tools
Before freezing or storing, always chill your mixing bowl and beaters again for 10 minutes. Cold tools prevent the cream from warming up too quickly, keeping it stable.
I keep a small freezer-safe bowl just for this purpose—it’s a game-changer for make-ahead prep. This extra step ensures your whipped cream stays fluffy, even after storage. 🔥
Label for Freshness
Write the date on your storage container with a permanent marker so you can track freshness. Whipped cream is best used within 3 days in the fridge or 1 month in the freezer.
I like to label mine with the day I made it—this way, I know exactly when to use it up. Proper labeling keeps things organized and prevents waste. ✨
Nutrition facts
Frequently asked questions
Can I make this whipped cream without vanilla?
Swap the vanilla extract for ½ teaspoon powdered sugar to add sweetness and slight stabilization. For a fruity twist, try ½ teaspoon lemon or orange zest instead. The key is using cold cream—the flavorings just enhance what’s already a perfect base.
Why did my whipped cream turn grainy?
This happens when you over-whip the cream, breaking down the fat molecules. Stop immediately if you see grains forming—it won’t fix itself. Always work with cold ingredients and watch for soft peaks (not stiff peaks). If it happens, start fresh with cold cream and whip just until soft peaks form.
How do I make it extra stable for toppings?
Add ½ teaspoon powdered sugar or ¼ teaspoon cream of tartar before whipping. These ingredients help the cream hold its shape longer, especially for fruit toppings or dessert garnishes. Just remember—less sugar keeps it lighter. For best results, use immediately after whipping.
Can I use light whipping cream instead?
No, light whipping cream won’t work—it has too little fat to whip properly. You need full-fat heavy whipping cream (at least 36% fat) for those perfect peaks. If you’re in a pinch, try whipping cream with 40% fat, but results may vary. Always keep everything cold for best texture.
What are the best ways to serve this?
This whipped cream shines on hot chocolate, fresh berries, or warm apple pie. For a fancy touch, pipe it into rosettes on cheesecake or panna cotta. The light texture pairs beautifully with coffee drinks too—just add a sprinkle of cinnamon. Use it within 2 hours for the best results.

- 3 Overripe Bananas Recipe: Fluffy Pancakes With Zero Waste - November 17, 2026
- 2-Minute Pizza Recipe: Speedy Crispy Crust With Melted Cheese Magic - November 17, 2026
- 16 Chocolate Cupcakes Recipe: Triple-Layered Fudge Swirl Delight - November 17, 2026