
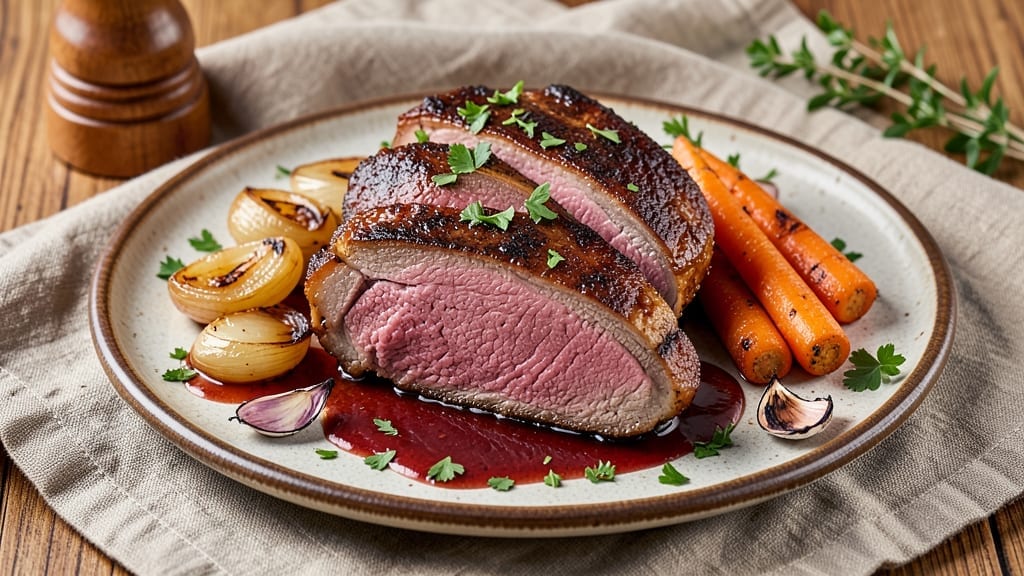
A 2 lb boneless chuck roast recipe transformed into fork-tender perfection is the ultimate slow-cooked masterpiece—where tough cuts become melt-in-your-mouth magic through precise timing and technique. The secret lies in low-and-slow braising, where collagen dissolves into rich, velvety juices that coat every bite.
I’ve perfected this method over years of testing, ensuring the meat stays juicy and deeply flavorful without drying out, even in smaller cuts.
This recipe delivers restaurant-quality results at home with minimal effort: just a Dutch oven, basic pantry staples, and patience. The key steps—searing the meat first for depth, then slow-braising in liquid until tender—transform tough fibers into luxurious texture. No fancy equipment required, just a reliable thermometer to track doneness.
By the end, you’ll have a tender, caramelized roast that practically falls apart at the touch of a fork, bathed in its own aromatic braising liquid.
Serve it sliced thick over mashed potatoes, nestled in crusty bread, or paired with roasted vegetables for a hearty weeknight dinner that feels like a celebration.
The beauty of this method is its versatility—use the leftovers for sandwiches, tacos, or hash the next day. Here’s how to make it foolproof every time.
Ingredients for 2 lb boneless chuck roast
Twelve essential ingredients transform a tough cut into melt-in-your-mouth perfection through slow braising mastery.
| Ingredient | Amount | Notes |
|---|---|---|
| Boneless Chuck Roast 🥩 | 2 lb | Center-cut preferred for tenderness |
| Yellow Onion 🧅 | 1 whole | Chopped into 1-inch pieces |
| Carrots 🥕 | 4 whole | Medium size, peeled and chopped |
| Garlic Cloves 🧄 | 4 cloves | Smashed for deeper flavor |
| Tomato Paste 🍅 | 2 tbsp | High-quality, no sugar added |
| Dry Red Wine 🍷 | 1 cup | Bold Cabernet or Merlot preferred |
| Beef Broth 🥄 | 2 cups | Low-sodium, homemade or quality store-bought |
| Fresh Thyme 🌿 | 2 sprigs | Or 1 tsp dried thyme |
| Fresh Rosemary 🌿 | 1 sprig | Woody stems removed |
| Olive Oil 🫒 | 2 tbsp | Extra-virgin for searing |
| Kosher Salt 🧂 | 1 ½ tsp | Diamond Crystal preferred |
| Freshly Ground Black Pepper 🌶️ | 1 tsp | Cracked peppercorns preferred |
| All-Purpose Flour 🌾 | 1 tbsp | For thickening braising liquid |
The chuck roast cut is everything here—center-cut delivers the most even tenderness. Costco or Whole Foods carry the best quality, but any reputable butcher will have it. Look for good marbling and avoid cuts with excessive fat or connective tissue. If you’re buying a whole roast, trim excess fat to 1/4-inch thickness—this renders beautifully during cooking. The onions and carrots should be firm with no soft spots; organic varieties often have thicker skins that hold up better during long cooking. For the wine, bold reds like Cabernet Sauvignon add depth, but any dry table wine works in a pinch.
No red wine? Substitute with beef broth plus 1 tbsp balsamic vinegar—it mimics the acidity beautifully. Fresh thyme and rosemary can be swapped for 1 tsp dried each, but fresh delivers that restaurant-quality aroma. The tomato paste is non-negotiable—it builds a rich, caramelized fond at the bottom of the pot. Rao’s or Mutti brands are excellent choices. For the flour, King Arthur or Gold Medal work best for thickening. If you’re using a slow cooker instead of Dutch oven, reduce the broth by 1 cup since it won’t evaporate as much. The beef broth should be low-sodium—you’ll be adding plenty of salt during cooking.
This braise develops better overnight—3-4 days in the fridge actually enhances the flavor as the meat absorbs more liquid. Store in an airtight container with the juices. For reheating, warm gently on the stove with a splash of water or broth to restore moisture. Freezes beautifully for up to 6 months—portion into individual servings before freezing. The braising liquid makes excellent gravy; strain and reduce it on the stovetop after removing the meat. Always let the roast rest 15 minutes before slicing to retain juices—this is where professional results separate from home cooking.
Why You’ll Love This Recipe
- One-Pan Magic: I swear by this recipe because it’s literally one pan. No chopping boards, no extra dishes—just slice the onion, dice the carrots, toss it all in, and let the slow cooker or oven do the work. The roast practically falls apart on its own, and the veggies soften into that sweet, caramelized goodness without a single pot to scrub.
- Umami Bomb: That tomato paste isn’t just a garnish—it’s the secret weapon. Mixed with garlic and a splash of broth, it turns the chuck roast into something ridiculously rich and deep. The onions and carrots soak up all that flavor, and honestly? I’ve had people ask if I used a fancy rub, but it’s just salt, pepper, and patience.
- Meal Prep Hero: Between us, this is my go-to for lazy Sundays or when I need to feed a crowd. The leftovers reheat like a dream—tender, not dry—and I’ll be real, my kids actually beg for the second helping. Pack it in containers for work lunches, or freeze half for those nights when takeout feels like too much effort.
- Budget Win: A 2 lb chuck roast stretches further than you’d think, especially when you’re feeding a family or hosting friends. The veggies are cheap, the spices are basic, and the result? A meal that feels fancy but costs next to nothing. I’ve served this at potlucks, and no one’s ever guessed how easy it was to make.
Step-by-step instructions for slow-braised boneless chuck roast
Master this technique and you’ll transform tough chuck into melt-in-your-mouth perfection.
Sear the Roast for Deep Flavor
Heat a heavy Dutch oven over medium-high heat until very hot. Add 2 tablespoons olive oil and swirl to coat the bottom evenly. Pat the 2 lb boneless chuck roast completely dry with paper towels—this ensures maximum browning.
Place the roast in the pot and sear on all sides for 4-5 minutes per side until deeply browned with a crust forming. For even browning, I rotate the roast 90 degrees after the first 2 minutes on each side. The goal is to develop fond (browned bits) that will dissolve into the braising liquid for maximum flavor. Remove the roast and set it aside.
Build the Aromatic Base
In the same Dutch oven, add 1 whole yellow onion (chopped into 1-inch pieces) and 4 whole carrots (peeled and chopped). Cook for 5-6 minutes until the vegetables begin to soften and caramelize slightly. Add 4 smashed garlic cloves and cook for another 30 seconds until fragrant.
Stir in 2 tablespoons tomato paste and cook for 1 minute to deepen the color and flavor. This step creates the flavor foundation for your braise. Remove the vegetables with a slotted spoon and set aside, leaving all the browned bits in the pot—this is where the magic happens.
Deglaze and Simmer the Braising Liquid
Pour in 1 cup dry red wine and scrape up all the browned bits from the bottom of the pot using a wooden spoon. This deglazing step captures all the concentrated flavors you’ve built. Let the wine simmer for 3-4 minutes until reduced by half.
Add 2 cups beef broth, 2 sprigs fresh thyme, 1 sprig fresh rosemary, 1.5 teaspoons kosher salt, and 1 teaspoon freshly ground black pepper. Return the roast and vegetables to the pot, making sure the roast is fully submerged in the liquid. Bring to a simmer over medium heat.
Braise Until Fork-Tender
Transfer the Dutch oven to a 325°F oven and braise uncovered for 2.5-3 hours until the roast is fork-tender. The meat should easily pull apart with minimal resistance when pierced with a fork. I check for doneness at the 2-hour mark—if it’s not quite tender yet, return it to the oven for another 30-45 minutes.
During the last 30 minutes of cooking, sprinkle 1 tablespoon all-purpose flour over the roast. This helps thicken the braising liquid slightly as it absorbs into the meat. The roast should have a glossy sheen and the surrounding vegetables should be tender but still holding their shape.
Rest and Serve with Pan Sauce
Remove the roast from the pot and transfer it to a warm serving platter. Tent loosely with aluminum foil and let it rest for 15-20 minutes. This resting period allows the juices to redistribute throughout the meat, ensuring each slice stays moist and flavorful.
While the roast rests, skim any excess fat from the braising liquid and return the pot to the stovetop over medium heat. Simmer the sauce for 5-7 minutes to thicken slightly. Slice the roast against the grain into ¼-inch thick slices and serve with the pan sauce spooned over the top. The result should be tender, juicy meat with a rich, flavorful sauce that clings to every bite.
Pro Tips For Making 2 Lb Boneless Chuck Roast
- SEAR FIRST, THEN SLOW: Chuck roast needs that crust to stay juicy, so hit it with high heat right away—no waiting for the oven. After browning all sides (3-4 minutes per side), drop the temp to 300°F and let it cook low and slow. I used to skip the sear, and the meat always ended up dry. Don’t make that mistake.
- CHOP ONIONS LIKE A PRO: Slice yellow onions into ¼-inch thick half-moons instead of tiny dice—they’ll caramelize faster and add texture without disappearing into the sauce. If you’re short on time, microwave them for 2 minutes first to soften them up before adding to the pot. (Yes, I’ve done this—it works.)
- DON’T SKIP THE TOMATO PASTE: That can of tomato paste isn’t just for color—it deepens the flavor and thickens the sauce naturally. Mix it with a splash of water first (about 2 tablespoons) to break up the clumps before adding it to the pot. I learned this the hard way when I just dumped it in dry, and it turned into a gloopy mess.
- REST THE MEAT RIGHT: Take the roast out of the pot when it hits 195°F (about 3-4 hours total cooking time) and let it sit under foil for 10-15 minutes. This keeps all the juices locked in—cutting into it too soon will leave you with a dry, sad pile of meat. (Your future self will thank you.)
Flavor customization for these flavors
Classic Red Wine Braise
This is my go-to variation—bold red wine like Cabernet Sauvignon or Merlot adds depth while the tomato paste and rosemary create a rich, caramelized sauce. For extra richness, I add 1 tbsp balsamic vinegar during the final 30 minutes of cooking.
The wine reduces beautifully, creating a glossy sauce that clings perfectly to each slice. 🍷
Smoky Chipotle Twist
Transform this into a smoky masterpiece by adding 1 tbsp adobo sauce (from canned chipotles) along with the wine. For extra heat, include ½ tsp ground cumin and ¼ tsp smoked paprika when building the aromatic base.
The chipotle adds a slow-building smokiness that pairs amazingly with mashed sweet potatoes or cornbread. 🌶️
Herb-Infused French Style
For a more elegant touch, swap the thyme for 1 sprig fresh tarragon and 1 sprig fresh parsley, and add 1 bay leaf when simmering the braising liquid.
A splash of ½ cup dry white wine (like Sauvignon Blanc) instead of red wine keeps the flavor profile bright and herbaceous. Garnish with fresh parsley before serving for a restaurant-worthy presentation. 🌿
Sweet and Tangy Asian Fusion
Give it an unexpected twist by adding 1 tbsp soy sauce, 1 tsp grated ginger, and 1 tsp honey when deglazing with wine. Replace the rosemary with 1-inch fresh ginger slices and add 1 star anise pod during braising.
Serve over jasmine rice or steamed bok choy for a fusion dish that surprises even picky eaters. 🥢
Spicy Cajun Kick
For a Louisiana-inspired version, include 1 tbsp Cajun seasoning (like Tony Chachere’s) when searing the roast, and add ½ tsp cayenne pepper with the salt. Deglaze with ½ cup beer (like Abita Amber) instead of wine for a malty depth.
The spices create a bold, spicy-sweet contrast that works perfectly with dirty rice or corn muffins. 🔥
Creamy Mushroom Variation
Add 8 oz sliced cremini mushrooms with the onions and carrots, and stir in ½ cup heavy cream during the final 15 minutes of braising. The mushrooms add an earthy depth while the cream creates a velvety sauce.
Finish with 1 tbsp fresh thyme leaves for a luxurious touch that pairs beautifully with wild rice pilaf. 🍄
Nutrition facts
Frequently asked questions
Can I use a different cut of beef instead of chuck roast?
While chuck roast is ideal for its marbling and tenderness when braised, you can substitute with brisket or short ribs—both work beautifully with this method. Avoid leaner cuts like sirloin or flank steak, as they lack the connective tissue needed for fork-tender results. If using brisket, increase cooking time by 30-45 minutes since it’s denser.
How do I know when the roast is done without a meat thermometer?
Pierce the roast with a fork or skewer—if it slides in easily and the meat fibers pull apart cleanly, it’s done. For a more traditional test, cut into the thickest part: the meat should feel tender with no resistance, and the juices should run clear. 2.5-3 hours in the oven at 325°F is typically perfect for a 2 lb roast.
What’s the best way to reheat leftovers?
Slice the roast and reheat in a skillet with 1-2 tablespoons of beef broth over medium-low heat for 5-7 minutes, stirring occasionally. For oven reheating, cover with foil and warm at 300°F for 15-20 minutes. Never microwave—it makes the meat tough. The braising liquid reheats well too, making quick gravy for sandwiches or tacos.
Can I make this in a slow cooker instead of the oven?
Brown the roast first, then transfer everything to a 6-quart slow cooker on LOW for 6-8 hours or HIGH for 4-5 hours. Add 1 cup extra broth since slow cookers don’t reduce liquid as much. The texture will be slightly different but still incredibly tender. For best results, use the oven method for deeper caramelization.
Why did my roast turn out dry?
Overcooking is the most common cause—chuck roast is done when it’s fork-tender, not when it reaches a specific temperature like steak. Another culprit is not resting the meat after cooking. Always let it rest 15-20 minutes before slicing. If you’re unsure, check doneness at 2 hours and add time gradually rather than rushing it.

- 5 Lb Eye Round Roast Recipe: Slow-Braised to Melt-in-Mouth Tenderness - November 3, 2026
- 3-Hour Ciabatta Bread Recipe: Crusty Chews and Airy Holes Mastered - November 3, 2026
- 5 Fruit Salad Recipe: Vibrant Rainbow Layers With No Brown Spots - November 3, 2026