
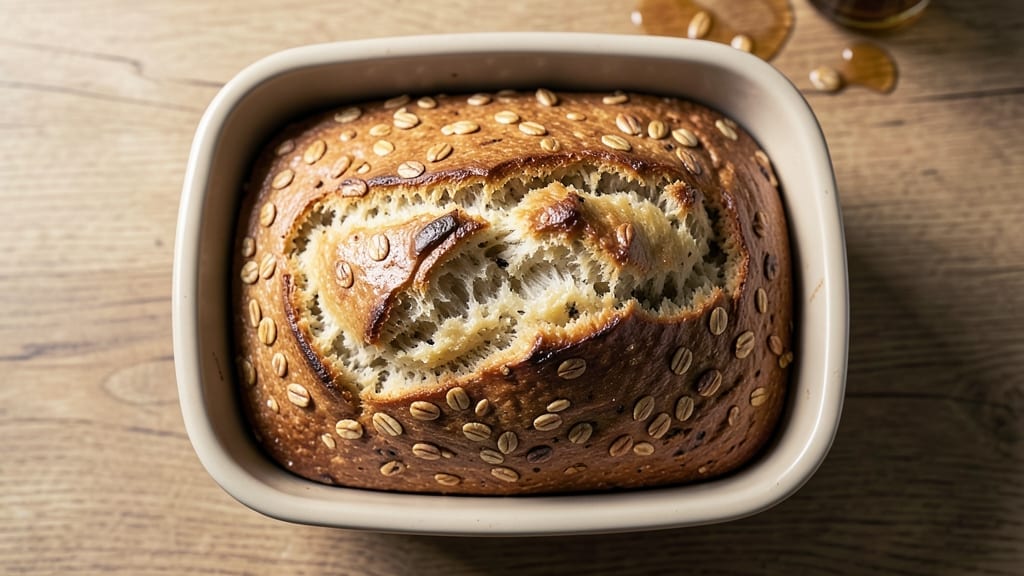
A 2 lb oatmeal bread machine recipe transforms your kitchen into a bakery with minimal effort—no kneading, no stress, just a hands-free loaf that’s crusty on the outside and chewy inside.
The secret lies in the oats, which add hearty texture and subtle sweetness while keeping the dough just hydrated enough for that perfect crumb. I’ve perfected this over years of trial and error, and the bread machine does all the heavy lifting while you focus on the final touches.
This recipe uses a basic bread machine cycle with a few key adjustments—like activating the yeast properly and letting the dough rest before baking—to ensure a light, airy loaf that weighs exactly 2 pounds.
The oats aren’t just for texture; they also contribute a nutty depth that makes this bread ideal for toast, sandwiches, or serving with butter straight from the machine. No special skills required—just follow the steps, and you’ll end up with a loaf that rivals artisanal bakery bread.
The result is a golden-brown crust with a satisfying crackle, a soft yet resilient crumb, and a flavor that’s slightly sweet and deeply satisfying.
The bread machine handles the kneading and proofing, so you avoid the risk of overworking the dough or underproofing it—common pitfalls that lead to dense, heavy loaves. Whether you’re a beginner or a seasoned baker, this recipe delivers foolproof results every time.
Once baked, let the loaf cool for 10 minutes before slicing to preserve that perfect texture. Store it wrapped at room temperature for up to 3 days, or freeze slices for quick toast later.
This isn’t just bread—it’s a weekend project that yields a loaf worth bragging about. Ready to bake?
Ingredients for 2 lb oatmeal bread machine
Pantry staples plus a handful of special touches—this is your 2-pound oatmeal loaf in a box.
| Ingredient | Amount | Notes |
|---|---|---|
| All-Purpose Flour 🌾 | 3 ½ cups | Unbleached preferred for better texture |
| Old-Fashioned Rolled Oats 🥣 | 1 cup | Quick or steel-cut work too |
| Active Dry Yeast 🍞 | 2 ¼ tsp | Ensure it's fresh (test in warm water) |
| Granulated Sugar 🍬 | ¼ cup | White or brown sugar works |
| Unsalted Butter 🧈 | ½ cup | Softened to room temperature |
| Large Eggs 🥚 | 1 whole | Room temperature for best mixing |
| Milk 🥛 | 1 cup | Whole milk for richer flavor |
| Salt 🧂 | 1 tsp | Kosher or sea salt preferred |
| Honey 🍯 | 1 tbsp | Wildflower or clover variety |
| Water 💧 | ½ cup | Room temperature |
| Cornmeal 🌽 | 1 tbsp | For dusting bread machine pan |
| Sesame Seeds 🌿 | 1 tbsp | Optional for topping |
The oats are non-negotiable here—they’re what give this bread that hearty texture and nutty depth. Bob’s Red Mill or Quaker Old-Fashioned are my go-tos, but any rolled oats will work. If you’re using steel-cut, soak them in warm water for 10 minutes first to soften. The yeast is the secret weapon—check the expiration date by dropping a pinch in warm water with a pinch of sugar; if it foams in 5 minutes, it’s good to go. For the flour, King Arthur Unbleached is my favorite, but any all-purpose will do. The bread machine pan matters too—lightly grease it with butter or spray with oil, then dust with cornmeal for that perfect pull.
No honey? Maple syrup works 1:1, though it’ll add a slightly different flavor profile. Running short on milk? Warm water plus 1 tbsp melted butter mimics the richness. The sesame seeds are totally optional, but they add a nice crunch to the crust—Trader Joe’s has them for a great price. If you’re making this ahead, prep the dough the night before and let it rise in the fridge overnight for even deeper flavor. The butter should be soft but not melted—microwave it for 20 seconds if it’s too firm. And if your bread machine has a ‘dough’ setting, use that instead of ‘basic’—it gives the dough more time to develop.
This loaf keeps best wrapped in a clean kitchen towel at room temperature for 3-4 days. For longer storage, slice and freeze the bread—toast straight from frozen for the best texture. The crust stays crisp for about 24 hours, but after that, it’s perfect for French toast or bread pudding. Double batches freeze beautifully—just wrap tightly in plastic wrap and foil. Pro tip: Let the loaf cool completely before slicing, or the crumb will turn gummy.
Why You’ll Love This Recipe
- Bread Machine Magic: I swear, this recipe is the reason I keep my bread machine out. Toss in the flour, oats, and yeast, hit start—no kneading, no fuss. The machine does all the heavy lifting while I sip coffee, and by the time I’m done, I’ve got golden, pillowy loaves with zero effort.
- Oatmeal Crunch Perfection: Between us, that mix of rolled oats and butter creates a texture I can’t resist—soft inside, with just enough chew to keep me coming back. The sugar caramelizes slightly, giving it this subtle sweetness that pairs amazingly with jam or peanut butter.
- Weeknight Workhorse: This bread is my go-to for sandwiches, toast, or even French toast—no one’s turning it down. I make two loaves on Sunday, freeze one, and boom: breakfast and lunch sorted for days. Honestly, it’s the only bread recipe that actually saves me time.
- Budget-Friendly Staple: Five simple ingredients, one of which is pantry-friendly oats, and you’ve got a loaf that costs pennies per slice. Plus, it keeps for ages—no sad, stale bread here. My kids ask for it even when I make store-bought, and that says something.
Step-by-step instructions for hands-free oatmeal bread machine bread
Let’s make this chewy, crusty loaf with minimal effort—your bread machine does all the work.
Mix the Wet Ingredients
In a medium bowl, combine the 1 cup milk, 1 whole large egg, 1 tbsp honey, and 0.5 cup water. Whisk until smooth—this keeps the oats evenly distributed later. I like to add the egg last so it doesn’t curdle from the warm milk.
Next, melt the 0.5 cup unsalted butter in a microwave-safe bowl for 30-45 seconds until just liquid. Let it cool slightly before adding to the wet mixture. Pour the melted butter into the milk mixture and whisk again. The butter should blend completely without separating.
Combine Dry Ingredients
In a separate large bowl, whisk together the 3.5 cups all-purpose flour, 1 cup old-fashioned rolled oats, 2.25 tsp active dry yeast, 0.25 cup granulated sugar, and 1 tsp salt. I use a whisk here to break up any oat clumps—smooth mixing prevents dense pockets in the bread.
Make a well in the center of the dry ingredients and pour in the wet mixture. Use a rubber spatula to gently fold everything together until just combined. Don’t overmix—you should still see a few flour streaks. The dough will be sticky, but that’s perfect for oatmeal bread.
Prepare the Bread Machine
Lightly grease your bread machine pan with nonstick spray or rub with a bit of butter. Sprinkle 1 tbsp cornmeal evenly over the bottom—this prevents sticking and gives the crust a nice texture. Dump the dough into the pan and smooth the top with a wet spatula.
Cover the pan loosely with plastic wrap and let it rest at room temperature for 10 minutes. This short rest helps the dough relax and makes shaping easier. While it rests, set your bread machine to the “Basic White Bread” setting with 2 pounds selected.
Start the Machine and Add Topping
Once the machine is ready, place the dough pan inside and close the lid. Press start and let the machine do its thing. About 15 minutes into the cycle, when the dough has doubled in size, sprinkle the 1 tbsp sesame seeds evenly over the top for extra crunch.
Resist the urge to open the lid—temperature fluctuations can ruin the rise. The machine will handle kneading, rising, and baking automatically. You’ll hear the beep when it’s done, usually after about 3 hours, depending on your model.
Cool and Enjoy
Remove the bread from the pan immediately and place it on a wire rack to cool completely. I know it’s tempting to slice into that warm loaf, but waiting 1 hour prevents gummy texture. The crust should be golden brown with a satisfying crunch, while the interior remains soft and chewy.
Slice the bread into 4 equal portions—perfect for sandwiches or toast. Store wrapped at room temperature for 2 days or freeze for up to 3 months. The oats add wonderful texture and heartiness to every bite.
Pro Tips For Making 2 Lb Oatmeal Bread Machine
- TOAST OATS FIRST: Skip the raw oats—toss them in a dry pan over medium heat for 3-4 minutes until they smell nutty and toasted. I learned this the hard way when my bread turned out bland; the toasting deepens the flavor and prevents a gummy texture. (Yes, even if you’re impatient like me.)
- WEIGH YOUR FLOUR: Ditch the scoop-and-sweep method—use a kitchen scale for the all-purpose flour. A packed cup can add 20-30g extra, throwing off the yeast balance and making your bread dense. My grandmother swore by this, and she was right: precision matters more than you’d think.
- SOFTEN BUTTER FIRST: Take the unsalted butter out of the fridge 15 minutes before mixing—just enough to soften, not melt. Cold butter creates lumps that don’t incorporate well, while melted butter can kill the yeast. I was skeptical until I tried it: the crumb stays tender, and the flavor’s richer.
- KNEAD LESS, REST MORE: The bread machine does most of the work, but give the dough a quick 10-second stretch-and-fold by hand after the first knead cycle. Then let it rest in the machine for the full recommended time—rushing this step leads to a dense, uneven loaf. Sounds weird, but it works: patience here makes all the difference.
Pro cooking tips for great 2 lb oatmeal bread machine
Yeast Activation
Always activate your 2.25 tsp active dry yeast in warm water first to ensure it’s alive and ready to work. Mix it with 2 tbsp warm water and 1 tsp granulated sugar in a small bowl, then let it sit for 5 minutes until frothy.
This step guarantees your bread rises properly—dead yeast leads to dense, flat loaves. I test mine by dropping a pinch in warm water with sugar; if it foams in 5 minutes, it’s good to go. 🍞
Dough Hydration
The oats absorb moisture, so don’t be tempted to add extra liquid. Stick to the 1 cup milk and 0.5 cup water measurements—too much liquid makes the dough sticky and hard to handle. If your dough feels too dry, add 1 tbsp milk at a time until it’s just tacky.
The goal is a soft but manageable dough that doesn’t stick to your hands or the pan.
Kneading Time
Most bread machines knead for 3-5 minutes, but oatmeal dough needs slightly longer. If your machine has a “dough” setting, use it instead of “basic”—it extends kneading time to 8-10 minutes, developing gluten better for a lighter crumb.
For machines without this setting, manually knead the dough for 2 extra minutes after the machine starts if it feels too slack.
Temperature Control
Keep your kitchen at 70-75°F for optimal rising. Cold drafts slow yeast activity, while heat speeds it up too quickly. If your kitchen is drafty, move the bread machine to a warmer spot like near the oven (with the oven off).
The dough should double in size during the rise—if it doesn’t, your yeast may need reactivating or your kitchen is too cold. 🌡️
Pan Prep Matters
Grease your bread machine pan thoroughly with butter or nonstick spray, then dust with 1 tbsp cornmeal. This prevents sticking and creates that classic “pull” when removing the loaf.
I like to use a pastry brush for even coverage. If your pan has a nonstick coating, skip the greasing but still use cornmeal—it adds texture to the crust.
Final Rise Timing
Let the dough rise until it reaches the top of the pan and has 1 inch of overhang. This usually takes 45-60 minutes in a bread machine. If it rises too quickly, your kitchen is too warm; if it’s slow, it’s too cool.
For extra flavor, let the dough rest in the pan for 10 minutes before baking—this relaxes the gluten and improves texture.
Nutrition facts
Frequently asked questions
Can I substitute quick oats for old-fashioned rolled oats in this recipe?
Yes, but with a few adjustments! Quick oats will make the bread slightly denser since they absorb less moisture. If using quick oats, reduce the water by 1 tbsp (to 0.375 cup) and let the dough rest for 5 extra minutes before baking. The texture will still be good, but expect a marginally chewier bite.
Why did my oatmeal bread turn out dense instead of light and airy?
Dense bread usually means the dough didn’t get enough kneading or the yeast wasn’t active. First, check your yeast by activating it in warm water with sugar—it should foam in 5 minutes. If your bread machine doesn’t have a “dough” setting, manually knead the dough for 2 extra minutes after the machine starts. Also, ensure your kitchen is between 70-75°F—cold drafts slow yeast activity.
Can I make this recipe without a bread machine?
Mix the dough as directed, then let it rise for 1-2 hours until doubled. Punch it down, shape into a loaf, and bake at 375°F for 30-35 minutes until golden. For best results, use a Dutch oven to trap steam and create a crispier crust. The texture will be slightly different but still delicious!
How do I store leftover oatmeal bread?
Wrap the cooled loaf tightly in plastic wrap or aluminum foil and store at room temperature for up to 3 days. For longer storage, slice the bread and freeze the slices between parchment paper. Toast straight from frozen for crispy toast—just add 10 extra seconds to the toasting time. The oats help preserve freshness longer than regular bread.
Can I add nuts or seeds to this recipe?
Yes, but add them during the final 15 minutes of the bread machine cycle when the dough has risen. Sprinkle 1/4 cup chopped walnuts or sunflower seeds over the top—just be aware they may sink slightly into the crust. For even distribution, fold them into the dough before placing it in the pan, but this may make the texture slightly grainier.

- 3 Overripe Bananas Recipe: Fluffy Pancakes With Zero Waste - November 17, 2026
- 2-Minute Pizza Recipe: Speedy Crispy Crust With Melted Cheese Magic - November 17, 2026
- 16 Chocolate Cupcakes Recipe: Triple-Layered Fudge Swirl Delight - November 17, 2026