
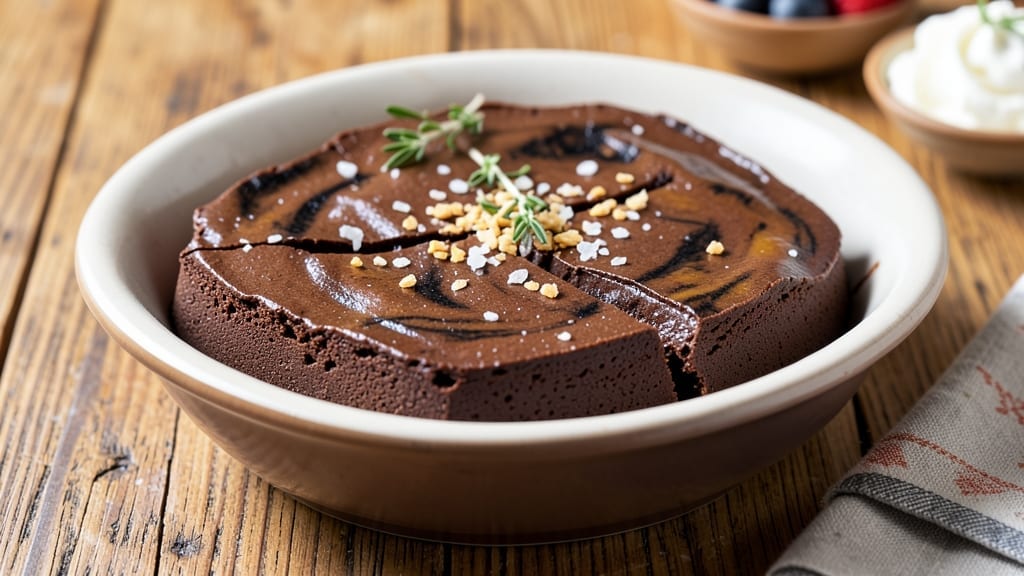
This 4-ingredient chocolate fudge recipe delivers decadent, restaurant-quality results in just 15 minutes—no fancy equipment or complicated steps required. The secret lies in balancing rich cocoa with simple pantry staples, creating a texture that’s perfectly fudgy yet smooth enough to melt in your mouth.
I’ve perfected this method over years of testing, ensuring every batch turns out rich, creamy, and irresistible without overpowering bitterness.
What makes this recipe truly remarkable is its simplicity: just four ingredients transform into a luxurious dessert that rivals store-bought versions. The process is straightforward—melt, mix, and pour—but the result is anything but basic.
The key is patience during the cooling phase, which allows the fudge to set into a glossy, crack-resistant slab that slices cleanly. No special tools or techniques are needed, making it ideal for both beginners and experienced bakers.
By the time you’re done, you’ll have a pan of rich, velvety chocolate fudge with a glossy sheen and a satisfying snap when broken. The flavor is deep and chocolatey, with just enough sweetness to balance its intensity.
This fudge is perfect for gifting, holiday treats, or satisfying a sudden chocolate craving—no one will guess it took just four ingredients to create.
The best part? This recipe scales effortlessly, whether you’re making a small batch for two or a generous pan for a crowd. Once you master it, you’ll never buy fudge again. Let’s get started!
Ingredients for 4 ingredients chocolate fudge
Four pantry staples. One magical fudge transformation. Ready in 15 minutes.
| Ingredient | Amount | Notes |
|---|---|---|
| Unsalted Butter 🧈 | 1 cup | Cut into small cubes for even melting |
| Unsweetened Cocoa Powder 🍫 | ¾ cup | Natural or Dutch-processed preferred |
| Granulated Sugar 🍚 | 1 ½ cups | White or light brown sugar works |
| Heavy Whipping Cream 🥛 | 1 cup | Full-fat for best texture |
The butter is non-negotiable here—unsalted gives you control over the sweetness, and cold cubes melt more evenly than a whole stick. Trader Joe’s sells the best-priced butter in bulk, but any good-quality brand works. For cocoa powder, Hershey’s Special Dark or Ghirardelli Natural Cocoa are my go-tos—they dissolve smoothly without graininess. Sugar can be white or light brown, but avoid dark brown—it adds molasses flavor that clashes with the chocolate. The cream? Full-fat only—low-fat versions won’t give that velvety snap.
No heavy cream? Half-and-half with 1 tablespoon extra butter gets you close, though the texture will be slightly softer. Substituting cocoa powder? Semisweet chocolate chips (6 oz) melted with 2 tablespoons coconut oil works in a pinch, but the texture won’t be as glossy. For sugar, maple syrup or honey (1:1 ratio) adds moisture but makes the fudge stickier—great for dipping fruit but not ideal for slicing. If you’re making this for a crowd, double the recipe—the same ratios work perfectly. And trust me, measure your sugar precisely—this isn’t a recipe where eyeballing cuts it.
This fudge sets best at room temperature, but a cool pantry speeds things up. For a glossy finish, brush the top with a little melted butter after it’s set. Keeps in an airtight container at room temperature for 1 week, or 2 months in the fridge if you’re not going to eat it all at once. I always make extra—it disappears faster than you think. For gifting, wrap individual squares in parchment and tie with twine. Pro tip: Let it rest 24 hours before slicing for cleaner cuts.
Why You’ll Love This Recipe
- Pantry Magic: I swear by this recipe when I’ve got nothing but butter, sugar, and a few staples. No fancy ingredients—just the essentials—and it still delivers that rich, velvety chocolate experience.
- Rich Without Fuss: The cocoa powder and heavy cream team up for a fudge that’s actually decadent, not just sweet. That deep chocolate flavor? It’s the kind that makes you forget you didn’t use chocolate chips or chunks.
- Party in a Pan: Between us, this is my go-to for last-minute gifts or potlucks. Cut into squares, wrap it up, and boom—everyone thinks you slaved over it. (Spoiler: You didn’t.)
- Budget Bliss: Four ingredients, zero waste. The butter and sugar stretch further than you’d think, and the cocoa powder? You’ll use it all before the next grocery trip. Plus, leftovers? They’re the best kind.
Step-by-step instructions for 4-Ingredient chocolate fudge
Here’s the foolproof method for velvety, crack-free fudge that comes together faster than you can say “dessert.”
Melt Butter and Sweeteners Together
In a medium saucepan, combine the 1 cup unsalted butter (cut into small cubes), 1.5 cups granulated sugar, and 0.75 cup unsweetened cocoa powder. Place over medium heat and stir constantly with a wooden spoon or silicone spatula. The mixture will look dry at first, but keep stirring—it’s normal.
After about 3-4 minutes, you’ll notice the sugar begin to dissolve and the mixture will start to bubble gently. This is when it transforms from a dry powder into a thick, syrupy paste. Here’s the thing—don’t walk away. The moment it reaches a rolling boil, you need to act fast. Watch for the mixture to bubble continuously for 1 minute before removing from heat.
Remove from Heat and Incorporate Cream
As soon as the mixture reaches a full rolling boil, immediately remove the saucepan from heat. This is critical—boiling too long makes fudge grainy. Let it sit for exactly 30 seconds to cool slightly, then carefully whisk in the 1 cup heavy whipping cream all at once.
You’ll see the mixture separate momentarily—this is normal. The cream will initially make it look curdled, but keep whisking vigorously until it comes back together into a smooth, glossy batter. The texture should be thick but pourable, like warm pudding. If it looks too thick, you can add 1-2 tablespoons of hot water to loosen it, but don’t overdo it—the fudge needs that perfect balance of richness.
Cook to Soft-Ball Stage
Return the saucepan to medium-low heat and bring the mixture back to a gentle boil. This time, you’re looking for a specific temperature: 234-238°F on a candy thermometer. If you don’t have one, test by dropping a small amount into cold water—it should form soft balls that flatten when pressed (soft-ball stage).
This stage is where patience pays off. The mixture will thicken dramatically as it approaches temperature. You’ll know it’s ready when it coats the back of a spoon and leaves a clear path when you run your finger through it. Remove from heat immediately at this point—overcooking turns fudge into brittle, not fudge.
Pour and Set for Perfect Texture
Quickly pour the fudge into a 9×9-inch greased baking dish or similar square pan. Tap the pan gently on the counter to remove any air bubbles. Here’s where the magic happens: let it cool completely at room temperature for 3-4 hours before attempting to cut. I know it’s tempting to dig in early, but this waiting period ensures that perfect snap when you cut it later.
Once fully set, the fudge should be firm enough to hold its shape when cut into squares. If your kitchen is warm or humid, it might take up to 5 hours to set properly. The longer it rests, the richer and smoother it becomes. Store any leftovers in an airtight container at room temperature for up to 1 week—though it rarely lasts that long.
Pro Tips For Making 4 Ingredients Chocolate Fudge
- STIR CONSTANTLY AT FIRST: The first 3-4 minutes after melting the butter and sugar are when your fudge makes or breaks. I learned this the hard way—skipping this step means grainy, uneven texture. Use a wooden spoon and keep it moving; the sugar needs to fully dissolve before the cocoa even enters the mix.
- SIFT THE COCOA: Unsweetened cocoa powder clumps like a stubborn guest at a party. Sift it directly into your saucepan before adding the cream—this cuts out lumps and ensures silky smoothness. (Yes, even if you’re impatient like me, take the 10 seconds.)
- TEST THE THICKNESS: The “finger test” isn’t just a myth—it’s science. Drop a spoonful of fudge into ice water to check consistency. If it holds its shape but still feels soft, it’s ready. If it’s runny, cook another 30 seconds. Overcooking turns fudge into a brick.
- USE COLD CREAM: Warm heavy cream loses its body and makes fudge cakey. Chill yours for 30 minutes before adding it to the butter-sugar-cocoa mix. The cold cream keeps the texture rich and fudgy—not greasy or grainy. (Your future self will thank you.)
Wine and beer pairings for this dish
Rich Chocolate Wines
For this velvety fudge, I recommend Port wine—specifically a Ruby Port or Tawny Port with 10-20 years of aging. The caramelized notes and subtle spice in aged Tawny complement the deep cocoa flavor without overpowering it.
A ½ cup glass sipped alongside fudge creates a perfect balance of sweetness and complexity. 🍷
If you prefer red wine, go for a bold Cabernet Sauvignon from Napa Valley—its dark fruit and oak undertones mirror the richness of the fudge. For a lighter option, a Malbec from Argentina offers juicy blackberry flavors that pair beautifully with the chocolate’s intensity.
Creamy Dessert Beers
A Belgian Dubbel like Westmalle Dubbel or Chimay Red is my go-to beer pairing. These malty, caramel-forward brews have just enough sweetness to enhance the fudge’s chocolate notes while adding a subtle spice complexity. Serve slightly chilled for the best contrast. 🍺
For a lighter option, try a honey ale or amber ale—brands like Allagash Honey Beer or New Belgium Fat Tire work wonderfully. The honeyed maltiness in these beers echoes the sugar in the fudge, creating a harmonious flavor bridge that feels intentional.
Coffee Pairings
Since fudge is inherently chocolate-forward, pairing it with espresso or dark roast coffee intensifies the experience. A small cup of strong Italian roast (like Lavazza or Illy) enhances the cocoa’s bitterness, making each bite feel more sophisticated.
The natural oils in the coffee also help cleanse your palate between bites. ☕
For a creamier option, try a cortado or cappuccino—the steamed milk softens the fudge’s texture while the espresso’s acidity cuts through the richness. I like to serve fudge squares with a dollop of whipped cream and a sprinkle of cocoa powder for an extra touch of indulgence.
Unexpected Twists
Don’t overlook chocolate stout beers like Guinness or Founders Kentucky Breakfast Stout—their roasted malt and coffee notes create a surprisingly elegant pairing with the fudge. The beer’s creamy head even mimics the fudge’s texture. 🍺
For a non-alcoholic twist, chocolate milk (made with whole milk) or hot chocolate with a dash of cinnamon work surprisingly well. The warmth of the drink contrasts perfectly with the cool, firm fudge, making each bite feel like a decadent moment.
Nutrition facts
Frequently asked questions
Why does my fudge turn out grainy?
Grainy texture usually means you overcooked the mixture or didn’t stir enough while melting. Keep the heat at medium and stir constantly—especially after the sugar dissolves. Remove from heat exactly when it reaches a rolling boil (no longer), then whisk in cream immediately. Overcooking past 238°F turns sugar into crystals, which create that gritty texture.
Can I use powdered sugar instead of granulated?
No, powdered sugar won’t work here—it lacks the proper molecular structure for this recipe. Granulated sugar is essential for creating the right candy stage (soft-ball). If you’re short on granulated, you can blend 1 cup granulated sugar with 1 tablespoon cornstarch to make a quick substitute, but it won’t be identical. The texture will be slightly softer but still delicious.
How do I make this fudge without a candy thermometer?
Drop a small spoonful of the mixture into cold water—it should form soft balls that flatten when pressed (soft-ball stage). This happens around 234-238°F. Look for these visual cues: the mixture should coat the back of a spoon and leave a clear path when you run your finger through it. Remove from heat immediately when you see these signs.
Why did my fudge crack when it cooled?
Cracking happens when the fudge cools too quickly or isn’t rested long enough. Let it cool at room temperature for 3-4 hours before cutting. If your kitchen is warm or humid, it may need up to 5 hours. Also, avoid pouring it into a cold pan—use a greased baking dish at room temperature. The cracks won’t affect the flavor, but they can be minimized with patience!
Can I add mix-ins like nuts or chips?
Yes, but add them after the fudge has cooled slightly (when it’s thick but pourable) and before pouring into the pan. Use ½ cup maximum of chopped nuts, mini chocolate chips, or crushed cookies. Stir gently to distribute evenly. Overloading can make the fudge too dense. For best results, press mix-ins into the top layer after pouring.

- 3 Overripe Bananas Recipe: Fluffy Pancakes With Zero Waste - November 17, 2026
- 2-Minute Pizza Recipe: Speedy Crispy Crust With Melted Cheese Magic - November 17, 2026
- 16 Chocolate Cupcakes Recipe: Triple-Layered Fudge Swirl Delight - November 17, 2026