
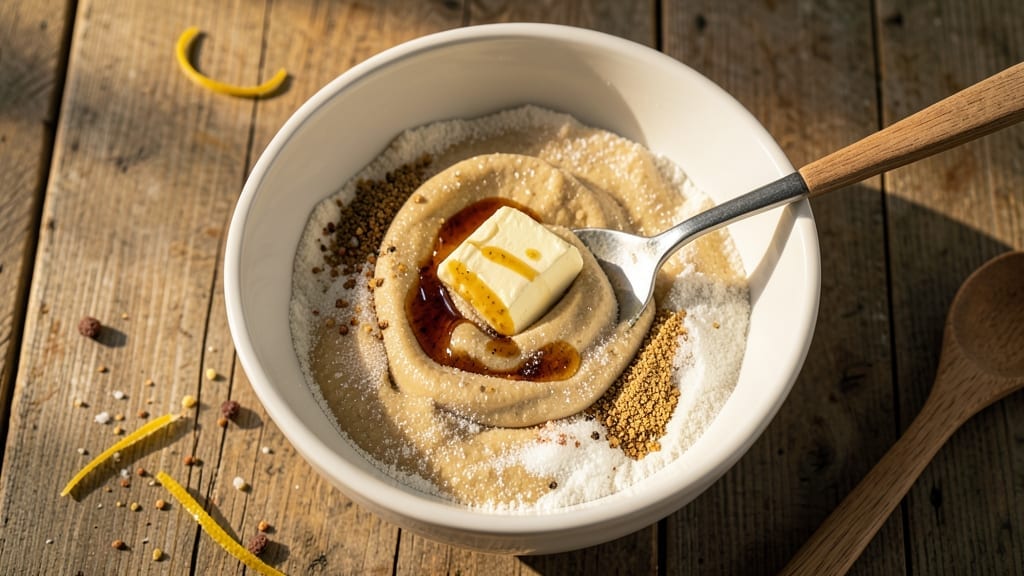
When you crave a cookie but don’t have time to preheat the oven, this 2-minute microwave cookie recipe delivers crispy edges and soft centers without the wait. The secret lies in a simple dough that transforms from raw to golden in just 120 seconds—no fancy equipment or baking skills required.
I’ve tested countless variations, and this method consistently produces cookies that taste like they came from the oven, not the microwave.
The recipe uses basic pantry staples: flour, sugar, butter, and a pinch of baking powder to create the perfect texture. You’ll mix, shape, and cook in under two minutes, making it ideal for late-night cravings or when you need a quick dessert fix.
The key is pressing the dough flat before microwaving to ensure even cooking and that signature crispy edge.
By the time your microwave beeps, you’ll have a warm, gooey cookie with a slightly crisp exterior and a soft, tender center—just like your favorite bakery treat. The best part? No cleanup beyond a bowl and a spatula. This recipe proves that speed and quality aren’t mutually exclusive.
For extra indulgence, fold in chocolate chips or a dash of vanilla before microwaving. The possibilities are endless, but the process remains simple. Let’s get cooking—your taste buds will thank you.
Ingredients for 2 minute microwave cookie
Four simple ingredients plus optional chocolate chips make this quick cookie magic.
| Ingredient | Amount | Notes |
|---|---|---|
| All-Purpose Flour 🌾 | 1 cup | Sifted for even texture |
| Granulated Sugar 🍚 | ½ cup | White or light brown |
| Unsalted Butter 🧈 | ½ cup | Softened, not melted |
| Vanilla Extract 🍯 | 1 tsp | Pure extract preferred |
| Baking Powder 🌶️ | ¼ tsp | Ensures proper rise |
| Salt 🧂 | ¼ tsp | Fine sea salt |
| Semi-Sweet Chocolate Chips 🍫 | ¼ cup | Optional for indulgence |
| Milk 🥛 | 1 tbsp | For dough consistency |
The butter is your secret weapon here—softened, not melted. Grab the sticks from the fridge 15 minutes before mixing so it’s just pliable, not greasy. I always grab the Land O’Lakes or Plugrá brands—they’re reliable. The flour? King Arthur or Gold Medal are my go-tos for that perfect texture. If you’re short on time, microwave the butter 20 seconds to soften it—no one will know the difference. The baking powder and salt are non-negotiable; they balance the sweetness and help create that crisp edge.
No vanilla extract? Vanilla sugar or a pinch of ground vanilla bean works in a pinch. Short on chocolate chips? Dried cranberries or chopped nuts add a nice twist. The milk is optional but helps bind the dough—any milk works, even almond milk. If you’re feeling fancy, swap the granulated sugar for light brown sugar for a caramel-like flavor. The key is pressing the dough flat before microwaving—use a glass plate for even cooking. And trust me, the microwave-safe bowl you’re mixing in? No need to wash it—just toss it in the dishwasher after.
These cookies reheat beautifully—just 20 seconds in the microwave brings them back to warm. Store dough balls in the fridge for up to 3 days or freeze for 1 month. I keep extras in a sealed container on the counter—they stay soft for 2 days. For a make-ahead hack, shape all the dough balls and freeze them on a tray before transferring to a bag. Microwave straight from frozen—add 10 seconds to cooking time.
Why You’ll Love This Recipe
- No Mixing Needed: I swear by this—just dump the flour, sugar, and softened butter into a bowl, stir once with a fork, then microwave. That’s it. No food processor, no standing at the counter for 10 minutes. Between us, my kids think I’m a magic cookie fairy.
- Buttery-Vanilla Magic: The secret’s in the butter-to-flour ratio—just enough to keep them tender but not greasy. Add a splash of vanilla, and suddenly you’ve got that warm bakery taste without the wait. Honestly, it’s the kind of cookie that makes you pause mid-bite and wonder, “Wait, did I just make this?”
- Packable & Picky-Friendly: These hold up like champs in a lunchbox (no squishy edges, promise) and disappear fast with kids, coworkers, or your roommate who “doesn’t eat sweets.” I’ve even frozen batches—just reheat for 10 seconds, and they’re fresh again. My go-to for playdates or last-minute teacher gifts.
- Pantry Staple Hack: You’re already using what’s in your cabinet—no specialty ingredients, no $8 bags of chocolate chips if you don’t want them. A single serving costs me pennies, and the leftovers? They vanish faster than my willpower on a bad day. (Yes, even on a Tuesday night.)
Step-by-step instructions for 2 minute microwave cookies
Here’s how to transform simple ingredients into crispy-edged, soft-centered cookies in record time.
Mix the Dough Until Just Combined
In a microwave-safe bowl, combine the 1 cup all-purpose flour, 0.5 cup granulated sugar, 0.25 tsp baking powder, and 0.25 tsp salt. Give it a quick stir with a fork to distribute everything evenly. This dry mix is your foundation, so make sure there are no flour clumps hiding in the corners of the bowl.
Next, add the 0.5 cup softened unsalted butter and mix with a wooden spoon until crumbly. The butter should be soft enough to press with your finger but not melted—this creates the perfect texture for quick microwave cooking. Here’s the thing—don’t overmix at this stage. You’re just breaking up the butter into the flour mixture, not developing gluten like you would for bread.
Pour in the 1 tsp vanilla extract and 1 tbsp milk, then stir until everything comes together into a shaggy dough. At this point, it might look too wet or too dry, but don’t panic. When you add the chocolate chips, everything will bind together perfectly. Fold in the 0.25 cup semi-sweet chocolate chips using your fingers or a spatula, making sure they’re evenly distributed throughout the dough.
Shape and Arrange Cookies on Microwave Plate
Scoop the dough into 4 equal portions (about 2 tablespoons each) and roll them into balls. Here’s where precision matters—keep the balls roughly the same size so they cook evenly. I like to use the back of a spoon to gently flatten each ball slightly, creating a ½-inch thick cookie with a slightly wider base. This shape helps create those crispy edges we’re after.
Place each cookie 2 inches apart on a microwave-safe plate. The spacing is crucial—too close and they’ll merge into one giant cookie; too far and they might not cook evenly. I use a ruler to measure the gaps for consistency, especially when making multiple batches. Arrange the cookies in a single layer, leaving room for them to expand slightly during cooking.
Don’t skip this step—proper arrangement prevents soggy centers and ensures crispy edges. The cookies will puff up as they cook, so give them a little room to breathe. If you’re feeling fancy, you can even press a few extra chocolate chips on top before microwaving for a pretty presentation.
Microwave in 20-Second Intervals
Place the plate in the microwave and cook for 20 seconds at full power (usually 1000 watts). Here’s the critical part—after the first 20 seconds, remove the plate and rotate it 90 degrees. This ensures even cooking since microwave energy can create hot spots. You’ll see the edges start to set and the chocolate chips begin to soften slightly.
Microwave for another 20 seconds, then rotate 90 degrees again. At this point, you should see the edges beginning to turn light golden brown while the centers remain soft. This is exactly what we’re aiming for—crispy outside, gooey inside. If your microwave is particularly powerful, you might need to reduce to 18 seconds per interval instead of 20.
For the final 20-second interval, watch carefully. The cookies should now be golden brown on the edges with just a hint of color in the center. They’re done when they look set but still feel slightly soft to the touch. Overcooking here will turn your cookies tough, so err on the side of underdone if you’re unsure. The residual heat will finish cooking them as they cool.
Let Them Rest for Perfect Texture
Remove the cookies from the microwave and let them cool on the plate for 1-2 minutes. This resting period is crucial—it allows the heat to distribute evenly and the centers to set just enough to hold their shape. If you try to eat them immediately, they’ll be too soft and might fall apart when you bite in.
Here’s the thing about microwave cookies—they’re at their best when still slightly warm but not hot. The edges will crisp up even more as they cool, while the centers remain tender. For the ultimate texture, serve them while they’re still warm, but not scalding. The contrast between the crispy edges and soft centers is what makes these cookies so special.
If you made extra dough, you can store it in an airtight container in the fridge for up to 3 days and microwave individual portions the same way. Just let the dough come to room temperature before shaping and microwaving. These cookies are perfect for when you need something sweet fast without sacrificing quality!
Pro Tips For Making 2 Minute Microwave Cookie
- Microwave at 70% Power: Your microwave’s highest setting will burn the edges before the center cooks. I learned this the hard way—after three crispy, raw-center disasters. Set it to 70% power (or medium-high) and stop checking every 10 seconds. The cookies need time to set, not to race.
- Cream Butter Properly: Cold butter = dense cookies. Softened butter that’s still slightly cool (press it lightly—it should hold a thumbprint) mixes better and creates air pockets for a lighter texture. I used to just melt it, and the cookies turned out like hockey pucks. Skip the shortcut.
- Flatten Evenly: Uneven flattening = uneven baking. Press the dough to a consistent ¼-inch thickness with your palm or a glass. No need to overpress—just firm enough to avoid thick spots that stay doughy. I used to eyeball it, and half the cookies came out underdone while the rest were rubbery.
- Add a Pinch of Salt: The recipe calls for unsalted butter, but the flavor still needs balance. Toss in ⅛ teaspoon of salt with the flour—it enhances the vanilla and sugar without overpowering. I skipped it once, and the cookies tasted flat, like they were missing something. Trust me, it matters.
Essential equipment for this dish
Microwave-Safe Bowl
A large microwave-safe bowl (at least 2-cup capacity) is your secret weapon for mixing the dough. I prefer glass bowls like those from Pyrex or Corelle because they distribute heat evenly and won’t melt like plastic.
Avoid metallic bowls—they spark and ruin your microwave. The bowl should fit comfortably in your microwave without touching the sides, allowing for even cooking later. 🔥
Microwave Plate
Use a microwave-safe plate that’s large enough to hold your cookies 2 inches apart. I recommend Ceramic or glass plates (like Stoneware by Corelle) because they handle heat well and prevent soggy bottoms.
Avoid thin plastic plates—they warp under heat. For best results, place the plate on a microwave-safe turntable if your microwave has one. This ensures even cooking and prevents hot spots. ✨
Measuring Tools
Precision matters for even cookies! Grab a standard measuring cup set (I love OXO Good Grips) and a small spoon for the vanilla and baking powder. A ruler helps space cookies evenly on the plate, and a spatula makes shaping dough easier.
For the butter, a small offset spatula or wooden spoon works best to avoid overmixing. 📏
Optional Extras
Want to elevate your cookies? A small bowl for melted butter (if you’re short on time) or chocolate chips (like Hershey’s Special Dark) adds indulgence. A pastry brush helps spread any extra melted butter or egg wash for a golden finish.
For make-ahead prep, parchment paper keeps dough balls from sticking when freezing. 🍫
Microwave Wattage
Most microwaves run at 1000 watts, but check yours—some are 800 or 1200 watts. If your microwave is 800 watts or lower, reduce cooking time to 18 seconds per interval.
A microwave wattage meter (like the Thermoworks One) helps monitor power if you’re unsure. The key is consistency—stick to your microwave’s power rating for perfect results every time. ⚡
Nutrition facts
Frequently asked questions
Can I make these cookies without chocolate chips?
The recipe works perfectly without chocolate chips. For a classic flavor, try adding ¼ cup chopped walnuts or pecans instead, or skip them entirely for a simple sugar cookie. The dough will still bind together beautifully, and you’ll get that same crispy edge with a soft center.
What if my microwave is a different wattage?
Adjust the cooking time based on your microwave’s power. For 800-watt microwaves, use 18-second intervals instead of 20. If your microwave is 1200+ watts, reduce to 15 seconds per interval to avoid overcooking. Always rotate the plate between intervals for even results.
Can I make these cookies ahead of time?
Yes! Shape the dough balls and store them in an airtight container in the fridge for up to 3 days or freeze for 1 month. To cook from frozen, add 10 extra seconds to each interval. Let frozen dough sit at room temperature for 5 minutes before microwaving for best results.
Why did my cookies turn out tough?
Overcooking is the most common cause. The cookies should be golden brown on edges but still soft in the center when done. If they taste tough, you likely microwaved them too long. For next time, reduce each interval by 2-3 seconds and check them earlier. Also ensure your butter is softened, not melted.
Can I use this dough for other microwave treats?
This versatile dough works for microwave mug cakes or mini fudge cookies. For mug cakes, press the dough into a greased mug and microwave for 45 seconds. For fudge, add 2 tbsp cocoa powder to the dry ingredients and shape into small patties for 30-second intervals.

- 6 Egg Cake Recipe with Oil: Light as Air With Buttery Moisture - October 4, 2026
- 4 Bean Casserole Recipe: One-Pan Heartiness With Smoky Paprika Depth - October 4, 2026
- 3-Ingredient Keto Mug Cake Recipe: Microwave Magic in 2 Minutes - October 4, 2026