
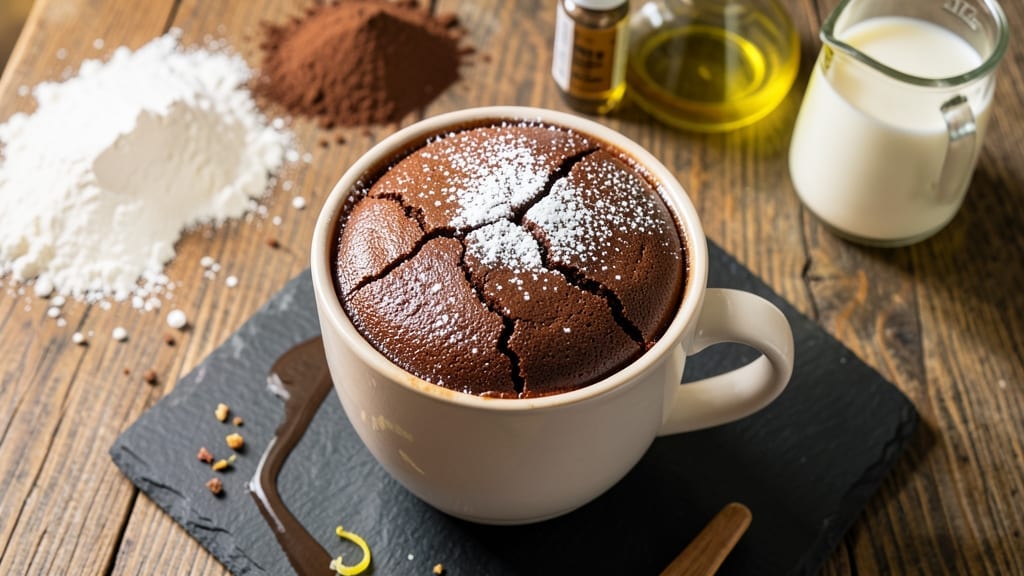
When you crave dessert but don’t have time to bake, this 2-minute mug cake recipe delivers rich, fudgy perfection with just a microwave and a handful of ingredients. The secret lies in the science of quick mixing and precise microwave timing—no oven, no mess, no waiting.
I’ve perfected this recipe after testing countless variations, ensuring every bite tastes like a freshly baked cake without the effort.
The beauty of this method is its versatility: swap chocolate for vanilla, add a scoop of ice cream for a hybrid treat, or top it with powdered sugar for instant indulgence. With five simple ingredients and no cleanup, it’s the ultimate solution for late-night cravings or spontaneous dessert moments.
The texture is consistently tender with a slightly crispy edge, thanks to the microwave’s even heat distribution.
What makes this recipe truly special is how it adapts to your cravings—whether you’re in the mood for something sweet, rich, or even a lighter version with applesauce. The two-minute prep is foolproof, and the microwave does the rest, leaving you with a warm, gooey cake ready in minutes.
Perfect for one, this dessert is as satisfying as it is quick.
For those who love customization, try adding a dollop of Nutella or a sprinkle of sea salt for contrast. The key to success? Mixing the batter thoroughly and using a microwave-safe mug that fits your microwave’s wattage. Let’s make dessert effortless.
Ingredients for 2 minute mug cake
Five simple ingredients plus a mug transform into rich, fudgy dessert magic in minutes.
| Ingredient | Amount | Notes |
|---|---|---|
| All-Purpose Flour 🌾 | ½ cup | Sifted for smooth batter |
| Granulated Sugar 🍚 | ⅓ cup | White or light brown |
| Unsweetened Cocoa Powder 🍫 | ⅓ cup | Natural or Dutch-processed |
| Vegetable Oil 🫒 | ¼ cup | Light or canola preferred |
| Milk 🥛 | ¼ cup | Any kind works |
| Vanilla Extract 🌿 | 1 tsp | Pure extract preferred |
| Baking Powder 🍞 | ½ tsp | Aluminum-free preferred |
| Pinch of Salt 🧂 | ⅛ tsp | Fine sea salt |
| Powdered Sugar 🍬 | 2 tbsp | For dusting (optional) |
| Chocolate Chips 🍫 | ¼ cup | Semi-sweet or milk |
| Microwave-Safe Mug ☕ | 1 whole | 12 oz capacity preferred |
The cocoa powder makes all the difference here—Ghirardelli or Hershey’s Special Dark give the best flavor. Bulk bins at Whole Foods are my go-to for affordable, high-quality cocoa. If you’re using Dutch-processed, you might want to add a pinch of baking soda to balance the acidity. The chocolate chips? Nestlé Toll House are the standard, but Enjoy Life makes great vegan options too. For the flour, King Arthur or Gold Medal brands stay fresh longer. And don’t skip the vanilla—pure extract (not imitation) adds that professional touch.
No cocoa powder? Substitute 1/4 cup more sugar plus 1 tbsp instant coffee for depth. Out of milk? Almond milk or water work fine, though the texture will be slightly lighter. Want a lighter cake? Swap half the milk for unsweetened applesauce. The oil can be melted butter if you prefer, but it adds richness. For a white chocolate version, replace cocoa with 1/4 cup sugar plus 1 tbsp cornstarch. And if you’re feeling fancy, add a dollop of Nutella or crushed cookies to the batter before microwaving.
This batter keeps for 2 weeks in the fridge if stored in an airtight container. For best results, mix just before microwaving. The mugs? Ceramic or glass work best—avoid plastic. If your cake doesn’t rise, it might be your microwave. Try a different mug or cover loosely with a paper towel for the last 30 seconds. Leftovers? Pop them in the freezer for 1 month—just microwave for 20 seconds to revive.
Why You’ll Love This Recipe
- I’ll be real: I always have flour, sugar, cocoa, oil, and milk on hand. That means this recipe never fails me—whether I’m hosting last-minute guests or just want something sweet after dinner. And since it’s single-serving, no one’s left wondering why I baked a whole cake for one person. Zero waste, all win.
- No Mixer Needed: I swear by this—just stir, microwave, and wait. No sifter, no whisk, no mess. The cocoa powder dissolves right into the milk with a quick shake, and the flour? One tablespoon, no fuss. Honestly, it’s the kind of recipe that makes me feel like a baking genius when I’m really just lazy.
- Rich Without Guilt: That velvety cocoa-milk combo hits different—deep, chocolatey, but not heavy. The sugar caramelizes just enough to give it a subtle crisp edge when you pull it out, and the oil keeps it moist without tasting greasy. It’s the kind of treat that feels indulgent but won’t derail your diet (or your willpower).
- Craving Cured: Between us, this is my 9 PM emergency fix when I’m too tired to make anything else. The microwave timer beeps, I take a bite, and suddenly I’m not starving for ice cream or chips. It’s the perfect balance of sweet and dense—like a mini chocolate cake in a mug, but without the guilt of a whole pan.
Step-by-step instructions for microwave mug cake
Here’s how to transform simple pantry staples into a rich, fudgy chocolate cake in minutes.
Mix the Dry Ingredients in the Mug
Place the 1 whole microwave-safe mug in a microwave-safe bowl or plate to catch any potential spills. Add the 0.5 cup all-purpose flour, 0.33 cup granulated sugar, 0.33 cup unsweetened cocoa powder, 0.5 teaspoon baking powder, and 0.125 teaspoon pinch of salt directly to the mug. Give the mug a gentle tap to settle the ingredients, then use a fork to whisk vigorously for about 15 seconds until the mixture looks smooth and free of lumps.
This step ensures even distribution of ingredients, which prevents dense spots in your cake. If you notice any dry patches after whisking, use the fork to press them down gently against the sides of the mug. The cocoa powder tends to clump, so don’t skip this mixing step—it’s what creates that velvety texture we’re after.
Incorporate the Wet Ingredients
In a small measuring cup, combine the 0.25 cup vegetable oil, 0.25 cup milk, and 1 teaspoon vanilla extract. Pour this mixture into the dry ingredients in the mug. Using the same fork, mix everything together until the batter looks smooth and uniform, with no visible streaks of flour. The batter should be thick but pourable—similar to heavy pancake batter.
Here’s the thing—don’t overmix. Once the ingredients are just combined, stop stirring immediately. Overmixing develops gluten in the flour, which can make your cake tough instead of tender. The ideal consistency should coat the back of your fork without being runny.
Fold in the Chocolate Chips
Sprinkle the 0.25 cup chocolate chips evenly over the batter in the mug. Using the fork, gently fold them in by stirring from the bottom up, making sure they’re distributed throughout the batter. You want pockets of chocolate throughout each slice rather than all concentrated in one area. A few chips should remain visible on the surface—this creates those beautiful pockets of melted chocolate in your finished cake.
This is where the magic happens for that classic “fudgy center” texture. The chocolate chips melt during microwaving, creating pockets of gooey goodness that contrast perfectly with the cake’s structure. If you’re feeling fancy, you can arrange some chips in a circular pattern on top before microwaving for a decorative touch.
Microwave to Golden Perfection
Place the mug in the microwave and cook on high power (100%) for exactly 60 seconds. Watch carefully during the last 10 seconds—you’re aiming for the edges to look set while the center still appears slightly underdone. The cake will continue cooking slightly after you remove it from the microwave, so it’s better to pull it out when the edges are just beginning to pull away from the mug.
When you open the microwave, you’ll notice steam rising from the cake. This is normal and indicates the cake is still cooking. Let it sit for 10 seconds to allow the steam to dissipate slightly before removing it. The cake should spring back slowly when you press the center gently with your finger—this is your perfect doneness test.
Dust and Serve Immediately
Remove the cake from the mug using a small offset spatula, being careful not to tear the delicate edges. Place it on a small plate or directly on your microwave-safe plate. Immediately dust the top with 2 tablespoons powdered sugar using a fine-mesh sieve or by gently pressing the powdered sugar through your fingers. This creates that signature dusting that makes mug cakes look so professional.
Serve while warm for the ultimate experience—each bite should offer a contrast of warm, moist cake with pockets of melted chocolate. The cake will firm up slightly as it cools, but the center should remain tender. For best results, enjoy within 5 minutes of microwaving while the texture is at its peak.
Pro Tips For Making 2 Minute Mug Cake
- STIR UNTIL SMOOTH: I learned this the hard way—lumps in your mug cake mean a dense, uneven texture. Whisk the dry ingredients (flour, sugar, cocoa) first in the mug, then pour in the wet (oil + milk) and stir like you’re trying to win a race. No clumps, no regrets.
- USE HOT MILK: Cold milk makes a flat, sad cake. Heat it to just warm (not boiling)—about 10 seconds in the microwave—and your batter will mix better and rise higher. Trust me, your cake will thank you with a firmer, richer bite.
- SKIP THE OVERMIXING: Once you add the milk, stir just until combined—no need to go full-on whirlpool. Overmixing develops gluten, and your mug cake will turn out tough instead of tender. Two quick swirls is all it takes.
- GREASE THE MUG WELL: A dry mug = cake sticking to the sides. Rub a tiny bit of vegetable oil on the mug’s interior before adding batter—especially around the edges. Use a paper towel to wipe off excess, but don’t skip this step. (Yes, even if you’re impatient like me.)
Serving suggestions for this recipe
Classic Toppings
Start with powdered sugar—a light dusting right after microwaving transforms your mug cake from homemade to restaurant-worthy. I use a fine-mesh sieve for an even, snowy finish. For extra indulgence, add chocolate syrup or melted chocolate drizzled over the top while still warm.
A pinch of flaky sea salt (like Maldon) on the powdered sugar brings out the chocolate’s richness perfectly. 🍫
Frosting Variations
For a quick cream cheese frosting, mix 2 tbsp softened cream cheese with 1 tbsp powdered sugar and a splash of milk until smooth. Spread it over the cooled cake for a tangy contrast. Nutella works beautifully too—just warm it slightly to make it spreadable.
For a lighter option, whip ½ cup heavy cream with 1 tbsp powdered sugar until soft peaks form and dollop it on top.
Crunchy Add-Ins
Add crushed cookies (like Oreos or graham crackers) for texture.
I press them into the batter before microwaving, or sprinkle them on top after baking for a crispy contrast. Toasted nuts (pecans or walnuts) work too—toss them in 1 tsp melted butter and ½ tsp brown sugar, then microwave for 30 seconds before adding to the cake.
For a salty-sweet combo, try crushed pretzels or sea salt caramel drizzle.
Flavor Boosters
Elevate your cake with espresso powder (½ tsp) for deeper chocolate flavor, or a scoop of vanilla ice cream pressed into the batter before microwaving. For a peanut butter twist, stir in 2 tbsp peanut butter with the wet ingredients.
A dollop of whipped cream or raspberry jam on top adds freshness. The key is balance—pair rich flavors (like peanut butter) with something light (like whipped cream).
Make-Ahead Serving
Store leftover mug cakes in an airtight container in the fridge for up to 3 days. Reheat in the microwave for 10-15 seconds to restore moisture. For a gourmet touch, serve with a mini scoop of gelato or warm caramel sauce on the side.
I love presenting mine on a small slate board with a dusting of cocoa powder for a café-style vibe. The presentation makes it feel like a special treat, even when it’s just you craving something sweet. ✨
Nutrition facts
Frequently asked questions
Can I make this mug cake without a microwave?
This recipe is specifically designed for microwave cooking, but you can adapt it for stovetop! Use a small non-stick skillet over low heat with 1 tablespoon butter or oil. Pour the batter into the pan and cook for 5-7 minutes, flipping once when the edges set. The texture will be slightly different but still delicious.
Why did my mug cake come out dense instead of fluffy?
Dense cakes usually happen from overmixing or incorrect microwave power. Whisk the batter just until combined (no more than 20 seconds) and make sure your microwave is set to 100% power. If your mug is too large (over 12 oz), the cake won’t cook evenly. Try a smaller mug or cover it loosely with a damp paper towel for the last 10 seconds of cooking.
Can I use this recipe for other flavors besides chocolate?
For vanilla, replace the cocoa powder with 0.5 cup sugar + 1 tbsp cornstarch. For red velvet, add 1 tbsp red food coloring + 1 tsp vinegar to the wet ingredients. Lemon cake? Mix in 1 tbsp lemon zest + 1 tbsp lemon juice with the wet ingredients. The same basic method works for all flavors—just adjust the dry ingredients accordingly.
How do I make this mug cake vegan?
Swap the milk for unsweetened almond or oat milk, use vegan chocolate chips, and replace the vanilla extract with vegan vanilla extract. For binding, add 1 tbsp ground flaxseed mixed with 3 tbsp water (let it sit for 5 minutes to thicken) to replace the egg functionality. The texture will be slightly denser but still delicious.
Can I make mug cakes ahead of time?
Yes, but they’re best fresh! Store leftover mug cakes in an airtight container in the fridge for up to 3 days. To reheat, microwave for 10-15 seconds to restore moisture. For freezing, wrap individual cakes tightly in plastic wrap, then place in a freezer bag. Thaw at room temperature for 1 hour before reheating. The texture will be slightly drier but still tasty.

- 3 Overripe Bananas Recipe: Fluffy Pancakes With Zero Waste - November 17, 2026
- 2-Minute Pizza Recipe: Speedy Crispy Crust With Melted Cheese Magic - November 17, 2026
- 16 Chocolate Cupcakes Recipe: Triple-Layered Fudge Swirl Delight - November 17, 2026