
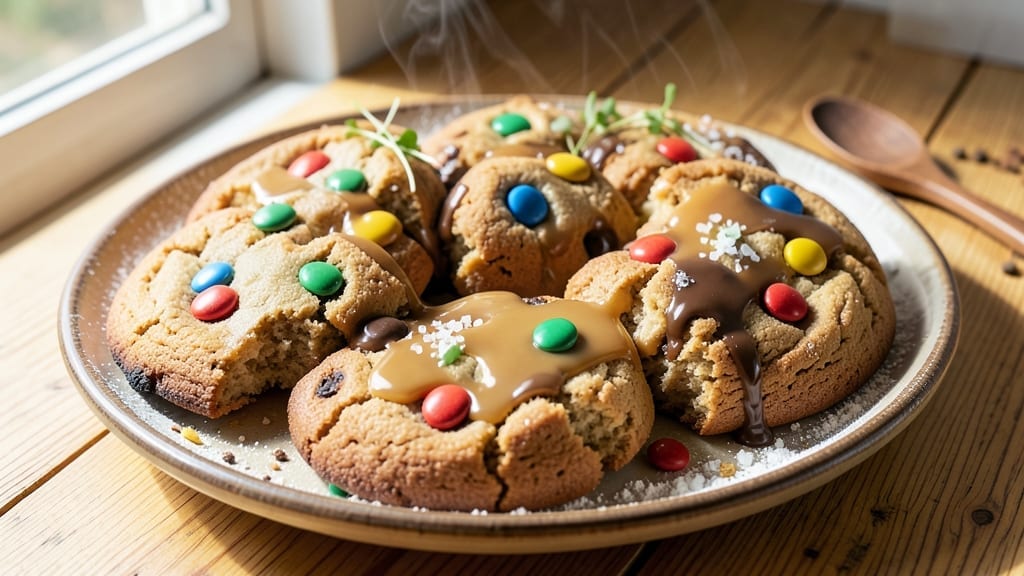
This 1970s M&M cookie recipe brings back the magic of childhood—crispy edges, chewy centers, and pockets of melty, colorful candy that make every bite feel like a trip down memory lane. 💛 The secret lies in the perfect balance of buttery dough and just the right amount of M&Ms, which stay vibrant and gooey even after baking.
I’ve tested this recipe dozens of times to recreate that nostalgic texture, and it never fails to deliver.
The dough is simple but foolproof, requiring just a few ingredients that come together in minutes. Unlike modern recipes that call for extra steps, this version relies on classic techniques—like chilling the dough—to ensure those signature crispy edges and soft centers.
The M&Ms are folded in at the last minute, so they stay bright and chewy, just like they did in the ’70s.
What you’ll end up with is a batch of cookies that looks like a rainbow exploded on a baking sheet—golden brown, slightly cracked on top, and packed with melty M&Ms in every bite.
The aroma alone will transport you back to childhood, while the taste delivers that perfect mix of buttery dough and sweet, crunchy candy. These cookies are perfect for sharing, gifting, or enjoying with a cold glass of milk.
For a twist, try adding chocolate chips or white chocolate chips to the dough before folding in the M&Ms. Serve warm for the best experience, or store in an airtight container for up to a week. Let’s bring back the magic of the ’70s with this timeless treat.
Ingredients for 1970s m&m cookie
Just ten ingredients bring back the magic of childhood M&M cookies—crispy, chewy, and packed with melty candy goodness!
| Ingredient | Amount | Notes |
|---|---|---|
| Unsalted Butter 🧈 | 1 cup | Softened to room temperature |
| Granulated Sugar 🍚 | 1 cup | White or light brown |
| Packed Brown Sugar 🍚 | ½ cup | Light or dark variety |
| Large Eggs 🥚 | 2 whole | Room temperature preferred |
| All-Purpose Flour 🌾 | 2 ½ cups | Spooning and leveling method |
| Vanilla Extract 🌿 | 2 tsp | Pure, not imitation |
| Baking Soda 🧂 | 1 tsp | For crispy edges |
| Salt 🧂 | ½ tsp | Fine sea salt preferred |
| M&Ms 🍬 | 2 cups | Original colors, not mini |
| Semisweet Chocolate Chips 🍫 | 1 cup | Optional for extra chocolate |
The butter is the secret here—use high-quality unsalted like Land O’Lakes or Plugrá. Room temperature is key (press a thumbprint into the butter—it should spring back). For the M&Ms, original colors only—they melt just right. I grab mine in bulk from Target or Walmart since they’re cheaper that way. The flour? King Arthur or Gold Medal is my go-to—never the store brand. And don’t skimp on vanilla—pure extract makes all the difference.
No vanilla extract? Vanilla sugar works at double the amount. Short on brown sugar? Use white sugar plus 1 tsp molasses. The chocolate chips are optional, but if you add them, fold them in before the M&Ms so they’re evenly distributed. For a twist, swap half the M&Ms for white chocolate chips. The dough should be thick but manageable—if it’s too sticky, chill it 30 minutes before scooping. And trust me, don’t overbake—they’ll keep crisping on the cooling rack.
Chill the dough for at least 2 hours (or overnight)—this is non-negotiable for those perfect crispy edges. Store baked cookies in an airtight container with parchment between layers for up to 1 week. For extra crispiness, bake at 375°F for 10-12 minutes—they’ll look underdone but set up as they cool. Freeze dough balls for up to 3 months—bake straight from frozen, adding 1-2 minutes.
Why You’ll Love This Recipe
- No Mixer Needed: I swear by this recipe because it’s all about the creamy butter-and-sugar magic—no electric mixer required. Just a sturdy wooden spoon and my arms for 5 minutes, and you’ve got that perfect, thick dough. (Yes, even if you’re not a baker by trade.)
- M&M Overload: Between us, these aren’t just any cookies—they’re packed with M&Ms, and I mean every bite has that melty chocolate crunch. The brown sugar caramelizes just enough to make them taste like a hug from your favorite childhood snack.
- Party-Proof Perfection: I’ve used these at potlucks, holiday gatherings, and even as a last-minute dessert for my book club. They’re sturdy enough to travel, look impressive on a tray, and disappear faster than you can say “second helping.” (Pro tip: Double the batch.)
- Budget-Friendly Nostalgia: This recipe costs me less than $5 for a dozen, and the ingredients—flour, sugar, butter—are pantry staples. Plus, the leftovers? They last forever in an airtight container, so I’m always covered when I crave that retro 70s sweetness.
Step-by-step instructions for 1970s M&m cookie recipe
Let’s make these legendary cookies with that perfect chewy center and crispy edges!
🍳 Step 1: Cream Butter and Sugars to Fluffy Perfection
In a large mixing bowl, beat the 1 cup unsalted butter (softened to room temperature) with the 1 cup granulated sugar and 0.5 cup packed brown sugar using an electric mixer on medium speed for 3-4 minutes. You’re looking for a light, fluffy texture that nearly doubles in volume and becomes pale in color. This creaming process incorporates air, which creates those beautiful crackly tops and helps the cookies spread just right.
I like to scrape down the sides of the bowl with a rubber spatula every 30 seconds to ensure everything gets fully incorporated. The mixture should look smooth and slightly thick—almost like whipped butter. Don’t rush this step, or you’ll end up with dense cookies instead of the classic chewy texture we’re after.
👨🍳 Step 2: Add Eggs and Vanilla for Rich Flavor
Add the 2 whole large eggs (room temperature preferred) one at a time, mixing on low speed for 30 seconds after each addition until fully combined. Then add the 2 teaspoons vanilla extract and mix for another 10 seconds. The mixture might look slightly curdled after adding the eggs, but that’s normal—it will come together when we add the dry ingredients.
Here’s the thing—room temperature eggs mix better and create a smoother dough. If your eggs are straight from the fridge, let them sit in warm water for 5 minutes first. The vanilla extract should be pure, not imitation, for that authentic 1970s flavor that makes these cookies so special.
👨🍳 Step 3: Combine Dry Ingredients and Chocolate
In a separate bowl, whisk together the 2.5 cups all-purpose flour, 1 teaspoon baking soda, and 0.5 teaspoon salt. Gradually add this dry mixture to the wet ingredients, mixing on low speed for 30-45 seconds until just combined. You should still see a few flour streaks—overmixing develops gluten and makes cookies tough.
Remove the bowl from the mixer and gently fold in the 2 cups M&Ms and 1 cup semisweet chocolate chips using a silicone spatula. I like to distribute them evenly throughout the dough, making sure they’re spread all the way to the edges. Yes, it looks like too much chocolate, but trust me—these cookies are worth every bite!
⏰ Step 4: Chill the Dough for Better Cookies
Cover the bowl with plastic wrap and refrigerate for at least 30 minutes (I prefer 1 hour or even overnight). Chilling solidifies the butter, which prevents the cookies from spreading too thin in the oven. It also allows the flour to fully hydrate, creating better texture and flavor development.
Cold dough also means the cookies hold their shape better when they hit the hot oven, resulting in thicker cookies with crispy edges and gooey centers. This step makes a MASSIVE difference in the final result—don’t skip it, even if you’re excited to bake!
🔥 Step 5: Bake to Golden, Crunchy Perfection
Preheat your oven to 375°F and line two baking sheets with parchment paper. Using a cookie scoop or tablespoon, drop the chilled dough into 2-tablespoon portions (about 1.5 inches apart) on the prepared sheets. These cookies spread quite a bit, so give them room to grow.
Bake for 10-12 minutes until the edges are golden brown but the centers still look slightly underdone. They’ll continue cooking on the hot pan after you remove them from the oven. Let them cool on the baking sheet for 5 minutes before transferring to a wire rack. Enjoy them warm for the ultimate experience—each bite delivers that perfect balance of crispy edges, chewy centers, and melty M&Ms!
Pro Tips For Making 1970s M&M Cookie
- Cream Butter Slowly: Dump that butter straight into the sugar mix and your dough will turn into a greasy mess. Beat the softened butter (room temp, not melted) for at least 2-3 minutes until it’s pale and fluffy—this incorporates air, which is what makes these cookies light and chewy, not dense. I used to rush this, and the cookies always tasted flat.
- Measure Brown Sugar Right: Pack that brown sugar like you’re stuffing a Thanksgiving turkey—firm but not bone-crushing. Too loose, and your cookies will spread like pancakes on a hot griddle. Too packed, and they’ll taste like caramelized sugar overload. A wet spoon helps, but don’t tap it—press it down gently.
- Chill the Dough Hard: Skip the fridge, and your M&Ms will sink like stones. Press the dough into a single disc, wrap it in plastic, and stash it in the freezer for at least 1 hour (yes, even if you’re impatient like me). Cold dough = thick cookies with those perfect chewy centers, not sad, flat pancakes.
- Use Room-Temp Eggs: Cold eggs? Your dough will seize up like a glitchy old computer. Let those eggs sit in warm water for 5 minutes before cracking them in—this keeps the mixture smooth and prevents lumps. Trust me, your future self will notice the difference when the dough comes together like butter.
Storing and reheating your 1970s m&m cookie
Room-Temp Revival
If your cookies have lost their crispy edge, revive them by placing the entire batch on a baking sheet and warming in a 300°F oven for 5-7 minutes.
This gently re-crispifies the exterior while keeping the M&Ms melty inside. For extra crunch, sprinkle with powdered sugar immediately after warming. 💫
Freezer Storage Secrets
Freeze baked cookies in a single layer on a tray before transferring to an airtight container with parchment between layers. They’ll stay fresh for up to 3 months—no need for reheating!
For dough balls, freeze them directly on a tray, then transfer to a freezer bag. Bake straight from frozen, adding 1-2 extra minutes at 375°F.
Microwave Refresh
For quick fixes, place 2-3 cookies on a microwave-safe plate with a damp paper towel. Heat on 50% power for 10-15 seconds—just enough to soften the edges without melting the M&Ms. This works best for cookies stored at room temperature for 2-3 days. Never microwave from frozen.
Oven Reheating Tips
For larger batches, spread cookies on a baking sheet and warm at 350°F for 3-5 minutes until edges are crisp again. Add 1 tsp milk or water to the pan to create steam—this helps restore that classic chewy center. Rotate the tray halfway through for even heating. 🔥
Storage Containers
Use glass containers with tight-sealing lids (like Pyrex) for refrigerator storage—they prevent moisture loss better than plastic. For long-term storage, vacuum-sealed bags extend freshness to 4 weeks in the freezer. Always label containers with the date to track freshness.
Milk Pairing
Serve reheated cookies with cold whole milk in a classic glass—it enhances the buttery flavor and balances the sweetness. For a retro touch, use 1970s-style glassware (like Pyrex or Corelle) to complete the nostalgic experience. 🥛
Nutrition facts
Frequently asked questions
Why do the M&Ms need to be folded in last?
Folding in the M&Ms at the very end keeps them bright and chewy—if mixed in earlier, they’d melt too much from the warm dough. The last-minute addition also ensures even distribution, so every bite has that classic rainbow surprise. Plus, it prevents the chocolate from bleeding into the candy coating.
Can I use mini M&Ms instead of regular ones?
Not for this recipe! Mini M&Ms are too small—they’ll bake unevenly and may not stay visible in the dough. The original-sized M&Ms melt just enough to create pockets of gooey goodness while maintaining their vibrant colors. If you’re set on mini ones, reduce to 2.5 cups and bake at 350°F for 11-13 minutes to prevent over-browning.
How do I fix cookies that spread too much?
Next time, chill the dough for at least 2 hours (or overnight) to firm up the butter. Also, scoop dough balls slightly smaller (1.5-inch diameter) and bake at 350°F instead of 375°F. For already baked cookies, they’ll crisp up more as they cool—just don’t overbake initially!
What’s the secret to crispy edges?
Three things: cold dough (chill 2+ hours), baking soda (creates lift), and high heat (375°F). The edges crisp while the centers stay soft—bake until just golden, then remove immediately. Let them cool 5 minutes on the tray before transferring.
Can I make these gluten-free?
Yes, but expect a different texture. Replace the 2.5 cups flour with 2 cups gluten-free 1:1 baking flour (like Bob’s Red Mill) plus 0.5 cup almond flour. Add 1 tsp xanthan gum if your blend doesn’t include it. These will be denser but still delicious—bake 1-2 minutes longer at 350°F.

- 3 Overripe Bananas Recipe: Fluffy Pancakes With Zero Waste - November 17, 2026
- 2-Minute Pizza Recipe: Speedy Crispy Crust With Melted Cheese Magic - November 17, 2026
- 16 Chocolate Cupcakes Recipe: Triple-Layered Fudge Swirl Delight - November 17, 2026