
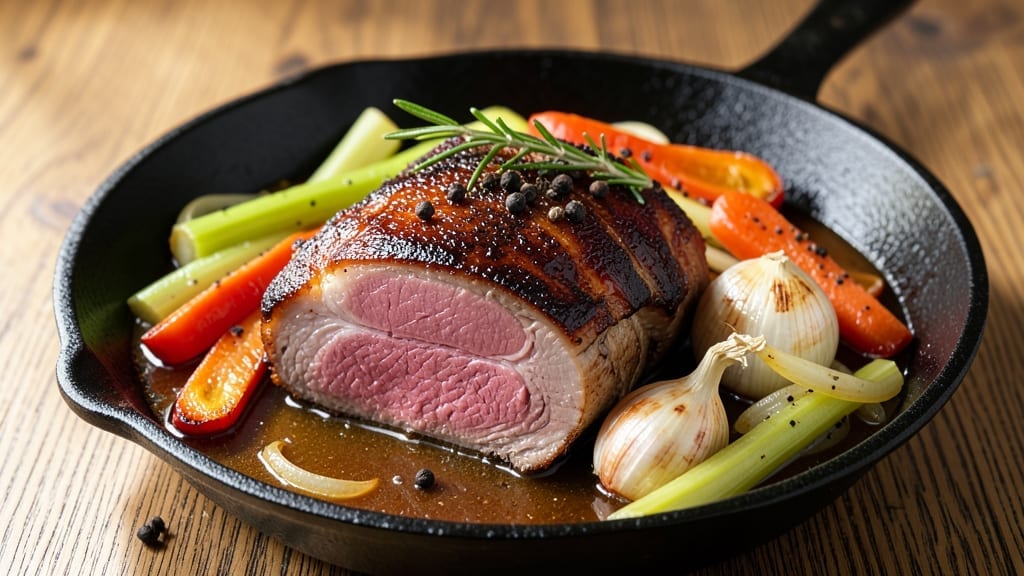
A 2-pound bottom round roast transformed from tough to fork-tender perfection requires patience and precision—but the results are worth every minute. This slow-braised method breaks down the meat’s connective tissue, yielding melt-in-your-mouth bites with deep, savory flavor.
The key lies in low-and-slow cooking paired with strategic seasoning and a long rest, ensuring every slice stays juicy and tender. What sets this recipe apart is the two-stage process: first searing the roast to lock in juices, then slow-braising until the internal temperature reaches 203°F for maximum tenderness.
No marinade or fancy techniques—just salt, pepper, and time. The result? A roast so tender it practically falls apart, with a rich, caramelized crust that adds depth to every bite.
By the time you serve it, you’ll have a juicy, restaurant-quality roast that’s perfect for meal prep or a special dinner. The slow cooking ensures even moisture distribution, while resting the meat before slicing guarantees slices that stay intact.
Serve with roasted vegetables or crusty bread to soak up the flavorful drippings. This method works for any cut of round roast, making it a foolproof solution for budget-friendly, protein-packed meals.
Whether you’re feeding a family or prepping for the week, this recipe delivers results that taste like they came from a high-end steakhouse—without the price tag.
Ingredients for 2 pound bottom round roast
Two pounds of bottom round roast transforms into melt-in-your-mouth perfection with these 13 ingredients.
| Ingredient | Amount | Notes |
|---|---|---|
| Bottom Round Roast 🥩 | 2 lb | Center-cut preferred for tenderness |
| Yellow Onion 🧅 | 1 whole | Chopped into 1-inch pieces |
| Carrots | 3 medium | Whole, peeled, cut into 2-inch chunks |
| Celery Stalks 🥕 | 3 whole | Cut into 2-inch pieces |
| Garlic Cloves 🧄 | 4 cloves | Smashed, not minced |
| Beef Broth 💧 | 4 cups | Low-sodium preferred |
| Red Wine 🍷 | 1 cup | Bold dry variety like Cabernet |
| Tomato Paste 🍅 | 2 tbsp | Smooth, not chunky |
| Kosher Salt 🧂 | 1 ½ tbsp | Diamond Crystal preferred |
| Freshly Ground Black Pepper 🌶️ | 1 tbsp | Coarse grind preferred |
| Fresh Thyme Leaves 🌿 | 1 tbsp | Or 1 tsp dried thyme |
| Olive Oil 🫒 | 2 tbsp | High smoke point preferred |
| Bouquet Garni 🌿 | 1 whole | Optional: thyme, bay leaf, parsley |
The bottom round roast is the star—center-cut pieces deliver the most tender results. Local butchers often carry this cut pre-trimmed, saving you time. If buying whole, trim excess fat to 1/4-inch thickness for even cooking. The roast should be bright red and firm to the touch, with visible marbling for moisture. For maximum tenderness, select a roast with a 1-inch diameter or larger—thinner cuts can dry out during slow braising. Pat it dry before searing to ensure a good crust.
No beef broth? Vegetable broth plus 1 tbsp soy sauce works in a pinch, though the flavor will differ slightly. The red wine adds depth—Cabernet Sauvignon or Merlot are ideal, but any dry red will do. Fresh thyme is preferred, but dried thyme at one-third the amount suffices. For tomato paste, Trader Joe’s squeeze tubes are perfect—no waste, and they keep for months. The bouquet garni is optional but adds aromatic complexity; tie thyme, bay leaf, and parsley in cheesecloth for easy removal. If you’re short on time, skip it—the recipe still delivers.
The roast and vegetables can be prepped 24 hours ahead—store them separately in the fridge. The braising liquid keeps well for 5 days in the refrigerator or 6 months frozen. For meal prep, portion the roast into 4-ounce servings and reheat in the oven at 325°F for 15 minutes. The leftovers reheat beautifully, with flavors deepening overnight. Always rest the meat 15-20 minutes before slicing to retain juices—this is non-negotiable for tender results.
Why You’ll Love This Recipe
- One-Pot Magic: I swear by this—just toss the roast, chopped veggies, and garlic into a Dutch oven with broth, cover it, and forget about it for hours. No flipping, no fussing, just hands-off perfection.
- Deep Umami Bomb: That bottom round soaks up the caramelized onions and celery like a sponge, while the garlic turns the whole thing into a flavor powerhouse—rich, savory, and just salty enough to make you lick the plate.
- Leftovers That Shine: Slice the roast thin for sandwiches, dice it into salads, or shred it for tacos—it’s that versatile. Honestly, I make this on Sundays just so I can repurpose it all week without getting bored.
- Budget Beef Winner: A 2-pound roast feeds four for under $10, and the veggies stretch it further. Between us, this is my go-to when I need hearty, filling meals without breaking the bank or the fridge.
Step-by-step instructions for slow-braised bottom round roast
This method transforms tough bottom round into melt-in-your-mouth perfection through precise timing and technique.
Sear the Roast for Deep Flavor
Heat a Dutch oven over medium-high heat until very hot. Add the 2 lb bottom round roast and sear on all sides until deeply browned, about 4-5 minutes per side. This step develops the Maillard reaction, creating complex flavors that will infuse into the braising liquid.
I press down gently on the roast during the first minute to prevent curling and ensure even contact with the pan. The goal is to achieve a rich, caramelized crust that will later dissolve into the sauce. Once properly seared, remove the roast and set it aside on a plate.
Build the Aromatic Base
In the same Dutch oven, add the 2 tbsp olive oil and heat over medium heat. Add the chopped 1 whole yellow onion, 3 medium carrots cut into chunks, and 3 whole celery stalks cut into pieces. Cook for 8-10 minutes until the vegetables soften and begin to caramelize, releasing their natural sweetness.
Add the smashed 4 cloves garlic and cook for another 30 seconds until fragrant. Stir in the 2 tbsp tomato paste and cook for 1 minute to deepen its flavor. This aromatic base forms the flavor foundation for your braise, so don’t rush this step.
Deglaze and Combine Liquids
Pour in the 1 cup red wine and scrape up all the browned bits from the bottom of the Dutch oven using a wooden spoon. This deglazing captures all the concentrated flavors that would otherwise be lost. Let the wine simmer for 2-3 minutes until reduced by half.
Add the 4 cups beef broth, the 1 whole bouquet garni, and bring the mixture to a gentle simmer. The liquid should just barely bubble at the edges. This is where patience pays off – a gentle simmer prevents the meat from cooking too quickly on the surface while allowing the connective tissues to break down slowly.
Braise Until Fork-Tender
Return the seared roast to the Dutch oven, placing it in the liquid. Add the 1.5 tbsp kosher salt and 1 tbsp freshly ground black pepper directly to the pot. Cover tightly with a lid and transfer to a preheated 300°F oven.
Braise for 3 hours, then carefully flip the roast and add the 1 tbsp fresh thyme leaves. Return to the oven and cook for another 1-2 hours until the meat is fork-tender and pulls apart easily. The internal temperature should reach 200-205°F when measured with an instant-read thermometer.
Rest and Serve with Sauce
Remove the roast from the Dutch oven and transfer it to a cutting board. Tent loosely with foil and let it rest for 15-20 minutes. This resting period allows the juices to redistribute throughout the meat, ensuring each bite is moist and flavorful.
Skimming the fat from the braising liquid before serving creates a cleaner presentation. The resulting sauce should be rich and deeply flavored, perfect for drizzling over each serving. Slice the roast against the grain for maximum tenderness and serve with the reduced braising sauce.
Pro Tips For Making 2 Pound Bottom Round Roast
- SEAR THE ROAST FIRST: Hit that 2-pound bottom round with a screaming-hot pan for 2-3 minutes per side before adding liquid—it builds flavor and locks in juices better than slow-browning. I used to skip this, and the roast always tasted bland until I tried it.
- CHOP VEGETABLES UNIFORM: Cut onions, carrots, and celery into ½-inch chunks—same size as each other so they cook at the same rate. My first batch had mushy onions and crunchy carrots because I was lazy with the knife.
- DON’T OVERCROWD THE PAN: Sauté onions, carrots, and celery in batches if needed—too many veggies steaming instead of browning. I learned this the hard way when my mirepoix turned into a sad, watery mush.
- REST BEFORE SLICING: Let the roast sit 10 minutes under foil after pulling it from the oven—it keeps the juices inside where they belong. I know, I know, you’re hungry, but cutting into it too soon means dry slices.
Make-ahead tips for leftovers
Prep Ahead Strategy
The beauty of this recipe is how much you can prep in advance. I like to chop all the vegetables—onion, carrots, and celery—and store them in a sealed container in the fridge for up to 3 days.
The roast itself can sit unseasoned in the fridge for 24 hours before searing, though I recommend patting it dry right before cooking for that perfect crust. 🌿
Braising Liquid Prep
Make the braising liquid—beef broth, red wine, tomato paste, and aromatics—a day ahead and store it in the fridge. This deepens the flavors as the spices meld together overnight.
When you’re ready to cook, simply heat it in the Dutch oven and add the seared roast. The prep time drops from 30 minutes to just 5 minutes of assembly. ✨
Freezer-Friendly Leftovers
This roast reheats beautifully, making it perfect for meal prep. After resting, portion the meat into 4-ounce servings and store in airtight containers with some of the braising sauce. Freeze for up to 3 months—just thaw overnight in the fridge before reheating.
For best results, warm in the oven at 325°F for 15 minutes to avoid drying out. 🥶
Sauce Make-Ahead Hack
Strain and reduce the braising sauce separately while the roast rests. Store it in a jar in the fridge for up to 5 days or freeze for 3 months. This lets you quickly reheat and drizzle over the roast later, saving time on busy nights.
I often double the sauce and use it for pasta or mashed potatoes the next day. 💡
Vegetable Pre-Cook Shortcut
For even faster prep, par-cook the vegetables—onion, carrots, and celery—in the microwave for 5 minutes before adding them to the Dutch oven. This cuts down on stovetop time and ensures they soften evenly during braising.
Just remember to add them raw if you want that caramelized depth from searing. 🔥
Seasoning Prep
Mix the kosher salt, black pepper, and thyme in a small bowl ahead of time. This saves you from measuring spices mid-cook and ensures even seasoning. Store the mixture in a small jar for up to 2 weeks—it’s perfect for other braised dishes too.
I like to label it “Braise Blend” so I don’t forget what’s in it. 🧂
Nutrition facts
Frequently asked questions
Why does this recipe call for such a long braising time?
The 3-5 hour braising time is essential for transforming tough bottom round into fork-tender meat. This cut contains more connective tissue than premium cuts, so slow cooking at 300°F breaks it down into gelatin, creating that melt-in-your-mouth texture. The magic happens when the internal temperature reaches 200-205°F—this is when collagen fully converts to gelatin.
Can I use a different cooking method like a slow cooker?
Yes! Transfer the seared roast and all ingredients to a slow cooker and cook on Low for 8 hours or High for 5-6 hours. The key is maintaining that 200-205°F internal temperature. For best results, use a meat thermometer and add 30-60 minutes of oven time at 300°F at the end to achieve the proper doneness.
What’s the best way to slice the roast for maximum tenderness?
Always slice against the grain—look for the long muscle fibers and cut perpendicular to them. This shortens the muscle fibers, making each bite more tender. For a 2 lb roast, you’ll get about 6-8 slices. Use a sharp knife and cut through the center first, then work outward to maintain even thickness.
How do I prevent the roast from drying out?
The secret is in the resting time! After removing the roast from the oven, tent it loosely with foil and let it rest for 15-20 minutes. This allows juices to redistribute throughout the meat. Also, avoid overcrowding the Dutch oven during braising—leave some space around the roast for proper heat circulation.
What are the best sides to serve with this dish?
This rich, flavorful roast pairs beautifully with starches and vegetables that complement its deep flavors. Try creamy mashed potatoes, crusty bread to soak up the sauce, or roasted root vegetables like carrots and parsnips. For a lighter option, a fresh green salad with a tangy vinaigrette cuts through the richness.

- 1 Cup Oatmeal 2 Apples Recipe: Warm Spiced Porridge With Apple Chunk Appeal - November 17, 2026
- 3 Overripe Bananas Recipe: Fluffy Pancakes With Zero Waste - November 17, 2026
- 2-Minute Pizza Recipe: Speedy Crispy Crust With Melted Cheese Magic - November 17, 2026