
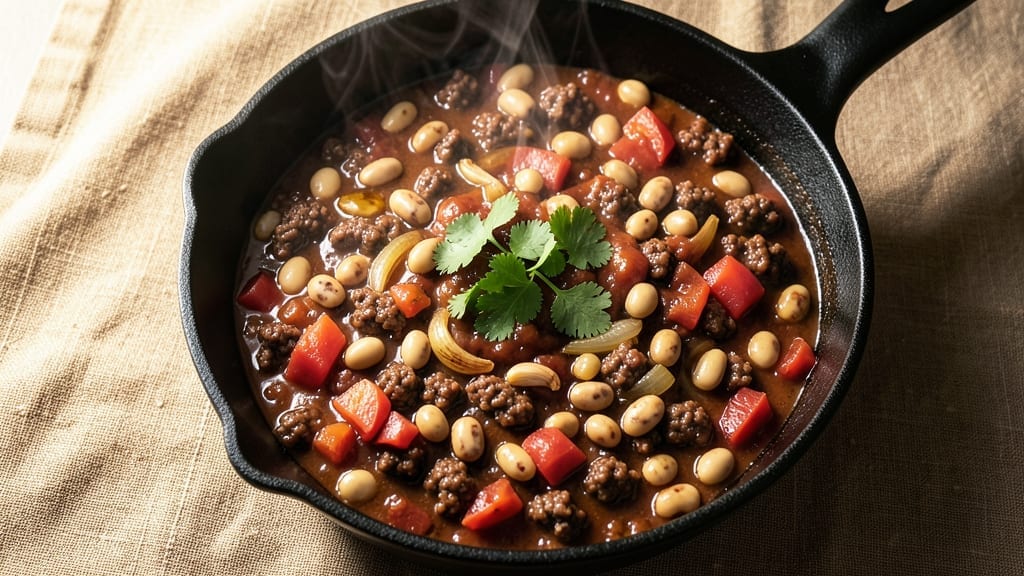
A 2-quart chili recipe that delivers deep, smoky flavors and hearty texture is the perfect way to feed a crowd without overwhelming your kitchen. This version simmers all day, transforming tough cuts of meat and beans into tender, flavorful bites that beg for seconds.
The secret lies in slow cooking—low and slow creates rich, complex flavors that canned or quick versions simply can’t match.
What sets this chili apart is the balance of ingredients: ground beef for heartiness, kidney beans for texture, and a blend of spices that build layers of warmth without overpowering. The recipe yields exactly 2 quarts, perfect for 4-6 servings, and scales easily if you need more.
No fancy techniques required—just patience and a few simple steps to unlock restaurant-quality results at home.
By the time it’s done, you’ll have a pot of chili with tender meat that falls apart, beans that soak up all the smoky flavors, and a broth so rich it coats every spoonful.
The aroma alone will have everyone gathering around the table, and the first bite delivers that satisfying combination of heat, depth, and comfort that makes chili a classic.
Whether you’re serving it with cornbread, tortilla chips, or a sprinkle of shredded cheese, this chili is designed to be versatile. The instructions are straightforward, but the flavors develop over time—so let it simmer while you handle other tasks. Here’s how to make it perfectly every time.
Ingredients for 2 quart chili
Simple pantry staples that transform into smoky, hearty chili with just time and patience.
| Ingredient | Amount | Notes |
|---|---|---|
| Ground Beef (80/20) 🥩 | 1 ½ lb | Lean-to-fat ratio for best flavor |
| Kidney Beans 🌱 | 1 cup | Dried or canned, drained |
| Diced Tomatoes (28 oz can) 🍅 | 1 can | Fire-roasted preferred for smokiness |
| Tomato Paste 🍅 | 2 tbsp | For concentrated depth |
| Onion (Yellow) 🧅 | 1 whole | Diced, medium size |
| Garlic Cloves 🧄 | 4 cloves | Minced, fresh preferred |
| Chili Powder 🌶️ | 2 tbsp | Medium heat variety |
| Ground Cumin 🌿 | 1 tbsp | Toasted for deeper flavor |
| Smoked Paprika 🌶️ | 1 tbsp | For authentic smokiness |
| Salt 🧂 | 1 ½ tsp | Adjust to taste |
| Black Pepper 🌶️ | ½ tsp | Freshly ground preferred |
| Beef Broth 💧 | 2 cups | Low-sodium preferred |
| Dark Brown Sugar 🍚 | 1 tbsp | Balances acidity |
The beef is your flavor foundation—80/20 ground chuck gives you that rich, juicy bite. Costco or Kroger usually have it pre-ground, but if you’re buying a whole chuck roast, ask the butcher to grind it fresh. Kidney beans? Canned is fine (just drain and rinse), but dried beans soak up all the smoky flavors better. For the tomatoes, Muir Glen fire-roasted is my go-to—they’ve got that perfect smoky kick that cuts through the richness of the beef. If you can’t find it, any good-quality canned diced tomatoes work, but avoid the watery, mushy ones.
No chili powder? Mix 1 tbsp paprika + 1 tsp cumin + pinch of cayenne in a pinch. Smoked paprika is non-negotiable for that authentic chili flavor—Penzeys or Trader Joe’s carry great options. Brown sugar might sound odd, but it balances the acidity from the tomatoes and beef broth. Low-sodium broth is key here—you’ll be adding plenty of salt later. The onion and garlic can be prepped ahead and stored in the fridge for up to 3 days, saving you time on cooking day. And if you’re short on time, pre-cooked beans cut prep down by half.
This chili tastes even better the next day—3-4 days in the fridge with the lid slightly loose lets the flavors meld perfectly. For leftovers, I portion into containers with a sprinkle of cheese on top—freezes beautifully for up to 3 months. The broth reduces as it cooks, so if it looks too thin after simmering, uncover and reduce by 10 minutes on medium heat. And trust me, double the batch—you’ll want seconds.
Why You’ll Love This Recipe
- No-Fuss Prep: I swear by this recipe because it’s literally five ingredients plus a pot. Brown the beef, dump in the onions and paste, then toss in the tomatoes and beans—no chopping, no fuss. Even when I’m dragging after work, this still tastes like I put in effort.
- Deep, Rich Satisfaction: That 80/20 ground beef? Chef’s kiss. The fat renders down into the tomato paste, creating this velvety, smoky base that clings to every bean. It’s the kind of chili where the first bowl disappears faster than you can say “seconds.”
- Leftovers That Don’t Suck: Honestly, I make this on Sundays just for the leftovers. The flavors deepen overnight, and it reheats like a dream—no dry, sad chili here. Pack it for lunch or freeze half; it’s still hearty and delicious days later.
- Budget-Friendly Crowd-Pleaser: Two quarts feeds my family of four and leaves enough for my neighbor who always drops by. Ground beef and kidney beans stretch for miles, and the canned tomatoes cut costs without skimping on taste. My wallet and my taste buds win.
Step-by-step instructions for deep-smoky beans and meat chili
Here’s how to build a chili that develops rich, layered flavors through slow simmering.
Brown the Ground Beef Thoroughly
Heat a large Dutch oven over medium-high heat and add the 1.5 lb ground beef (80/20). Break it apart with a wooden spoon, letting it cook undisturbed for 3-4 minutes until it loses its raw color and starts to brown. This step is crucial—it develops deep meaty flavor that infuses the entire chili.
Once the beef begins to release fat and brown in spots, use a spoon to break it into smaller pieces, about ½-inch in size. Continue cooking until all the meat is browned and no longer pink, about 8-10 minutes total. This should yield about ¼ cup of rendered fat in the pot—don’t drain it. That fat carries flavor and helps build the chili’s rich base.
Sauté Onions and Garlic for Flavor Foundation
Add the diced yellow onion to the Dutch oven and cook for 4-5 minutes, stirring occasionally, until softened and translucent. The onions should caramelize slightly at the edges, adding natural sweetness to the chili. Here’s the thing—don’t rush this step. Well-cooked onions form the flavor backbone of chili.
Stir in the 4 minced garlic cloves and cook for 30 seconds until fragrant. Garlic burns quickly, so watch closely. When you can smell that rich, toasty aroma, it’s time to move to the next ingredients. The garlic should be golden but not browned—just enough to release its sweet, aromatic oils.
Build the Chili Base with Spices and Tomatoes
Add the 2 tbsp chili powder, 1 tbsp ground cumin, 1 tbsp smoked paprika, 1.5 tsp salt, and 0.5 tsp black pepper to the pot. Stir vigorously for 1 minute to toast the spices and release their aromatic oils. You’ll see the spices darken slightly and smell their earthy, smoky notes—this is where the chili gets its complex flavor profile.
Pour in the 2 tbsp tomato paste and stir to combine completely, letting it cook for 1 minute until it darkens and thickens. Then add the 1 can diced tomatoes (with juices) and 2 cups beef broth. Stir well to incorporate all the spices into the liquid. The mixture should be vibrant red with visible chunks of tomato.
Simmer the Chili for Deep Flavor Development
Bring the chili to a gentle boil over medium-high heat, then immediately reduce heat to low. Add the 1 cup kidney beans and stir. The chili should simmer steadily, with small bubbles breaking the surface but not a full rolling boil. This gentle simmer is what creates those rich, developed flavors.
Cover the pot and let the chili cook for 1.5 hours, stirring occasionally. The beans will soften and absorb the flavors, while the meat will become tender and the spices will meld together. Here’s the secret: don’t lift the lid during this time—every time you do, you lose heat and moisture. Trust the process and let it work its magic.
Finish and Adjust for Perfect Balance
After 1.5 hours, taste the chili and adjust seasoning if needed. Add more salt if it’s bland, or more chili powder if you want more heat. Stir in the 1 tbsp dark brown sugar to balance any acidity from the tomatoes. This step ensures your chili has the perfect harmony of flavors—sweet, smoky, spicy, and savory.
Let the chili sit off the heat for 10 minutes before serving. This resting period allows the flavors to fully meld together. Serve with crusty bread or cornbread to soak up all that rich chili. The texture should be thick but not pasty, with tender meat, softened beans, and a sauce that coats the back of a spoon.
Pro Tips For Making 2 Quart Chili
- CRANK THE HEAT FIRST: Brown that ground beef fast and hot—no simmering yet. I used to let it cook slow, and the chili always tasted flat. Two minutes of sizzling at medium-high gets the beef crispy and the onions caramelized before you even add the tomatoes.
- DRAIN AND RINSE BEANS: Skip the canned beans straight from the jar, and your chili won’t turn into a soup. Drain and rinse those kidney beans first—they hold more water than you think, and that extra liquid dilutes the flavor. (Yes, even if the label says “ready to eat.”)
- STIR IN PASTE LAST: Add the tomato paste when the onions are soft but not browned—about 3 minutes before the tomatoes. I learned this after a batch where the paste burned and made the whole thing taste bitter. Wait until the pot’s hot but not searing.
- USE A SPLASH OF BEER: No alcohol in your kitchen? Skip it. But if you’ve got a cold one, add ½ cup of beer (or broth) with the tomatoes. It cuts the acidity and deepens the flavor without extra effort. (I know, I know—it’s not traditional, but it works.)
Regional styles of 2 quart chili
Texas-Style Chili
This version keeps it simple with just beef, beans, and a bold spice blend—no tomatoes! Brown 1.5 lb ground beef in a Dutch oven, then add 1 large onion and 4 garlic cloves until soft.
Stir in 3 tbsp chili powder, 1 tbsp cumin, 1 tbsp smoked paprika, and 2 cups beef broth. Simmer 1.5 hours with 1 cup kidney beans, then adjust salt to taste. The result?
A thick, meaty chili with deep, smoky heat—just like you’d find at a Texas chili cook-off. 🌶️
New Mexico Red Chili
For a sweeter, slightly spicier take, add 1 can (15 oz) red enchilada sauce and 1 cup diced green chiles (like Ro-Tel) to the base. Use 1 tbsp cocoa powder and 1 tsp cinnamon for depth, then simmer with 1 cup pinto beans instead of kidney beans.
This version is thicker and richer, with a touch of chocolatey warmth that balances the heat. Serve with fresh tortilla chips for scooping. 🌵
Carolina-Style White Chili
Swap the tomatoes for 4 cups chicken broth and add 1 lb shredded chicken (cooked separately) along with 1 cup white beans. Use 1 tsp turmeric for color and ½ tsp cayenne for heat.
Simmer 45 minutes to let flavors meld, then top with avocado slices and cilantro. This creamy, mild chili is a Southern classic—perfect for cooler weather. 🥑
Southwest Fusion Chili
Boost the flavors with ½ cup corn kernels, ½ cup diced bell peppers, and 1 jalapeño (seeds removed). Add 1 tsp oregano and ½ tsp coriander to the spice mix, then simmer with 1 cup black beans.
Top with sour cream, shredded cheese, and green onions for a Tex-Mex twist. This version is bright, fresh, and packed with texture. 🌶️💛
Slow-Cooker Adaptation
For hands-off cooking, brown the beef in a skillet first, then transfer everything to a 6-quart slow cooker. Cook on low for 6-8 hours or high for 4 hours.
The slow cooker keeps the chili tender and flavorful without constant monitoring. Add 1 extra cup of broth if it looks too thick at the end. Perfect for busy days! ⏰
Nutrition facts
Frequently asked questions
Can I use ground turkey or chicken instead of beef?
For a lighter option, swap the beef for 1.5 lb ground turkey or chicken, but reduce cooking time to 1 hour since poultry cooks faster. Use chicken broth instead of beef broth to complement the flavor. The texture will be slightly leaner, but still delicious with a touch of cream or cheese on top.
What if my chili is too thin or too thick?
For thin chili, simmer uncovered on medium heat for 10 minutes to reduce the liquid. If it’s too thick, stir in ½ cup broth or water. The ideal consistency should coat the back of a spoon but still be spoonable. For extra thickness, mash some beans with a fork before adding them back to the pot.
How can I make this chili spicier or milder?
For more heat, add ½ tsp cayenne pepper or 1 chopped jalapeño while simmering. To mellow it, reduce chili powder to 1 tbsp and add 1 tsp cocoa powder for depth instead. Always taste before serving—you can adjust flavors even after cooking!
Can I prepare this chili ahead of time?
Yes! This chili tastes even better the next day. Let it cool, then refrigerate in an airtight container for up to 4 days. For freezing, portion into containers with a sprinkle of cheese on top—it keeps well for 3 months. Reheat gently on low heat or in the microwave, stirring occasionally to prevent drying out.
What are the best toppings for this chili?
Classic options include shredded cheddar, sour cream, chopped green onions, or crushed tortilla chips. For extra flavor, try avocado slices, pickled jalapeños, or a dollop of Greek yogurt. Serve with warm cornbread or crusty rolls to soak up every last bite!

- 5 Lb Eye Round Roast Recipe: Slow-Braised to Melt-in-Mouth Tenderness - November 3, 2026
- 3-Hour Ciabatta Bread Recipe: Crusty Chews and Airy Holes Mastered - November 3, 2026
- 5 Fruit Salad Recipe: Vibrant Rainbow Layers With No Brown Spots - November 3, 2026