
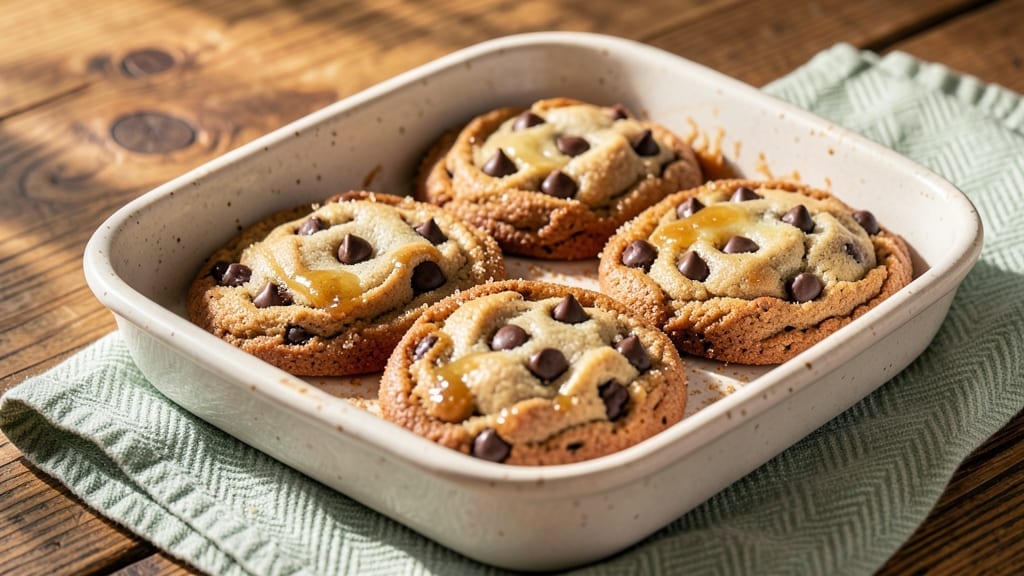
This 2-serving chocolate chip cookie recipe delivers the perfect balance of crispy edges and gooey centers—without the guilt of baking an entire batch. 💛 The secret lies in precise measurements and a 15-minute bake time that yields two perfectly portioned cookies, ideal for sharing or satisfying a single craving.
I developed this after years of testing cookie recipes, always searching for that ideal texture and flavor without the excess. What sets this recipe apart is its simplicity—just 5 ingredients and a foolproof technique that ensures consistent results every time.
The dough comes together in minutes, with a 30-minute chill (optional but recommended) that prevents excessive spreading. Using brown sugar adds depth to the flavor, while a mix of melted butter and chilled butter creates the perfect balance of richness and texture.
By the time they emerge from the oven, you’ll have two cookies with golden, crackly edges and a soft, chewy center, studded with pockets of melted chocolate.
The aroma alone will transform your kitchen into a cozy haven, and each bite delivers that classic chocolate chip cookie experience—just scaled down for two. Perfect for a quick treat, a small gathering, or when you’re craving something sweet but don’t want to bake a full batch.
Here’s how to make them!
Ingredients for 2 serving chocolate chip cookie
Five simple ingredients for two perfect cookies—no waste, all flavor.
| Ingredient | Amount | Notes |
|---|---|---|
| All-Purpose Flour 🌾 | ½ cup | Sifted for light texture |
| Packed Brown Sugar 🍚 | ¼ cup | Light or dark preferred |
| Unsalted Butter 🧈 | ¼ cup | Cold, cubed plus melted |
| Semisweet Chocolate Chips 🍫 | ¼ cup | Enjoy Life brand for allergies |
| Large Egg 🥚 | 1 whole | Room temperature preferred |
| Vanilla Extract 🌿 | ½ tsp | Pure vanilla extract |
| Fine Sea Salt 🧂 | ¼ tsp | Diamond Crystal preferred |
The butter is key here—use half cold cubed, half melted for that perfect balance of crispy edges and chewy centers. European-style butter like Plugrá or Land O’Lakes works best, but any unsalted will do. Brown sugar adds depth, so don’t substitute white—it’s worth the extra penny. Chocolate chips? Enjoy Life brand is my go-to (it’s allergy-friendly too), but any good-quality chips will melt beautifully. Flour matters too—King Arthur or Gold Medal are my favorites for consistent texture. Grab a small bag from the grocery store, or use what you’ve got if it’s fresh.
No vanilla extract? Vanilla bean paste at half the amount gives you those little specks of magic. Short on butter? Coconut oil works in a pinch (it’s neutral in flavor), but trust me on the butter for that classic taste. Chocolate chips too expensive? Chop your own chocolate bar—just make sure it’s at least 60% cacao for that melty goodness. The salt is non-negotiable—Diamond Crystal kosher salt dissolves perfectly, but any fine sea salt works. And if you’re feeling fancy, add a pinch of flaky sea salt on top after baking for extra crunch.
Chill the dough for 30 minutes if you can—it’s worth the wait. The cookies keep in an airtight container for 3 days at room temperature, or freeze for 3 months (wrap individually in plastic). For reheating, pop them in the oven at 300°F for 2-3 minutes—they’ll taste fresh-baked every time. I always make a double batch and freeze half—perfect for when cookie cravings strike unexpectedly.
Why You’ll Love This Recipe
- No Mixer Needed: I swear by this—just creaming the cold butter and brown sugar with my fingers until it’s light and fluffy. No electric mixer, no fuss, and the texture comes out just right.
- Melty Magic Core: That crispy edge with the gooey chocolate center? It’s all in the brown sugar and slightly underbaked edges. Honestly, I’ve tried fancier recipes, but this one delivers every time—no tricks, just pure chocolatey satisfaction.
- Half-Batch Brilliance: Two servings means I can bake one batch for myself and freeze the other for when I’m too tired to cook. (Yes, even on a Tuesday night.) The butter stays fresh longer in the dough, too—no wasted ingredients.
- Budget-Friendly Indulgence: Five ingredients, all pantry staples, and it costs me less than $3 for two cookies. Between us, this is my go-to when I want to feel like I’m treating myself without breaking the bank.
Step-by-step instructions for perfect 2-Serving chocolate chip cookies
Here’s how to make rich, chewy cookies with just the right amount of chocolate—no overbaking, no mess.
🍳 Step 1: Cream Butter and Sugar Until Light and Fluffy
In a medium bowl, combine the 0.25 cup unsalted butter (cold, cubed) and the 0.25 cup packed brown sugar. Using a hand mixer on medium-high speed, beat for 2-3 minutes until the mixture is pale, fluffy, and nearly doubles in volume. You’ll see the butter transform from grainy to smooth and airy—this is your signal it’s ready.
I like to scrape the sides of the bowl with a rubber spatula every 30 seconds to ensure everything gets incorporated. The butter should leave a slight impression when pressed with your finger, but not be greasy. This creaming process is what creates those beautiful crackly tops and chewy centers we all love.
👨🍳 Step 2: Add Egg, Vanilla, and Dry Ingredients
Add the 1 whole large egg (room temperature) and the 0.5 teaspoon vanilla extract to the butter-sugar mixture. Mix on low speed for 30 seconds until just combined. The batter will look slightly curdled, but that’s normal—it will smooth out when we add the dry ingredients.
In a separate small bowl, whisk together the 0.5 cup all-purpose flour (sifted), 0.25 teaspoon fine sea salt. With the mixer on low speed, gradually add the dry ingredients to the wet mixture, mixing just until combined. You should still see small flour streaks—overmixing develops gluten and makes cookies tough. Stop mixing as soon as the dough comes together.
🥘 Step 3: Fold in Chocolate Chips and Chill
Using a silicone spatula, gently fold in the 0.25 cup semisweet chocolate chips until evenly distributed throughout the dough. The chips should be spread throughout without clumping. Here’s the thing—don’t worry if the dough looks too soft or sticky. It will firm up when chilled.
Cover the bowl with plastic wrap and refrigerate for at least 30 minutes (up to 24 hours if you want to prep ahead). Chilling is crucial—it firms up the butter, prevents excessive spreading, and allows the flour to fully hydrate. Pro tip: Press a piece of dough between your fingers—if it holds its shape, it’s ready to bake.
🔥 Step 4: Scoop and Bake for Perfect Texture
Preheat your oven to 350°F and line a baking sheet with parchment paper. Using a 2-tablespoon cookie scoop (or a tablespoon measure), drop the dough onto the prepared baking sheet, spacing the cookies about 2 inches apart. They’ll spread slightly during baking, so don’t crowd them.
Bake for 10-12 minutes until the edges are golden brown but the centers still look slightly soft. The cookies should pull away from the edges of the baking sheet but still be slightly underdone in the middle—that’s how you get that perfect chewy texture. If you’re unsure, err on the side of underbaking—they’ll firm up as they cool.
⏰ Step 5: Cool and Enjoy Warm
Remove the cookies from the oven and let them cool on the baking sheet for 2 minutes before transferring to a wire rack to cool completely. This brief resting period helps set the cookies’ shape while keeping them warm and gooey inside. Real talk: the first cookie is always the best when it’s still warm!
For the ultimate experience, serve immediately with a glass of cold milk. Each bite should deliver that perfect balance of crispy edges, chewy centers, and melty chocolate. Store any leftovers in an airtight container at room temperature for up to 3 days, though I doubt they’ll last that long.
Pro Tips For Making 2 Serving Chocolate Chip Cookie
- Use Cold Butter, Not Soft: I learned this the hard way—when butter’s too soft, cookies spread like pancakes. Take that ½ cup (1 stick) straight from the fridge, cut it into chunks, and let the dough handle the melting. The edges stay crisp, and you won’t end up with flat, sad discs.
- Mix Just Until Combined: Overworking the dough makes tough cookies. After adding the egg, stir until the flour barely disappears—lumps are fine. The moment you see a smooth ball, stop. That extra folding develops gluten, and you’ll regret it when they turn out like crackers.
- Preheat to 375°F, No Less: Skimp on the oven temp, and you’ll get dense, underbaked cookies. A hot oven (375°F) ensures quick browning and even cooking. Use an oven thermometer—mine was off by 25°F before I caught it. Place the pan on the middle rack for the most consistent results.
- Chop Chips for Chewy Centers: Store-bought chips melt too fast, pooling at the bottom. Roughly chop half of them into uneven pieces—they’ll stay embedded longer, giving you pockets of gooey chocolate in every bite. Save the full chips for the top layer if you’re feeling fancy.
Wine and beer pairings for these flavors
Sweet Wine Pairings
For these rich, buttery cookies, reach for a Moscato d’Asti from Italy—its light effervescence and honeyed notes complement the caramelized sugar without overpowering the chocolate. I love the Bartoli brand; it’s crisp enough to cut through the fat while enhancing the vanilla undertones.
Serve slightly chilled for that perfect balance of sweetness and acidity. 🍷
Creamy Dessert Wines
A Riesling with some residual sugar (look for labels like “Spätlese”) brings a bright citrus finish that contrasts beautifully with the cookies’ warmth. The Dr. Loosen Blue Slate from Germany is my go-to—its peach and floral notes mirror the brown sugar’s caramelization.
Avoid dry Rieslings; you want that sweetness to harmonize with the chocolate.
Coffee Liqueur Twist
If you prefer something stronger, add 1 tablespoon Kahlúa to your glass of wine or serve it on the side for dipping. The coffee’s bitterness balances the sweetness, while the vanilla in the cookies bridges the flavors.
I like to pour a splash of Kahlúa over vanilla ice cream for a decadent dessert pairing that feels like a grown-up cookie party. ☕
Beer for Contrast
For a beer lover’s twist, try a Belgian Dubbel like Westmalle Trappist 8—its caramel, raisin, and spice notes echo the cookie’s brown sugar and vanilla.
The malt sweetness stands up to the chocolate, while the yeasty depth adds complexity. Serve the beer slightly cooler than room temperature to highlight its fruitiness.
Non-Alcoholic Options
Don’t drink alcohol? A sparkling apple cider (like Martinelli’s) adds a refreshing crispness that cuts through the richness. For something warmer, chai tea with a splash of milk enhances the vanilla and spice notes.
I often make a quick chai latte by steeping Tazo Chai tea bags in hot milk and topping it with a sprinkle of cinnamon. 🍎
Nutrition facts
Frequently asked questions
Can I make these cookies without butter?
Yes, but the texture will change. Replace the 0.25 cup butter with 0.25 cup coconut oil (melted and cooled) or 0.25 cup vegetable shortening. For best flavor, use butter if possible—it creates that classic cookie taste. If you’re avoiding dairy, coconut oil works well but gives a slightly denser texture.
Why do my cookies spread too much?
Overmixing the dough or skipping the 30-minute chill are the most common causes. The butter needs time to firm up to prevent spreading. Also, make sure your oven is fully preheated to 350°F—a cold oven causes uneven baking. For extra control, use a 2-tablespoon scoop and flatten the dough balls slightly before baking.
Can I use white sugar instead of brown?
Technically yes, but your cookies will lose that deep caramel flavor. If you must substitute, use 0.125 cup white sugar + 0.125 cup corn syrup to mimic brown sugar’s moisture and molasses notes. For best results, stick with brown sugar—it’s worth the extra penny for that rich taste.
How do I store these cookies?
Keep them in an airtight container at room temperature for up to 3 days. For longer storage, freeze the baked cookies (wrap individually in plastic) for up to 3 months. To reheat, warm in the oven at 300°F for 2-3 minutes—they’ll taste fresh-baked every time.
What if I don’t have vanilla extract?
Use 0.5 teaspoon vanilla bean paste (half the amount) for those little specks of magic. In a pinch, 0.5 teaspoon almond extract works but has a different flavor profile. For a non-extract option, try 0.5 teaspoon lemon zest + 0.25 teaspoon cinnamon—it adds brightness but won’t replicate vanilla’s depth.

- 3lb Prime Rib Roast Recipe: Juicy Pink Center Guaranteed in 3 Hours - October 31, 2026
- 5 Spice Cake Recipe: Warmly Spiced Layers With Crunchy Top - October 31, 2026
- 1950’s Macaroni and Cheese Recipe: Nostalgic Creamy Cheese Sauce with Buttery Noodles - October 31, 2026