
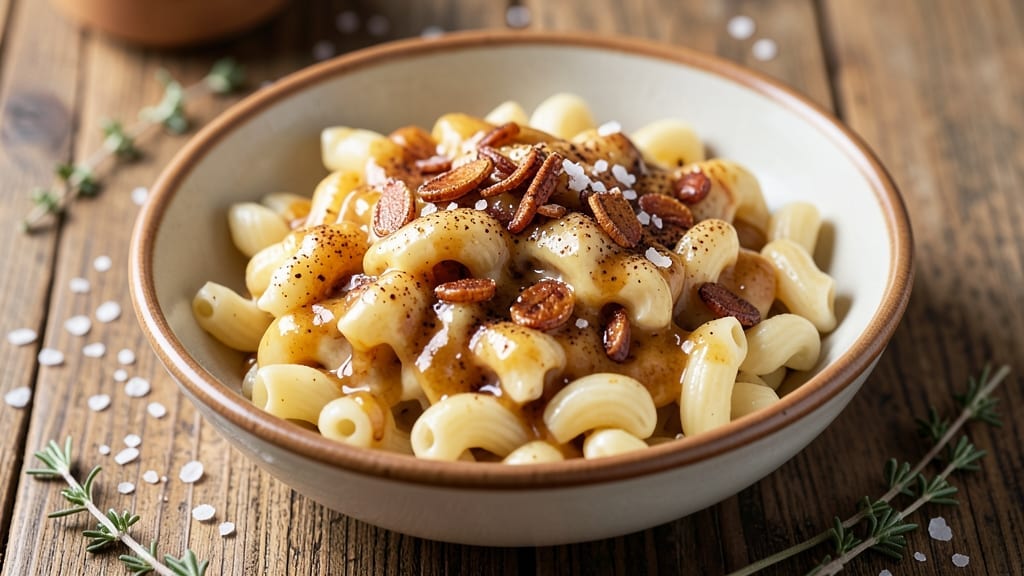
A 2-serving mac and cheese recipe is the perfect solution when you want rich, creamy comfort without making a full batch. This single-pan method delivers restaurant-quality texture with tender pasta and a velvety cheese sauce that coats every noodle.
The secret lies in precise timing and a proper roux—no lumps, just silky smooth perfection that pairs beautifully with crispy breadcrumbs or fresh herbs.
This recipe transforms simple ingredients into a dish that feels indulgent yet remains approachable for any home cook. You’ll start with al dente pasta, then build a cheese sauce from scratch using a blend of sharp cheddar and Gruyère for depth.
The sauce thickens just enough to cling to the noodles, creating that signature “cheesy pull” without being overly heavy.
By the time it emerges from the oven, you’ll have golden, bubbling mac and cheese with a crispy topping that adds texture contrast. The sauce remains luscious, not greasy, and every bite delivers that perfect balance of cheesy richness and buttery pasta.
It’s the kind of dish that transforms a simple weeknight into a cozy, satisfying meal.
Whether you’re feeding just yourself or sharing with one other person, this recipe scales perfectly while maintaining its creamy, comforting essence. Ready in under 45 minutes, it’s ideal for busy evenings when you still want something hearty and delicious. Let’s get cooking!
Ingredients for 2 serving mac and cheese
Pantry staples plus a few cheesy upgrades for restaurant-style mac and cheese—just for two.
| Ingredient | Amount | Notes |
|---|---|---|
| Elbow Macaroni 🍝 | 4 oz | Dry, al dente preferred |
| Unsalted Butter 🧈 | 4 tbsp | Cold, cut into small cubes |
| All-Purpose Flour 🌾 | ¼ cup | For roux, sifted preferred |
| Sharp White Cheddar Cheese 🧀 | 1 ½ cups | Shredded, block preferred |
| Gruyère Cheese 🧀 | ½ cup | Shredded, adds depth |
| Whole Milk 🥛 | ½ cup | Warmed for smooth sauce |
| Yellow Mustard 🍯 | 1 tsp | For tangy brightness |
| Salt 🧂 | ½ tsp | Kosher or sea salt |
| Black Pepper 🌶️ | ¼ tsp | Freshly ground preferred |
| Garlic Cloves 🧄 | 2 cloves | Minced for subtle flavor |
| Panko Breadcrumbs 🍞 | ¼ cup | For crispy topping |
| Fresh Parsley 🌿 | ⅛ cup | Chopped, for garnish |
The cheeses are non-negotiable here. Sharp white cheddar gives that classic tang, but Gruyère adds nutty depth—don’t skip it. Grab a block of each and shred yourself; pre-shredded gets clumpy. For the pasta, elbow macaroni works best, but any short shape will do. If you’re short on time, Whole Foods or Trader Joe’s sell pre-shredded cheese blends that work in a pinch. The butter? Cold cubes make the roux smoother—no waiting for it to soften.
No Gruyère? Extra sharp cheddar plus a splash of cream gets you close. Running low on milk? Heavy cream at half the amount makes the sauce richer. The mustard is key for that signature tang—if you don’t have yellow, Dijon works too. For the crispy topping, panko is your best bet, but regular breadcrumbs toasted in butter work fine. Fresh parsley is ideal, but dried parsley at one-third the amount saves time. Pro tip: Toast the garlic in butter before adding it to the sauce—game changer.
This reheats beautifully—just add a splash of milk to loosen the sauce. Keeps for 3-4 days in the fridge, but honestly, it disappears faster. For leftovers, cover tightly and reheat on low to avoid drying out. The crispy topping is best eaten fresh, but if you must reheat, broil for 2-3 minutes to restore the crunch. Portion into two containers for easy grab-and-go meals.
Why You’ll Love This Recipe
- Two-Ingredient Cheese Base: This recipe nails the perfect roux with just butter and flour—no measuring headaches, no extra steps. I melt the butter, whisk in the flour, and let it cook until it’s golden and nutty, which takes all of five minutes. That’s it. No fancy techniques, just rich, velvety magic.
- Gruyère Glamour: The sharp white cheddar gives it that classic tang, but the Gruyère? That’s the star. It melts into creamy, almost buttery pockets while keeping just enough texture to make every bite satisfying. Between us, this combo is way more exciting than the powdered kind.
- Weeknight Workhorse: I make this when I’m exhausted and still want something impressive. It’s ready in 30 minutes, feeds two (or one very hungry person), and pairs with anything—grilled chicken, steamed broccoli, or even just a side salad. Honestly, it’s my go-to when I don’t want to think too hard.
- Leftovers That Don’t Suck: Unlike some mac and cheese, this reheats like a dream—no grainy cheese or sad texture. I make a big batch on Sundays, portion it out, and freeze half. When I’m in a rush, I just pop it in the oven or microwave and boom, dinner’s saved. Plus, it’s cheap—just a handful of ingredients for two servings.
Step-by-step instructions for 2 serving mac and cheese
Here’s how to make rich, creamy mac and cheese in one pan—no fuss, just flavor.
Cook the Elbow Macaroni to Al Dente
Bring a pot of water to a rolling boil and salt it generously—it should taste like the ocean. Add the 4 oz elbow macaroni and cook for 8-9 minutes until al dente. You want it firm to the bite but fully cooked through. Drain in a colander and set aside, reserving ½ cup of the pasta water.
Don’t rinse the pasta—those starchy waters are what’ll help create our silky sauce later. I like to give the pasta a quick shake in the colander to help break up any clumps before moving to the next step.
Make the Creamy Cheese Sauce
In the same pot you cooked the pasta (no need to clean it!), melt the 4 tbsp cold cubed unsalted butter over medium heat until it’s fully melted and foaming. Add the 0.25 cup all-purpose flour all at once and whisk vigorously for 1-2 minutes until the mixture turns golden and bubbly—this is your roux.
Slowly pour in the 0.5 cup warmed whole milk while whisking constantly to prevent lumps. Cook for another 2 minutes until the mixture thickens. Then reduce heat to low and stir in the 1.5 cups sharp white cheddar cheese and 0.5 cup gruyère cheese until completely melted and smooth.
Combine Pasta and Sauce
Add the cooked macaroni to the cheese sauce and stir gently to coat every strand. If the sauce seems too thick, add a splash of the reserved pasta water 1 tablespoon at a time until you reach a creamy consistency. Stir in the 1 tsp yellow mustard, 0.5 tsp salt, 0.25 tsp black pepper, and 2 cloves minced garlic.
Taste and adjust seasoning—you might need a bit more salt or pepper depending on your cheeses. The sauce should be rich, velvety, and perfectly seasoned. Let it sit off the heat for 2-3 minutes to thicken slightly before serving.
Add the Crispy Topping
Transfer the mac and cheese to a small baking dish or skillet. In a separate bowl, mix the 0.25 cup panko breadcrumbs with 1 tbsp melted butter (from the remaining 1 tbsp you didn’t use earlier). Sprinkle this mixture evenly over the top of the mac and cheese.
Broil on high heat for 2-3 minutes until the breadcrumbs are golden brown and crispy. Watch it closely—it burns faster than you think! Remove from the oven and let it rest for 1 minute before garnishing with 0.125 cup chopped fresh parsley.
Pro Tips For Making 2 Serving Mac And Cheese
- Cook pasta al dente: Pull those elbows out just before they’re fully tender—you’ll finish cooking them in the cheese sauce, and they’ll soak up flavor like a sponge. I learned this the hard way after serving mushy mac that tasted like glue.
- Grate cheese fresh: Skip the pre-shredded stuff—it’s coated in anti-caking agents that make the sauce grainy. Use a box grater for sharp cheddar and Gruyère, and save the leftover cheese dust for garnishes or next time’s recipe.
- Melt butter low: Start the roux on medium-low heat or you’ll burn the flour before the sauce thickens. After burning three batches, I finally figured out: butter foams before it browns—wait for that foam to settle before adding flour.
- Add cheese in stages: Dump all the cheese in at once and you’ll end up with lumps. Stir in half first, let it melt completely, then add the rest while stirring like you’re mixing paint. This recipe’s small size makes it easy to control—don’t rush it.
Pro cooking tips for this recipe
Roux Perfection
The key to a velvety mac and cheese sauce starts with your roux—don’t skimp on whisking! Melt the 4 tbsp cold cubed butter over medium heat until foaming, then whisk in the ¼ cup flour constantly for 1-2 minutes until it turns a golden, nutty color.
This takes patience, but rushing leads to lumps. I like to use a heatproof whisk and keep the heat steady—I’ve burned a few rouxes trying to rush this step! 🔥
Once your roux reaches that perfect golden hue, immediately pour in the ½ cup warmed milk while whisking vigorously. The milk should be lukewarm (not hot) to avoid scrambling the cheese later.
If you see any lumps forming, strain the sauce through a fine-mesh sieve before adding the cheese. Trust me, this extra step makes all the difference in texture.
Cheese Blend Secrets
The sharp white cheddar and Gruyère combo is non-negotiable for depth, but here’s my pro tip: shred the cheese yourself using the large holes on a box grater. Pre-shredded cheese contains anti-caking agents that make the sauce grainy.
I also like to temper the cheese by mixing it with a splash of milk before adding it to the sauce—this prevents clumping. 🧀
If you’re short on Gruyère, swap in extra sharp cheddar plus 1 tbsp cream for richness. For a smoky twist, add ½ tsp smoked paprika to the sauce.
And here’s a secret: Toast the garlic in the butter before adding it to the sauce—this deepens its flavor without overpowering the dish.
Pasta Water Magic
Never, ever rinse your pasta after cooking! The ½ cup reserved pasta water is liquid gold—it’s packed with starch that helps emulsify the cheese sauce.
If your sauce starts looking too thick after combining with the pasta, add the water 1 tablespoon at a time until it reaches a silky, coatable consistency. I usually need about 2-3 tbsp total. 💫
Pro tip: If your pasta feels dry after draining, toss it back into the pot with 1 tbsp butter and 1 tbsp milk while it’s still hot. This keeps it tender and prevents it from absorbing too much of the sauce later.
The goal is al dente pasta that’s still firm enough to hold up to the creamy sauce.
Broiling Like a Boss
For that perfectly crispy topping, mix the ¼ cup panko with 1 tbsp melted butter and spread it evenly over the mac and cheese. Place the dish on the middle rack of your oven and broil on high heat for 2-3 minutes.
Watch it like a hawk—panko burns faster than you’d think! 🌡️
If your oven runs hot, start with 1 minute and check frequently. The topping should be golden brown, not dark brown. Let it rest for 1 minute after broiling to set, then garnish with chopped parsley.
For extra flavor, sprinkle with crushed black pepper or smoked paprika right before serving.
Nutrition facts
Frequently asked questions
Can I use a different type of pasta?
While elbow macaroni is traditional, any short pasta shape like penne, cavatappi, or shells works beautifully. Long pasta like spaghetti won’t hold the sauce as well. For a fun twist, try star-shaped pasta or gemelli—just reduce cook time by 1 minute to prevent overcooking.
What if my sauce gets too thick?
Don’t panic! The reserved pasta water is your secret weapon. Add it 1 tablespoon at a time while stirring until you reach a creamy, coatable consistency. If you run out, warm 1 tablespoon milk and whisk it in. The sauce should be thick enough to cling to the pasta but still silky smooth—never dry or grainy.
How do I make this without dairy?
Swap the butter for olive oil or dairy-free margarine, use unsweetened almond milk instead of whole milk, and choose vegan cheddar or nutritional yeast for cheesiness. Add 1 tsp lemon juice to brighten the flavor. The texture will be slightly lighter but still delicious—just avoid broiling the topping (use toasted breadcrumbs instead).
Can I make this ahead of time?
Yes! Assemble the mac and cheese completely (without the crispy topping) and refrigerate for up to 2 days. When ready to serve, reheat covered on low heat with a splash of milk to restore creaminess. For the crispy topping, add it fresh after reheating and broil for 1-2 minutes. The sauce may thicken slightly when chilled—just thin with milk or broth when reheating.
Why did my cheese sauce get grainy?
This usually happens from one of three things: pre-shredded cheese (use block cheese shredded yourself), not whisking enough when adding cheese, or adding cold cheese too quickly. Next time, warm the cheese slightly with a splash of milk before adding, and whisk constantly on low heat until fully melted. If it happens, strain through a fine-mesh sieve to rescue the sauce!

- 3lb Prime Rib Roast Recipe: Juicy Pink Center Guaranteed in 3 Hours - October 31, 2026
- 5 Spice Cake Recipe: Warmly Spiced Layers With Crunchy Top - October 31, 2026
- 1950’s Macaroni and Cheese Recipe: Nostalgic Creamy Cheese Sauce with Buttery Noodles - October 31, 2026